1. Introduction
This manual provides detailed instructions for the safe and efficient operation of your GROWNSY N1T Baby Bottle Warmer. Please read all instructions carefully before use and retain this manual for future reference.
The GROWNSY N1T is a versatile 8-in-1 device designed to simplify baby feeding routines. It offers multiple functions including fast warming, thawing, constant temperature keeping (24H), steaming, food heating, and sterilization.
2. Product Components
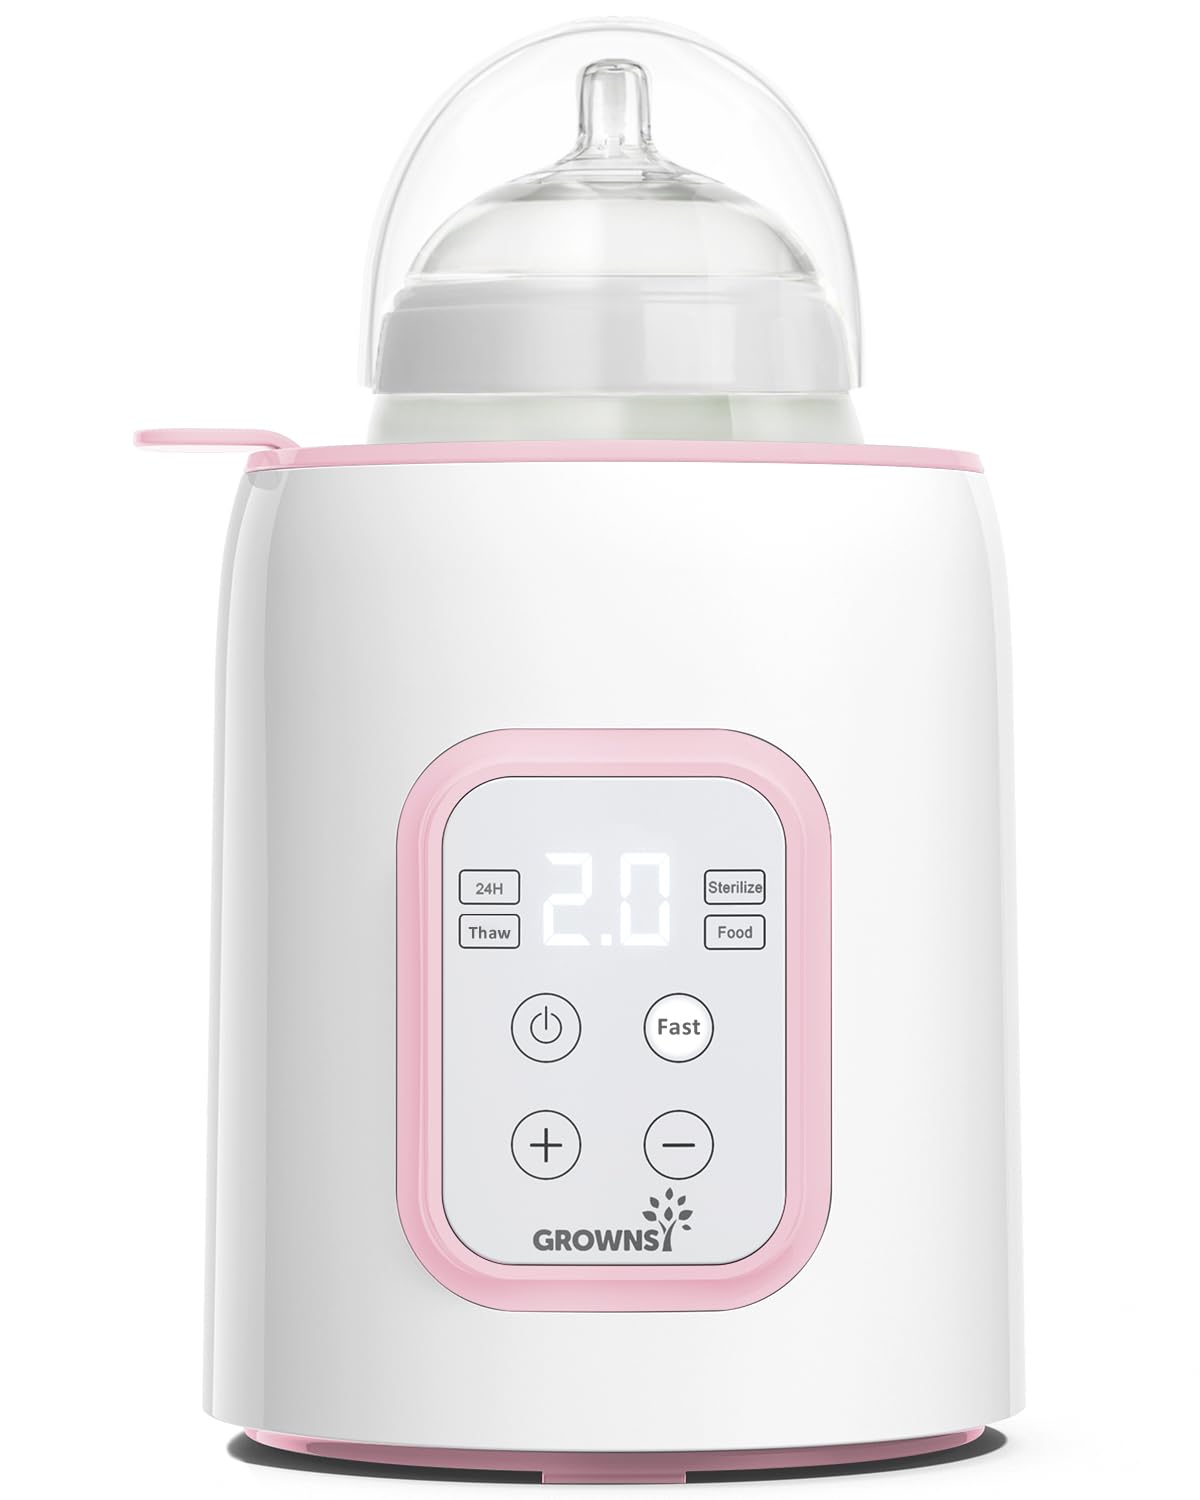
Figure 1: GROWNSY N1T Baby Bottle Warmer Overview
This image displays the main unit of the GROWNSY N1T Baby Bottle Warmer, featuring its compact design, transparent lid, and intuitive control panel. A baby bottle is shown inside the warmer.
The GROWNSY N1T Baby Bottle Warmer typically includes the following components:
- Main Warmer Unit with Control Panel
- Transparent Lid
- Bottle Basket (Anti-scald basket)
- Measuring Cup (for water)
- Instruction Manual

Figure 2: Control Panel Detail
A close-up view of the control panel, showing buttons for Power, Fast Warming, 24H Keep Warm, Food Heating, Sterilize, and temperature/time adjustment buttons (+/-).
3. Setup
- Unpack: Carefully remove all components from the packaging.
- Clean: Before first use, clean the main unit with a damp cloth. Wash the transparent lid, bottle basket, and measuring cup with warm soapy water, then rinse thoroughly.
- Placement: Place the warmer on a stable, flat, heat-resistant surface, away from direct sunlight and heat sources.
- Connect Power: Plug the power cord into a suitable electrical outlet. The unit will beep once, and the display will briefly illuminate.
4. Operating Instructions
General Operation Steps:
- Place the bottle or food jar into the bottle basket.
- Add the recommended amount of purified water into the heating chamber using the measuring cup. (Refer to the side chart on the warmer's side for specific water amounts based on milk volume and bottle material).
- Place the transparent lid over the warmer.
- Press the Power button (⏻) to turn on the device.
- Select the desired function (Fast, 24H, Food, Sterilize) using the mode selection button (⌖).
- Adjust the heating time or temperature using the +/- buttons if necessary.
- The device will automatically start the selected function. It will beep when the process is complete.
- Carefully remove the bottle/food using the bottle basket handle to avoid burns. Always test the temperature of the milk/food before feeding.
4.1. Fast Warming
This mode quickly heats milk or formula to a ready-to-feed temperature. Ideal for urgent feeding needs.
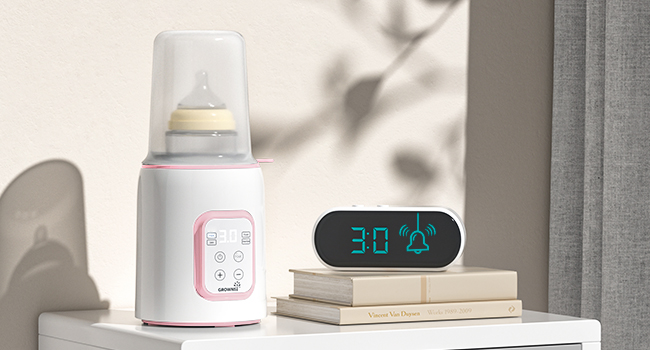
Figure 3: Night Feeding Convenience
The bottle warmer is shown on a nightstand, illustrating its compact size and utility for quick night feedings. The digital clock indicates 3:00, emphasizing its use during early morning hours.
- Select the "Fast" mode.
- The display will show a default time. Adjust using +/- buttons according to the reference chart on the warmer's side.
- The warmer will heat the milk and beep when finished.
4.2. Thawing
Gently thaws frozen breast milk or formula, preserving nutrients. This method uses a water bath to ensure even thawing.
Figure 4: Gentle Thawing Process
A bag of frozen breastmilk is placed inside the GROWNSY N1T Bottle Warmer for thawing. The warmer's display shows "3.0", indicating the thawing mode or time setting.
- Place the frozen milk bag or bottle into the basket.
- Add water to the heating chamber.
- Select the "Fast" mode and adjust time for thawing (typically longer than fast warming).
- Monitor the thawing process to ensure milk is not overheated.
4.3. Keep Warm (24H)
Maintains milk at a constant, safe temperature for up to 24 hours, ideal for night feedings.
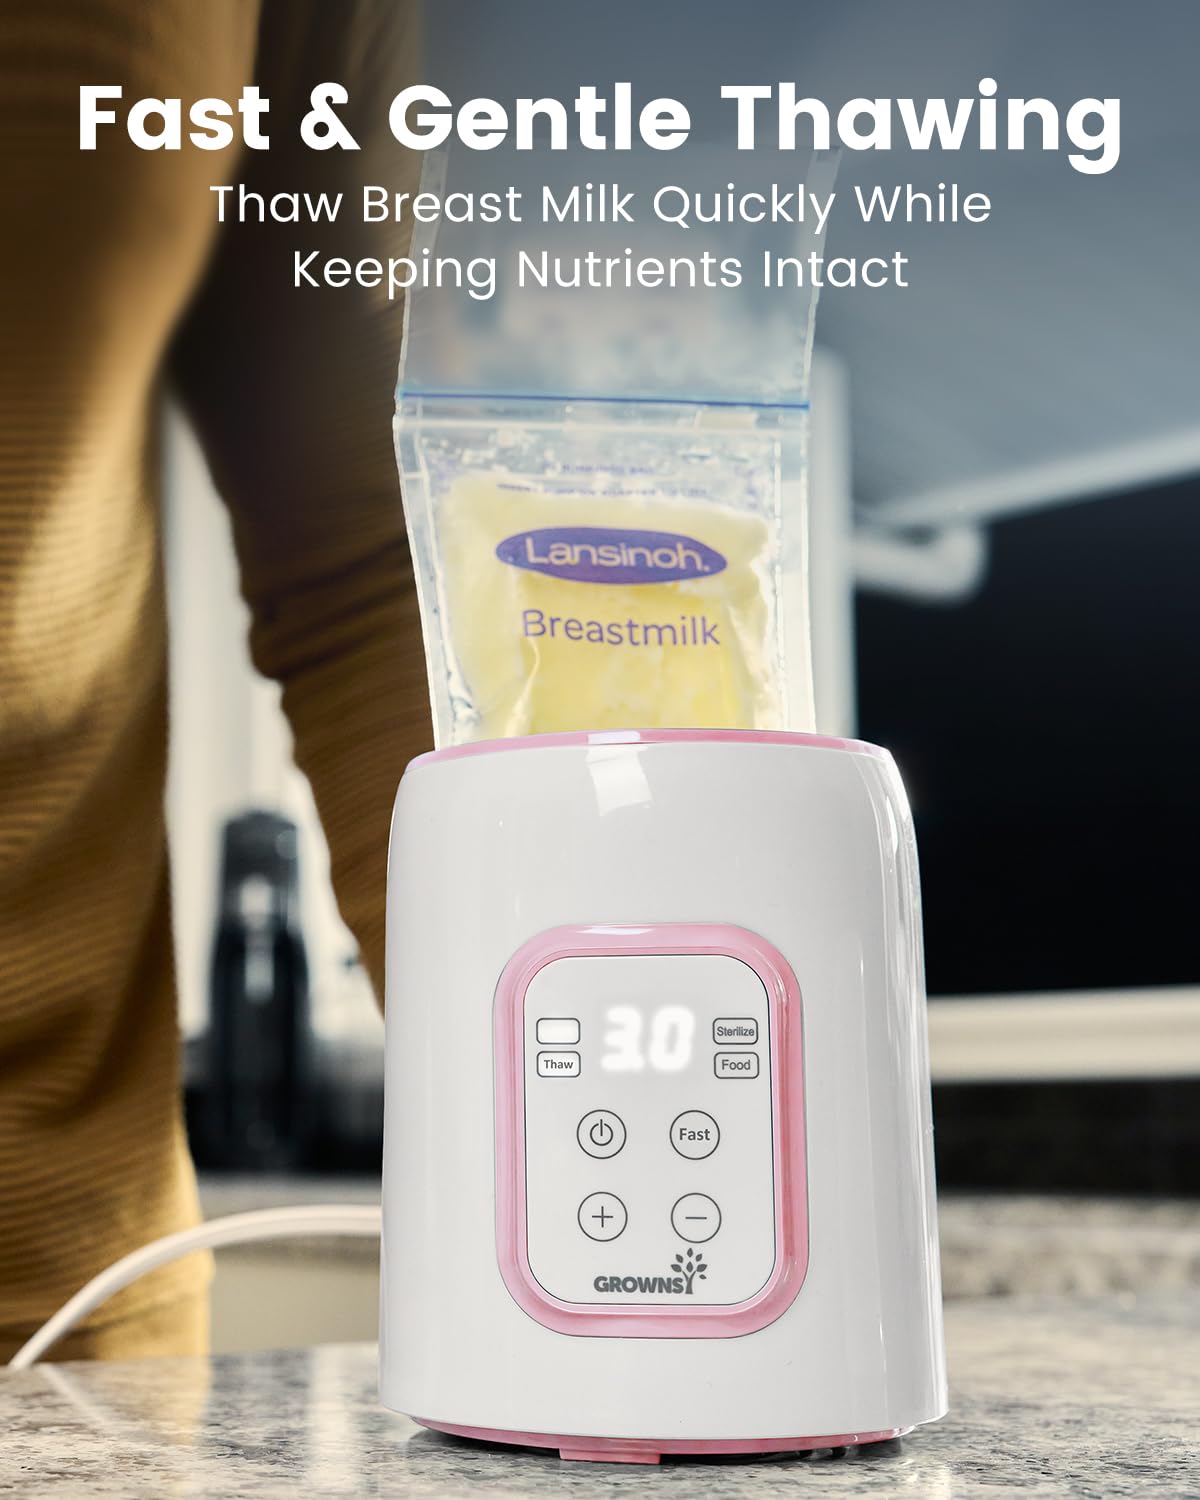
Figure 5: 24-Hour Keep Warm Function
The bottle warmer is positioned on a nightstand, with a bottle inside, demonstrating its "24H Keep Warm" feature. The display shows "38", likely indicating the target temperature in Celsius.
- Select the "24H" mode.
- The default temperature is usually 37°C (98.6°F). Adjust using +/- buttons if a different temperature is desired.
- The warmer will maintain the set temperature for 24 hours or until manually turned off.
4.4. Food Heating
Heats baby food jars or pouches to a suitable temperature.

Figure 6: Heating Baby Food
A jar of baby food is shown being heated in the GROWNSY N1T Bottle Warmer, highlighting its versatility beyond just milk. The image also shows icons representing bottles, milk bags, and baby food.
- Place the baby food jar/pouch into the basket.
- Add water to the heating chamber.
- Select the "Food" mode and adjust time/temperature as needed.
- Always stir and test the food temperature before feeding.
4.5. Sterilization
Uses steam to sterilize bottles, pacifiers, and small accessories.

Figure 7: Steam Sterilization
A baby bottle is shown inside the GROWNSY N1T Bottle Warmer, undergoing steam sterilization. Condensation is visible on the transparent lid, indicating the steam process.
- Place clean bottles/accessories upside down in the basket.
- Add 100ml of purified water to the heating chamber.
- Select the "Sterilize" mode. The device will generate steam to sterilize the items.
- Allow items to cool before handling.
5. Safety Precautions
- Always use purified water to prevent mineral buildup and ensure proper function.
- Do not immerse the main unit in water.
- Keep out of reach of children.
- Always test the temperature of milk or food before feeding to prevent scalding.
- Unplug the device when not in use and before cleaning.
- Ensure the lid is properly placed during operation to maintain temperature and prevent steam escape.
- Use the anti-scald basket to safely remove hot bottles or food containers.
6. Maintenance and Cleaning
- Daily Cleaning: After each use, unplug the warmer and allow it to cool. Empty any remaining water from the heating chamber. Wipe the interior and exterior of the main unit with a damp cloth. Wash the lid, bottle basket, and measuring cup with warm soapy water and rinse.
- Descaling: Mineral deposits (limescale) can build up over time, especially with hard water. Descale the warmer regularly (e.g., once a week or every few days depending on water hardness).
- Mix 50ml of white vinegar with 100ml of water.
- Pour the solution into the heating chamber.
- Let it stand for 30 minutes to 1 hour (or longer for heavy buildup).
- Empty the solution and rinse the chamber thoroughly with clean water.
- Run a sterilization cycle with clean water to remove any residual vinegar smell.
- Storage: Store the clean and dry warmer in a cool, dry place.
7. Troubleshooting
| Problem | Possible Cause | Solution |
|---|---|---|
| Warmer not turning on. | Not plugged in; power outage; faulty outlet. | Check power connection; try a different outlet. |
| Milk not warming sufficiently. | Insufficient water; incorrect time/temperature setting; excessive milk volume. | Add correct water amount; adjust settings according to chart; ensure lid is closed. |
| White residue in heating chamber. | Limescale buildup from hard water. | Perform descaling procedure (Section 6). |
| Device beeps continuously. | Cycle complete; error condition. | Remove bottle/food; if error, unplug and re-plug. |
8. Specifications
- Model: N1T
- Dimensions: 8.74 x 5.28 x 5.16 inches
- Material: Plastic
- Weight: 1.41 pounds
- Power: 120V, 60Hz, 210W
- Functions: Fast Warming, Thawing, 24H Keep Warm, Food Heating, Sterilization
- Safety Features: Automatic Shut-Off, Anti-scald Basket
9. Warranty and Support
GROWNSY products are designed for reliability and performance. For warranty information, technical support, or customer service inquiries, please refer to the contact details provided on the product packaging or visit the official GROWNSY website.
Please retain your proof of purchase for any warranty claims.


