
OLIGHT BATONTURBO-BK-300000
OLIGHT BatonTurbo EDC Rechargeable Handheld Flashlight User Manual
Model: BATONTURBO-BK-300000 | Brand: OLIGHT
1. Introduction
Thank you for purchasing the OLIGHT BatonTurbo EDC Rechargeable Handheld Flashlight. This compact and powerful flashlight is designed for everyday carry (EDC) and various outdoor and home uses, offering exceptional brightness and long-range illumination. Please read this manual thoroughly before using the product to ensure safe and optimal operation.
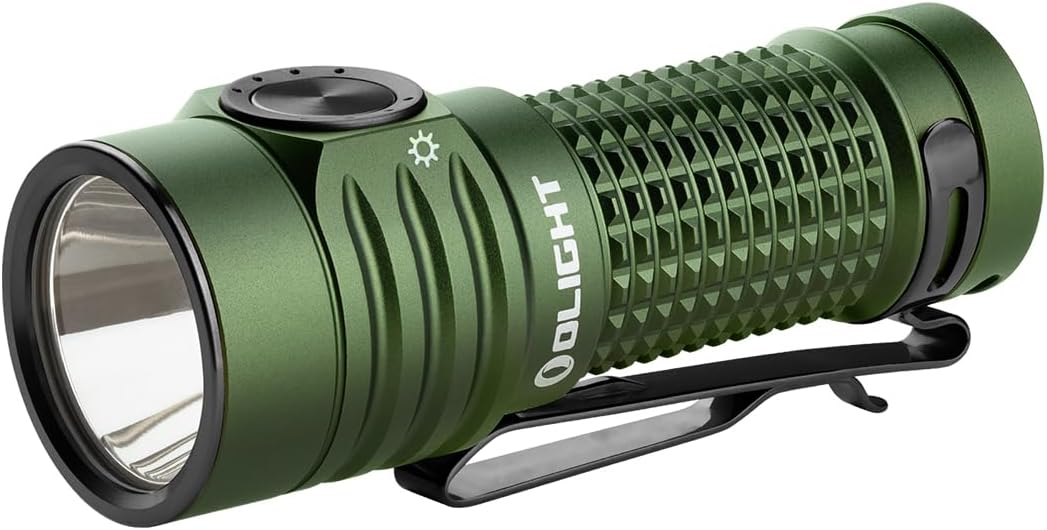
Image: The OLIGHT BatonTurbo EDC Rechargeable Handheld Flashlight in OD Green, showcasing its compact design and textured body.
2. What's in the Box
Upon opening your OLIGHT BatonTurbo package, you should find the following items:
- OLIGHT BatonTurbo Flashlight (OD Green)
- Customized Olight Rechargeable Battery (included inside the flashlight)
- Magnetic Charging Cable
- Two-Way Pocket Clip (pre-installed)
- Lanyard
- Battery Sleeve (for optional CR123A battery use)
- User Manual

Image: All components included in the OLIGHT BatonTurbo package, including the flashlight, charging cable, lanyard, battery sleeve, and user manual.
3. Specifications
The OLIGHT BatonTurbo is engineered for high performance and durability. Below are its key specifications:
| Feature | Detail |
|---|---|
| Light Output (Max) | 1000 Lumens |
| Beam Distance (Max) | 510 Meters |
| Power Source | Customized Lithium Ion Rechargeable Battery (included) or optional CR123A battery |
| Material | Aluminum Alloy |
| Water Resistance | Waterproof (IPX8 rated) |
| Dimensions | 1.98"D x 1.45"W x 5.82"H |
| Weight | 3.2 Ounces |
| Special Features | Adjustable Light Modes, Long Range, Magnetic Base, Portable, Rechargeable, Recessed Switch |

Image: A detailed table showing the output specifications for different brightness levels (Turbo, High, Medium, Low, Moonlight) including lumens, runtime, and beam distance.
4. Setup
4.1 First Use & Battery Installation
The flashlight comes with a customized rechargeable battery pre-installed. Before first use, ensure the battery is fully charged.
- Unscrew the tail cap of the flashlight.
- Remove the insulating film from the battery if present.
- Screw the tail cap back on tightly to ensure proper contact and water resistance.
4.2 Charging the Battery
The BatonTurbo features a magnetic charging system for convenience.
- Connect the magnetic charging cable (MCC) to a USB power source.
- Attach the magnetic end of the cable to the tail cap of the flashlight. The indicator on the MCC will glow red during charging and turn green when fully charged.
- A full charge typically takes approximately 1.5 hours.

Image: An OLIGHT BatonTurbo flashlight connected to its magnetic charging cable, illustrating the charging process.
5. Operating Instructions
5.1 Basic Operation
- Turn ON/OFF: Single click the side switch to turn the flashlight ON/OFF.
- Change Brightness Level: When the flashlight is ON, press and hold the side switch to cycle through Low, Medium, and High modes. Release the switch to select the desired mode.
- Moonlight Mode: When the flashlight is OFF, press and hold the side switch for over one second to access Moonlight mode.
- Turbo Mode: Double click the side switch to activate Turbo mode. Double click again to return to the previous mode.
- Strobe Mode: Triple click the side switch to activate Strobe mode. Single click or press and hold to exit Strobe mode.
- Lockout/Unlock: When the flashlight is OFF, press and hold the side switch for approximately two seconds until the Moonlight mode briefly turns on and then off. The flashlight is now locked out. To unlock, press and hold the side switch for approximately two seconds until Moonlight mode turns on.

Image: Diagram illustrating the intuitive operation of the OLIGHT BatonTurbo, showing the side switch, battery level indicator, and different brightness levels.
5.2 Battery Level Indicator
The indicator light on the side switch displays the battery level:
- Green: Battery power is sufficient (75% - 100%)
- Orange: Battery power is medium (25% - 75%)
- Red: Battery power is low (10% - 25%)
- Flashing Red: Battery power is critical (0% - 10%)
5.3 Versatile Carry Options
The two-way clip and lanyard provide multiple ways to carry and use your BatonTurbo:
- Deep bezel-down pocket carry for quick access.
- Clip on a hat for hands-free illumination.
- Attach to a bag strap or backpack.
- Wear on the wrist using the included lanyard.

Image: Collage showing various ways to carry the OLIGHT BatonTurbo, including deep pocket carry, clipped to a hat, attached to a bag, and worn on the wrist.
5.4 Usage Scenarios
The OLIGHT BatonTurbo is a dependable backup for various situations:
- Dog walking at night.
- Camping and outdoor adventures.
- Repair work in low-light conditions.
- Cave exploration or other dark environments.

Image: Four panels depicting different usage scenarios for the OLIGHT BatonTurbo: dog walking, camping, repair work, and cave exploration.
6. Maintenance
To ensure the longevity and optimal performance of your OLIGHT BatonTurbo, follow these maintenance guidelines:
- Cleaning: Regularly clean the threads and O-rings with a clean cloth. Lubricate the O-rings periodically with silicone grease to maintain water resistance.
- Battery Care: If the flashlight is to be stored for an extended period, remove the battery to prevent potential leakage. Recharge the battery every 3-6 months to maintain its health.
- Contact Points: Keep the magnetic charging port and the battery contact points clean to ensure efficient charging and reliable operation.
- Storage: Store the flashlight in a cool, dry place, away from direct sunlight and extreme temperatures.

Image: An OLIGHT BatonTurbo flashlight placed on a solar charging panel, demonstrating its rechargeable nature and potential for outdoor charging.
7. Troubleshooting
If you encounter issues with your OLIGHT BatonTurbo, please refer to the following common problems and solutions:
| Problem | Possible Cause | Solution |
|---|---|---|
| Flashlight does not turn on. | Battery is low or dead. Insulating film not removed. Flashlight is in lockout mode. Tail cap is loose. | Charge the battery. Remove insulating film. Unlock the flashlight (press and hold side switch for ~2 seconds). Tighten the tail cap. |
| Light output is dim or flickers. | Low battery. Dirty contact points. | Recharge the battery. Clean the battery contacts and magnetic charging port. |
| Flashlight gets hot during use. | Operating in Turbo/High mode for extended periods. | This is normal. The flashlight has a thermal management system that will automatically step down brightness to prevent overheating. Reduce brightness if discomfort occurs. |
| Magnetic charging not working. | Dirty magnetic contacts. Faulty charging cable or power source. | Clean the magnetic contacts on both the flashlight and cable. Try a different USB power source or charging cable. |
If the issue persists after trying these solutions, please contact OLIGHT customer support for further assistance.
8. Warranty and Support
OLIGHT offers a comprehensive warranty for the BatonTurbo EDC Rechargeable Handheld Flashlight.
- Lifetime Warranty: OLIGHT proudly offers a lifetime warranty on its products, covering manufacturing defects.
- For detailed warranty information and to register your product, please visit the official OLIGHT website or refer to the warranty card included in your package.
- For technical support, service, or replacement parts, please contact OLIGHT customer service through their official channels.

Image: The OLIGHT Lifetime Warranty logo, signifying the brand's commitment to product quality and customer satisfaction.
9. Official Product Videos
Watch these official videos from OLIGHT for more information on the BatonTurbo:
9.1 OLIGHT Baton Turbo EDC Rechargeable Handheld Flashlight Overview
Video: An official overview of the OLIGHT Baton Turbo EDC Rechargeable Handheld Flashlight, demonstrating its features, brightness levels, and accessories. This video is provided by an influencer, Jack Lawson - Recon Survival, and offers a detailed look at the product's capabilities.
Related documentsBATONTURBO-BK-300000


Ask a question about this manual
Ask about setup, troubleshooting, compatibility, parts, safety, or missing instructions. Manuals+ will review the question and use this page’s manual context to help answer it.