
Wilprep WCO-C0G2-LP
WILPREP Gas Convection Oven User Manual
Model: WCO-C0G2-LP
1. Product Overview
The WILPREP Double Deck Commercial Gas Convection Oven is designed for high-volume commercial kitchen environments, offering efficient and precise cooking capabilities. This appliance features two independent oven chambers, each with its own controls, allowing for simultaneous preparation of different food items at varying temperatures.

Figure 1.1: Front view of the WILPREP Double Deck Commercial Gas Convection Oven. This image displays the two stacked oven units, each with dual glass doors and control panels on the right side.
Each chamber provides a spacious 7 cu. ft. capacity, equipped with multiple rack positions to accommodate a wide range of baking and roasting needs. The oven operates on Liquid Propane Gas (LPG) and requires a 120V electrical connection for its control systems and convection fans.
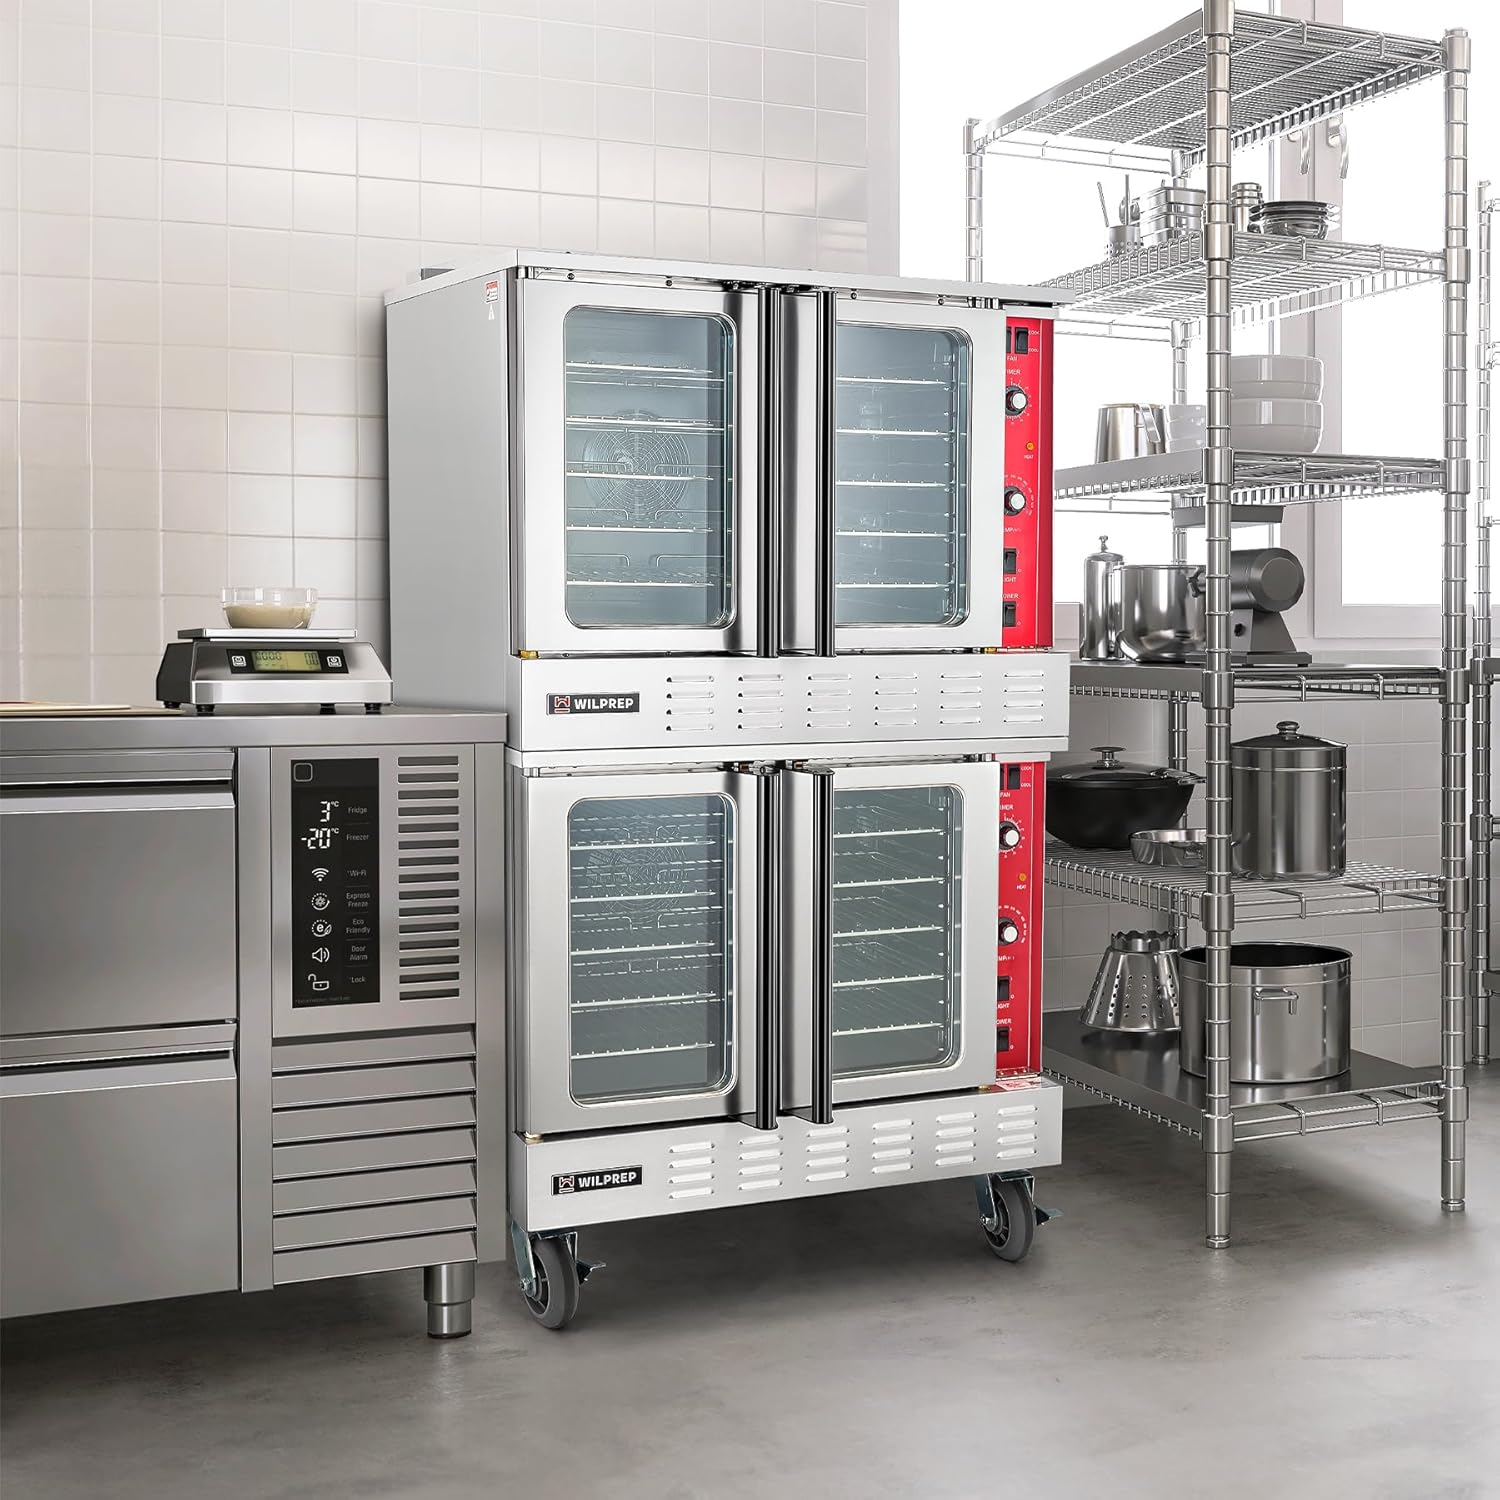
Figure 1.2: The WILPREP Gas Convection Oven integrated into a commercial kitchen environment, demonstrating its size and placement alongside other kitchen equipment.
Key features include powerful 54,000 BTU heating per chamber, automatic thermostats for temperature control from 150°F to 500°F, and user-friendly controls for fan speed and mode selection. The oven is constructed with durable stainless steel exteriors and easy-to-clean enamel interiors.

Figure 1.3: An interior view of one of the oven chambers, highlighting its 7 cu. ft. capacity and adjustable rack brackets. The image shows various baked goods, such as breads, pastries, pizzas, and chicken, illustrating the oven's versatility.
2. Safety Instructions
Always adhere to local codes and regulations for gas appliance installation and operation. Failure to do so may result in property damage, injury, or death.
- Ensure proper ventilation in the kitchen area.
- Do not store or use gasoline or other flammable vapors and liquids in the vicinity of this or any other appliance.
- Keep the area around the appliance clear and free from combustible materials.
- Only qualified personnel should install, service, or repair this appliance.
- Disconnect power and gas supply before performing any maintenance or cleaning.
- Wear appropriate personal protective equipment (PPE) when operating or servicing the oven, especially when handling hot items.

Figure 2.1: Side view of the oven showing overall dimensions and the cCSAus safety certification logo, indicating compliance with North American safety standards.
3. Installation and Setup
3.1 Unpacking
Carefully remove the oven from its packaging. Inspect for any shipping damage. Report any damage immediately to the carrier and supplier. Retain all packaging materials for inspection.
3.2 Location Requirements
- Install the oven on a level, non-combustible surface.
- Ensure adequate clearance from walls and other equipment for ventilation and service access. Refer to local fire codes for specific clearance requirements.
- The oven must be installed under an appropriate commercial ventilation hood system.
3.3 Gas Connection
- This oven is configured for Liquid Propane Gas (LPG). Field conversion to natural gas is possible by a qualified technician using a manufacturer-approved conversion kit.
- The gas supply line must be sized to provide sufficient gas pressure and volume for the oven's BTU rating (54,000 BTU per chamber, 108,000 BTU total).
- Install a manual shut-off valve in the gas supply line in an accessible location.
- Perform a leak test on all gas connections using a non-corrosive leak detection solution.
3.4 Electrical Connection
- The oven requires a 120V electrical supply.
- Ensure the electrical circuit is properly grounded and protected by a circuit breaker of appropriate amperage.
- Do not use extension cords.
4. Operating Instructions
4.1 Control Panel Overview
Each oven chamber has an independent control panel located on the right side. Controls typically include:
- Temperature Dial: Adjusts oven temperature from 150°F to 500°F.
- Timer: A 60-minute timer for setting cooking durations. This timer provides an audible alert but does not shut off the oven.
- Fan Speed Switch: Selects high or low fan speed for convection.
- Mode Switch: Selects between "Cook" and "Cool" modes. "Cool" mode activates the fan without heat to cool down the oven chamber.
- Light Switch: Activates the interior LED lights.
- Power Switch: Turns the oven chamber on/off.

Figure 4.1: Close-up of the oven interior illustrating the 54,000 BTU heating capacity and the temperature range of 150°F to 500°F, with arrows indicating airflow for fast heating.
4.2 Initial Startup
- Ensure gas and electrical connections are secure and active.
- Turn the Power Switch to "ON" for the desired oven chamber.
- Set the Temperature Dial to the desired cooking temperature. The automatic ignition system will attempt to light the burner.
- Allow the oven to preheat to the set temperature.
4.3 Cooking with Convection
The convection fan circulates hot air for even cooking and faster baking times.

Figure 4.2: Detailed view of the built-in convection fan, highlighting its two-speed options and dual modes for efficient and even convection. The image also mentions the automatic ignition system.
- Select "High" or "Low" fan speed based on the food item. High speed is suitable for most baking, while low speed is better for delicate items.
- Use the "Cook" mode for standard operation.
- Monitor cooking progress through the glass doors using the interior LED lights.

Figure 4.3: The oven interior illuminated by LED lights, demonstrating how the clear glass doors allow for effortless food monitoring without opening the oven.
5. Maintenance and Cleaning
Regular maintenance and cleaning will extend the life of your oven and ensure optimal performance. Always disconnect power and gas supply before cleaning.
5.1 Daily Cleaning
- Wipe down the stainless steel exterior with a damp cloth and mild detergent. Avoid abrasive cleaners.
- Clean the enamel interior with a non-abrasive oven cleaner or a solution of warm water and mild detergent. Rinse thoroughly.
- Remove and clean oven racks and rack guides.
- Wipe down glass doors with a glass cleaner.
5.2 Weekly/Monthly Cleaning
- Inspect and clean the convection fan blades if accessible.
- Check for any grease buildup in the oven cavity and clean as necessary.
5.3 Professional Maintenance
It is recommended to have a qualified service technician inspect the oven annually. This includes checking gas connections, burner operation, electrical components, and fan motor.

Figure 5.1: A composite image detailing the oven's construction materials, including the stainless steel body for corrosion resistance, the non-porous enamel interior for easy cleaning, double-layer glass doors for insulation and safety, and powder-coated handles for durability and comfort.
6. Troubleshooting
Before calling for service, review the following common issues and their potential solutions:
| Problem | Possible Cause | Solution |
|---|---|---|
| Oven not heating | No gas supply; Electrical power off; Ignition failure; Thermostat setting too low. | Check gas shut-off valve; Ensure oven is plugged in and circuit breaker is not tripped; If ignition fails after 3 attempts, turn off and wait 5 minutes before retrying; Increase temperature setting. |
| Uneven cooking | Fan not operating; Oven overloaded; Improper rack placement. | Check fan power and mode settings; Do not overload oven; Ensure proper air circulation around food items. |
| Excessive smoke/odor | Food spills; Grease buildup; New oven "burn-off" period. | Clean oven interior thoroughly; For new ovens, run empty at high temperature for 1-2 hours to burn off manufacturing residues (ensure good ventilation). |
| Timer not working | Timer malfunction. | Contact qualified service technician. |
If the problem persists after attempting these solutions, contact a qualified service technician.
7. Specifications
| Attribute | Specification |
|---|---|
| Model Number | WCO-C0G2-LP |
| Brand | Wilprep |
| Oven Type | Double Deck Commercial Gas Convection Oven |
| Fuel Type | Liquid Propane Gas (LPG), field convertible to Natural Gas |
| BTU Rating (Total) | 108,000 BTU (54,000 BTU per chamber) |
| Electrical Requirement | 120V |
| Temperature Range | 150°F - 500°F |
| Capacity (Each Chamber) | 7 cu. ft. |
| Number of Racks | 10 (5 per chamber) |
| Rack Brackets | 22 sets (11 per chamber) |
| Exterior Material | Stainless Steel |
| Interior Material | Enamel |
| Product Dimensions (L x W x H) | 48.03 x 41.73 x 75.39 inches |
| Item Weight | 955 pounds |
| Installation Type | Countertop (with casters for mobility) |
Figure 7.1: Side view of the oven illustrating key dimensions: 38 inches width, 44.5 inches depth (including casters), and 61.8 inches height.
8. Warranty and Support
For warranty information and technical support, please refer to the warranty card included with your product or visit the official Wilprep website. Ensure you have your model number (WCO-C0G2-LP) and purchase date available when contacting support.
For additional resources and product information, you may visit the Wilprep Store on Amazon.
Related documentsWCO-C0G2-LP

Ask a question about this manual
Ask about setup, troubleshooting, compatibility, parts, safety, or missing instructions. Manuals+ will review the question and use this page’s manual context to help answer it.