
Introduction
This manual provides detailed instructions for the setup, operation, and maintenance of your NGTeco TC1 Cloud Time Clock. Please read this manual thoroughly before using the device to ensure proper functionality and to avoid any potential issues. Keep this manual for future reference.
Product Overview
The NGTeco TC1 is an advanced cloud-connected time clock system designed for efficient employee time management. It supports multiple verification methods including fingerprint, facial recognition, RFID card, and PIN, offering flexibility and security for various business environments.
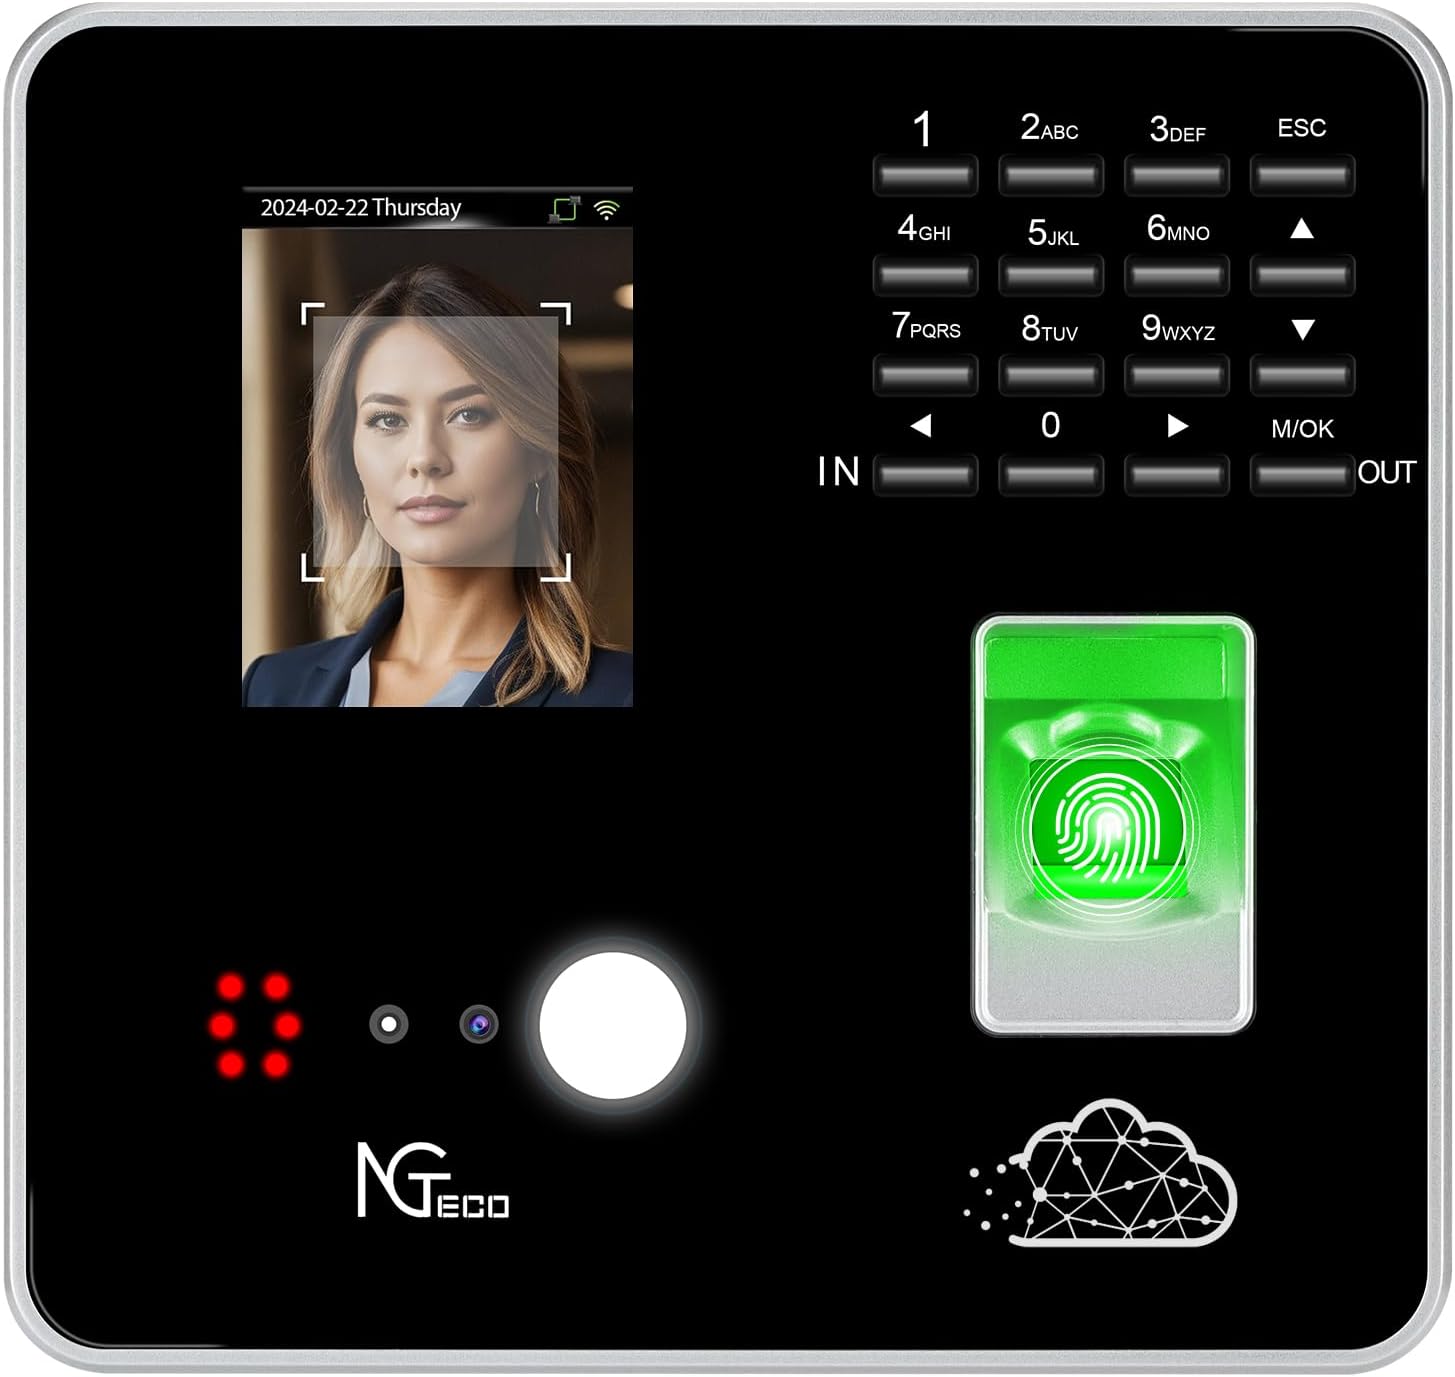
Figure 1: Front view of the NGTeco TC1 Cloud Time Clock, showing the facial recognition camera, fingerprint scanner, keypad, and display.
Key Features:
- Cloud-Based Software: Real-time attendance data access from anywhere, automated timesheet calculation, schedule creation, and report generation via web browser.
- No Monthly Fees: Free NGTeco Office Cloud software suitable for businesses of all sizes.
- Large Data Capacity: Supports up to 200 users and 30,000 records.
- Connectivity: LAN or 2.4 GHz Wi-Fi connectivity with offline data storage and synchronization.
- Automatic Punch Mode: Automatically updates punch status based on previous user state, reducing errors.
- Multiple Verification Methods: Fingerprint, Facial Recognition, RFID Card, and PIN.
Setup Guide
1. Unboxing and Inspection
Carefully unpack all components from the box. Verify that all items listed in the packing list are present and undamaged. If any items are missing or damaged, contact NGTeco customer support immediately.
2. Mounting the Device
- Choose a suitable location for installation, preferably on a solid wall, away from direct sunlight or strong light sources that might interfere with facial recognition.
- Use the provided mounting template to mark the drilling points on the wall.
- Drill holes and insert wall anchors if necessary.
- Secure the mounting bracket to the wall using the screws.
- Attach the TC1 device to the mounting bracket.
3. Power Connection
Connect the provided power adapter to the device's power input port and then plug it into a standard electrical outlet. Ensure the power supply is stable.
4. Network Configuration
The TC1 supports both LAN (Ethernet) and Wi-Fi (2.4 GHz) connectivity.
- LAN Connection: Connect an Ethernet cable from the device to your network router or switch. The device will attempt to obtain an IP address automatically via DHCP.
- Wi-Fi Connection:
- On the device's screen, navigate to the network settings.
- Select "Wi-Fi" and choose your desired 2.4 GHz network from the list.
- Enter the Wi-Fi password using the keypad.
- Confirm the connection.
Once connected, the device will synchronize with the NGTeco Office Cloud. Ensure your network allows outbound connections for cloud services.
Operating Instructions
1. Accessing the NGTeco Office Cloud Software
The NGTeco Office Cloud software is accessible via any web browser. No installation is required.
- Open your web browser and navigate to the NGTeco Office Cloud portal (refer to the quick start guide for the exact URL).
- Log in using your administrator credentials.
- From the dashboard, you can manage users, view attendance records, generate reports, and configure device settings.

Figure 2: Screenshot of the NGTeco Office Cloud software interface, showing attendance reports and management options.
2. User Enrollment
Users can be enrolled directly on the device or through the NGTeco Office Cloud software.
- On Device Enrollment:
- Access the device's menu (requires administrator authentication).
- Select "User Management" then "Add User".
- Enter user ID and name.
- Enroll fingerprint, facial template, or register an RFID card/PIN as required.
- Cloud Software Enrollment:
- Log into the NGTeco Office Cloud software.
- Navigate to "Personnel" or "User Management".
- Add new user details.
- For biometric data (fingerprint/face), the user will need to enroll directly on the device after their profile is created in the cloud.

Figure 3: Illustration of the four primary verification methods: facial scan, fingerprint, RFID card, and PIN code entry.
3. Punching In/Out
Employees can punch in or out using their registered verification method:
- Facial Recognition: Stand approximately 30-50 cm (12-20 inches) in front of the device, aligning your face with the on-screen guide.
- Fingerprint: Place your registered finger flat on the fingerprint scanner until verification is confirmed.
- RFID Card: Tap your registered RFID card against the card reader area.
- PIN: Enter your personal PIN on the keypad and press M/OK.
The device will display a success message upon successful verification. In automatic punch mode, the system intelligently determines if it's an 'IN' or 'OUT' punch based on the user's previous record.
Maintenance
1. Cleaning the Device
Regular cleaning helps maintain optimal performance, especially for the facial recognition camera and fingerprint sensor.
- Use a soft, dry, lint-free cloth to wipe the screen and device surface.
- For the fingerprint sensor and camera lens, use a microfiber cloth.
- Do not use abrasive cleaners, solvents, or aerosol sprays directly on the device.
2. Software Updates
NGTeco regularly releases software updates to improve performance, add features, and enhance security. Ensure your device and cloud software are kept up-to-date.
- Cloud Software: Updates are typically applied automatically by NGTeco. You will be notified of major changes.
- Device Firmware: Check the NGTeco Office Cloud software or NGTeco support website for available firmware updates for your TC1 device. Follow the provided instructions carefully for firmware upgrades.
3. Data Backup
While the NGTeco Office Cloud provides robust data storage, it is recommended to regularly export and back up your attendance data from the cloud software for additional security.
Troubleshooting
| Problem | Possible Cause | Solution |
|---|---|---|
| Device not powering on. | Power adapter disconnected or faulty; power outlet issue. | Check power connections. Try a different power outlet. Contact support if the issue persists. |
| Cannot connect to Wi-Fi/Network. | Incorrect Wi-Fi password; out of range; network issues; firewall blocking. | Verify Wi-Fi password. Ensure device is within Wi-Fi range. Check router/network status. Adjust firewall settings if necessary. |
| Facial recognition failure. | Poor lighting; face not aligned; enrolled template issue; camera lens dirty. | Ensure adequate, even lighting. Position face correctly. Re-enroll facial template if needed. Clean camera lens. |
| Fingerprint recognition failure. | Finger wet/dirty; sensor dirty; enrolled template issue; finger not placed correctly. | Ensure finger and sensor are clean and dry. Place finger flat on the sensor. Re-enroll fingerprint if needed. |
| Data not syncing to cloud. | No internet connection; cloud service temporary outage; incorrect cloud settings. | Check network connection. Verify NGTeco Office Cloud status page. Review device cloud settings. Data will sync once connection is restored. |
Specifications
| Feature | Detail |
|---|---|
| Model Number | TC1 |
| Dimensions (L x W x H) | 27 x 22 x 8 cm (10.6 x 8.7 x 3.1 inches) |
| Weight | 800 grams (1.76 lbs) |
| User Capacity | 200 Users |
| Record Capacity | 30,000 Records |
| Verification Methods | Fingerprint, Facial Recognition, RFID, PIN |
| Connectivity | LAN (Ethernet), Wi-Fi (2.4 GHz) |
| Software | NGTeco Office Cloud (Browser-based) |
| Battery | 1 Lithium-ion (included) |
Warranty and Support
Warranty Information
NGTeco products typically come with a standard manufacturer's warranty. Please refer to the warranty card included with your product or visit the official NGTeco website for detailed warranty terms and conditions. Keep your purchase receipt as proof of purchase for warranty claims.
Customer Support
For technical assistance, troubleshooting, or any product-related inquiries, please contact NGTeco customer support:
- Website: Visit the official NGTeco website for FAQs, support articles, and contact forms.
- Email: Refer to your product packaging or the NGTeco website for the support email address.
- Phone: Contact numbers for regional support may be available on the NGTeco website.
When contacting support, please have your product model number (TC1) and purchase details ready.

