
BIELMEIER f2c0ab25-5386-4c98-acb3-2a73c9c49e05
20V MAX Cordless Electric Drill Set with LED Light - User Manual
Brand: BIELMEIER | Model: f2c0ab25-5386-4c98-acb3-2a73c9c49e05
Introduction
This user manual provides essential information for the safe and efficient operation, maintenance, and troubleshooting of your BIELMEIER 20V MAX Cordless Electric Drill Set. Please read this manual thoroughly before using the product and retain it for future reference.
What's Included
Your BIELMEIER 20V MAX Cordless Electric Drill Set includes the following components:
- (1) 20V MAX Cordless Electric Drill
- (1) 1.5Ah Lithium Battery
- (1) Battery Charger
- (1) Magnetic Flexible Shaft (for hard-to-reach places)
- (3) Woodworking Drill Bits
- (3) Twist Drill Bits
- (1) Screwdriver Bit
- (1) 60mm Magnetic Bit Adaptor
- (20) Driver Bits
- (1) Belt Buckle
- (1) User Manual

Figure 1: All components included in the BIELMEIER 20V MAX Cordless Electric Drill Set.
Product Overview and Features
The BIELMEIER 20V MAX Cordless Electric Drill is designed for versatility and ease of use, featuring:
- High Precision Control: Equipped with 64+1 torque settings, offering up to 250 inch-pounds of torque for precise drilling and driving.
- Quick Chuck Design: A 3/8 inch keyless chuck allows for tool-free accessory changes, enhancing efficiency.
- Multifunctional Applications: Suitable for drilling in wood, metal, and gypsum board, as well as driving screws.
- Integrated LED Light: Illuminates dim work areas for improved visibility.
- Forward/Reverse Switch: Easily switch between clockwise and anticlockwise rotations for various tasks.
- Adjustable Variable Speed: Speed control from 0-700 RPM for precise operations.
- Electronic Brake Feature: Provides immediate stopping power for enhanced safety and control.
- Durable 1500mAh Battery: A 1.5Ah lithium battery with a 3-color indicator light for clear power level monitoring.
- Ergonomic Design: Compact, lightweight, and features rubber-coated handles for comfortable grip and reduced vibration.
Key Components Diagram

Figure 2: Detailed view of the drill's main features.
Torque Settings and Keyless Chuck
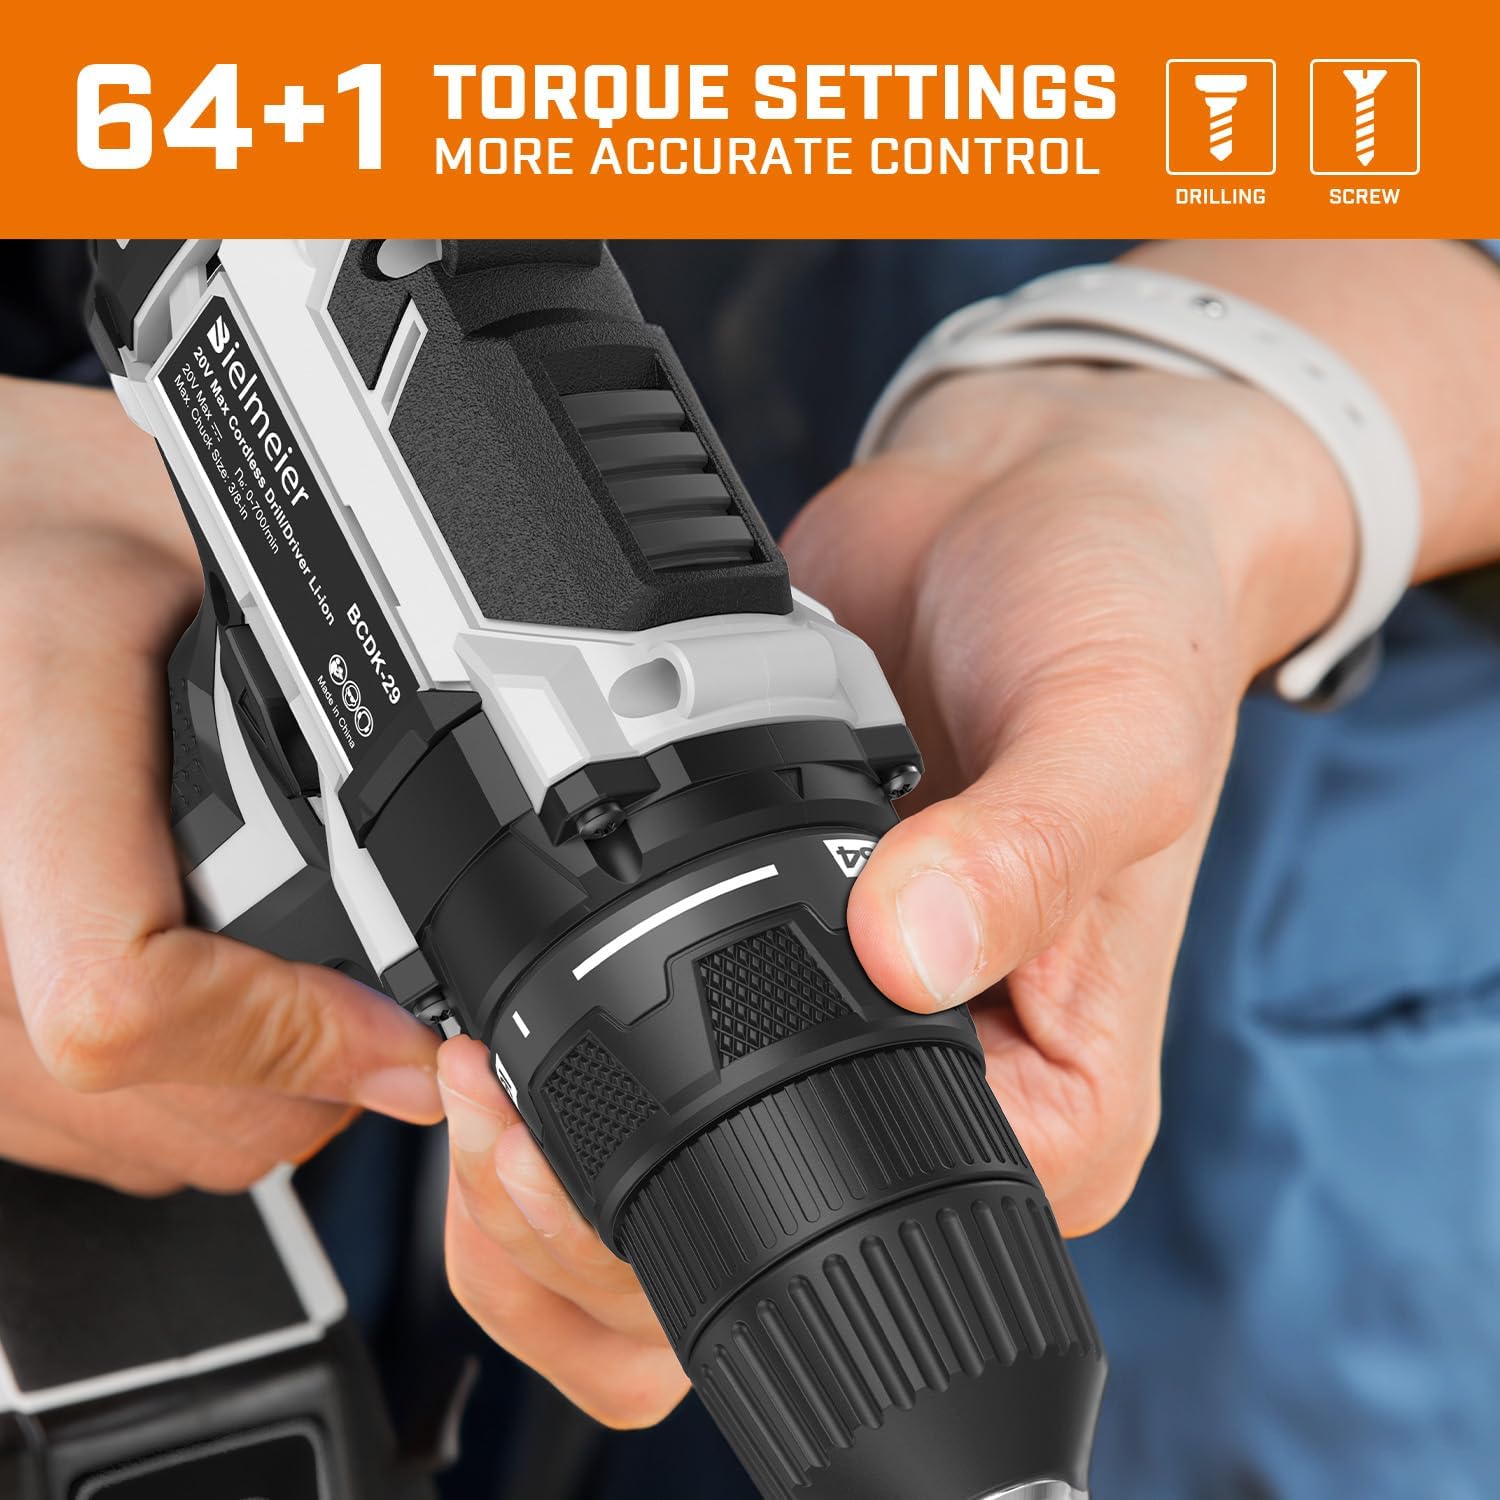
Figure 3: The 64+1 torque settings provide accurate operational control, and the 3/8" keyless chuck allows for quick accessory changes.
Flexible Shaft for Tight Spaces

Figure 4: The magnetic flexible shaft is ideal for working in confined or hard-to-reach areas.
LED Work Light in Action

Figure 5: The integrated LED light provides essential illumination for working in low-light conditions.
Official Product Video: Overview
Video 1: An overview of the BIELMEIER 20V MAX Cordless Electric Drill, demonstrating its drilling and driving capabilities on various materials like metal and wood.
Official Product Video: Features Demonstration
Video 2: A concise demonstration of the drill's features, including the flexible shaft and bit changes.
Setup
1. Charging the Battery
Before first use, fully charge the 1.5Ah Lithium-Ion battery. Connect the charger to a standard power outlet and insert the battery. The 3-color battery indicator light will show charging status. A full charge typically takes approximately 1 hour.
2. Installing/Removing the Battery
- Installation: Align the battery with the base of the drill and slide it firmly until it clicks into place.
- Removal: Press the battery release buttons on the sides of the battery pack and slide the battery out.
3. Installing/Changing Drill Bits or Driver Bits
- Open Chuck: Rotate the chuck counter-clockwise until the jaws are wide enough to insert the desired bit.
- Insert Bit: Insert the drill bit or driver bit into the chuck, ensuring it is seated as deeply as possible.
- Tighten Chuck: Rotate the chuck clockwise until the bit is securely clamped. Hand-tighten firmly. The keyless chuck design allows for quick changes without additional tools.
Operating Instructions
1. Selecting Torque Setting
The drill features 64+1 torque settings. Rotate the torque collar (located behind the chuck) to select the appropriate setting for your task. Lower settings are for driving screws to prevent over-tightening or stripping, while higher settings and the drill icon setting are for drilling into harder materials.
2. Adjusting Speed (Variable Speed Trigger)
The drill's speed is controlled by the pressure applied to the trigger. Pressing the trigger lightly will result in a slower speed, while pressing it fully will achieve the maximum speed of 700 RPM. This variable speed control allows for precise starting and controlled drilling/driving.
3. Forward/Reverse Operation
Locate the forward/reverse switch above the trigger. Push the switch to the left for forward (clockwise) rotation (for driving screws or drilling). Push the switch to the right for reverse (counter-clockwise) rotation (for removing screws or backing out bits). Ensure the switch is in the neutral (middle) position when not in use to prevent accidental activation.
4. Using the LED Work Light
The LED work light automatically activates when the trigger is pressed, illuminating the work surface. It remains on for a short period after the trigger is released to provide continued visibility.
Maintenance
Regular maintenance ensures the longevity and optimal performance of your drill:
- Cleaning: Keep the drill's ventilation openings clean and free of dust and debris. Use a soft, damp cloth to wipe down the exterior. Do not use harsh chemicals or abrasive cleaners.
- Bit Care: Clean drill bits and driver bits after each use. Store them in the provided case to prevent damage and loss.
- Battery Storage: Store the battery in a cool, dry place away from direct sunlight and extreme temperatures. For long-term storage, ensure the battery is partially charged (around 50%).
- Inspection: Periodically inspect the power cord of the charger for damage. Check the chuck for any signs of wear or damage.
Troubleshooting
| Problem | Possible Cause | Solution |
|---|---|---|
| Drill does not start. | Battery is not charged or not properly inserted. | Ensure battery is fully charged and securely inserted. |
| Drill loses power during operation. | Battery charge is low. | Recharge the battery. |
| Bit slips in chuck. | Chuck not tightened sufficiently or bit shank is dirty/damaged. | Re-tighten chuck firmly. Clean or replace the bit if necessary. |
| Drill overheats. | Prolonged heavy use or blocked ventilation. | Allow drill to cool down. Clear any obstructions from ventilation openings. |
Specifications
| Feature | Detail |
|---|---|
| Brand | BIELMEIER |
| Model Number | f2c0ab25-5386-4c98-acb3-2a73c9c49e05 |
| Power Source | Battery Powered |
| Voltage | 20 Volts |
| Battery Capacity | 1.5 Amp Hours (1500mAh) |
| Maximum Rotational Speed | 700 RPM |
| Maximum Chuck Size | 0.37 Inches (3/8") |
| Torque Settings | 64+1 |
| Maximum Torque | 20.5 Inch Pounds (28 Newton Meters) |
| Item Weight | 2.6 Pounds |
| Product Dimensions | 12"L x 3"W x 4"H |
| Special Feature | Variable Speed, LED Light |
Warranty & Support
For warranty information and customer support, please refer to the documentation included with your product or visit the official BIELMEIER website. Keep your purchase receipt as proof of purchase for any warranty claims.
For additional assistance, you may contact BIELMEIER customer service through their official channels.
Ask a question about this manual
Ask about setup, troubleshooting, compatibility, parts, safety, or missing instructions. Manuals+ will review the question and use this page’s manual context to help answer it.