1. Important Safety Information
Please read and understand this entire manual before attempting to assemble, operate, or install the product. Failure to follow these instructions could result in electric shock, fire, or serious personal injury.
- Always disconnect power at the main circuit breaker before beginning installation or making any repairs.
- All wiring must be in accordance with national and local electrical codes. If you are unfamiliar with wiring, consult a qualified electrician.
- Use only replacement parts specified by the manufacturer.
- The fan must be mounted with a minimum of 7 feet (2.1 meters) clearance from the trailing edge of the blades to the floor.
- Ensure the mounting structure is capable of supporting the fan's weight (approximately 14.55 lbs).
- This fan is damp rated for indoor or outdoor use in spaces exposed to moisture and humidity such as porches, patios, sunrooms, and bathrooms, but not direct exposure to water.
2. Package Contents
Carefully unpack your fan and inspect the contents. You should have the following items:
- Motor Housing Assembly
- Fan Blades (5)
- Blade Brackets
- Downrod Assembly (3-inch downrod included)
- Mounting Bracket
- Wall Control Unit
- Hardware Pack (screws, washers, wire nuts)
- Instruction Manual

Image: The Hunter Burton 52-inch ceiling fan in Fresh White, shown with its included wall control unit.
3. Setup and Installation
Follow these steps for proper installation of your ceiling fan. It is recommended to have two people for installation.
3.1 Mounting the Fan
- Secure the mounting bracket to the ceiling junction box. Ensure the junction box is securely fastened to the building structure and can support the fan's weight.
- Attach the downrod to the motor housing assembly, feeding the wires through the downrod.
- Carefully lift the fan assembly and hang it from the mounting bracket.

Image: The Hunter Burton fan installed on an outdoor patio with a wooden ceiling, demonstrating its suitability for damp locations.

Image: The Hunter Burton fan installed on a white outdoor porch ceiling, blending with the farmhouse style.
3.2 Wiring Instructions
- Connect the fan's electrical wires to the household wiring according to the wiring diagram provided in the full installation guide (refer to the included paper manual for detailed diagrams).
- Ensure all wire connections are secure using the provided wire nuts.
- Install the wall control unit in a standard wall switch box, connecting it to the appropriate household wiring.
3.3 Attaching Blades
- Attach each fan blade to its corresponding blade bracket using the screws provided.
- Secure the blade assemblies to the motor housing. Ensure all screws are tightened securely.

Image: A close-up view of the fan's central motor housing, featuring the Hunter logo.

Image: A detailed view of one of the fan blades, showcasing its texture and attachment points.
4. Operating Instructions
Your Hunter Burton ceiling fan is designed for ease of use with the included wall control.
4.1 Using the Wall Control
The wall control allows you to adjust fan speed and direction.
- Speed Control: Use the slider on the wall control to select one of the four available fan speeds (HI, MD, L2, L1).
- Fan On/Off: The top switch on the wall control typically controls the fan's power.
- Direction Control: A separate switch on the wall control (often a small toggle) allows you to reverse the fan's blade rotation direction.
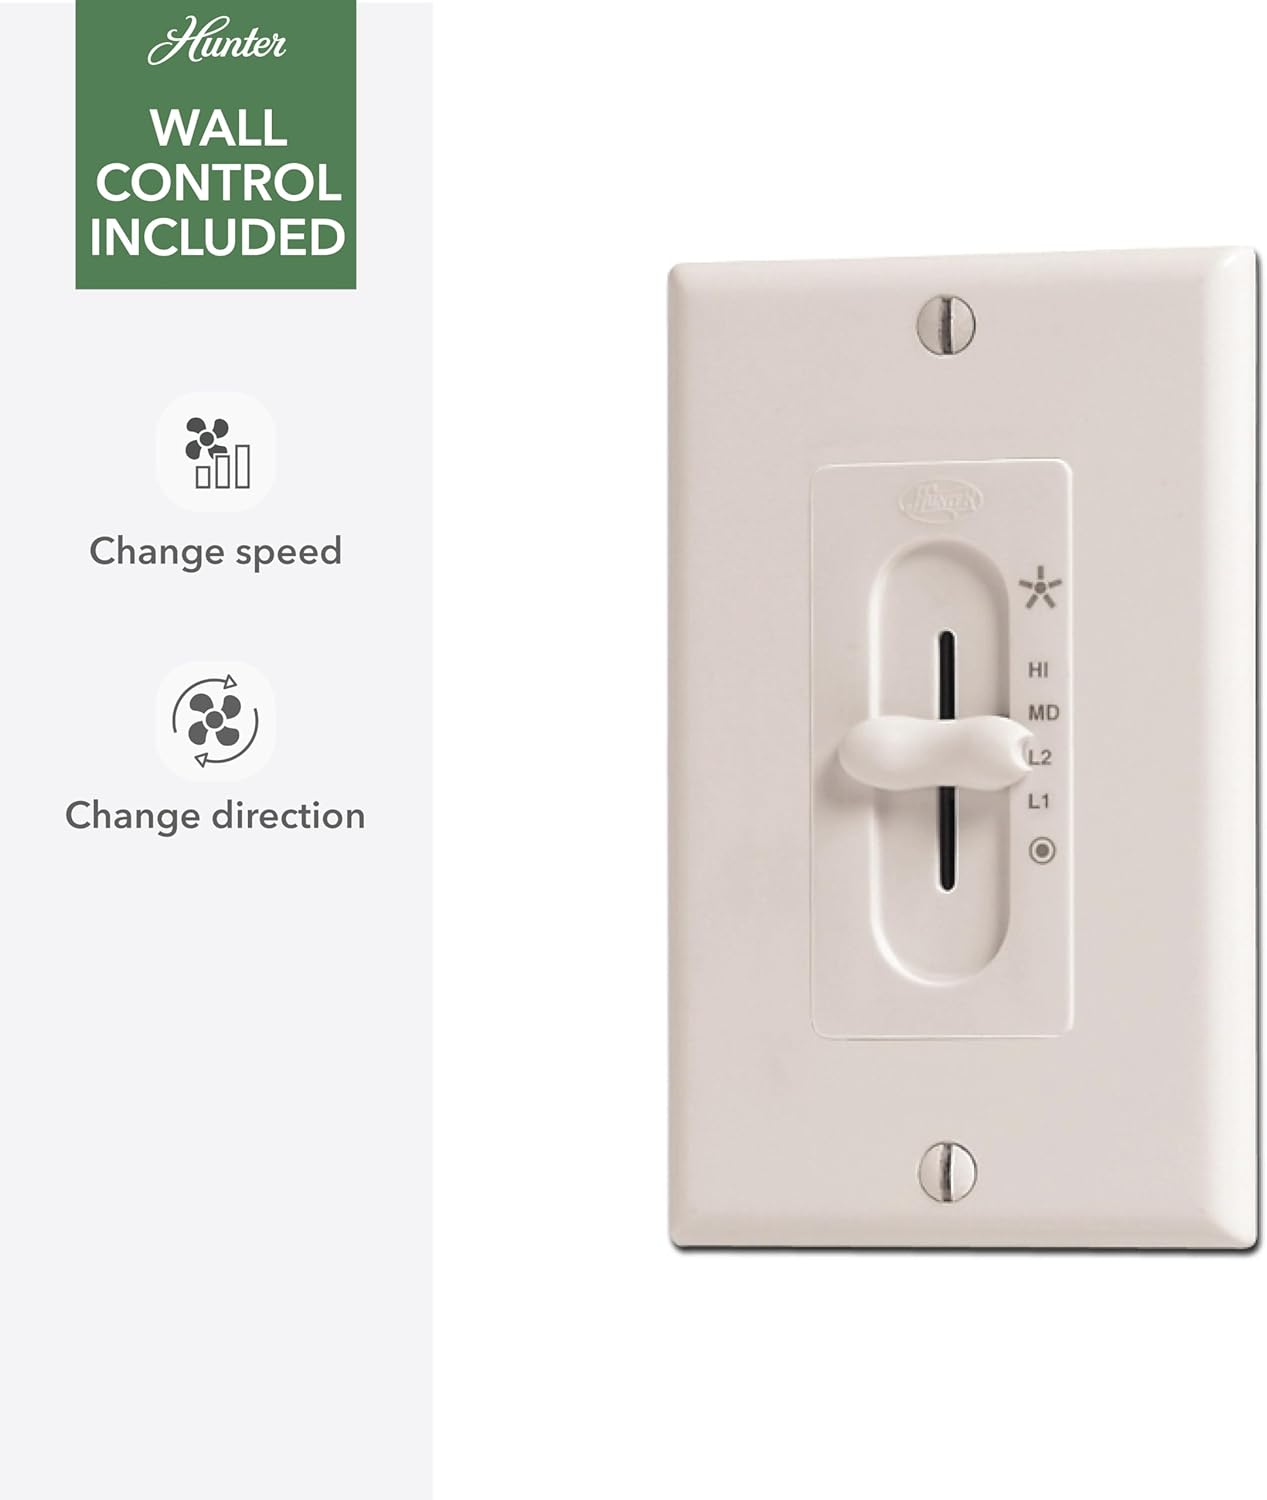
Image: The included wall control unit, showing controls for changing fan speed and direction.
4.2 Reversible Motor Function (Winter and Summer Operation)
The reversible WhisperWind motor allows you to optimize airflow for different seasons:
- Summer Mode (Downdraft): Set the fan to rotate counter-clockwise. This creates a downdraft that produces a cooling breeze, making the room feel cooler.
- Winter Mode (Updraft): Set the fan to rotate clockwise. This creates an updraft that circulates warm air trapped near the ceiling down into the room, helping to distribute heat more evenly.

Image: A graphic illustrating Hunter's SureSpeed Technology, emphasizing "Faster Cooling Power" with a cheetah icon, representing efficient airflow.
5. Maintenance
Regular maintenance will ensure the longevity and optimal performance of your Hunter Burton ceiling fan.
- Cleaning: To clean the fan, wipe with a soft, damp cloth. Do not use abrasive cleaners or solvents, as these may damage the finish.
- Blade Cleaning: Dust the blades regularly to prevent dust buildup, which can affect fan balance and performance.
- Tighten Screws: Periodically check all screws on the fan assembly, especially those securing the blades, and tighten them if necessary.
- Motor Lubrication: The WhisperWind motor is permanently lubricated and does not require oiling.
6. Troubleshooting
Before contacting customer support, please refer to the following troubleshooting guide for common issues.
| Problem | Possible Cause | Solution |
|---|---|---|
| Fan will not start | No power to fan; Loose wire connections; Blown fuse/tripped circuit breaker. | Check circuit breaker/fuse box; Ensure all wire connections are secure; Verify power supply to the fan. |
| Fan is noisy | Loose screws; Motor hum; Blades out of balance. | Tighten all screws on fan housing and blades; Allow a 24-hour break-in period for motor hum to subside; Check blade balance using a balancing kit (not included). |
| Fan wobbles excessively | Loose blade screws; Improper blade alignment; Mounting bracket not secure. | Ensure all blade screws are tight; Check that blades are installed correctly and evenly; Verify mounting bracket is securely fastened to the ceiling. |
| Wall control not working | Incorrect wiring; Faulty wall control. | Review wiring diagram for correct connections; Contact customer support if wall control is suspected to be faulty. |
7. Specifications
| Attribute | Detail |
|---|---|
| Brand | Hunter |
| Model Name | Burton |
| Item Model Number | 52929 |
| Color | Fresh White |
| Product Dimensions | 52"D x 52"W x 12.02"H |
| Number of Blades | 5 |
| Blade Material | Plastic |
| Air Flow Capacity | 4861 Cubic Feet Per Minute (CFM) on high speed |
| Wattage | 48 watts |
| Voltage | 120 Volts |
| Control Method | Wall Control (included) |
| Indoor/Outdoor Usage | Outdoor, Indoor (Damp Rated) |
| Item Weight | 14.55 Pounds |
| UPC | 049694529299 |
8. Warranty and Support
Hunter Fan Company stands behind the quality of its products.
8.1 Warranty Information
Your Hunter Burton ceiling fan comes with a Limited Lifetime Motor Warranty. Hunter performs extensive testing to ensure their ceiling fans are durable and long-lasting.
For specific details regarding warranty coverage and terms, please refer to the warranty card included with your product or visit the official Hunter Fan Company website.
8.2 Customer Support
If you require further assistance, have questions about installation, or need to troubleshoot an issue not covered in this manual, please contact Hunter Customer Support.
- Online Support: Visit the Hunter Fan Company website for FAQs, video tutorials, and contact forms.
- Phone Support: Refer to your product packaging or the Hunter Fan Company website for the most current customer service phone number.
Hunter Fan Company has been a trusted name in ceiling fans for over 135 years, known for their commitment to quality and performance.


