
Introduction
This manual provides detailed instructions for the HiFuture YACHT Rose Gold earbuds. Please read this manual carefully before using the product to ensure proper operation and to maximize its lifespan. Keep this manual for future reference.
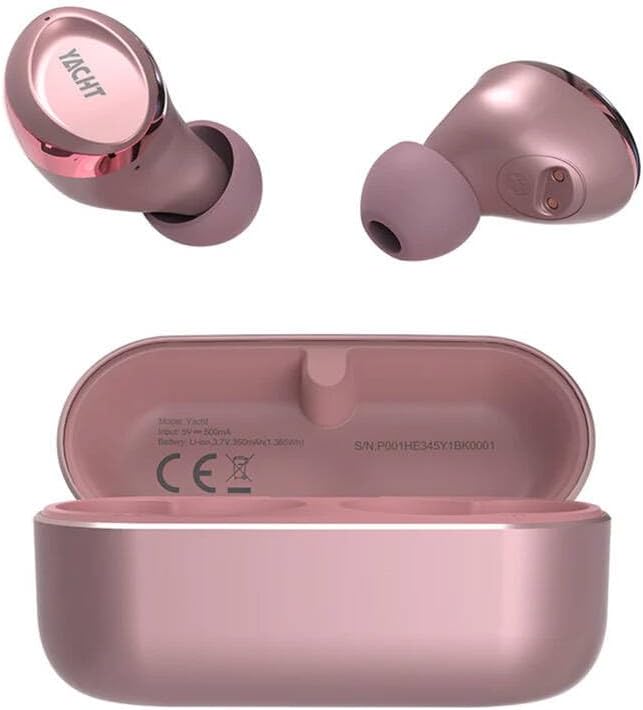
Image 1: HiFuture YACHT Rose Gold Earbuds and Charging Case. The image displays two rose gold earbuds, one showing the 'YACHT' branding on its outer surface, and the other showing its inner contact points. Below them is the open rose gold charging case, revealing the charging cradles and internal specifications such as 'Model: Yacht', 'Input: 5V ≈ 500mA', 'Battery: Li-ion 3.7V 350mAh/1.36Wh', and 'S/N: P001HE345Y1BK0001'.
Package Contents
The HiFuture YACHT Earbuds package typically includes:
- HiFuture YACHT Rose Gold Earbuds (Left and Right)
- Charging Case
- USB Charging Cable
- User Manual (this document)
- Eartips (various sizes, if applicable, though not specified)
Setup
1. Initial Charging
Before first use, fully charge the earbuds and the charging case. The charging case has an input requirement of 5V at 500mA. The internal battery of the case is a Li-ion 3.7V 350mAh (1.36Wh).
- Place both earbuds into the charging case.
- Connect the USB charging cable to the charging port on the case and to a compatible USB power source (e.g., computer, wall adapter).
- The indicator lights on the case and/or earbuds will show the charging status. Refer to the indicator light section for details (if available, otherwise assume standard behavior).
- Once fully charged, disconnect the charging cable.
2. Bluetooth Pairing
To connect your HiFuture YACHT earbuds to a device:
- Ensure the earbuds are charged and placed in the charging case.
- Open the charging case lid. The earbuds will automatically enter pairing mode, indicated by a flashing LED light (usually on one earbud).
- On your device (smartphone, tablet, computer), go to the Bluetooth settings.
- Turn on Bluetooth.
- Search for available devices. You should see "HiFuture YACHT" or a similar name appear in the list.
- Select "HiFuture YACHT" to connect.
- Once connected, the LED indicator on the earbuds will typically stop flashing or change to a solid color.
- The earbuds are now ready for use.
Note: If pairing fails, place the earbuds back in the case, close the lid, wait a few seconds, then reopen and try again. Ensure no other devices are actively trying to connect to the earbuds.
Operating Instructions
1. Power On/Off
- Power On: Open the charging case lid, or take the earbuds out of the case. They will automatically power on and attempt to reconnect to the last paired device.
- Power Off: Place the earbuds back into the charging case and close the lid. They will automatically disconnect and power off.
2. Wearing the Earbuds
Gently insert each earbud into the corresponding ear canal (L for left, R for right). Rotate them slightly until they fit snugly and comfortably. A proper fit ensures optimal sound quality and secure placement.
3. Basic Controls (Touch/Button)
The HiFuture YACHT earbuds feature touch-sensitive controls. Specific functions may vary slightly, but common operations include:
- Play/Pause: Single tap on either earbud.
- Next Track: Double tap on the right earbud.
- Previous Track: Double tap on the left earbud.
- Answer/End Call: Single tap on either earbud during an incoming call.
- Reject Call: Press and hold either earbud for 2 seconds during an incoming call.
- Activate Voice Assistant: Triple tap on either earbud (e.g., Siri, Google Assistant).
- Volume Control: (If supported) Tap and hold the right earbud to increase volume, tap and hold the left earbud to decrease volume. Refer to specific product documentation for exact volume control methods.
Maintenance
1. Cleaning
Regular cleaning helps maintain sound quality and hygiene.
- Use a soft, dry, lint-free cloth to wipe the earbuds and charging case.
- For stubborn dirt, slightly dampen the cloth with water or a mild, non-abrasive cleaner. Avoid getting liquid into openings.
- Gently remove any earwax or debris from the eartips and speaker mesh using a small, soft brush or cotton swab.
- Ensure all components are completely dry before placing earbuds back in the case or charging.
2. Storage
When not in use, store the earbuds in their charging case to protect them from dust, damage, and to keep them charged.
3. Battery Care
- Avoid exposing the earbuds and case to extreme temperatures (hot or cold).
- Do not fully deplete the battery for extended periods. Charge regularly.
- Use only the provided charging cable or a certified equivalent.
Troubleshooting
| Problem | Possible Solution |
|---|---|
| Earbuds not pairing with device. |
|
| No sound or low volume. |
|
| Earbuds not charging. |
|
| One earbud not working. |
|
Specifications
| Feature | Detail |
|---|---|
| Brand | HiFuture |
| Model Name | YACHT |
| Color | Rose Gold |
| Item Weight | 80 Grams (total package) |
| Number of Items | 1 (package) |
| Charging Case Input | 5V ≈ 500mA |
| Charging Case Battery | Li-ion 3.7V 350mAh (1.36Wh) |
| Serial Number (Example) | P001HE345Y1BK0001 (may vary by unit) |
Warranty and Support
HiFuture products are designed for reliability and performance. For warranty information, please refer to the warranty card included with your purchase or visit the official HiFuture website. For technical support or inquiries, please contact HiFuture customer service through their official channels.
- Online Support: Visit the official HiFuture website for FAQs, support resources, and contact options.
- Email Support: Refer to your product packaging or the official website for customer service email addresses.


