1. Introduction
Thank you for purchasing the Ledvion 200W LED Floodlight with Motion Sensor. This manual provides important information for the safe and efficient installation, operation, and maintenance of your new floodlight. Please read this manual thoroughly before installation and keep it for future reference.
This professional LED floodlight is designed for various outdoor applications, offering powerful and efficient illumination. Its robust construction ensures durability and reliable performance in diverse environmental conditions.
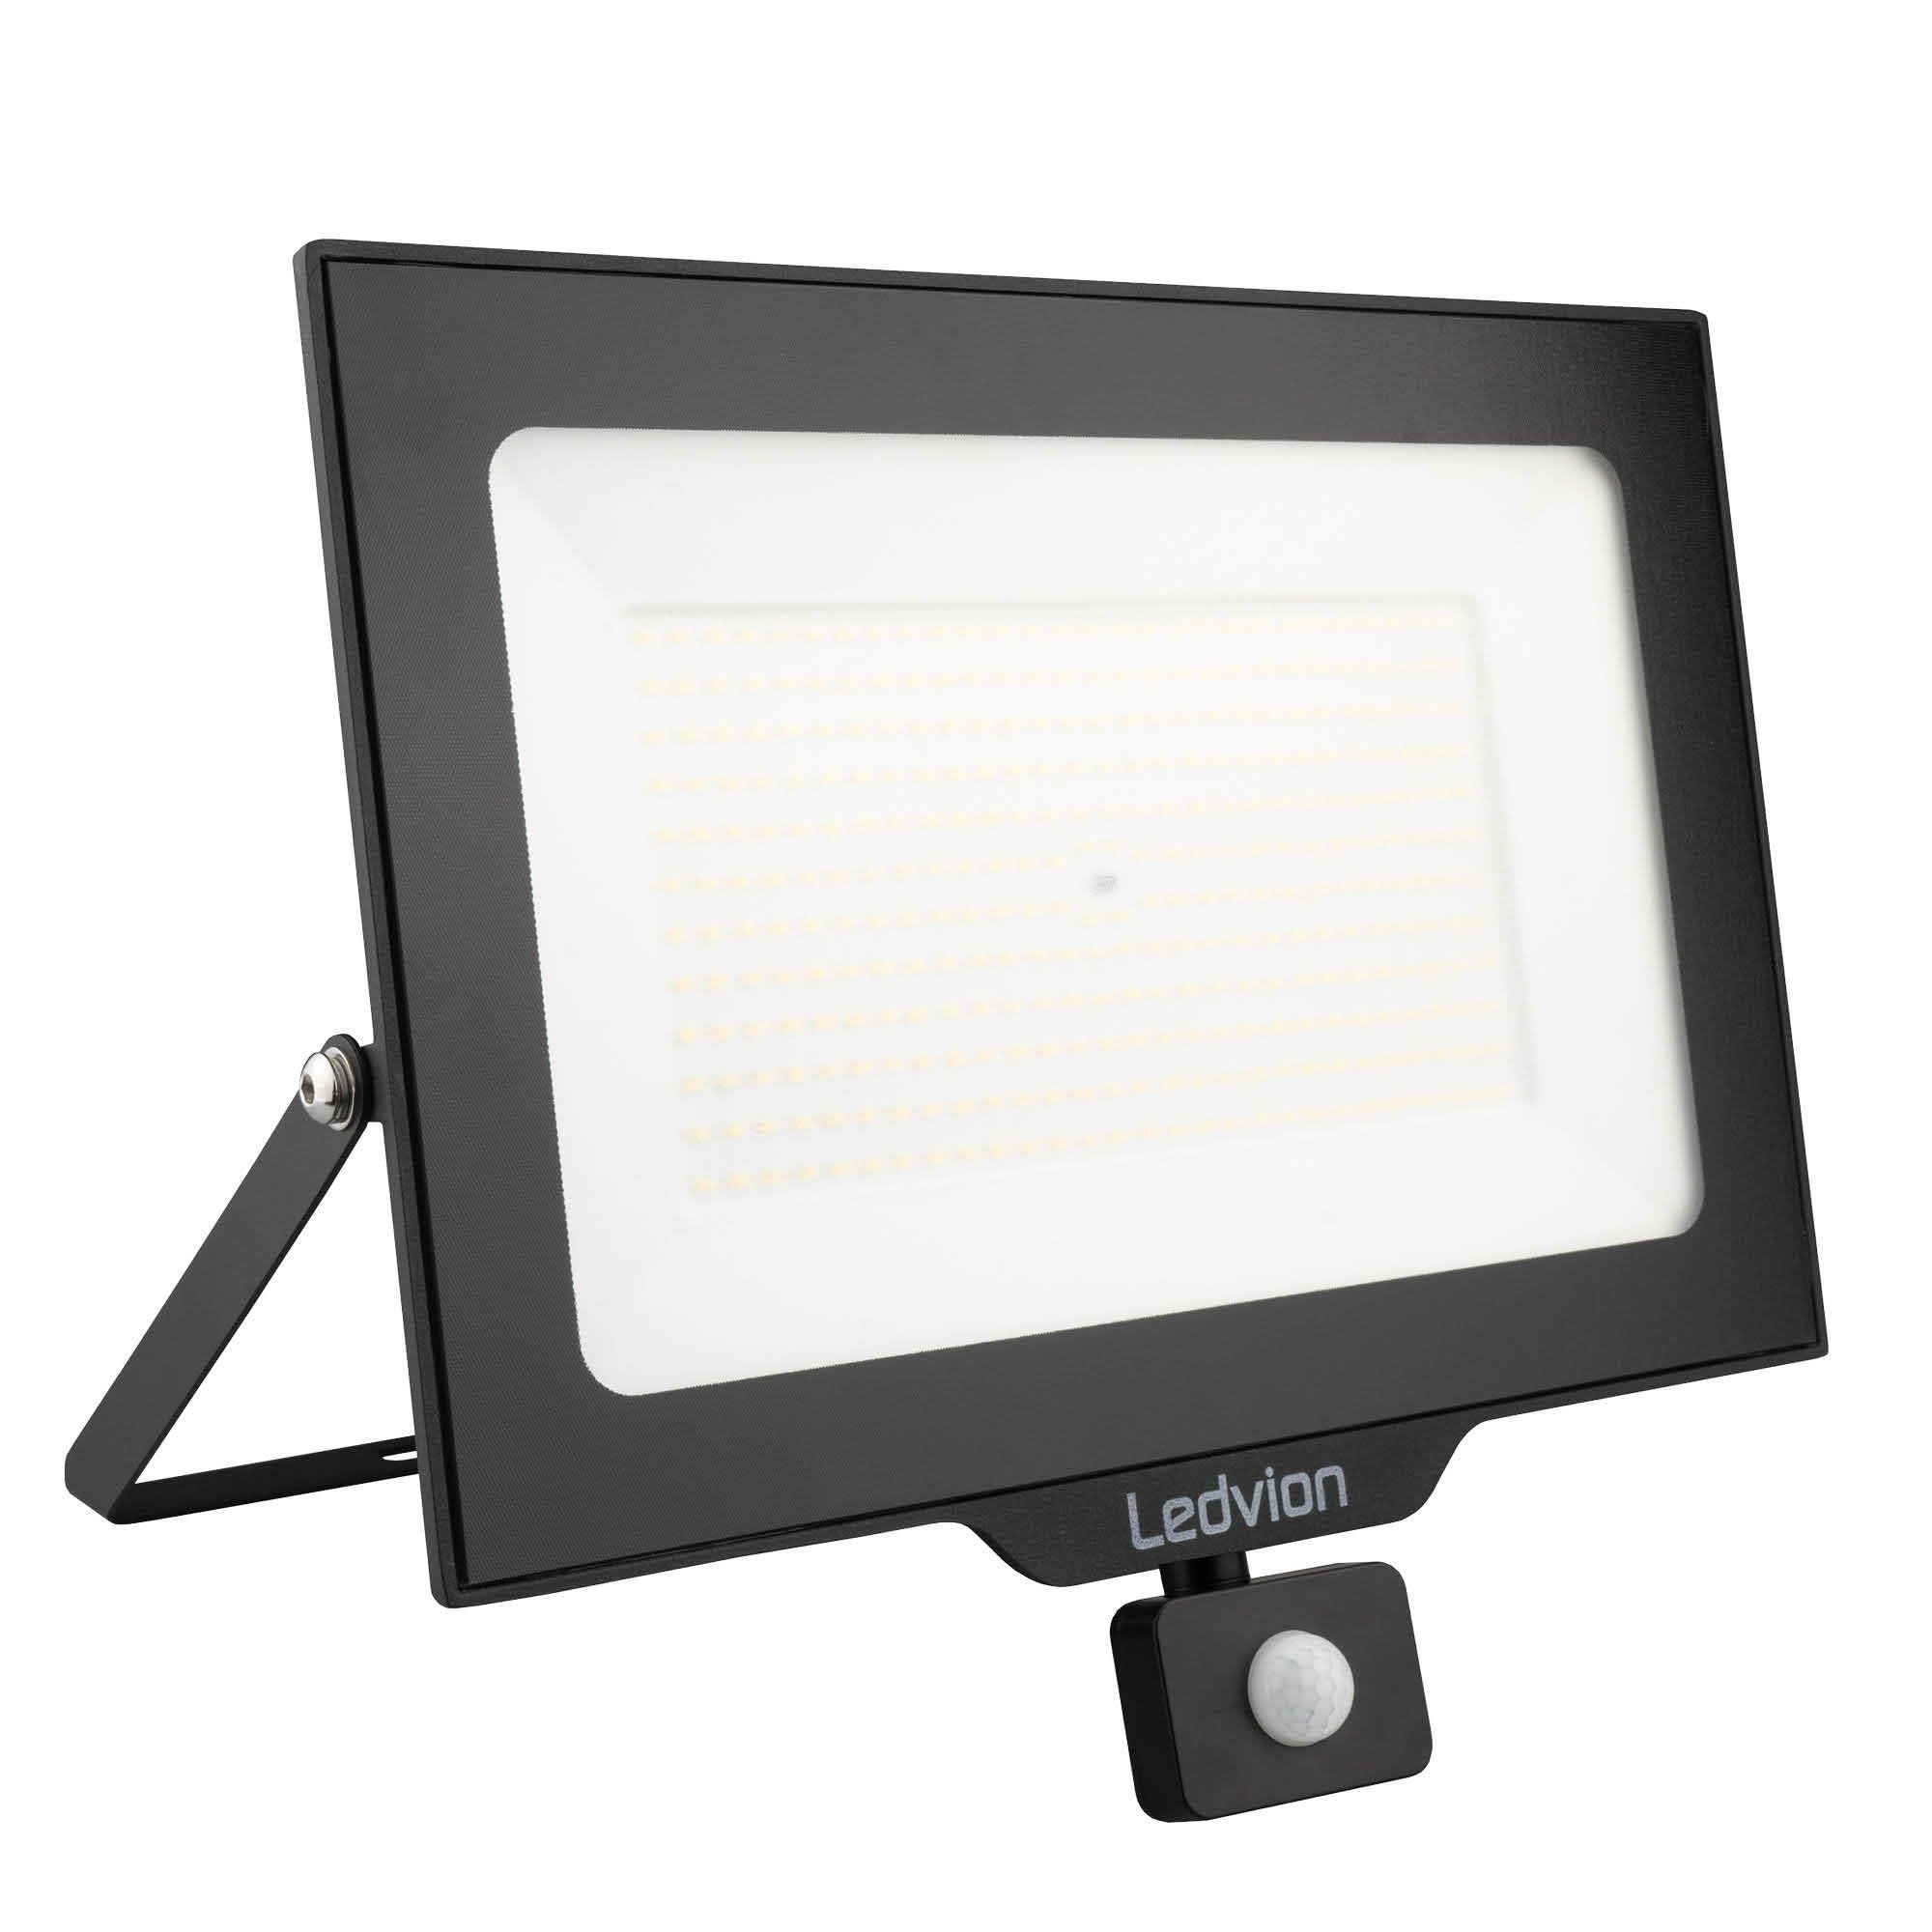
Figure 1: Ledvion 200W LED Floodlight with Motion Sensor.
2. Safety Instructions
WARNING: Failure to follow these safety instructions may result in fire, electric shock, serious injury, or property damage. Always consult a qualified electrician for installation if you are unsure.
- Electrical Safety: This device is intended for its intended purpose only. Do not use this device if damaged or defective. If the power cord is damaged, especially if the cable or driver is damaged, this product must be shut down immediately. Any repair or replacement is required before replacing. Turn off power and let the product cool down before any maintenance. Repairs may only be used in combination with the original driver. This product should only be opened by an authorized technician. When the product is defective, do not carry out repairs yourself. To disconnect voltage, pull the plug.
- Installation: Ensure the mounting surface is stable and can support the weight of the floodlight. All electrical connections must comply with local regulations and standards.
- Operating Environment: The floodlight is designed for outdoor use (IP44 rated). Avoid submerging it in water or exposing it to extreme mechanical stress.
- Temperature: Operates reliably in temperatures from -20°C to 50°C.
- Maintenance: Always disconnect power before cleaning or performing any maintenance. Use a soft, damp cloth for cleaning; do not use abrasive cleaners.
- Children: Keep the product out of reach of children.

Figure 2: Important safety and product information from the packaging. Scan the QR code for safety documents: https://qr.ledvion.com/DOC
3. Product Features
The Ledvion LED Floodlight is engineered with advanced features for superior performance and durability:
- High Quality Construction: Made from high-quality materials, featuring a strong aluminum base and a powder-coated surface for corrosion protection.
- Powerful Illumination: 200W power output, delivering 24000 lumens with a 6000K cool white light temperature.
- Integrated Motion Sensor: Equipped with an adjustable Passive Infrared (PIR) sensor for automatic light activation, detecting motion up to 6 meters with a 120° angle.
- Durable and Weather-Resistant: IP44 rated, making it splash-proof and suitable for outdoor use. Features IK07 tempered safety glass for impact resistance.
- Efficient Heat Dissipation: The back of the floodlight is equipped with a durable heatsink to prevent overheating of the OSRAM LED chips during prolonged use, ensuring a long lifespan.
- Easy Installation: Designed for easy wall mounting with a mobile bracket and includes a quick connector for simplified electrical hookup.
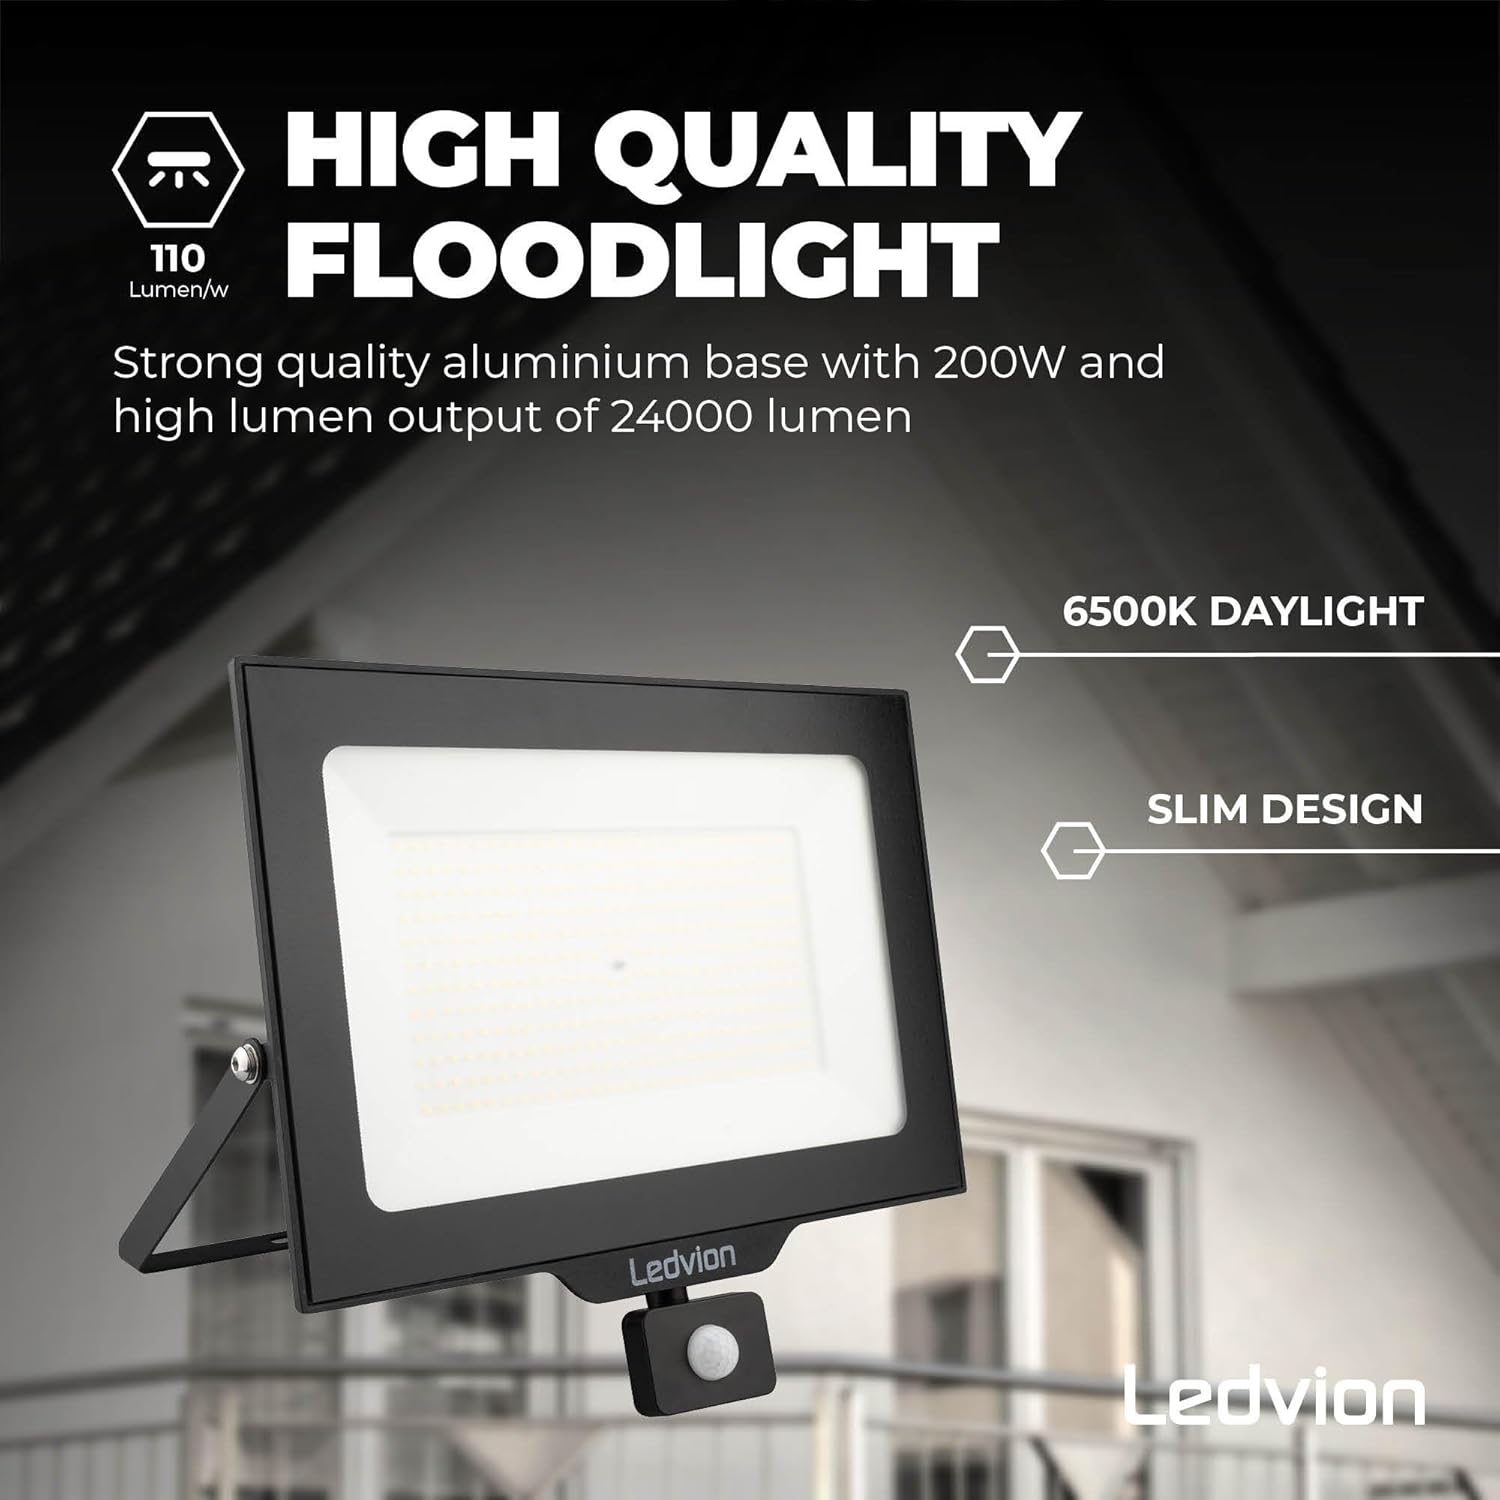
Figure 3: Key features of the Ledvion floodlight, including high lumen output and slim design.
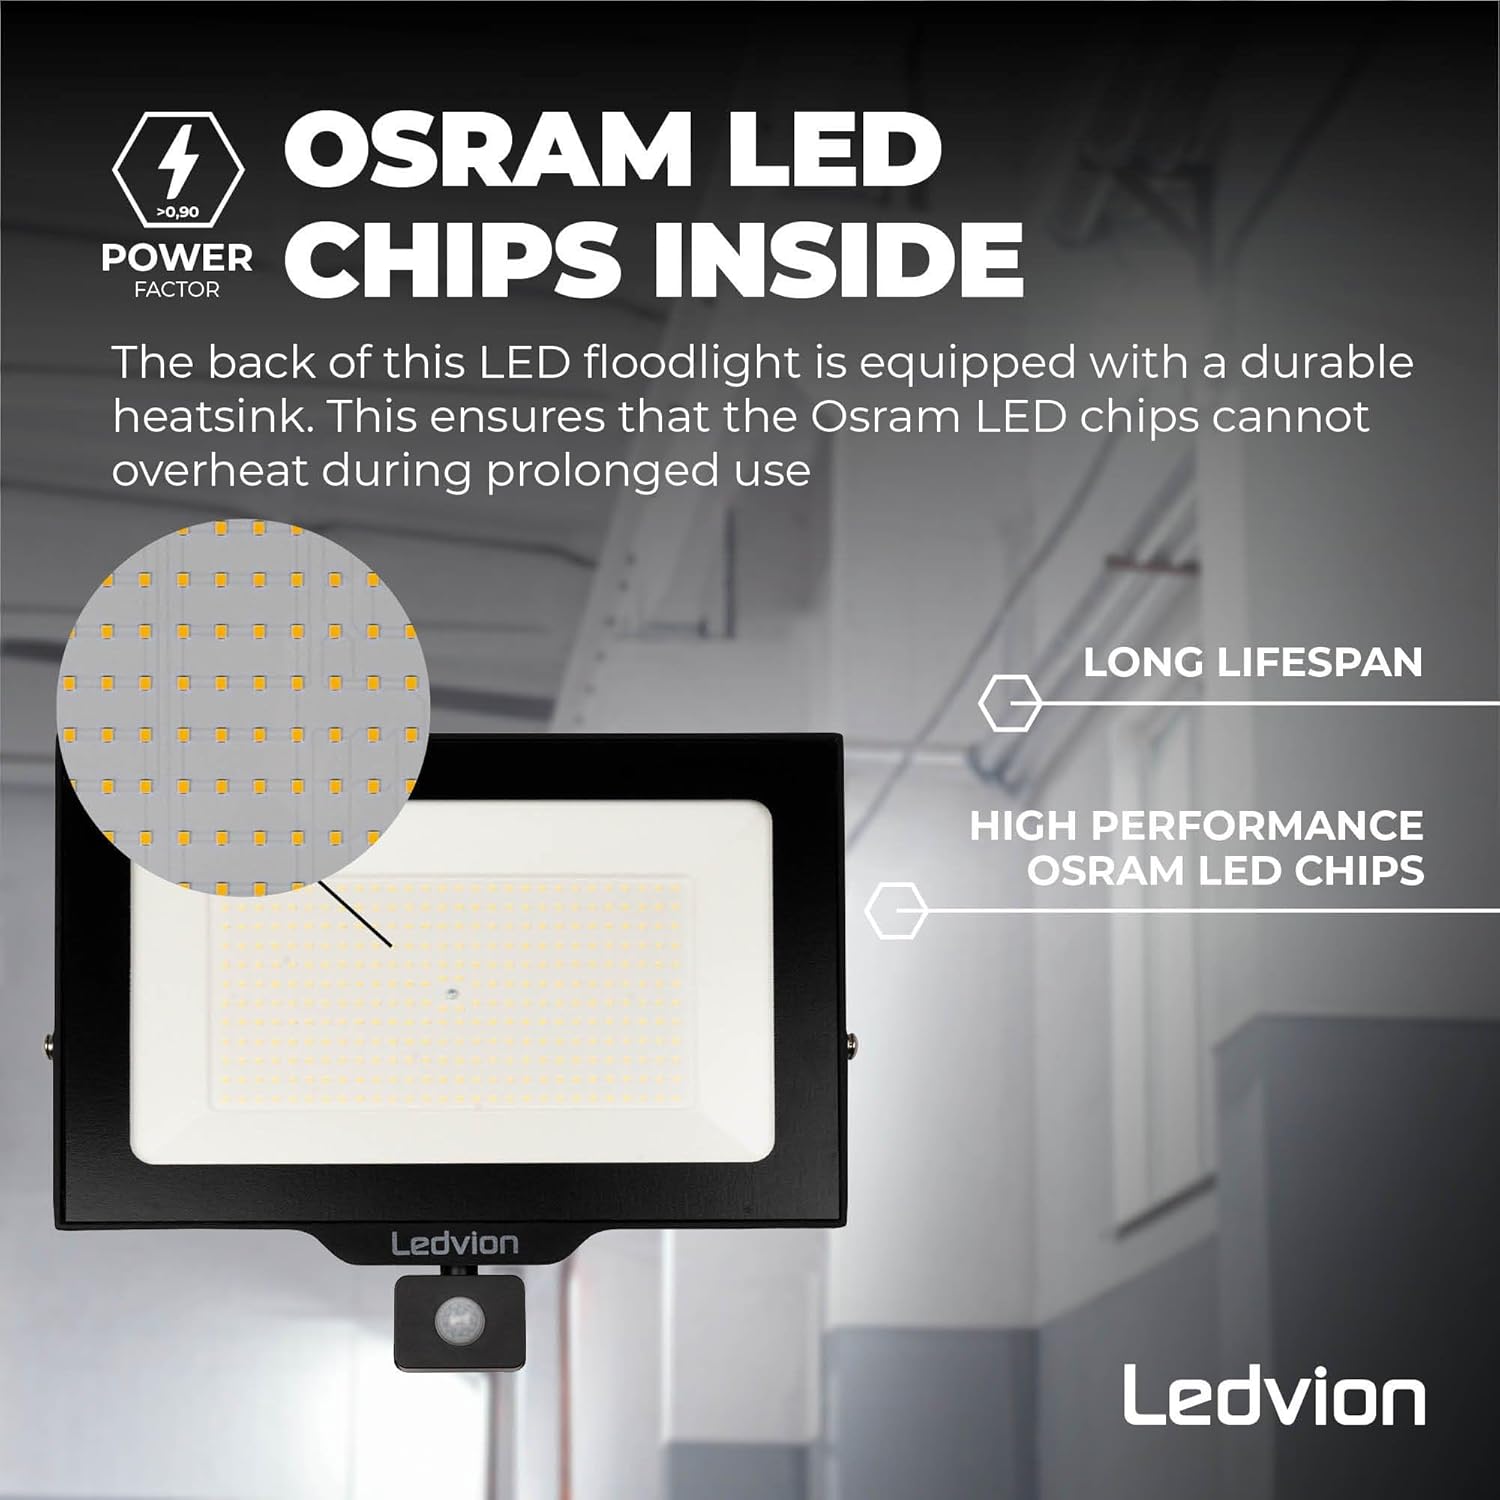
Figure 4: Illustration of the OSRAM LED chips and the heatsink for optimal heat management.

Figure 5: This image illustrates the floodlight's resistance to water and dust. The Ledvion 200W LED Floodlight is rated IP44, providing protection against splashing water from any direction.
4. Installation
Before beginning installation, ensure the power supply is disconnected at the main circuit breaker to prevent electric shock.
4.1. Package Contents
The package typically includes:
- Ledvion LED Floodlight with Motion Sensor (Model: LV50014-sensor)
- Mounting bracket (pre-attached)
- Quick connector (included for simplified wiring)
- Instruction Manual (this document)
4.2. Mounting the Floodlight
- Choose Location: Select a suitable outdoor location for mounting, such as a wall, ensuring the surface is sturdy enough to hold the floodlight's weight. Consider the desired illumination area and motion sensor coverage.
- Mark Drilling Points: Use the mounting bracket as a template to mark the drilling points on the wall. The bracket has mounting holes with a diameter of 12.5 mm, spaced 120 mm and 180 mm apart.
- Drill Holes: Drill holes at the marked points. Insert appropriate wall plugs (not included) if necessary.
- Secure Bracket: Attach the mounting bracket to the wall using screws (not included). Ensure it is securely fastened.
- Attach Floodlight: Mount the floodlight onto the secured bracket. The bracket allows for angle adjustment after installation.

Figure 6: Example of the floodlight installed on an exterior wall.
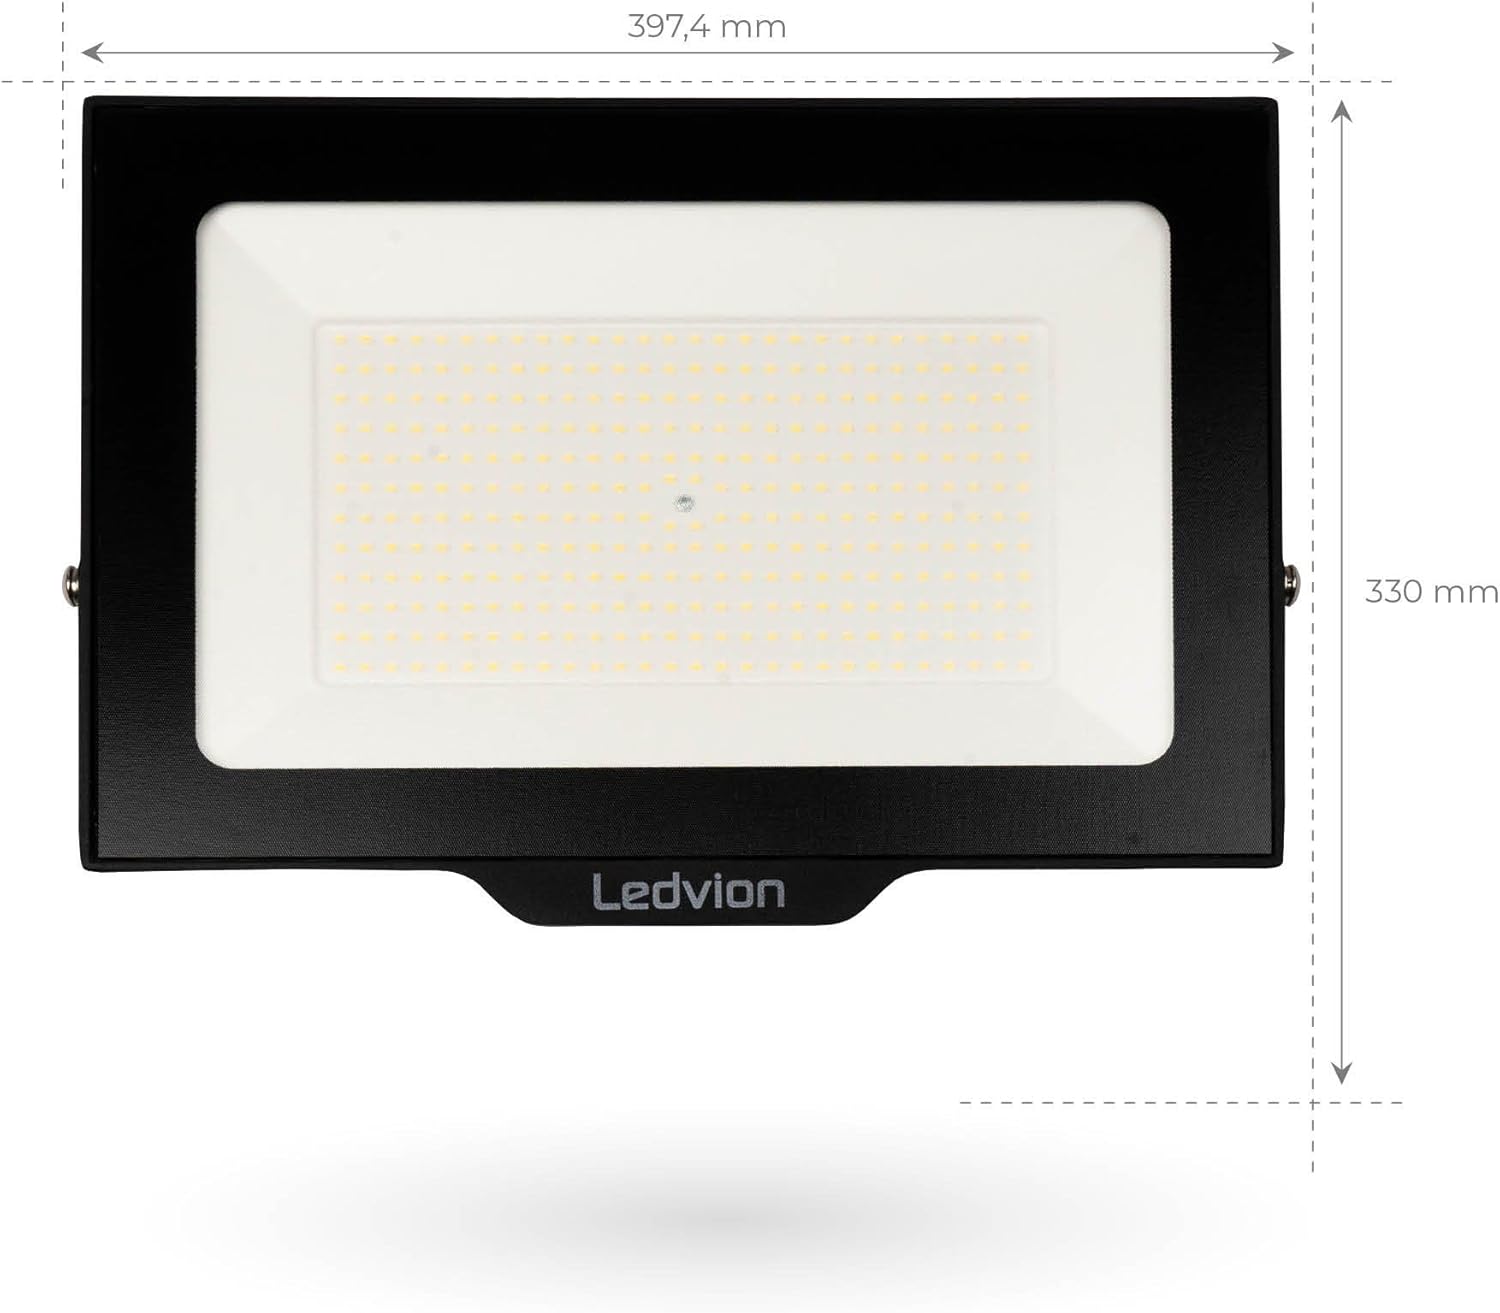
Figure 7: Front view dimensions of the floodlight.

Figure 8: Side view dimensions, including cable length and mounting hole spacing (120mm, 180mm, 12.5mm diameter).
4.3. Electrical Connection
The floodlight comes with a pre-attached cable and a quick connector for easy wiring. Ensure all connections are secure and waterproof.
- Identify Wires: The cable typically contains three wires: Live (brown/black), Neutral (blue), and Earth (green/yellow).
- Connect to Power: Connect the floodlight's wires to your main power supply using the quick connector, ensuring correct polarity (Live to Live, Neutral to Neutral, Earth to Earth).
- Secure Connections: Ensure all connections are tight and protected from moisture.
- Restore Power: Once all connections are made and secured, restore power at the main circuit breaker.
5. Operating Instructions
The Ledvion floodlight features an integrated motion sensor (PIR sensor) that automatically activates the light when motion is detected within its range.
5.1. Adjusting the Motion Sensor
The PIR sensor is adjustable to customize its detection range and duration. The sensor typically has controls for:
- SENS (Sensitivity): Adjusts the detection range. The sensor can detect motion up to 6 meters.
- TIME (Time Delay): Sets how long the light remains on after motion is detected and no further motion is sensed.
- LUX (Light Sensitivity): Determines the ambient light level at which the sensor becomes active. This allows the light to only turn on when it's dark enough.
Refer to the specific dials or switches on the sensor unit for precise adjustments. Test the settings after adjustment to ensure optimal performance.

Figure 9: Illustration of the adjustable PIR sensor's detection angle (120°) and range (up to 6 meters).
6. Maintenance
Regular maintenance ensures the longevity and optimal performance of your Ledvion floodlight.
- Cleaning: Periodically clean the floodlight's surface and sensor lens with a soft, damp cloth. Do not use harsh chemicals or abrasive materials, as these can damage the finish or sensor.
- Inspection: Regularly inspect the power cable and housing for any signs of damage, wear, or corrosion. If any damage is found, disconnect power immediately and consult a qualified technician.
- No User-Serviceable Parts: The LED light source and driver are not user-serviceable. Do not attempt to open or repair the floodlight yourself.
7. Troubleshooting
If you encounter issues with your floodlight, refer to the following common problems and solutions:
| Problem | Possible Cause | Solution |
|---|---|---|
| Light does not turn on. | No power supply. Sensor settings incorrect. Faulty wiring. | Check circuit breaker and power connections. Adjust LUX setting to a darker level or TIME setting. Verify all electrical connections are secure. |
| Light stays on continuously. | Continuous motion detected. TIME setting too long. Sensor faulty. | Ensure no objects are causing constant detection. Adjust TIME setting to a shorter duration. Contact customer support if problem persists. |
| Light turns on during daylight. | LUX setting too high (too sensitive to light). | Adjust LUX setting to a lower (darker) level. |
| Motion sensor range is poor. | SENS setting too low. Obstructions. Incorrect mounting height. | Increase SENS setting. Clear any obstructions in the sensor's field of view. Ensure sensor is mounted at an optimal height (typically 1.8-2.5m). |
If the problem persists after attempting these solutions, please contact Ledvion customer support.
8. Specifications
Detailed technical specifications for the Ledvion 200W LED Floodlight with Motion Sensor (Model: LV50014-sensor):
| Feature | Value |
|---|---|
| Brand | Ledvion |
| Model Number | LV50014-sensor |
| Power Consumption | 200 Watts |
| Luminous Flux | 24000 Lumens |
| Color Temperature | 6000 Kelvin (Cool White) |
| Color Rendering Index (CRI) | 85 |
| Voltage | 230 Volts |
| Material | Aluminum |
| Finish Type | Powder Coating |
| Product Dimensions (L x W x H) | 41 x 13 x 30 cm (410 x 130 x 300 mm) |
| Item Weight | 2.41 Kilograms |
| Ingress Protection (IP) Rating | IP44 (Splash-proof) |
| Impact Protection (IK) Rating | IK07 (Tempered safety glass) |
| Special Features | Motion Detector |
| Installation Type | Wall Mount |
| Power Source | Corded Electric |
| Operating Temperature | -20°C to 50°C |
| Motion Sensor Detection Range | Up to 6 meters |
| Motion Sensor Angle | 120° |

Figure 10: Official product information sheet (translated values are included in the table above).

Figure 11: Energy label for the Ledvion floodlight. For more details, visit: https://eprel.ec.europa.eu/qr/1665563
9. Warranty & Disposal
9.1. Warranty Information
This Ledvion product comes with a 2-year warranty from the date of purchase. The warranty covers defects in materials and workmanship under normal use. It does not cover damage caused by improper installation, misuse, accidents, unauthorized repairs, or normal wear and tear.
For warranty claims, please retain your proof of purchase and contact Ledvion customer support. Any attempt to open or modify the product will void the warranty.
9.2. Product Disposal
This product contains electrical and electronic components that must be disposed of separately from household waste. The crossed-out wheeled bin symbol indicates that the product should not be disposed of with general household waste.
Please dispose of this product at designated collection points for electrical and electronic equipment recycling. Proper disposal helps prevent potential negative consequences for the environment and human health. For more information on where to drop off your waste equipment for recycling, please contact your local city office, your household waste disposal service, or the shop where you purchased the product.
Figure 12: The WEEE symbol indicates that this product should be disposed of responsibly through designated recycling channels.


