
1. Introduction
This manual provides detailed instructions for the installation, operation, and maintenance of the Genmitsu 4040-PRO X-Axis Extension Kit. This kit is designed to expand the working area of your Genmitsu 4040-PRO CNC Router Machine, allowing for larger projects and increased versatility. By extending the X-axis, the working area is increased to 600 x 400mm (23.62'' x 15.75'').
Please read this manual thoroughly before beginning the installation process to ensure proper setup and safe operation.
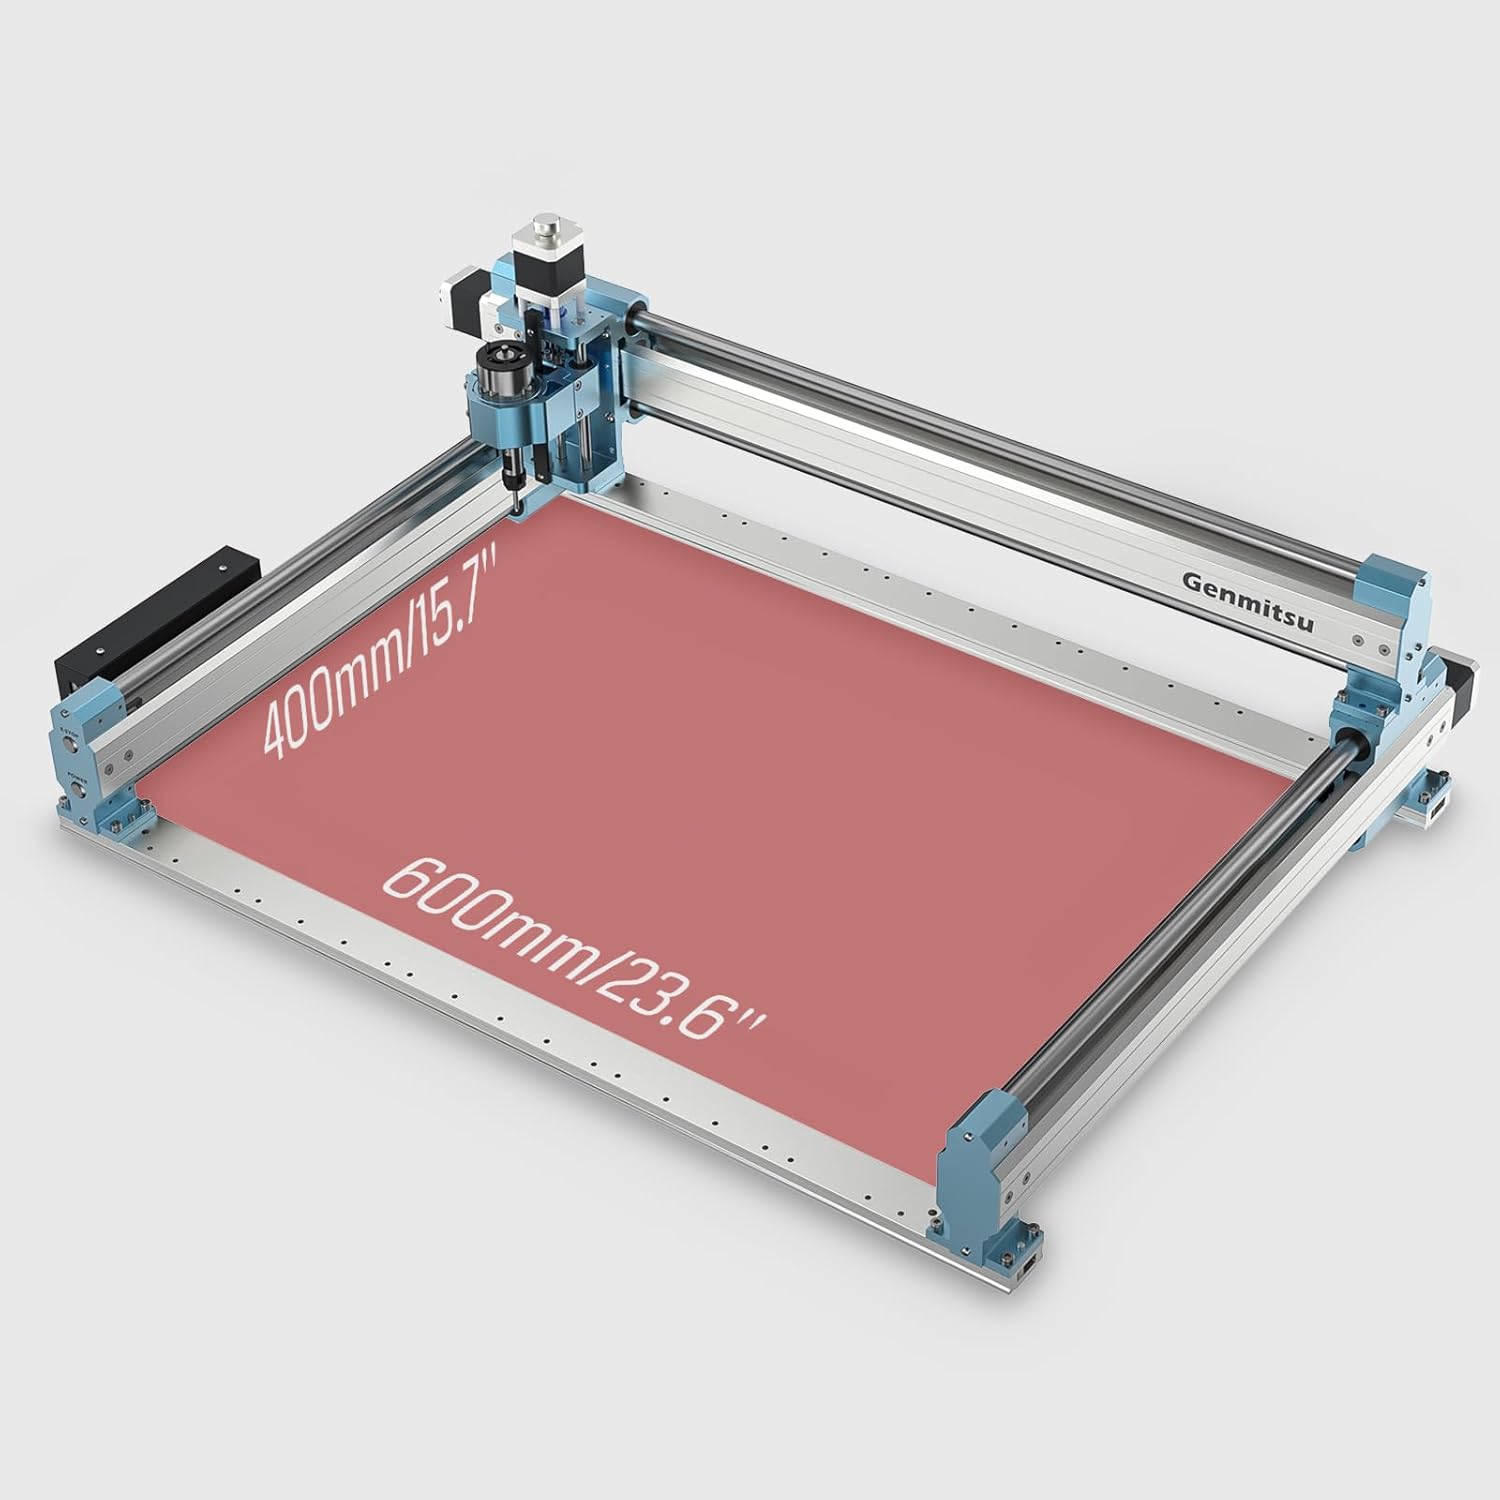
Image 1.1: Genmitsu 4040-PRO with X-Axis Extension, illustrating the expanded working area.

Image 1.2: Visual representation of the 50% working area extension.
2. Parts List
Before starting the installation, verify that all components listed below are present in your kit. If any parts are missing or damaged, please contact Genmitsu customer support.

Image 2.1: Components of the X-Axis Extension Kit.
The kit typically includes:
- Extended X-axis aluminum profiles
- Extended lead screw for X-axis
- Support blocks and mounting hardware
- Necessary cables and connectors
- Instruction manual
Note: The spoilboard is not included with this kit and must be acquired separately if you are upgrading to a larger size.
3. Setup and Installation
This section outlines the steps to install the X-Axis Extension Kit onto your Genmitsu 4040-PRO CNC machine. Ensure the machine is powered off and unplugged before proceeding.
3.1 Disassembly of Original X-Axis
- Carefully remove the existing X-axis assembly from your 4040-PRO CNC machine. This typically involves detaching the support blocks and disconnecting the lead screw.
- Keep all original screws and components organized, as some may be reused.
3.2 Installation of New X-Axis Components
- Attach the new, longer X-axis aluminum profiles to the machine frame using the provided hardware. Ensure they are securely fastened and aligned.
- Install the extended lead screw into the new X-axis assembly.
- Mount the X-axis support blocks (left and right) onto the new profiles, ensuring smooth movement.
- Re-attach the XZ module to the newly installed X-axis.
- Connect any necessary cables for the stepper motor and limit switches.

Image 3.1: Original aluminum profiles for reference during installation.

Image 3.2: Overview of components for X600*Y400mm upgrade.
3.3 Video Guide for Upgrade Process
For a visual guide on the upgrade process, refer to the following video. While it demonstrates an upgrade to a 'MAX' version, the general steps for disassembling and reassembling axis components are applicable.
Video 3.1: Guide on upgrading a Genmitsu 4040-PRO CNC machine. This video demonstrates general axis component installation steps relevant to the X-axis extension kit.
4. Operating Instructions
After successfully installing the X-Axis Extension Kit, your Genmitsu 4040-PRO CNC machine will have an expanded working area. This allows for larger projects without compromising the machine's stability or accuracy.
4.1 Software Configuration
It may be necessary to update your CNC control software (e.g., GRBL settings) to reflect the new maximum travel limits of the X-axis. Consult your CNC machine's primary instruction manual or the software documentation for details on adjusting axis limits.
4.2 Utilizing the Extended Area
When setting up new projects, ensure your design fits within the new 600 x 400mm working area. Always perform a dry run (air cut) to verify the tool paths and ensure there are no collisions or out-of-bounds movements before starting a material cut.
5. Maintenance
Regular maintenance of your CNC machine, including the extended X-axis components, is crucial for optimal performance and longevity.
- Cleaning: Keep the aluminum profiles, lead screw, and support blocks free from dust, debris, and wood chips. Use a soft brush or compressed air.
- Lubrication: Periodically apply a small amount of appropriate lubricant to the lead screw to ensure smooth and efficient movement. Refer to your main CNC machine manual for recommended lubricants.
- Inspection: Regularly check all fasteners and connections to ensure they remain tight. Loose components can lead to reduced accuracy and increased wear.
6. Troubleshooting
If you encounter issues after installing the X-Axis Extension Kit, consider the following common problems and solutions:
- Reduced Accuracy or Chatter:
- Ensure all mounting screws for the new X-axis profiles and support blocks are securely tightened.
- Verify that the lead screw is properly aligned and lubricated.
- Check for any obstructions or debris affecting the smooth movement of the X-axis.
- Confirm that the stepper motor is correctly connected and functioning.
- Machine Not Recognizing Extended Area:
- Review your CNC control software settings (e.g., GRBL parameters) to ensure the X-axis travel limits have been updated to reflect the new dimensions.
- Perform a homing cycle to re-establish the machine's origin and limits.
- Compatibility Issues:
- This kit is specifically designed for the Genmitsu 4040-PRO. Ensure your base machine is the correct model.
- If you are attempting to combine this with other extension kits (e.g., Y-axis extension), ensure all components are compatible and installed according to their respective manuals.
For persistent issues, please refer to the comprehensive troubleshooting guide for your Genmitsu 4040-PRO or contact Genmitsu customer support.
7. Specifications
| Feature | Detail |
|---|---|
| Model Number | 40P-XE60 |
| Compatible CNC Machine | Genmitsu 4040-PRO |
| Extended X-Axis Working Area | 600mm (23.62 inches) |
| Resulting Total Working Area | 600 x 400mm (23.62'' x 15.75'') |
| Included Components | X-axis Extension Kit (profiles, lead screw, hardware) |
| Item Weight | 5.26 kg |
8. Warranty and Support
For warranty information, please refer to the documentation provided with your original Genmitsu 4040-PRO CNC Router Machine or visit the official Genmitsu website. This extension kit is covered under the manufacturer's standard accessory warranty.
If you require technical assistance, have questions about installation, or need to report missing/damaged parts, please contact Genmitsu customer support directly. You can typically find contact information on the Genmitsu website or through your purchase platform.
Manufacturer: Genmitsu
Seller: SainSmart Tech CA

