
1. Introduction
This manual provides essential instructions for the safe and effective use, installation, and maintenance of your Riddost 4.5 Cubic Foot Large Fireproof Home Safe. Please read this manual thoroughly before operating the safe and retain it for future reference. Proper understanding of these instructions will ensure optimal security and longevity of your product.

Image 1.1: The Riddost 4.5 Cubic Foot Large Fireproof Home Safe with its door open, showcasing the spacious interior, adjustable shelving, and an internal lockbox. The digital keypad and key entry are visible on the exterior.
2. What's in the Box
Carefully unpack your safe and verify that all components listed below are included. If any items are missing or damaged, please contact customer support.
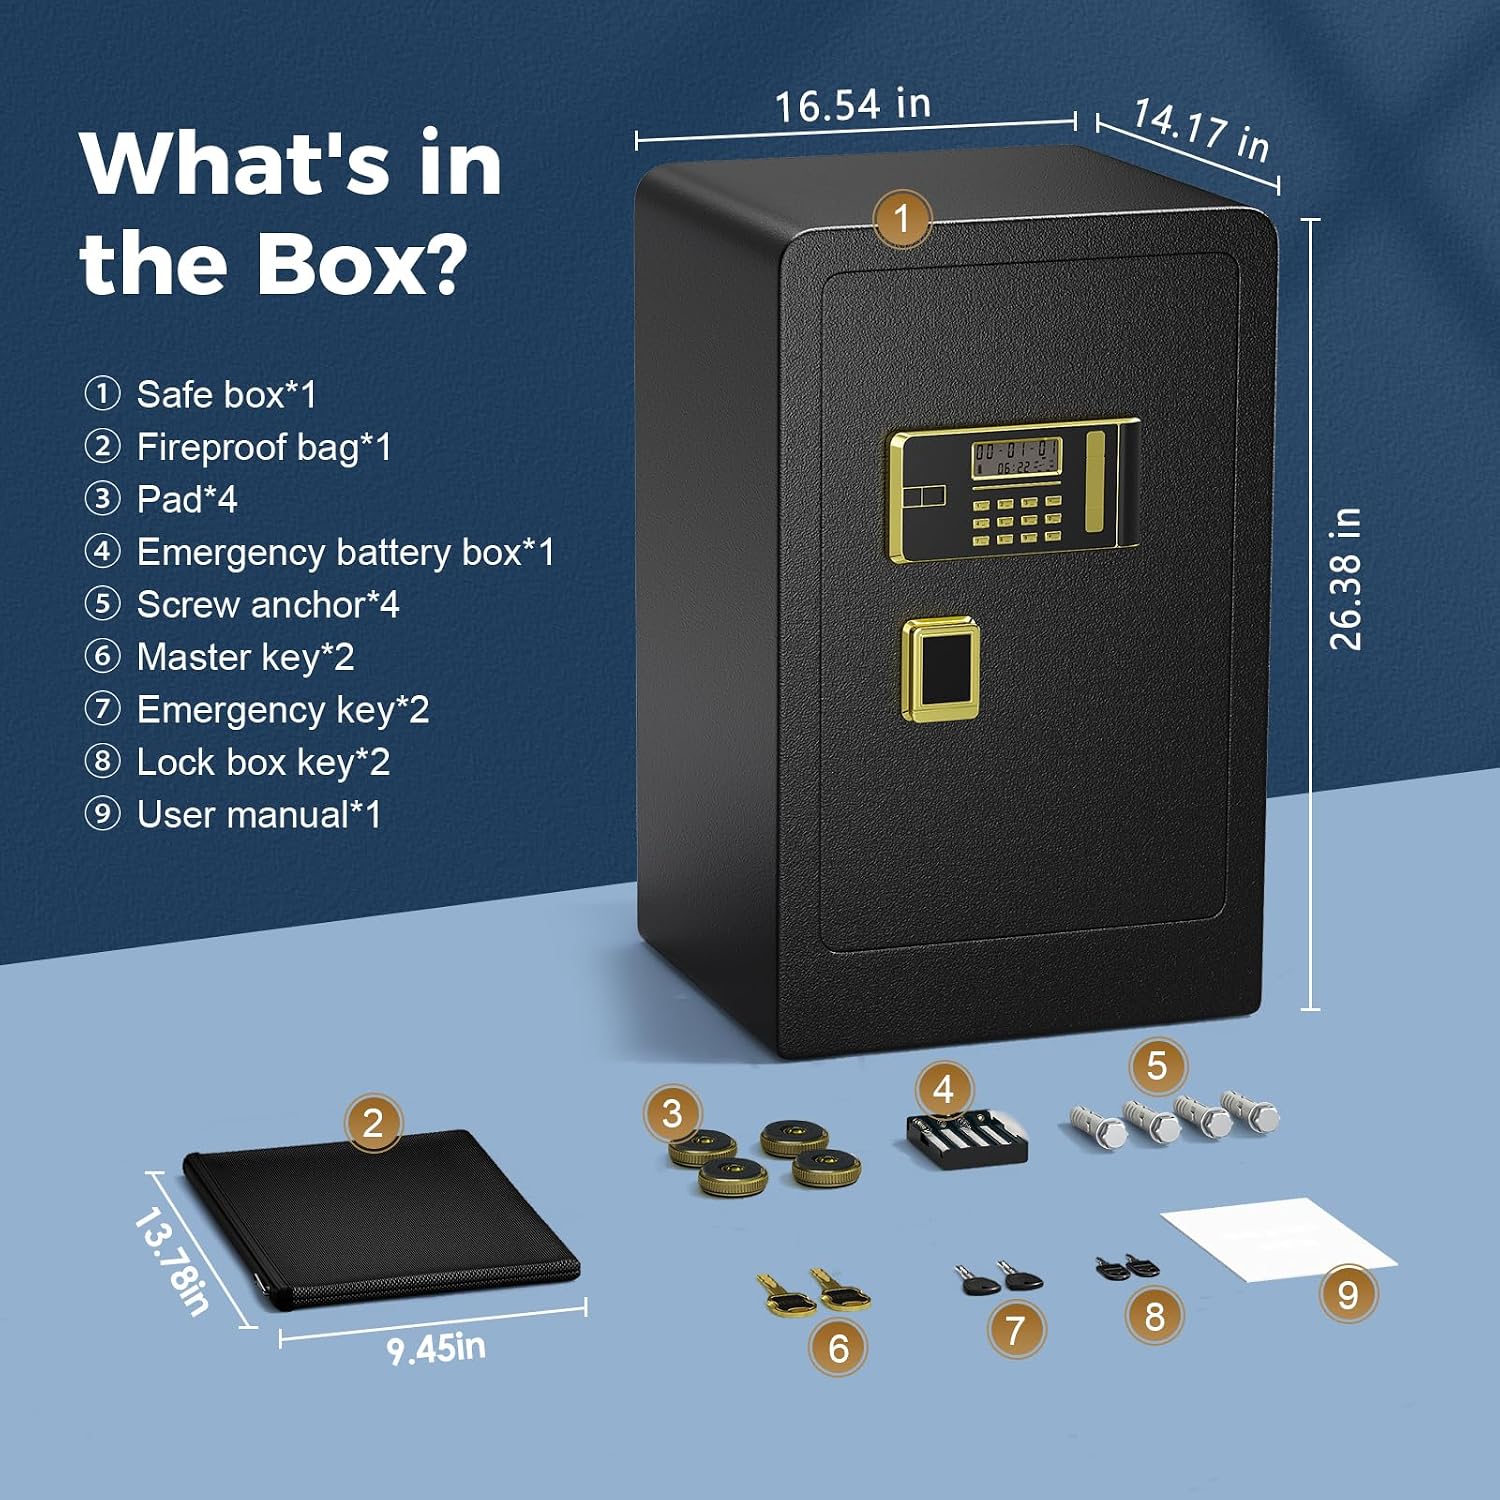
Image 2.1: An illustration detailing the contents of the product packaging. It shows the main safe unit, a fireproof document bag, four protective pads, an emergency battery box, four screw anchors for mounting, two master keys, two emergency keys, two lock box keys, and the user manual.
- Safe box x 1
- Fireproof bag x 1
- Pad x 4
- Emergency battery box x 1
- Screw anchor x 4
- Master key x 2
- Emergency key x 2
- Lock box key x 2
- User manual x 1
3. Product Features
The Riddost Fireproof Home Safe is designed with multiple features to ensure the security and protection of your valuables.
- Large Capacity: Approximately 4.5 cubic feet (or 4.2 cubic feet as per some specifications), with dimensions of approximately 16.54 inches (width) x 14.17 inches (depth) x 26.38 inches (height).
- Adjustable Storage: Features a movable layer for flexible organization of items.
- Robust Construction: Equipped with 70mm thick alloy anti-pry steel doors, 6 live locking bolts, and 4x25 mm anti-pry steel bars for enhanced security.
- Mounting Capability: Solid wall design with pre-drilled holes allows for secure wall mounting.
- Intelligent Alarm System: Activates a 70dB alarm for 60 seconds after 3 incorrect password entries or detection of external interference (e.g., carrying, heavy knocking).
- Dual Unlocking Methods: Offers two distinct ways to access the safe for convenience and redundancy.
- Internal Lockbox: Includes a separate, lockable internal compartment for additional security.
- Additional Features: Hooks for hanging items, built-in lighting, removable dividers, a reset button, and an external battery compartment for emergency power.

Image 3.1: The Riddost safe positioned next to a bed, illustrating its discreet placement in a home environment. Icons below highlight key features: internal hooks, built-in lighting, removable dividers, a reset button, and an external battery compartment.
4. Setup and Installation
4.1 Initial Power Up
Before first use, install 4 AA batteries (not included) into the battery compartment located inside the safe door. If the safe is locked and batteries are depleted, use the emergency battery box by connecting it to the external power port on the keypad.
4.2 Wall Mounting
For enhanced security, it is recommended to mount the safe to a wall or floor using the pre-drilled holes and included screw anchors.
- Step 1: Choose a suitable location. Mark the positions for drilling holes on the wall or floor through the pre-drilled holes at the back or bottom of the safe.
- Step 2: Drill holes at the marked positions using an appropriate drill bit.
- Step 3: Insert the screw anchors into the drilled holes.
- Step 4: Align the safe with the anchors and secure it using the provided screws. Ensure the safe is firmly attached.

Image 4.1: A visual guide demonstrating the three steps for securely installing the safe. Step 1 shows drilling holes in the wall, Step 2 illustrates inserting screw anchors, and Step 3 depicts the completed installation of the safe.
5. Operating Instructions
5.1 Unlocking the Safe
The Riddost safe offers two primary methods for unlocking:

Image 5.1: A detailed graphic illustrating the two methods for opening the safe. Method 1 involves using the master key, emergency key, and turning the knob. Method 2 involves using the master key, entering the password, and turning the knob.
- Method 1: Master Key + Password + Turning Handle
Insert the master key into the keyhole. Enter your personal password on the keypad. Turn the handle clockwise to open the safe door. - Method 2: Master Key + Emergency Key + Turning Handle
This method is typically used if you forget your password or if the batteries are completely depleted and the emergency battery box is not available. Insert the master key into the main keyhole and the emergency key into the emergency keyhole. Turn both keys simultaneously and then turn the handle clockwise to open the safe door.
Important Note: Do not store the master keys or emergency keys inside the safe. Keep them in a secure, separate location.
5.2 Setting the Password

Image 5.2: A visual guide explaining how to set both a personal password and an administrator password for the safe. It outlines the steps for opening the safe, pressing the reset button, entering the new password, and confirming the setting.
How to Set a Personal Password:
- Open the safe.
- Press the reset button (usually located on the inside of the door).
- Enter a 3-8 digit password, and press "#" button to save.
- When the screen displays "-into-", the password is set successfully.
How to Set an Administrator Password:
- Open the safe.
- Press the "0" button twice, and the number "00" will be displayed on the screen.
- Press the reset button.
- Enter a 3-8 digit administrator password, and press "#" button to save.
- When the screen displays "-into-", the administrator password is set successfully.
5.3 Intelligent Alarm System
The safe is equipped with an intelligent alarm system to deter unauthorized access.

Image 5.3: A graphic depicting the smart alarm system of the safe. It shows the alarm activating with a 70dB sound for 60 seconds if the safe is violently knocked, moved, or if an incorrect password is entered three times.
- Incorrect Password Alarm: If an incorrect password is entered 3 consecutive times, the safe will emit a piercing 70dB alarm sound for 60 seconds.
- Vandalism/Handling Alarm: If the safe detects violent knocking, prying attempts, or is moved/carried while locked, it will activate the 70dB alarm for 60 seconds.
6. Maintenance
Regular maintenance ensures the optimal performance and longevity of your safe.
- Cleaning: Wipe the exterior of the safe with a soft, damp cloth. Avoid abrasive cleaners or solvents that could damage the finish.
- Battery Replacement: When the LCD screen displays "L-BAT" (low battery), replace the 4 AA batteries promptly. Use high-quality alkaline batteries for best performance.
- Key Maintenance: Keep keys clean and dry. Do not force keys into the lock. If a key becomes difficult to turn, consult customer support.
7. Troubleshooting
Refer to the following common issues and their solutions:
| Problem | Possible Cause | Solution |
|---|---|---|
| Safe does not open with password. | Incorrect password entered; low batteries. | Ensure correct password. Replace batteries or use emergency battery box. Try Method 2 (Master Key + Emergency Key). |
| Alarm sounds unexpectedly. | Safe was moved or subjected to impact; incorrect password entered multiple times. | Ensure safe is stable. Enter correct password to disarm. |
| LCD screen displays "L-BAT". | Low battery power. | Replace all 4 AA batteries immediately. |
| Keys do not turn in lock. | Obstruction in keyhole; incorrect key. | Ensure keyhole is clear. Use the correct master or emergency key. Do not force the key. |
8. Specifications
| Feature | Detail |
|---|---|
| Brand | Riddost |
| Model Number | HGLXF0022BB00 |
| Product Dimensions (External) | Approx. 16.54" (W) x 14.17" (D) x 26.38" (H) |
| Capacity | Approx. 4.5 Cubic Feet |
| Lock Type | Key and Digital Keypad |
| Material | Alloy Steel |
| Special Feature | Anti-Theft, Fireproof, Waterproof (with included bag) |
| Mounting Type | Wall Mount (hardware included) |
| Alarm | Intrusion Detection (70dB) |
| Item Weight | Approx. 77.3 pounds |
| Batteries Required | 4 x AA (not included) |
9. Safety Precautions
Adhere to these safety guidelines to prevent accidents and ensure the security of your items.

Image 9.1: A scene depicting a parent and child, with the safe visible in the background. This image serves as a reminder to store potentially dangerous items such as firearms and medicines securely within the safe, out of reach of children, to prevent accidents.
- Always keep master and emergency keys in a secure location separate from the safe. Never store them inside the safe.
- Ensure the safe is securely mounted to prevent unauthorized removal.
- Do not store flammable liquids or explosives inside the safe.
- Keep the safe locked when not in use, especially if storing firearms, medications, or other items that could pose a risk to children or unauthorized individuals.
- Avoid exposing the safe to extreme temperatures or direct sunlight for prolonged periods.
10. Customer Support
Riddost is committed to providing high-quality security products and excellent customer service. If you have any questions, concerns, or require assistance with your safe, please do not hesitate to contact our support team.
- Our customer service team is available 24 hours to assist you.
- A professional after-sales team is ready to address any product-related inquiries.
Please refer to the contact information provided with your purchase or visit the official Riddost website for support details.
