
1. Introduction
This user manual provides essential information for the safe and efficient operation, maintenance, and troubleshooting of your SINGER Heavy Duty 4432 sewing machine. Please read this manual thoroughly before using the machine to ensure proper setup and to maximize its performance and longevity.
Important Safety Instructions
- Always unplug the sewing machine from the electrical outlet immediately after using and before cleaning, removing covers, or making any user servicing adjustments.
- Do not allow children to use the machine unsupervised.
- Use this appliance only for its intended use as described in this manual.
- Never operate the machine if it has a damaged cord or plug, if it is not working properly, or if it has been dropped or damaged.
- Keep fingers away from all moving parts. Special care is required around the sewing machine needle.
- Always use the proper needle plate. The wrong plate can cause the needle to break.
- Do not pull or push fabric while stitching. This may deflect the needle, causing it to break.
- Ensure the machine is connected to a 230V/50Hz power supply with a compatible Schuko (CEE 7/7) plug.
2. Product Overview
Familiarize yourself with the main components of your SINGER Heavy Duty 4432 sewing machine.
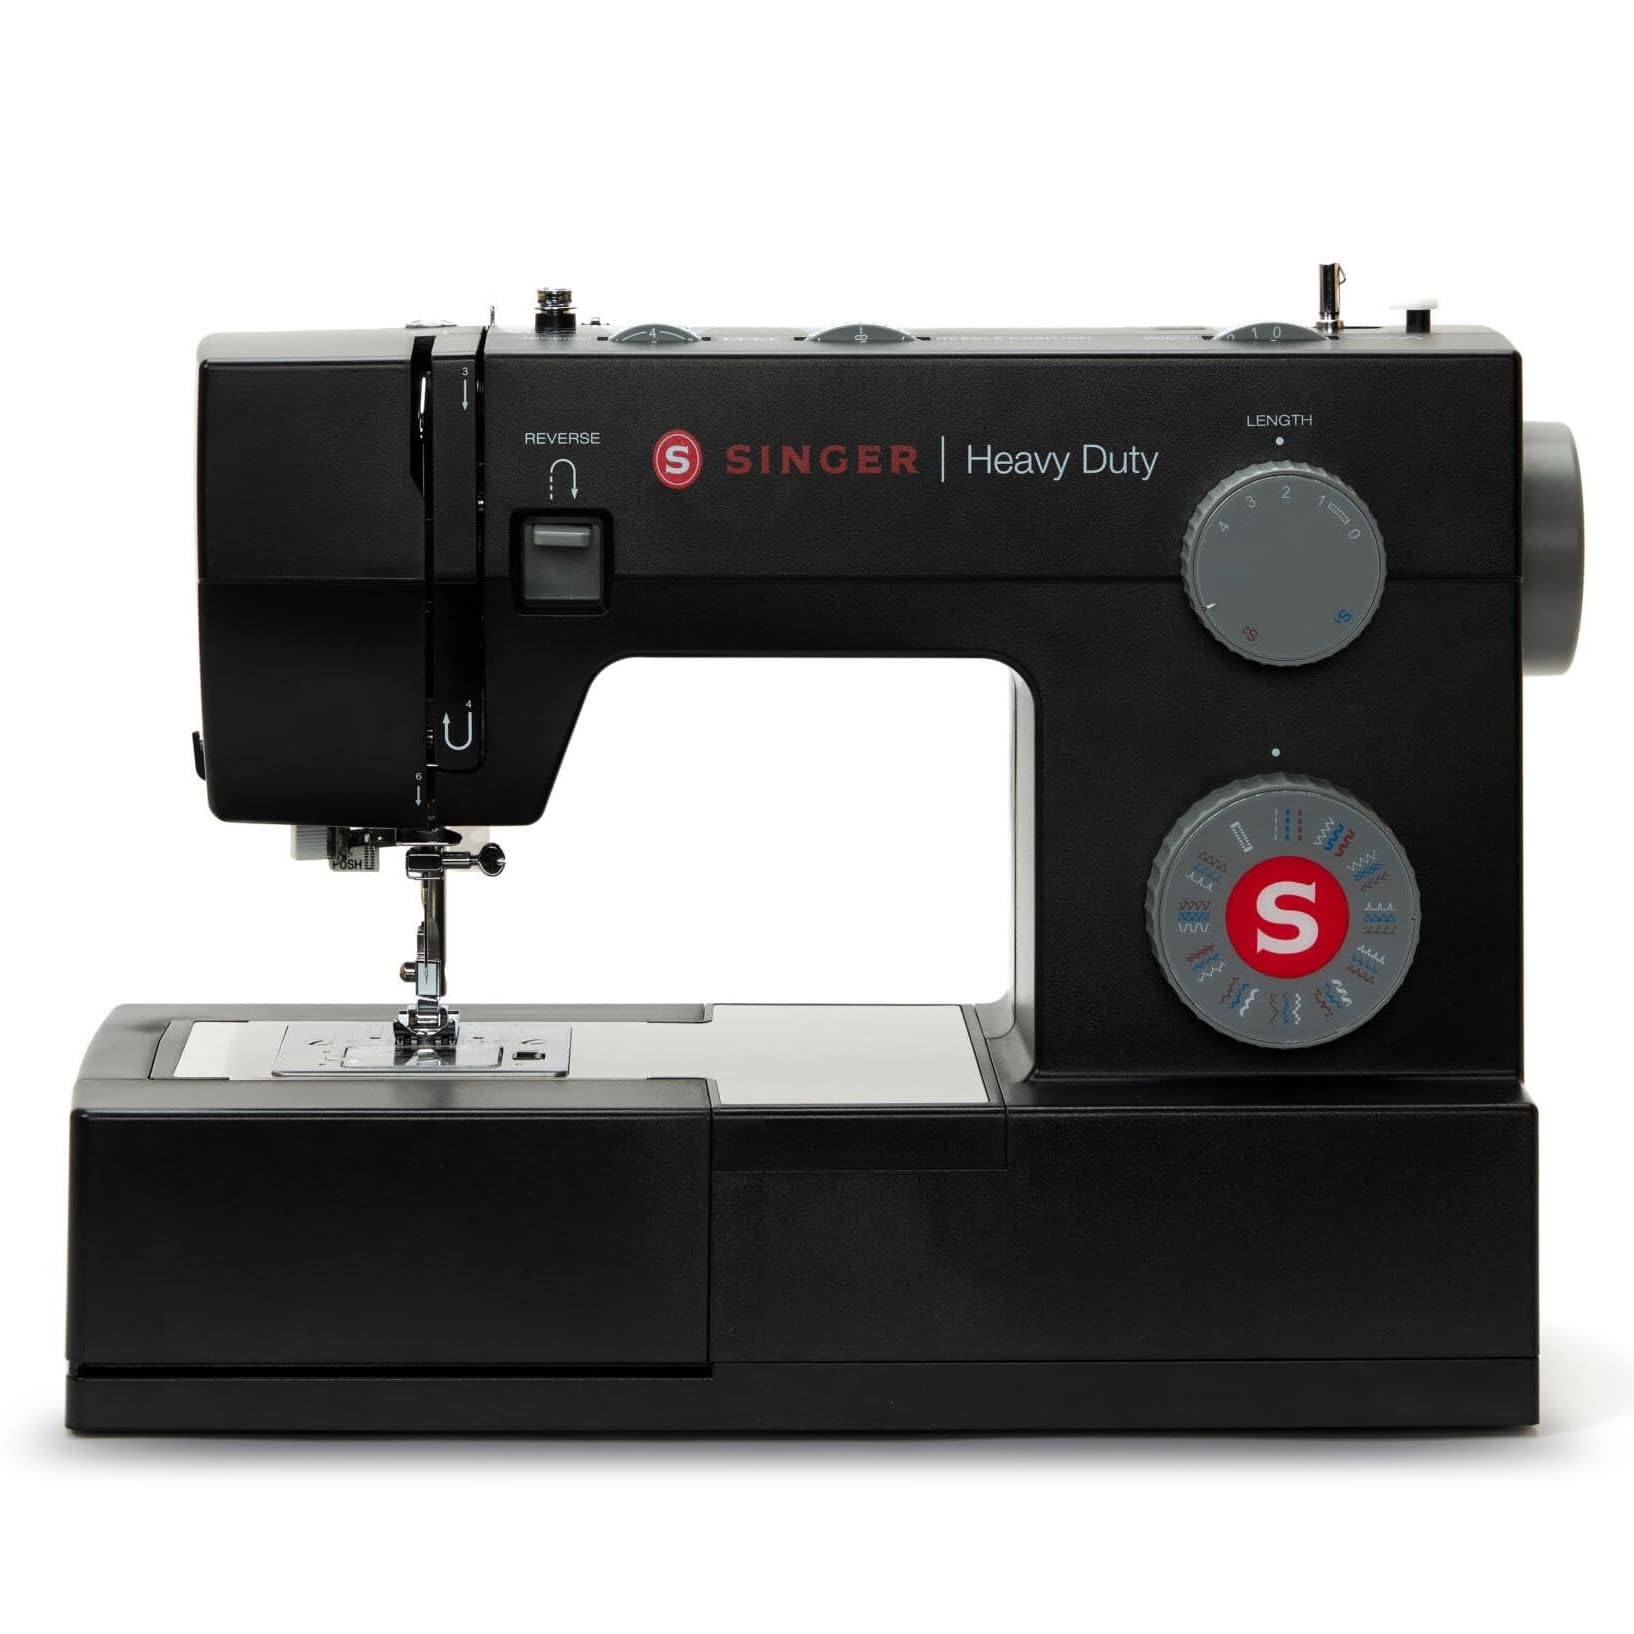
Figure 2.1: Front view of the SINGER Heavy Duty 4432 sewing machine, highlighting its compact dimensions (39cm width, 30cm height, 16cm depth).

Figure 2.2: Top view showing the tension dial, needle position, and stitch width controls.

Figure 2.3: Overview of key features including 32 stitch programs, stable metal frame, one-step buttonhole, integrated needle threader, top-loading bobbin, retractable feed dog, dual LED lighting, snap-on presser foot, practical free arm, and soft cover.
3. Setup
3.1 Unpacking and Placement
Carefully remove the machine from its packaging. Place the machine on a stable, flat surface. Ensure there is adequate lighting and space for comfortable operation.
3.2 Power Connection
Connect the power cord to the machine and then to a suitable electrical outlet. This machine is designed for 230V/50Hz power supply and uses a Schuko (CEE 7/7) plug, compatible with German Type F sockets.
3.3 Foot Pedal Connection
Plug the foot pedal cord into the designated receptacle on the machine. The foot pedal controls the sewing speed.
3.4 Needle Installation
- Turn the handwheel towards you to raise the needle to its highest position.
- Loosen the needle clamp screw.
- Insert the new needle with the flat side facing the back of the machine. Push it up as far as it will go.
- Tighten the needle clamp screw securely.
3.5 Bobbin Winding
- Place a spool of thread on the spool pin.
- Guide the thread through the upper thread guide and around the bobbin winding tension disc.
- Place an empty bobbin onto the bobbin winder spindle.
- Wind the thread clockwise a few times around the bobbin.
- Push the bobbin winder spindle to the right.
- Press the foot pedal gently to start winding. The machine will stop automatically when the bobbin is full.
- Cut the thread and push the bobbin winder spindle back to the left.
3.6 Inserting the Bobbin

Figure 3.1: Detailed view of the top drop-in bobbin with a transparent cover, showing the threading path.
- Open the transparent bobbin cover.
- Insert the wound bobbin into the bobbin case, ensuring the thread unwinds in the correct direction (usually counter-clockwise).
- Guide the thread through the tension spring and into the thread guide slot.
- Pull out about 15 cm (6 inches) of thread.
- Replace the bobbin cover.
3.7 Threading the Upper Thread
- Raise the needle to its highest position using the handwheel.
- Raise the presser foot lever.
- Place the spool of thread on the spool pin.
- Guide the thread through the upper thread guides.
- Follow the numbered threading path down to the needle.
- Use the integrated needle threader for easy threading of the needle eye. If not using the threader, manually thread the needle from front to back.
- Pull about 15 cm (6 inches) of thread through the needle eye.
4. Operating Instructions
4.1 Selecting Stitches
Your SINGER Heavy Duty 4432 offers 32 built-in stitches, including utility, elastic, and decorative stitches, as well as a one-step buttonhole. Turn the stitch selector dial to choose your desired stitch pattern.
4.2 Adjusting Stitch Length and Width
Use the stitch length dial to adjust the length of your stitches. The stitch width dial allows you to modify the width of zigzag and decorative stitches.
4.3 Integrated Needle Threader
To use the integrated needle threader, ensure the needle is in its highest position. Lower the threader mechanism, hook the thread, and gently pull it through the needle eye. Refer to the detailed instructions in the machine's full manual for precise steps.
4.4 High-Speed Sewing
The machine is capable of sewing at an extra-high speed of up to 1100 stitches per minute. Control the speed using the foot pedal. Start slowly and gradually increase pressure for faster sewing.
4.5 Free Arm Sewing
To access the free arm, slide off the accessory storage compartment. The free arm is ideal for sewing cuffs, sleeves, pant hems, and other small, circular items.
4.6 Reverse Sewing
Press and hold the reverse lever to sew in reverse. This is useful for securing the beginning and end of seams.
4.7 Using Different Presser Feet
The machine features a snap-on presser foot system for easy changing. Different presser feet are used for various tasks, such as zipper insertion, buttonholes, and decorative stitching.

Figure 4.1: The machine in operation, demonstrating the use of a zipper foot for precise stitching alongside a zipper.
5. Maintenance
Regular maintenance ensures your sewing machine operates smoothly and extends its lifespan.
5.1 Cleaning
- Lint and Dust Removal: Regularly remove the needle plate and bobbin case to clean out lint and dust accumulation with a small brush or vacuum cleaner.
- Exterior Cleaning: Wipe the exterior of the machine with a soft, damp cloth. Do not use harsh chemicals or abrasive cleaners.
5.2 Needle Replacement
Change your needle frequently, especially after 8-10 hours of sewing or if it becomes bent, dull, or burred. A damaged needle can cause skipped stitches, fabric damage, or needle breakage.
5.3 Lubrication
Refer to the comprehensive manual for specific lubrication points and frequency. Generally, a few drops of high-quality sewing machine oil are applied to moving metal parts.
6. Troubleshooting
This section addresses common issues you might encounter during operation.
| Problem | Possible Cause | Solution |
|---|---|---|
| Needle Breaking |
|
|
| Thread Jamming / Nesting Under Fabric |
|
|
| Skipped Stitches |
|
|
| Machine Not Starting |
|
|
7. Specifications
| Feature | Detail |
|---|---|
| Model Number | 4432 |
| Stitch Programs | 32 (Utility, Elastic, Decorative, 1-step Buttonhole) |
| Max Sewing Speed | 1100 stitches per minute |
| Needle Threader | Integrated |
| Bobbin System | Top Drop-in with transparent cover |
| Frame Material | Heavy Duty Metal Frame with Stainless Steel Base Plate |
| Lighting | Dual LED |
| Power Supply | 230V AC, 50Hz (Schuko CEE 7/7 plug) |
| Product Dimensions (D x W x H) | 15 cm x 40 cm x 30 cm (approx. 5.9 in x 15.7 in x 11.8 in) |
| Product Weight | 8 kg (approx. 17.64 lbs) |
8. Warranty and Support
For warranty information and customer support, please refer to the documentation included with your purchase or visit the official Singer website. Keep your proof of purchase for warranty claims.
If you encounter issues not covered in this manual or require professional assistance, contact Singer customer service or an authorized service center.


