
Retevis FA9061D-C9059N
Retevis RT22 Two Way Radio and 10-Way Gang Charger Instruction Manual
Model: FA9061D-C9059N | Brand: Retevis
1. Introduction
This manual provides detailed instructions for the safe and efficient use of your Retevis RT22 Two Way Radios and the accompanying 10-Way Gang Charger. The RT22 radios are designed for reliable communication in various environments, offering features such as VOX hands-free operation, emergency alarms, and a compact, portable design. The 10-way gang charger provides a convenient and safe solution for simultaneously charging multiple radios.
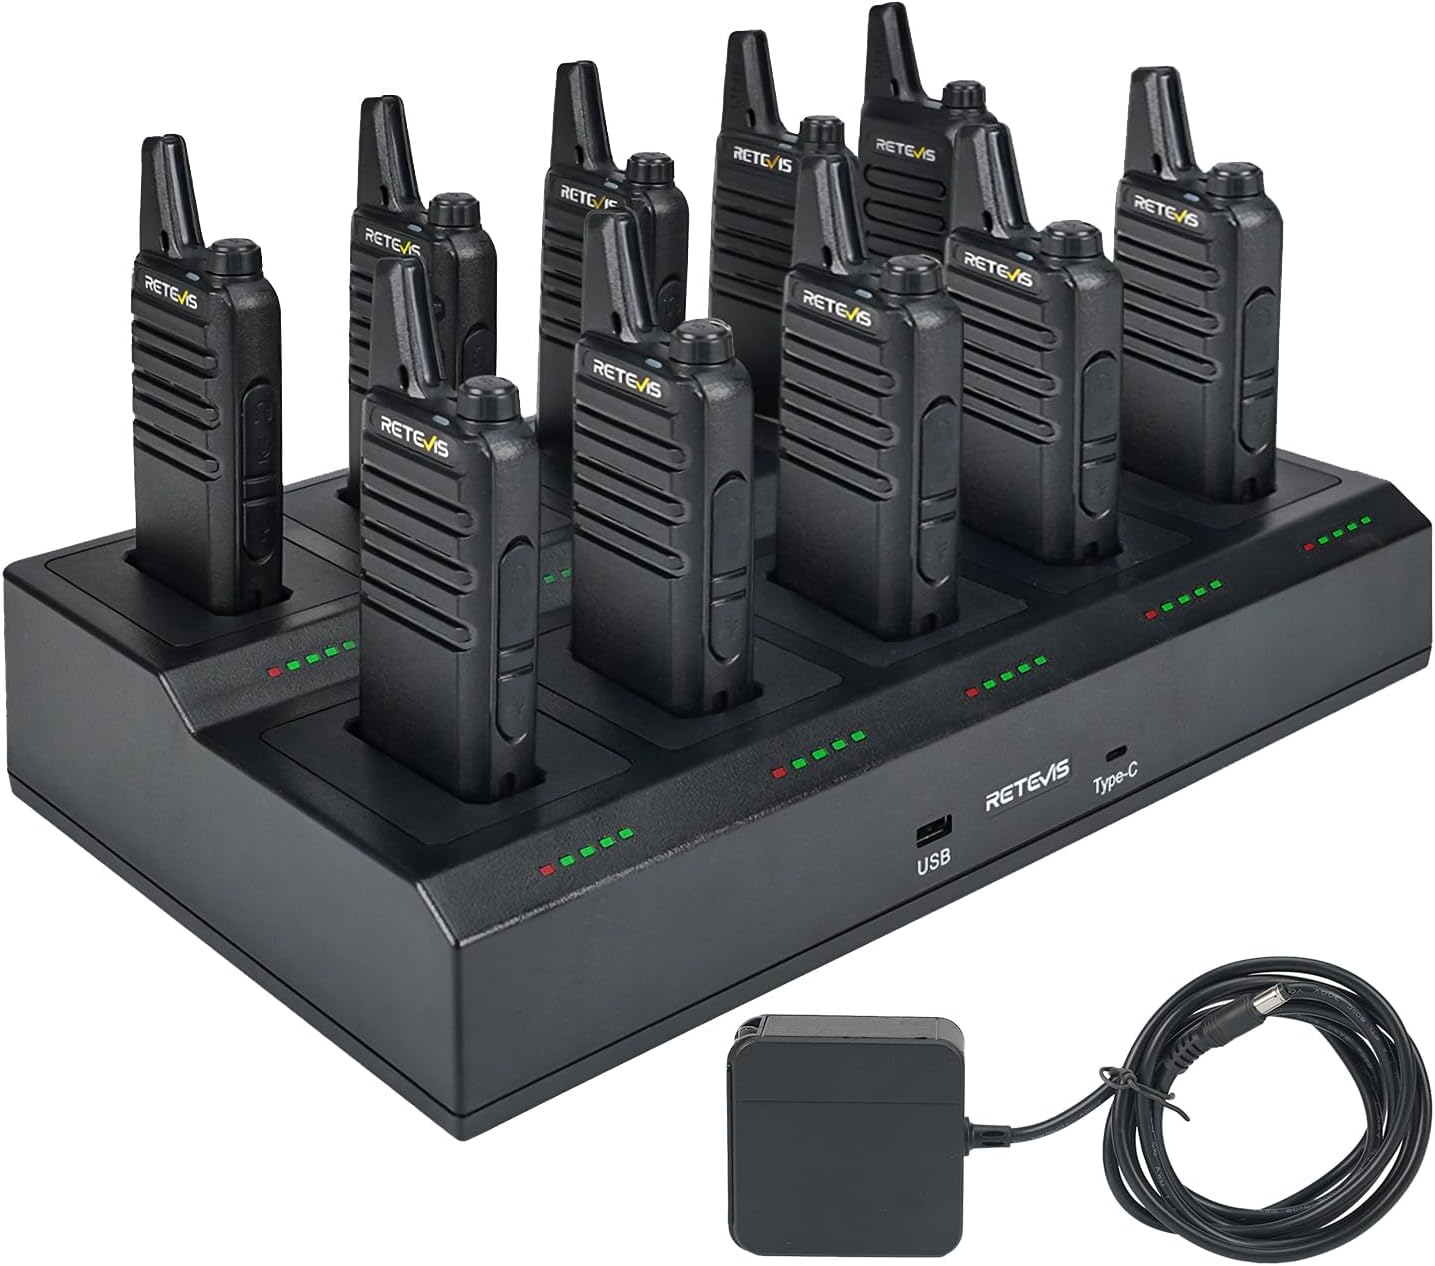
Image: The Retevis RT22 two-way radios and their 10-way gang charger, ready for use.
2. Safety Information
Please read all safety information carefully before operating the radios or charger. Failure to follow these instructions may result in injury or damage to the product.
- FCC Compliance: Our walkie talkies FCC ID is: 2AAR8RETEVISRT22. Our walkie talkies meet FCC rule part 95.
- Charging Safety: The 10-way gang charger is UL certified and includes overheat, overvoltage, and overcurrent protection to ensure a safe charging process. Always use the provided AC adapter and DC adapter.
- Battery Safety: Use only the specified Lithium Ion batteries. Do not attempt to open, disassemble, or short-circuit batteries. Dispose of batteries properly according to local regulations.
- Environmental Conditions: Do not expose the radios or charger to extreme temperatures, direct sunlight, moisture, or corrosive substances.
- Maintenance: Do not attempt to repair the device yourself. Refer all servicing to qualified personnel.
3. Package Contents
Verify that all items listed below are included in your package:
- 10 x Retevis RT22 Radio Walkie Talkies
- 10 x Battery (Lithium Ion)
- 10 x Belt Clip
- 1 x RTC22T 10-Unit Charger
- 1 x AC Adapter
- 1 x DC Adapter
- 1 x User Manual

Image: Contents of the Retevis RT22 10-pack, including radios, charger, and accessories.
4. Product Overview
4.1 Retevis RT22 Radio Features
- Multi-functional: Includes emergency alarms, VOX hands-free operation, Keypad lock, and Squelch.
- License-Free: Operates right out of the box without requiring a radio license or complex settings.
- Compact and Portable: Measures approximately 5.35 x 2.2 x 0.83 inches (136 x 56 x 21 mm) and weighs 0.24 lbs (108g). Equipped with an independent back clip for easy carrying.
- Fixed Antenna: Designed for optimal performance and durability.
- Customized Side Keys: Programmable for functions like VOX or emergency alarm.
- K 2 Pin Connector: Compatible with various audio accessories.

Image: The compact size and light weight of the Retevis RT22 radio.


Image: Detailed views of the RT22 radio's independent belt clip, fixed antenna, customized side keys, and K 2 Pin connector.
4.2 10-Way Gang Charger Features
- Multi-charging & Space-saving: Recharges up to 10 RT22 radios simultaneously, helping to keep your workspace organized. (Note: Back clip needs to be removed when charging).
- Updated Design: Features LED indicators and a progress bar for clear charging status at a glance.
- Easier Charging: Supports AC or DC input, with USB charging capability. Includes charging cable and adapter for versatile use in office or car environments.
- Safer Charging: UL certified with overheat, overvoltage, and overcurrent protection.
- Reduced Replacement Costs: Independent charging slots are removable and replaceable, allowing for individual slot replacement instead of the entire charger.
- Broad Compatibility: USB and Type-C ports are available for charging other electronic devices like mobile phones and iPads.

Image: The 10-way gang charger demonstrating efficient and safe charging with LED indicators.

Image: Detailed features of the charger, including USB/Type-C ports, LED indicators, and power switch.

Image: The 10-way gang charger's compatibility with other devices, such as smartphones, via USB and Type-C ports.

Image: The modular design of the charger, allowing for individual charging slot replacement.
5. Setup
5.1 Battery Installation
- Ensure the radio is turned off.
- Locate the battery compartment cover on the back of the radio.
- Slide the battery cover downwards to remove it.
- Insert the Lithium Ion battery into the compartment, ensuring the contacts align correctly.
- Replace the battery cover and slide it upwards until it clicks into place.

Image: View of the RT22 radio's battery compartment for installation.
5.2 Charging the Radios
- Connect the AC adapter to the 10-unit charger and plug it into a power outlet. Alternatively, use the DC adapter for car charging.
- Ensure the power switch on the charger is in the 'ON' position.
- Remove the belt clip from each RT22 radio before placing it into a charging slot.
- Place each radio firmly into an available charging slot. The LED indicator for that slot will illuminate to show charging status.
- A full charge is indicated by the LED changing color or the progress bar reaching 100%.
6. Operating Instructions
6.1 Power On/Off and Volume Adjustment
- Power On: Rotate the Power/Volume knob clockwise until you hear a click. The radio will announce the current channel.
- Power Off: Rotate the Power/Volume knob counter-clockwise until you hear a click.
- Volume Adjustment: Continue rotating the Power/Volume knob clockwise to increase volume, or counter-clockwise to decrease volume.
6.2 Channel Selection
The RT22 radios come pre-programmed with 16 channels. To change channels, rotate the Channel Selector knob located on top of the radio to the desired channel number. Ensure all radios intended for communication are set to the same channel.
6.3 Transmitting and Receiving
- To Transmit: Press and hold the Push-to-Talk (PTT) button on the side of the radio. Speak clearly into the microphone. Release the PTT button to stop transmitting.
- To Receive: Ensure the PTT button is not pressed. The radio will automatically receive transmissions on the selected channel.
6.4 VOX Hands-Free Operation
The Voice Operated Exchange (VOX) feature allows you to transmit without pressing the PTT button. When VOX is enabled, the radio will automatically transmit when it detects your voice.
- Enabling/Disabling VOX: This feature is typically programmed to a side key or can be enabled via programming software. Refer to the specific programming instructions if you wish to customize this.
- VOX Sensitivity: The sensitivity of the VOX feature can usually be adjusted to prevent accidental transmissions from background noise.

Image: Illustration of VOX hands-free operation, allowing communication without pressing the PTT button.
6.5 Emergency Alarm
The emergency alarm feature can be activated to send an alert signal in urgent situations.
- Activating Alarm: This feature is typically programmed to a side key. Press the designated side key to activate the emergency alarm.
- Deactivating Alarm: Press the same side key again or turn off the radio to deactivate the alarm.

Image: Visual representation of the emergency alarm feature for safety in critical situations.
6.6 Keypad Lock
The keypad lock feature prevents accidental changes to settings or transmissions.
- Activating/Deactivating Lock: This function is typically assigned to a specific button combination or a programmable side key. Consult the radio's programming guide for details.
6.7 Squelch
Squelch filters out weak signals and background noise, ensuring you only hear clear transmissions. The RT22 radios have an automatic squelch function.
7. Maintenance
- Cleaning: Use a soft, damp cloth to clean the radio and charger surfaces. Do not use harsh chemicals or abrasive cleaners.
- Battery Care: To prolong battery life, avoid overcharging or completely draining the batteries. Store radios and batteries in a cool, dry place when not in use for extended periods.
- Charger Slots: Periodically inspect charging slots for debris or damage. Clean as necessary.
8. Troubleshooting
| Problem | Possible Cause | Solution |
|---|---|---|
| Radio does not turn on. | Battery is not installed or is drained. | Ensure battery is correctly installed and charged. |
| Cannot communicate with other radios. | Radios are on different channels or out of range. | Verify all radios are on the same channel. Move closer to other radios. |
| Poor audio quality or static. | Weak signal, interference, or low battery. | Move to an open area. Check battery level. |
| Charger LEDs not lighting up. | Charger not powered or radio not seated correctly. | Ensure power adapter is connected and charger is switched on. Re-seat the radio in the slot. |
9. Specifications
| Feature | Detail |
|---|---|
| Model Number | FA9061D-C9059N |
| Item Weight | 7.43 pounds (total package) |
| Product Dimensions (Package) | 18.7 x 8.86 x 6.1 inches |
| Radio Dimensions (Single) | 5.35 x 2.2 x 0.83 inches (136 x 56 x 21 mm) |
| Radio Weight (Single) | 0.24 lbs (108g) |
| Batteries | 10 Lithium Ion batteries (included) |
| Color | Black |
| Number of Channels | 16 |
| Frequency Range | FRS (Family Radio Service) |
| Talking Range Maximum | 2 Miles (Line of Sight, actual range varies) |
| Voltage | 3.7 Volts |
| Water Resistance Level | Not Water Resistant |
| Special Features | 10-way multi-charger for faster & easier charging; License-free operation. |
| FCC ID | 2AAR8RETEVISRT22 |
10. Warranty and Support
- Warranty: Retevis provides a 3-year warranty for the radio body and a 1-year warranty for accessories.
- Return Policy: 30 days no reason to return.
- After-Sales Service: Beyond the warranty period, Retevis still offers maintenance service; buyers are required to afford corresponding costs.
- Customer Support: For any inquiries or support, contact Retevis customer service on Amazon. They aim to reply within 12 hours.
Related documentsFA9061D-C9059N


Ask a question about this manual
Ask about setup, troubleshooting, compatibility, parts, safety, or missing instructions. Manuals+ will review the question and use this page’s manual context to help answer it.