1. Introduction
This manual provides comprehensive instructions for the installation, operation, and maintenance of the LKUYTVB STC-3028 Dual Digital Thermostat Temperature Humidity Controller. This device is designed for precise control of both temperature and humidity simultaneously, making it suitable for various applications such as incubators, terrariums, and climate-controlled environments. Please read this manual thoroughly before use to ensure proper function and safety.

Image 1.1: The STC-3028 controller is versatile, suitable for applications requiring precise temperature and humidity regulation, such as refrigerators, incubators, and wine cellars.
2. Product Overview
The STC-3028 is a dual-function controller capable of managing both temperature and humidity. It features two independent output relays, allowing simultaneous connection to heating/cooling and humidifying/dehumidifying equipment. The device includes a dual display window to show both measured and set values concurrently, enhancing user convenience. Separate settings for heating/cooling and humidifying/dehumidifying functions prevent rapid fluctuations, ensuring stable environmental control. It also supports temperature and humidity calibration for accuracy.

Image 2.1: Front view of the STC-3028 controller, highlighting its dual digital displays for temperature and humidity, along with intuitive control buttons.
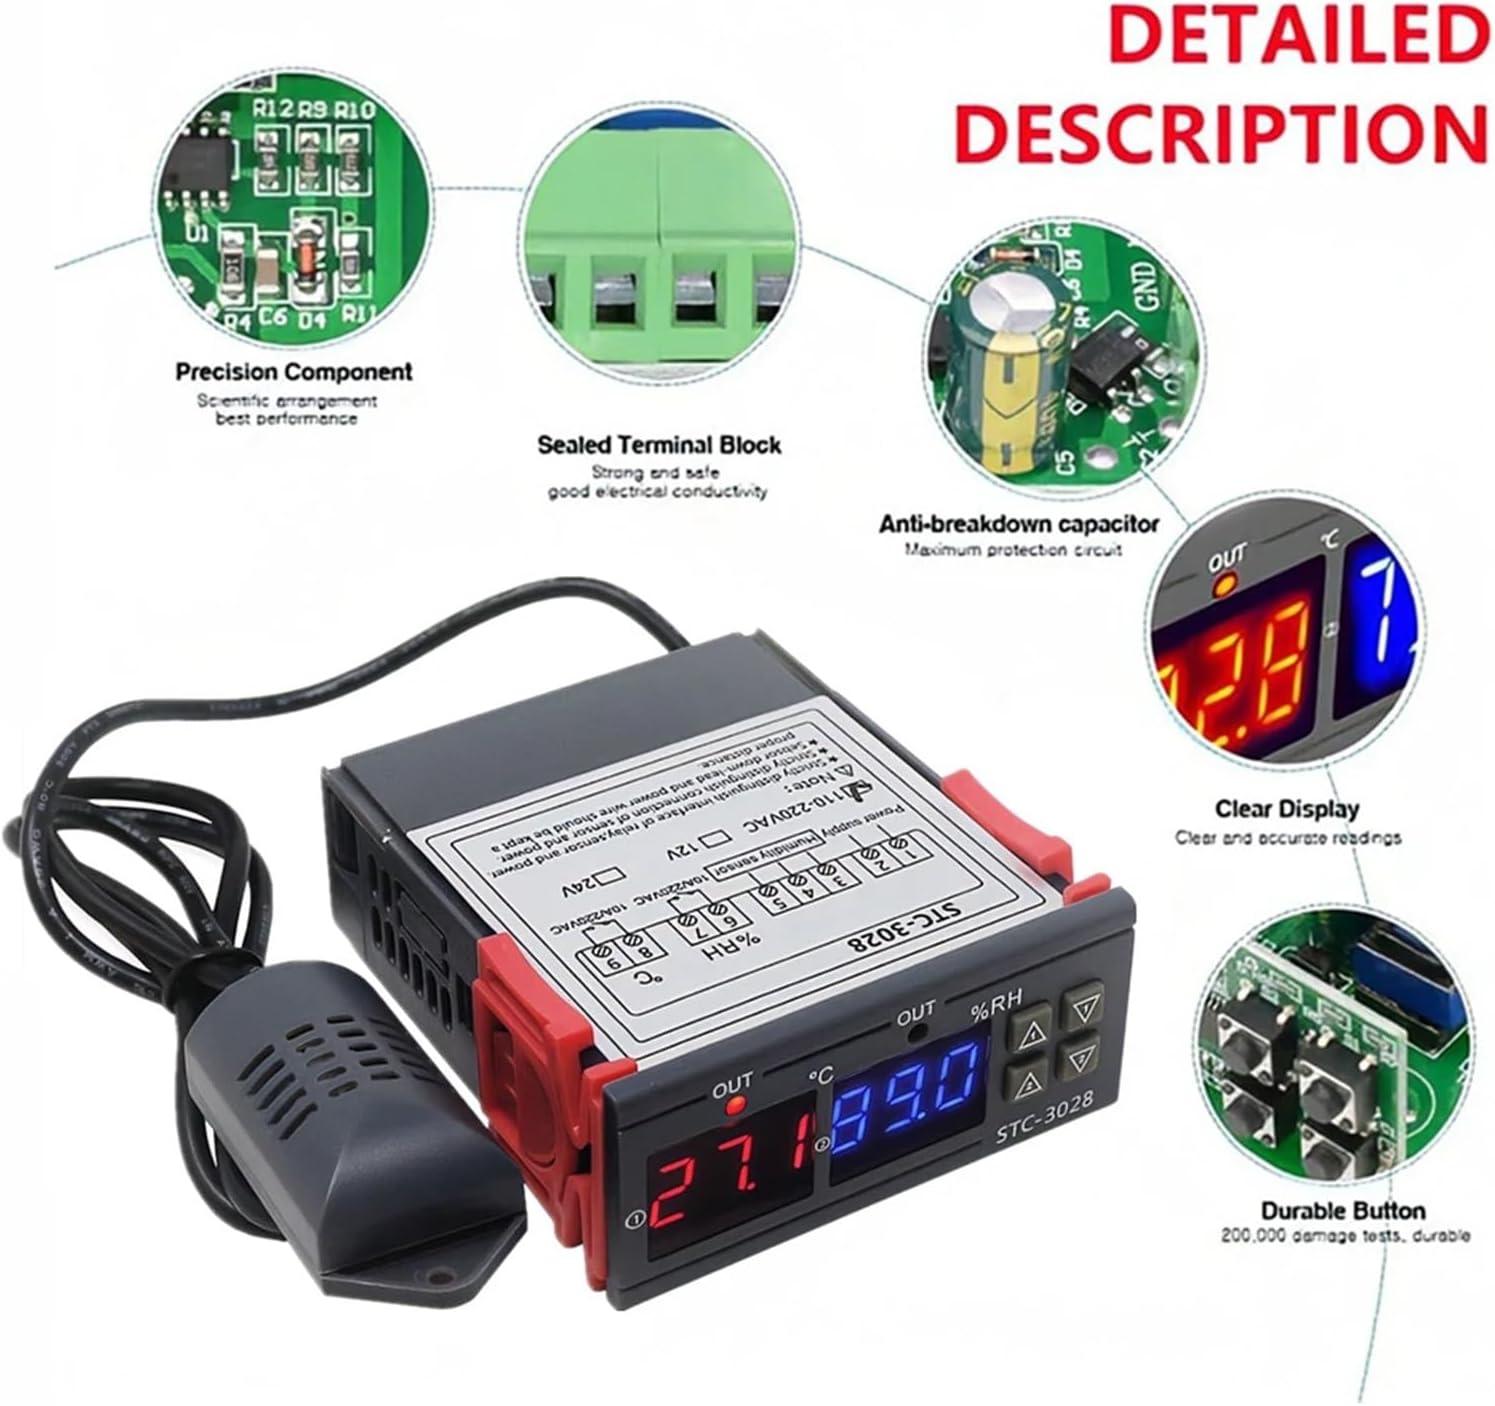
Image 2.2: Detailed view of the STC-3028's internal construction, featuring precision components for reliable performance, sealed terminal blocks for secure connections, an anti-breakdown capacitor for protection, a clear display for easy reading, and durable buttons designed for longevity.
3. Specifications
| Feature | Specification |
|---|---|
| Model | STC-3028 |
| Input Voltage | DC 12V (This variant) |
| Measuring Temperature Range | -50°C to +110°C |
| Measuring Humidity Range | 00%RH to 100%RH |
| Temperature Accuracy | ±1°C |
| Humidity Accuracy | 0.1%RH |
| Relay Output Contact Capacity | 10A/240VAC |
| Shell Material | PC + ABS Fireproof |
| Sensor Length | 1 meter |
| Package Dimensions | 1.18 x 0.79 x 0.39 inches |
| Item Weight | 1.76 ounces (50 Grams) |

Image 3.1: Dimensional drawing of the STC-3028 controller and its integrated sensor, providing measurements for installation planning.
4. Setup and Wiring
Careful wiring is essential for the safe and correct operation of the STC-3028 controller. Ensure the power supply matches the specified voltage for your unit (DC 12V for this model).
4.1 Wiring Instructions
- Power Supply: Connect the DC 12V power supply to the designated terminals. Refer to the wiring diagram on the device label.
- Temperature/Humidity Sensor: Connect the provided 1-meter sensor to the sensor input terminals.
- Output Relays: Connect your heating/cooling equipment to the temperature output relay and your humidifying/dehumidifying equipment to the humidity output relay. Ensure the load current does not exceed 10A/240VAC.
4.2 Important Safety Notes
- Strictly distinguish between the interface of the relay, sensor, and power connections. Incorrect wiring can damage the device or connected equipment.
- Ensure the sensor cable and power wires are kept at a proper distance from each other to avoid interference.
- Always disconnect power before performing any wiring or maintenance.

Image 4.1: The STC-3028 controller with its sensor, showing the wiring diagram printed on the device label. This diagram illustrates the connections for power supply, humidity sensor, and output relays for both temperature and humidity control.
5. Operating Instructions
The STC-3028 allows for easy setting of desired temperature and humidity ranges.
5.1 Setting Startup Temperature/Humidity
- Press the "Up" button (▲) once to display the current startup temperature or humidity value.
- Long press the "Up" button (▲) for approximately 3 seconds until the displayed value flashes.
- Use the "Up" (▲) and "Down" (▼) buttons to adjust the desired startup temperature or humidity.
- The setting will automatically save after a few seconds of inactivity, or you can press any other button to confirm.
5.2 Setting Stop Temperature/Humidity
- Press the "Down" button (▼) once to display the current stop temperature or humidity value.
- Long press the "Down" button (▼) for approximately 3 seconds until the displayed value flashes.
- Use the "Up" (▲) and "Down" (▼) buttons to adjust the desired stop temperature or humidity.
- The setting will automatically save after a few seconds of inactivity, or you can press any other button to confirm.
5.3 Temperature/Humidity Correction
To calibrate the temperature or humidity readings:
- Press the "Up" (▲) and "Down" (▼) buttons simultaneously for a few seconds. The display will enter calibration mode.
- Use the "Up" (▲) and "Down" (▼) buttons to adjust the offset value.
- The setting will automatically save after a few seconds of inactivity.
5.4 Factory Reset
To reset the controller to factory default settings:
- Long press the "Down" button (▼) for 3 seconds. This will restore all settings to their original factory values.

Image 5.1: Visual guide for setting the startup and stop temperatures and humidity levels on the STC-3028 controller, including examples for heating, cooling, humidification, and dehumidification.
6. Maintenance
Regular maintenance ensures the longevity and accuracy of your STC-3028 controller.
- Cleaning: Wipe the device with a soft, dry cloth. Do not use abrasive cleaners or solvents. Ensure no liquid enters the device.
- Sensor Care: Keep the temperature and humidity sensor clean and free from dust or debris. Avoid exposing the sensor to extreme physical shock or corrosive environments.
- Connections: Periodically check all wiring connections to ensure they are secure and free from corrosion.
- Environment: Operate the controller within its specified environmental conditions (temperature and humidity ranges) to prevent damage.
7. Troubleshooting
If you encounter issues with your STC-3028 controller, refer to the following common troubleshooting steps:
- No Power/Display:
- Check the power supply connection. Ensure it is securely connected and providing the correct DC 12V.
- Verify the power source is active.
- Incorrect Readings:
- Ensure the sensor is properly connected and not damaged.
- Clean the sensor to remove any dust or obstructions.
- Perform a temperature/humidity correction as described in Section 5.3.
- Output Not Activating:
- Check the set startup and stop values to ensure they are configured correctly for your desired operation.
- Verify the wiring to the heating/cooling or humidifying/dehumidifying equipment.
- Ensure the connected equipment is functional.
- Display Flashing/Error Codes:
- Refer to the device's specific error code documentation if available (not provided in this manual).
- Try resetting the device to factory settings (Section 5.4).
If problems persist after attempting these steps, contact customer support for further assistance.


