1. Introduction
This manual provides instructions for the StarTech.com TR-M2-REMOVABLE-PCIE M.2 NVMe SSD Drive Tray. This drive tray is designed to be used with compatible PCIe Expansion Product Series (M2-REMOVABLE-PCIE-N1 or 2M2-REMOVABLE-PCIE) to add or swap M-Key M.2 NVMe SSDs. It supports various M.2 SSD sizes and offers features for secure and efficient drive management.
2. Package Contents
- 1 M.2 Drive Tray
- 1 Self-adhesive Heatsink Pad
- 1 Quick Start Guide
3. Product Overview
The StarTech.com M.2 NVMe SSD Drive Tray is engineered for flexibility and convenience in managing M.2 drives. Key features include:
- Additional Drive Tray: Designed for use with M2-REMOVABLE-PCIE-N1 or 2M2-REMOVABLE-PCIE for additional hot-swappable drives.
- M.2 NVMe SSD Support: Accommodates 2230, 2242, 2260, and 2280 M-Key M.2 NVMe SSDs.
- High Performance: Capable of reaching read/write speeds up to 64Gbps (dependent on the M.2 SSD and host system).
- Toolless Installation: Allows for easy installation of an M.2 SSD into the tray without the need for tools.
- Status Indicator: Features a Power/Activity LED indicator to monitor drive status.
- Secure Installation: Includes a latching mechanism and is lockable (2 keys included) to deter theft of data storage devices.
- Enhanced Heat Dissipation: Equipped with thermal pads and an aluminum cover to aid heat dissipation and prevent thermal throttling.
- Vibration Reduction: Anti-vibration springs reduce impact during installation and enhance drive stability and longevity.
- Broad Compatibility: No drivers or software required, compatible with Windows, Windows Server, and Linux operating systems.
4. Setup & Installation
Before beginning installation, ensure your system is powered off and unplugged. Always wear ESD protection when working inside the system.
4.1 Installing an M.2 SSD into the Drive Tray
- Unscrew the two small screws on the side of the drive tray to open it.
- Carefully open the drive tray to reveal the internal M.2 slot and thermal pad areas.
- Remove the protective film from the self-adhesive thermal pads provided. Apply one thermal pad to the bottom of the M.2 SSD and another to the inside of the drive tray cover, ensuring they align with the SSD's components for optimal heat transfer.
- Insert your M-Key M.2 NVMe SSD (2230, 2242, 2260, or 2280 size) into the designated slot within the drive tray. The toolless design allows the SSD to snap securely into place.
- Close the drive tray cover and secure it by re-inserting and tightening the two small screws.
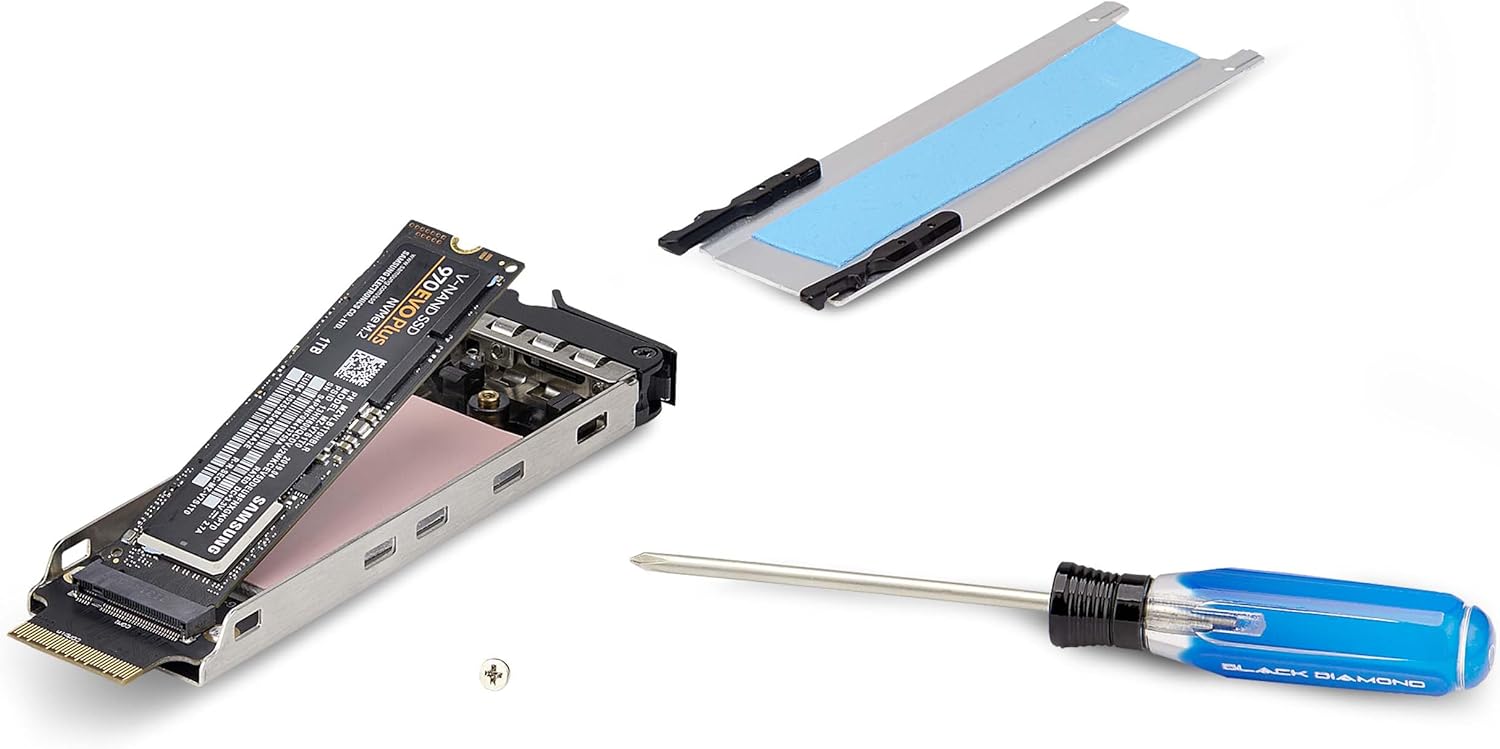
Figure 1: M.2 SSD components and drive tray for installation.

Figure 2: M.2 SSD installed within the drive tray.
4.2 Installing the Drive Tray into a Compatible PCIe Expansion Product
Once the M.2 SSD is secured within the drive tray, insert the tray into an available slot on your compatible StarTech.com PCIe Expansion Product (e.g., M2-REMOVABLE-PCIE-N1 or 2M2-REMOVABLE-PCIE). Ensure the tray is fully seated and the latching mechanism engages. If your base product supports it, you may use the included keys to lock the tray for added security.

Figure 3: Drive tray inserted into a PCIe expansion product.

Figure 4: Drive tray secured and locked in a PC case.

Figure 5: Multiple drive trays providing expanded storage.
4.3 Video Guide: M.2 Module Installation
Video 1: Guide on installing an M.2 module into a Dell Precision Workstation. This video demonstrates a similar installation process for M.2 drives.
5. Operation
5.1 Power/Activity LED Indicator
The drive tray features a Power/Activity LED indicator. This LED provides visual feedback on the drive's status, typically indicating power on and data activity (reads/writes).
5.2 Hot Swap Functionality
This additional drive tray offers flexibility and convenience when working with multiple drives, including hot swap support. Important: NVMe PCIe hot swap support is dependent on the motherboard. Verify hot swap support with the manufacturer of your motherboard and consult their instructions regarding how to enable this feature in the BIOS/UEFI settings.
6. Maintenance
The drive tray is designed for durability and reliable performance. To ensure longevity:
- Keep the drive tray and SSD free from dust and debris.
- The thermal pads and aluminum cover are crucial for heat dissipation. Ensure they remain properly seated and undamaged to prevent potential thermal throttling of the M.2 SSD.
- Avoid exposing the drive tray to extreme temperatures or humidity.
7. Troubleshooting
7.1 Drive Not Detected
- Ensure the M.2 SSD is correctly seated within the drive tray and the tray is fully inserted into the compatible PCIe Expansion Product.
- Verify that your motherboard supports PCIe bifurcation and is configured correctly in the BIOS/UEFI settings for the PCIe slot being used. Consult your motherboard manual for specific instructions.
- Check the Power/Activity LED indicator on the drive tray. If it's not lit, ensure the PCIe Expansion Product is receiving adequate power and is correctly installed.
- Confirm that the M.2 SSD is an NVMe (M-Key) type. This tray is not compatible with M.2 SATA drives.
7.2 Performance Issues (Thermal Throttling)
- Ensure the thermal pads are correctly applied and making good contact with both the M.2 SSD and the aluminum cover of the drive tray.
- Verify adequate airflow within your PC case to help dissipate heat from the PCIe Expansion Product and drive tray.
8. Specifications
| Feature | Detail |
|---|---|
| Model Number | TR-M2-REMOVABLE-PCIE |
| Compatible M.2 SSDs | M-Key M.2 NVMe SSDs (2230, 2242, 2260, 2280) |
| Interface | NVMe (via compatible PCIe Expansion Product) |
| Max Read/Write Speed | Up to 64Gbps (dependent on M.2 SSD and host system) |
| Installation | Toolless M.2 SSD installation into tray |
| Indicators | Power/Activity LED |
| Security | Latching mechanism, optional lock (2 keys included) |
| Heat Management | Thermal pads, aluminum cover |
| Vibration Control | Anti-vibration springs |
| Operating System Compatibility | OS independent (No drivers required) |
| Dimensions (LxWxH) | 4.9 x 1.3 x 0.5 inches |
| Item Weight | 1.27 ounces |
9. Warranty & Support
This StarTech.com product is backed by a 2-year warranty. Free lifetime 24/5 multi-lingual technical assistance is available. For further assistance or to verify motherboard hot swap support, please contact StarTech.com customer support or visit their official website.


