
Introduction
The ZEBRONICS G41-D3S motherboard is designed for modern computing needs, featuring the G41 chipset. It supports DDR3 memory at speeds of 1066MHz and 1333MHz, compatible with LGA 775 socket Intel processors. This motherboard includes 5.1 audio, 10/100 Mbps LAN, 4 SATA ports, and a PCIe slot for enhanced connectivity and functionality.
Features
- DDR3 Memory Support: Compatible with DDR3 memory modules, supporting speeds between 1066MHz and 1333MHz for efficient system performance.
- G41 Chipset: Integrates the G41 chipset, providing a stable and reliable foundation for motherboard operations.
- LGA 775 Socket: Designed with an LGA 775 socket, supporting Intel Core 2 Quad, Core 2 Duo, Pentium, and Celeron series processors.
- 5.1 Channel Audio: Delivers clear 5.1 channel audio for an immersive sound experience.
- LAN Connectivity: Equipped with 10/100 Mbps LAN support for reliable internet connection.
- Storage Options: Features 4 SATA ports for connecting multiple storage devices like hard drives and SSDs.
- PCIe Slot: Includes a PCIe slot for additional peripheral connections.
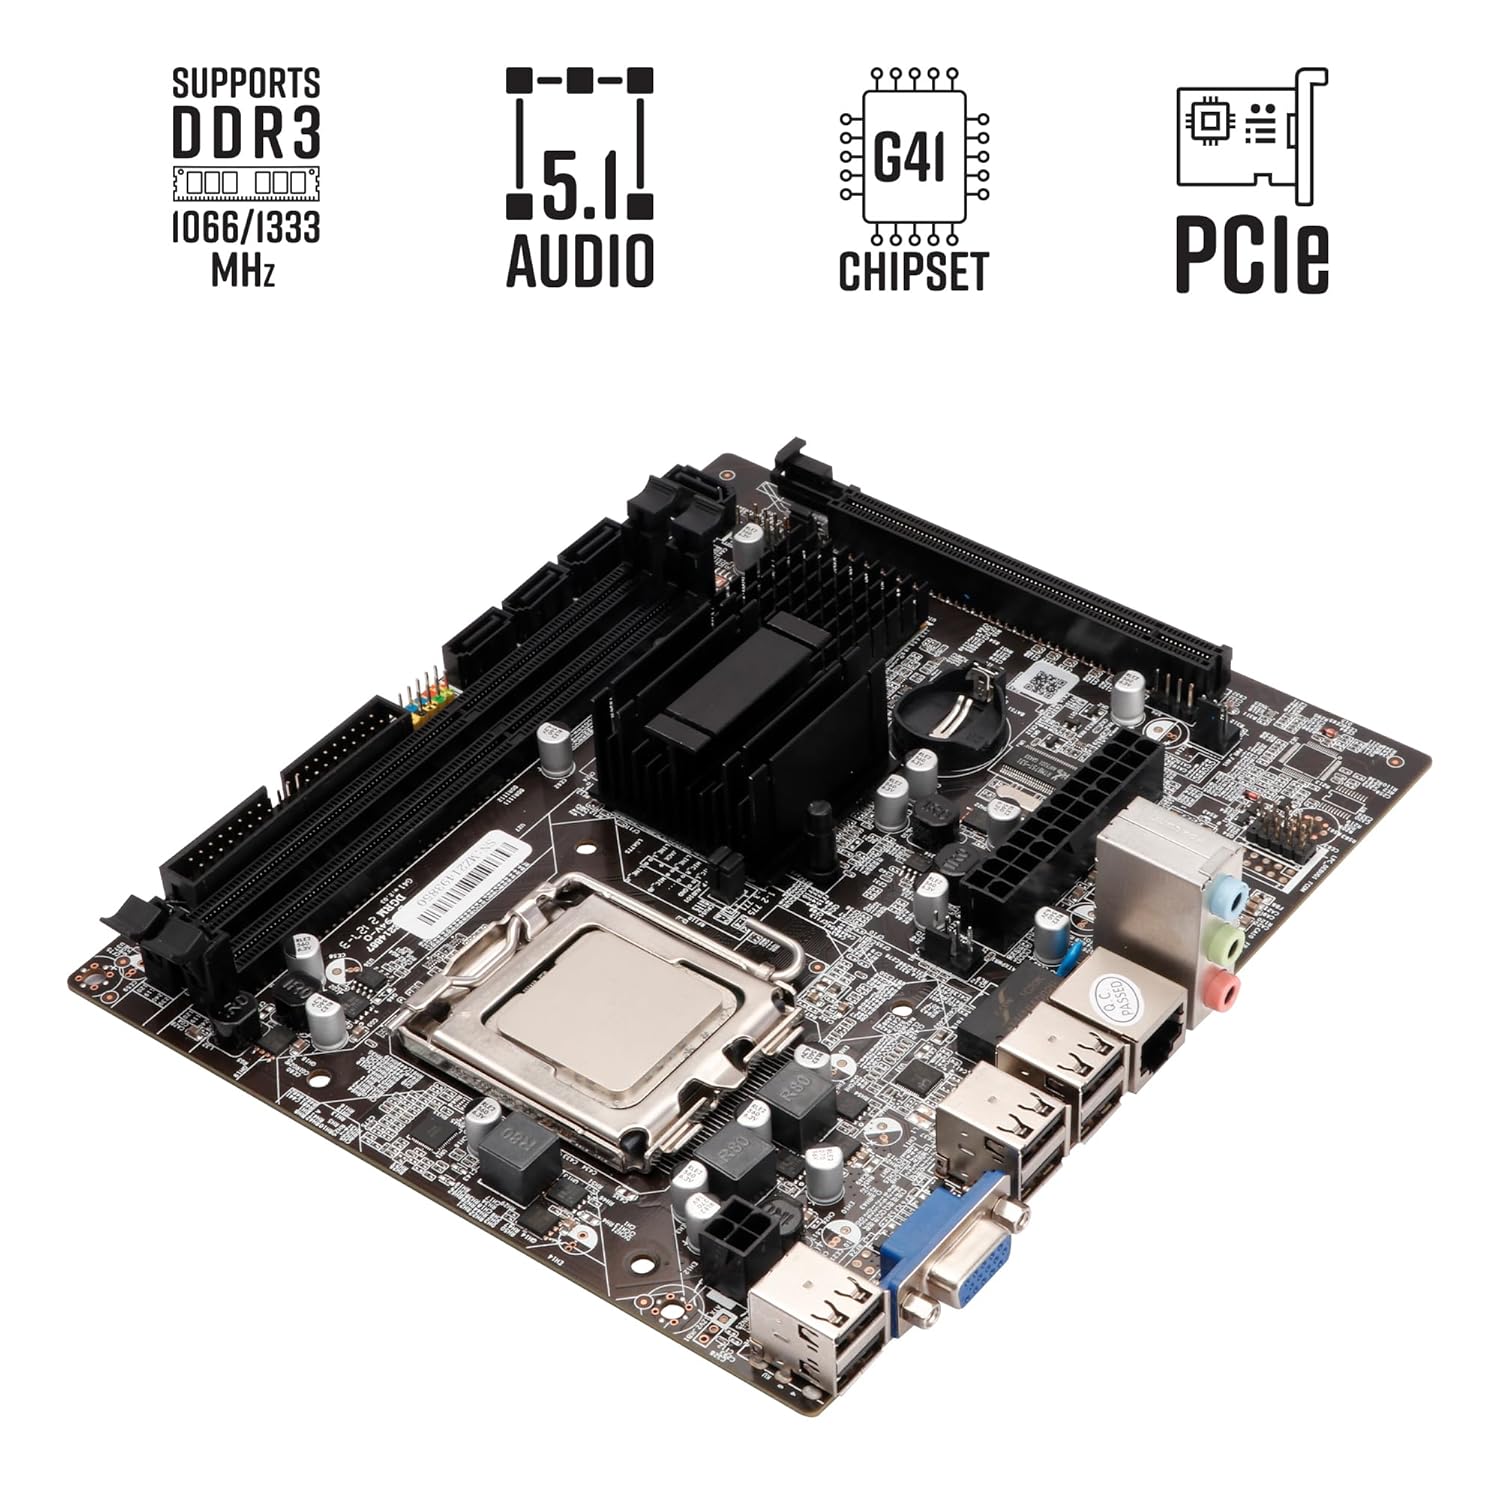
Image: ZEBRONICS G41-D3S Motherboard highlighting key features like DDR3 support, 5.1 audio, G41 chipset, and PCIe slot.
Setup and Installation
Proper installation is crucial for the stable operation of your motherboard. Follow these steps carefully.

Image: Detailed view of the ZEBRONICS G41-D3S Motherboard with labels for CPU Slot, DDR3 Memory Slots, 24 Pin ATX Power Supply, 4PIN Power Supply, 4PIN Fan pin, SATA ports, PCIe 16X slot, USB 2.0 ports, VGA port, RJ45 LAN Port, and Audio Cluster.
1. Processor (CPU) Installation
- Locate the LGA 775 CPU socket on the motherboard.
- Open the CPU socket lever.
- Carefully align the CPU with the socket, ensuring the notches on the CPU match the socket. Do not force the CPU into the socket.
- Gently lower the CPU into place.
- Close the CPU socket lever to secure the processor.
- Apply thermal paste to the CPU and install the CPU cooler according to its instructions.
2. Memory (RAM) Installation
- Identify the DDR3 memory slots (2 slots available).
- Open the clips at both ends of the memory slot.
- Align the memory module with the slot, ensuring the notch on the module matches the key in the slot.
- Press down firmly on both ends of the memory module until the clips snap into place.
3. Power Supply Connection
- Connect the 24-pin ATX power connector from your power supply unit (PSU) to the corresponding slot on the motherboard.
- Connect the 4-pin CPU power connector (ATX 12V) from your PSU to the 4PIN Power Supply connector near the CPU socket.
4. Storage Device Connection
- Connect SATA data cables from your storage devices (HDDs, SSDs) to the SATA ports on the motherboard (4 ports available).
- Ensure your storage devices are also connected to the power supply.
5. Peripheral Connections
- Graphics Card: If using a dedicated graphics card, install it into the PCIe 16X slot.
- USB Devices: Connect USB devices to the available USB 2.0 ports (4 ports on the rear I/O, plus internal headers for front panel USB).
- Display: Connect your monitor to the VGA port on the rear I/O.
- Network: Connect an Ethernet cable to the RJ45 LAN Port for network access.
- Audio: Connect speakers or headphones to the Audio Cluster ports.
- Front Panel Connectors: Connect your PC case's front panel connectors (power button, reset button, USB, audio) to the corresponding headers on the motherboard. Refer to your PC case manual for specific pin assignments.
6. Driver Installation
After installing the operating system, install the necessary drivers for the motherboard components (chipset, audio, LAN, etc.). These drivers are typically provided on an installation CD or can be downloaded from the ZEBRONICS official website.

Image: ZEBRONICS G41-D3S Motherboard Installation Driver CD, indicating the source for necessary system drivers.
Operating Instructions
Once all components are installed and connected, you can power on your system.
- Initial Boot: Press the power button on your PC case. The system should power on, and you should see a display on your monitor.
- BIOS/UEFI Setup: During startup, press the designated key (usually DEL, F2, or F10) to enter the BIOS/UEFI setup utility. Here, you can configure boot order, system time, and other hardware settings.
- Operating System Installation: Insert your operating system installation media (USB drive or DVD) and follow the on-screen instructions to install the OS.
- Driver Installation: After OS installation, install all necessary drivers as mentioned in the Setup section to ensure full functionality of all motherboard components.
Maintenance
Regular maintenance helps ensure the longevity and stable performance of your motherboard.
- Dust Removal: Periodically clean dust from the motherboard and other internal components using compressed air. Ensure the system is powered off and unplugged before cleaning.
- Cable Management: Ensure all cables are neatly routed and do not obstruct airflow.
- BIOS Updates: Check the ZEBRONICS website for BIOS updates. Update the BIOS only if necessary and follow the instructions carefully to avoid system instability.
- Environmental Conditions: Operate the computer in a well-ventilated area, away from direct sunlight, excessive heat, and moisture.
Troubleshooting
If you encounter issues, refer to these common troubleshooting steps.
- No Power/No Boot:
- Check all power connections (24-pin ATX, 4-pin CPU) from the PSU to the motherboard.
- Ensure the power supply unit is functioning correctly.
- Verify that the front panel power button connector is correctly attached to the motherboard header.
- No Display:
- Ensure the monitor is connected to the correct video output (VGA on the motherboard or dedicated graphics card).
- Reseat the memory modules. Try booting with one memory module at a time.
- If using a dedicated graphics card, reseat it in the PCIe slot.
- System Instability/Crashes:
- Check for proper CPU cooler installation and thermal paste application to prevent overheating.
- Ensure memory modules are compatible and correctly installed.
- Update motherboard drivers.
- Audio Not Working:
- Verify speakers/headphones are correctly plugged into the audio jacks.
- Ensure audio drivers are installed and up to date.
- Check audio settings in the operating system.
- Network Connectivity Issues:
- Check the Ethernet cable connection.
- Ensure LAN drivers are installed.
- Verify network settings in the operating system.
Specifications
| Feature | Detail |
|---|---|
| Brand | ZEBRONICS |
| Model Number | G41-D3S |
| Form Factor | Micro-ATX |
| CPU Socket | LGA 775 |
| Compatible Processors | Intel Core 2 Quad, Core 2 Duo, Pentium, Celeron Series |
| Chipset | Intel G41 |
| Memory Technology | DDR3 |
| Memory Slots | 2 x DDR3 DIMM |
| Memory Clock Speed | 1066 MHz, 1333 MHz |
| SATA Ports | 4 x SATA |
| PCIe Slots | 1 x PCIe 16X |
| USB 2.0 Ports | 4 (rear I/O) + internal headers |
| Video Output | 1 x VGA |
| LAN | 10/100 Mbps RJ45 |
| Audio | 5.1 Channel Audio Cluster |
| Dimensions (LxWxH) | 22 x 5.5 x 27 Centimeters |
| Item Weight | 800 g |

Image: Top-down view of the ZEBRONICS G41-D3S Micro-ATX Motherboard, showing its layout and components.
Warranty and Support
This ZEBRONICS G41-D3S Motherboard comes with a 1 Year Warranty. For technical support, service, or warranty claims, please contact ZEBRONICS customer service. Keep your purchase receipt as proof of purchase for warranty validation.
You can find contact information and further support resources on the official ZEBRONICS website.