Introduction
This manual provides detailed instructions for the operation and maintenance of your REACHER 15W Fast Wireless Charging Alarm Clock with White Noise Machine. Please read this manual thoroughly before use to ensure proper functionality and to maximize your product experience.
Important Safety Information
For safe operation, this device should be used with the recommended voltage and power requirements. Do not attempt to open or disassemble the device as it may increase the risk of electric shock. This product is not a toy and should be kept out of reach of children. Always follow the manufacturer's instructions for use.
Place the noise machine on a flat surface, connect the noise machine to a power source, select a soothing sound, and adjust the volume to your preference.
Product Features
- 3-in-1 Functionality: Combines a sound machine, 15W fast wireless charger, and digital alarm clock.
- Through-Case Charging: Supports wireless charging through protective cases up to 10mm thick.
- Dimmable Digital Display: Adjustable brightness from 0-100% for the clock display.
- Extensive Soundscapes: Features 20 high-fidelity sounds, including 5 white noises, 3 fan sounds, 2 lullabies, and 10 nature sounds.
- Gradual Wake & Snooze: Offers 5 wake-up sounds and an unlimited snooze function.
- Auto-Off Timer: Programmable sleep timers (30 minutes, 1 hour, 2 hours) or continuous play.
- Type-C Power Connector: Utilizes a compatible Type-C power input for versatile connectivity.
- Design: Wrapped in soft grey fabric material for an elegant and stylish appearance.
Setup Guide
1. Power Connection
Connect the provided Type-C power cable to the device's Type-C port located on the back. Plug the other end into a compatible power adapter (not always included) and then into a wall outlet. The clock display will illuminate.

Image: Rear view of the alarm clock showing the Type-C power connector and cable plugged in.
2. Initial Time Setting
Upon first power-up, the clock may display a default time. Refer to the "Operating Instructions" section for detailed steps on how to set the current time.
Operating Instructions
Setting the Time
Locate the Time Set button and the +/- buttons or rotary wheel on the device. The exact location may vary, refer to the product diagram if available.
- Press the Time Set button. The hour display will begin to flash.
- Use the +/- buttons or rotate the wheel to adjust the hour.
- Press Time Set again. The minute display will begin to flash.
- Use the +/- buttons or rotate the wheel to adjust the minutes.
- Press Time Set once more to confirm the time and exit time setting mode.
Setting Alarms
Locate the Alarm Set button and the +/- buttons or rotary wheel.
- Press the Alarm Set button. The alarm hour display will flash.
- Use the +/- buttons or rotate the wheel to set the desired alarm hour.
- Press Alarm Set again to set the minutes.
- Use the +/- buttons or rotate the wheel to set the desired alarm minutes.
- Press Alarm Set to cycle through and select one of the 5 wake-up sounds (bird, ocean, beep, flute, and forest).
- Press Alarm Set once more to confirm and activate the alarm. An alarm icon will appear on the display.
To deactivate an alarm, press the Alarm Set button repeatedly until the alarm icon disappears from the display.
When the alarm sounds, press the Snooze button for a temporary pause. The alarm will sound again after 9 minutes. To turn off the alarm completely, press any other button.
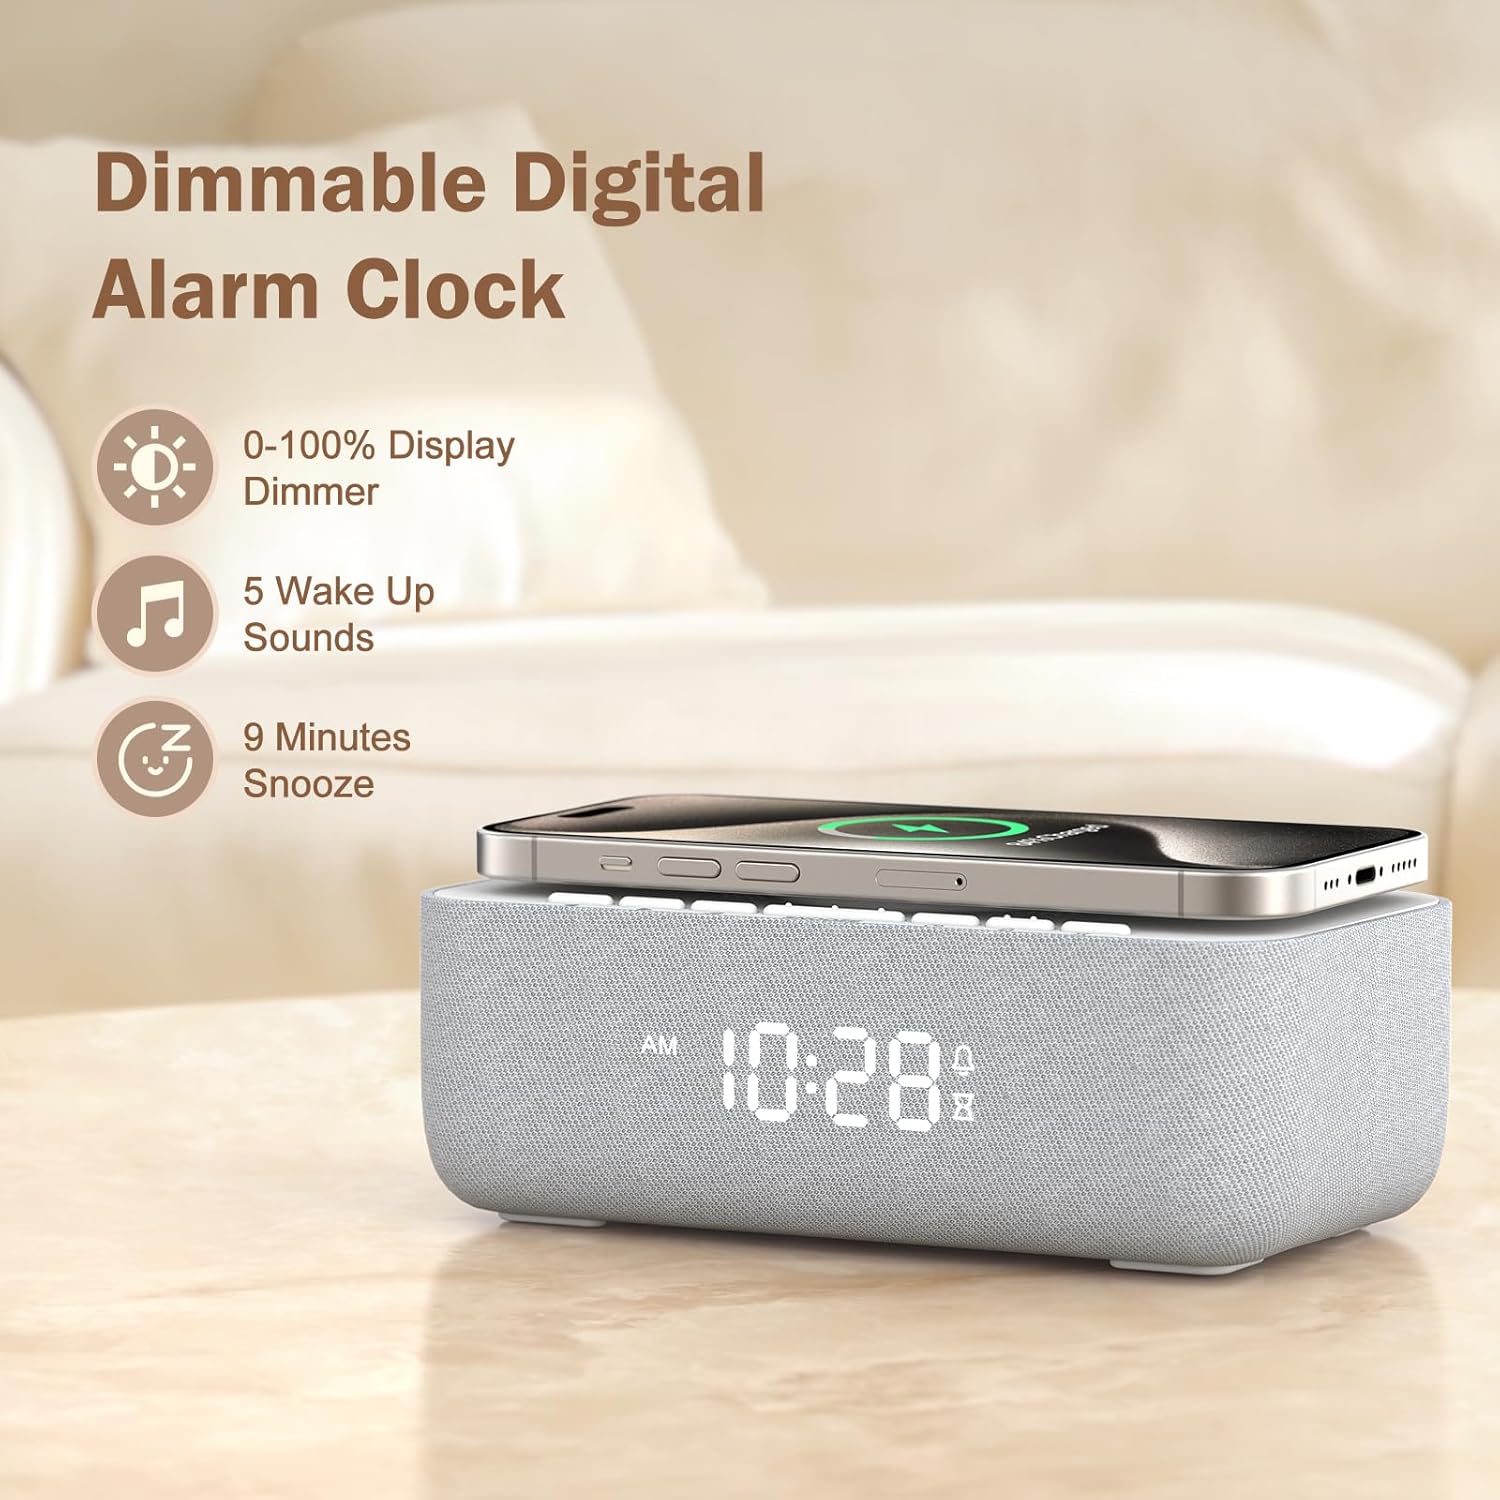
Image: The digital alarm clock display showing time, with a smartphone placed on the wireless charging pad, illustrating the dimmable display and snooze function.
Using the Sound Machine
Locate the Sound button and Volume +/- buttons or rotary wheel.
- Press the Sound button to cycle through the 20 available high-fidelity sounds (5 white noises, 3 fan sounds, 2 lullabies, and 10 nature sounds like rain, thunderstorm, campfire, stream, ocean, bird, frog, cricket, heartbeat, meditation).
- Use the Volume +/- buttons or rotate the wheel to adjust the sound volume (30 levels).
- To set an auto-off timer, press the Timer button. Cycle through 30 minutes, 1 hour, 2 hours, or OFF (continuous play). The sound will automatically turn off when the timer expires.

Image: A scene depicting a parent and baby, with the alarm clock in the background, highlighting the 20 built-in natural sounds for improved sleep quality.
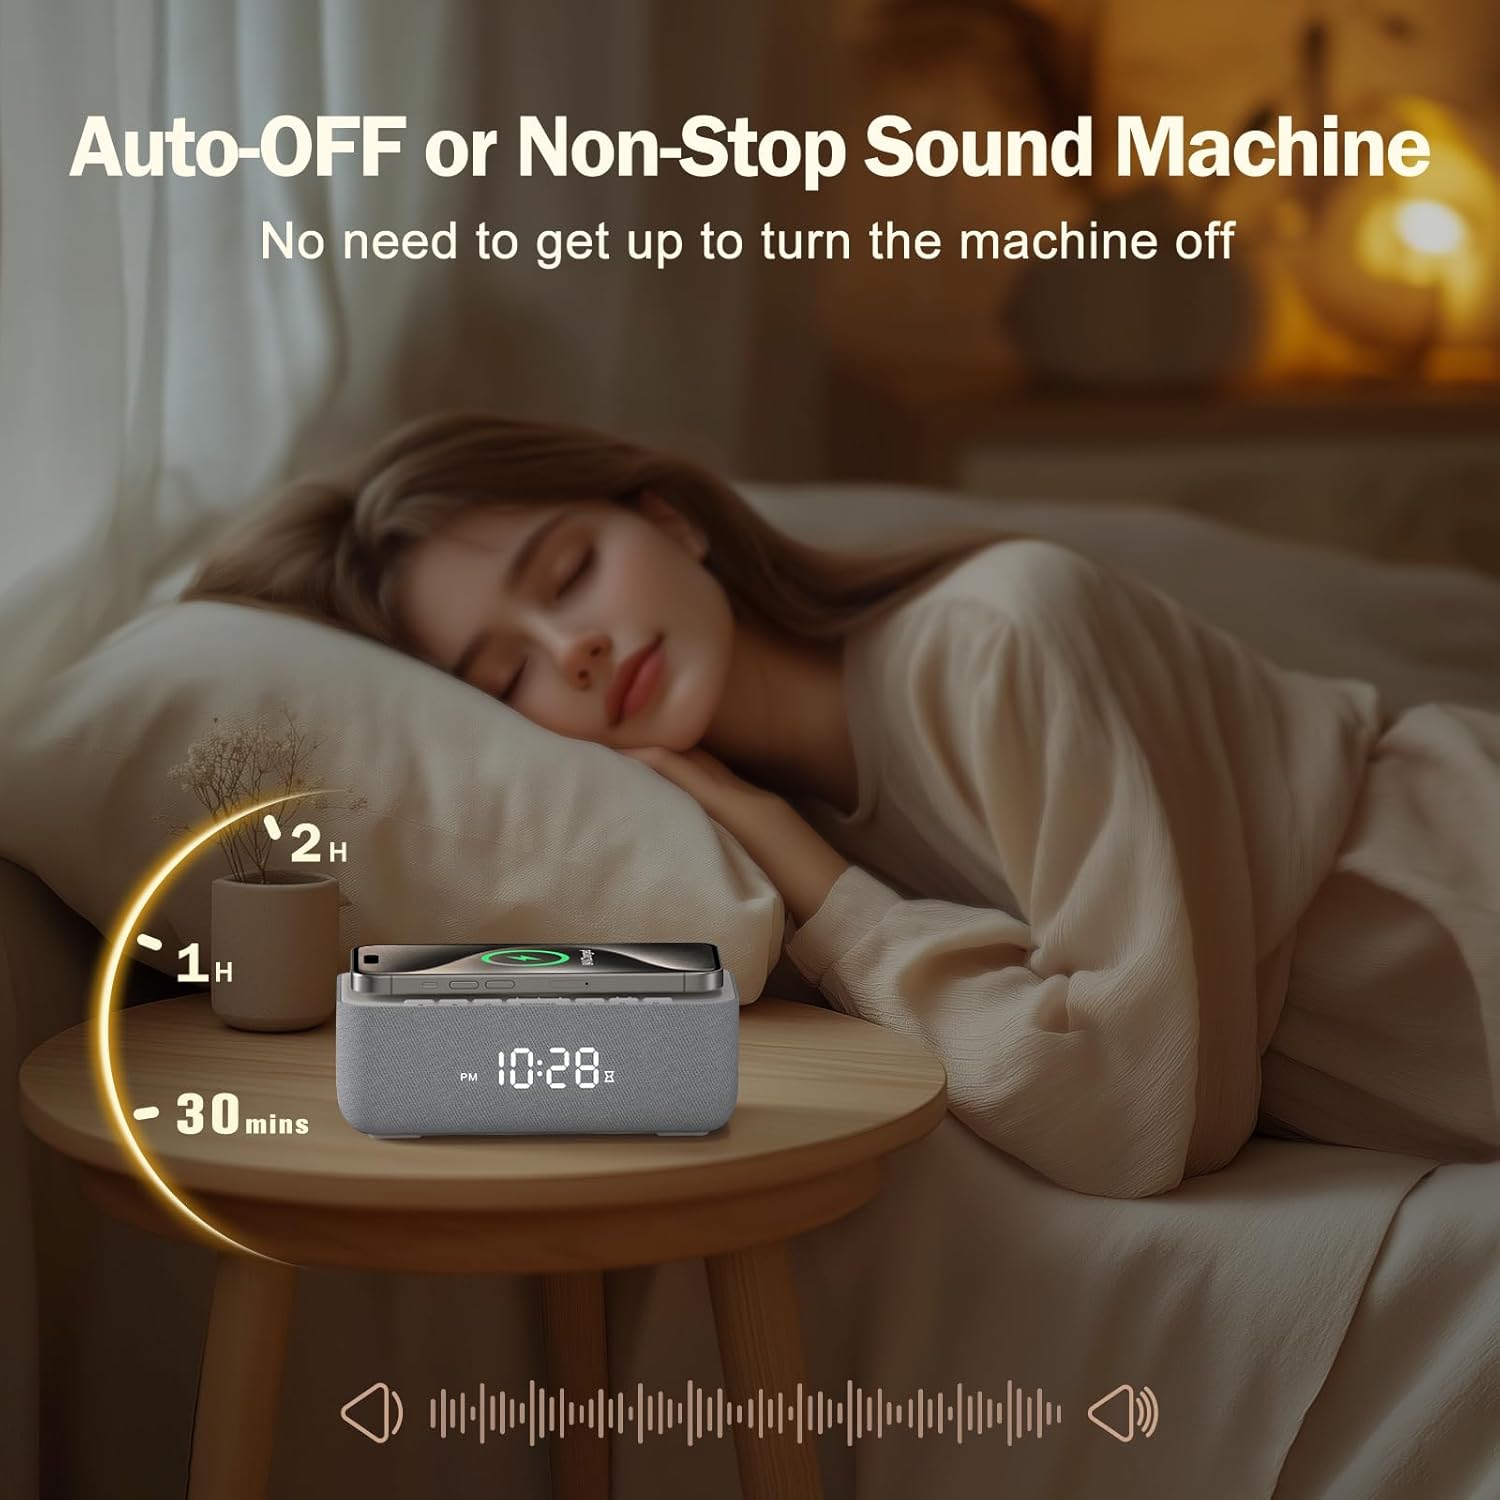
Image: The alarm clock on a nightstand next to a sleeping person, illustrating the auto-off timer feature with 30 minutes, 1 hour, and 2 hour options for sound playback.
Using the Wireless Charger
Place your Qi-compatible smartphone directly onto the charging pad located on top of the alarm clock. Ensure the phone is centered for optimal charging. The charging indicator on your phone will confirm that charging has begun. The device supports charging through cases up to 10mm thick.

Image: A smartphone being wirelessly charged on top of the REACHER alarm clock, with charging waves depicted, demonstrating the 15W fast charging capability.
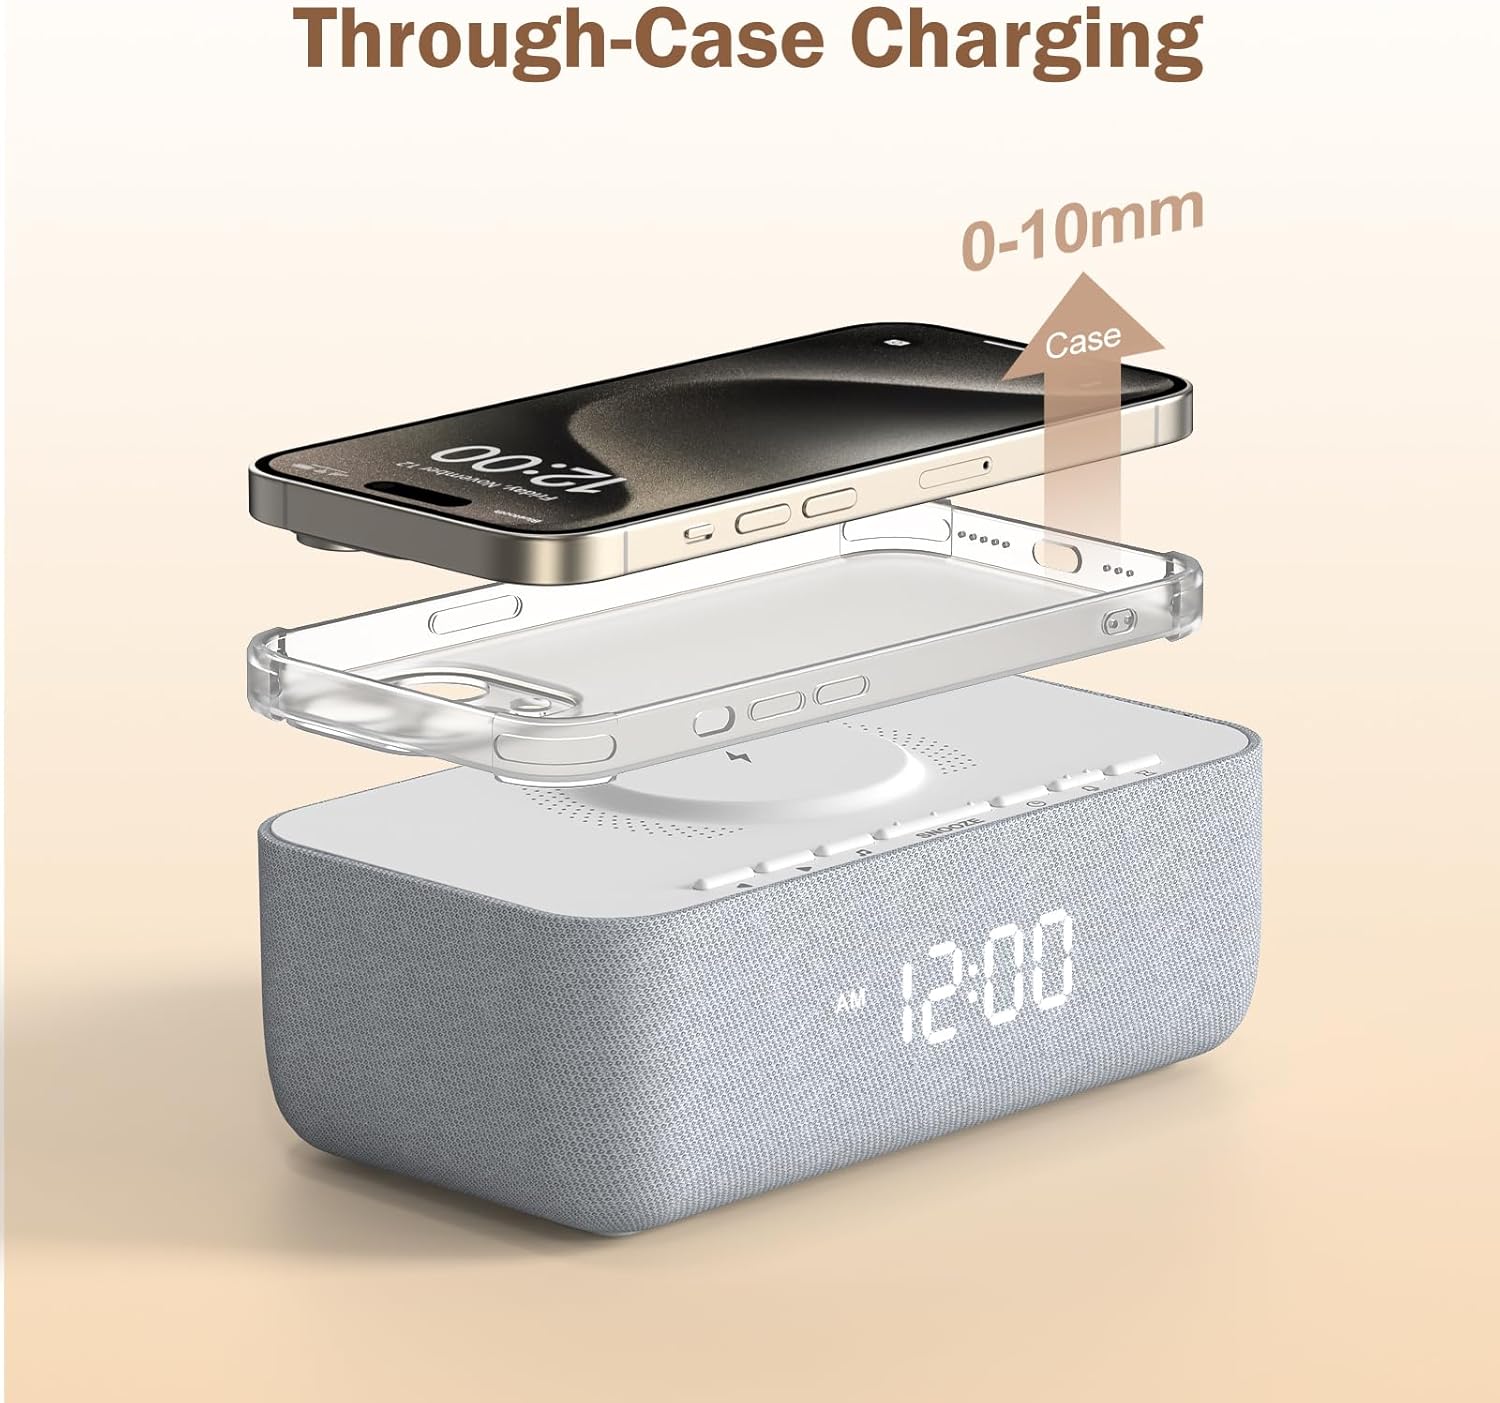
Image: An exploded view showing a smartphone, a protective case, and the alarm clock, illustrating the ability to charge through cases up to 10mm thick.
Adjusting Display Brightness
Locate the Dimmer button (or similar control for brightness adjustment). Press this button to cycle through brightness levels from 0% (off) to 100% (maximum brightness). This allows customization for both daytime visibility and nighttime comfort.

Image: Three views of the alarm clock display showing different brightness levels: 0%, 50%, and 100%, demonstrating the dimmable feature.
Maintenance
- To clean the device, use a soft, dry cloth. Do not use liquid cleaners, sprays, or abrasive materials.
- Keep the device away from water, high humidity, and extreme temperatures.
- Avoid exposing the device to direct sunlight for prolonged periods.
- Ensure the wireless charging pad is free of dust, metal objects, and debris for optimal and safe charging performance.
Troubleshooting
| Problem | Possible Cause | Solution |
|---|---|---|
| Device does not power on. | Power cable not connected properly or power outlet is not active. | Ensure the Type-C cable is securely connected to both the device and a working power adapter/outlet. Try a different outlet. |
| Wireless charging is not working. | Phone not centered, phone case too thick, foreign objects on pad, or phone is not Qi-compatible. | Reposition the phone on the charging pad, ensuring it is centered. Remove thick phone cases (over 10mm). Remove any metal objects or debris from the charging pad. Verify your phone supports Qi wireless charging. |
| Alarm does not sound. | Alarm not set, alarm deactivated, or alarm volume is too low. | Ensure the alarm is activated (alarm icon visible on display). Check and adjust the alarm volume to an audible level. |
| Sound machine not playing sounds. | Sound not selected, sound machine is off, or volume is too low. | Press the Sound button to select a sound. Ensure the sound machine is active. Adjust the volume using the Volume +/- buttons. |
| Display is too bright or too dim. | Brightness setting needs adjustment. | Press the Dimmer button to cycle through the brightness levels until the desired setting is achieved. |
Specifications
- Brand: REACHER
- Model: Wireless Charger
- Color: White
- Display Type: Digital
- Wireless Charging Output: 15W Fast Charging
- Soundscapes: 20 High-Fidelity Sounds (5 white noises, 3 fan sounds, 2 lullabies, 10 nature sounds)
- Wake-up Sounds: 5 options (bird, ocean, beep, flute, forest)
- Display Brightness: 0-100% Dimmable
- Volume Levels: 30 levels
- Auto-Off Timer: 30 minutes, 1 hour, 2 hours, or OFF
- Power Source: Corded Electric (Type-C)
- Product Dimensions: 3.85"W x 2.42"H
- Material: Plastic, Fabric (Acrylonitrile Butadiene Styrene)
- Item Weight: 1.37 pounds (0.62 Kilograms)
- Batteries: 1 CR2032 battery required (included for backup, not primary power)
Warranty and Support
For warranty information or technical support, please contact REACHER customer service through the retailer where the product was purchased or visit the official REACHER website. Please retain your proof of purchase for warranty claims.


