
1. Introduction
This instruction manual provides comprehensive guidance for the assembly and care of your ROBOTIME Miniature Garage Workshop and DIY Wooden Drum Kit. These kits are designed to offer an engaging and rewarding building experience, resulting in detailed miniature models suitable for display.
Please read all instructions carefully before beginning assembly. Ensure all components are present and accounted for. For detailed step-by-step instructions, refer to the specific manual included within each kit packaging.

Image 1.1: The ROBOTIME Miniature Garage Workshop and DIY Wooden Drum Kit. This image displays both the intricate garage workshop model and the detailed wooden drum set model, showcasing the final assembled products.
2. Product Overview
2.1. Miniature Garage Workshop
The Miniature Garage Workshop kit allows you to construct a detailed replica of a garage environment. This model features various miniature tools, equipment, and furniture, designed to immerse you in the world of craftsmanship. It is intended for display and appreciation of miniature artistry.

Image 2.1: Close-up view of the Miniature Garage Workshop, highlighting intricate details such as a universal workbench, car modification area, parts storage, and a versatile storage rack.

Image 2.2: The Miniature Garage Workshop displayed as a decorative item, showcasing its aesthetic appeal in a home or office setting.
2.2. DIY Wooden Drum Kit
The DIY Wooden Drum Kit is a 3D wooden puzzle that, once assembled, forms a miniature drum set. This kit is designed to challenge problem-solving skills and provide a sense of accomplishment upon completion. It is suitable for both adults and children, fostering hand-eye coordination and logical thinking.

Image 2.3: A fully assembled DIY Wooden Drum Kit, featuring a bass drum, snare drum, tom-toms, cymbals, and drumsticks, all crafted from wood.

Image 2.4: Close-up views of the individual components of the DIY Wooden Drum Kit, illustrating the detailed construction of the drums and cymbals.
3. Assembly Instructions
Both the Miniature Garage Workshop and the DIY Wooden Drum Kit require self-assembly. Each kit includes a detailed, step-by-step instruction manual specific to its model. Please refer to the manual provided in your kit packaging for precise assembly guidance.
3.1. General Assembly Steps
- Unpack Components: Carefully open the packaging and lay out all wooden sheets, accessories, and the instruction booklet. Verify that all parts are present according to the parts list in the manual.
- Prepare Parts: Gently detach the wooden pieces from their sheets. Use a small tool like a craft knife or sandpaper if necessary to smooth any rough edges.
- Follow Instructions: Adhere strictly to the numbered steps and diagrams in the included manual. Pay close attention to the orientation of each piece.
- Use Adhesive (if required): Some kits may require adhesive for certain connections. Use a suitable craft glue sparingly, allowing adequate drying time.
- Connect Pieces: Interlock or attach pieces as indicated. Ensure a snug fit without forcing components, which could cause damage.
- Add Accessories: Once the main structure is complete, add any decorative accessories or smaller components as directed.
Estimated Assembly Time:
- Miniature Garage Workshop: Approximately 3.5 hours (157 pieces)
- DIY Wooden Drum Kit: Approximately 2 hours (246 pieces)

Image 3.1: Hands carefully assembling components of a wooden craft kit, demonstrating the hands-on nature of the building process.

Image 3.2: A parent and child engaged in assembling a DIY kit, illustrating the educational and bonding aspects of the activity, promoting imagination, hand-eye coordination, logical thinking, and patience.
4. Operating and Display
These kits are primarily designed as static display models. Once assembled, they do not require power or active operation.
- Placement: Choose a stable, flat surface for display, away from direct sunlight, excessive humidity, or extreme temperatures to prevent warping or fading of the wooden components.
- Interaction: While durable, the models are not intended for rough play. Handle them gently to avoid dislodging small parts.
- Customization: If desired, you may paint or further decorate your assembled models using appropriate craft paints and materials. Ensure any additions do not compromise the structural integrity.
5. Maintenance
Proper maintenance will help preserve the appearance and integrity of your ROBOTIME models.
- Cleaning: Dust regularly with a soft, dry cloth or a soft-bristled brush. Avoid using water or chemical cleaners, as these can damage the wood or painted surfaces.
- Storage: If disassembling for storage, do so carefully and keep all parts organized in a secure container to prevent loss or damage. Store in a cool, dry place.
- Repairs: In case of minor damage, use a small amount of craft glue to reattach detached pieces.
6. Troubleshooting
This section addresses common issues that may arise during assembly or use.
| Issue | Possible Cause | Solution |
|---|---|---|
| Pieces do not fit together. | Incorrect orientation; excess material on edges; wrong piece. | Double-check the instruction manual for correct orientation. Gently sand edges if needed. Verify you are using the correct piece. |
| Missing parts. | Parts may be overlooked or accidentally discarded with packaging. | Carefully re-examine all packaging materials. If still missing, contact ROBOTIME customer support. |
| Model is unstable after assembly. | Pieces not fully seated; adhesive not fully cured (if used). | Press all connections firmly. Allow sufficient drying time for any adhesive. Ensure the display surface is level. |
7. Specifications
7.1. Miniature Garage Workshop
- Model Name: Miniature Garage Workshop
- Approximate Assembled Dimensions: 9.5 inches (L) x 5.9 inches (W) x 6.7 inches (H)
- Number of Pieces: 157
- Estimated Assembly Time: 3.5 hours
- Recommended Age: 14+ years
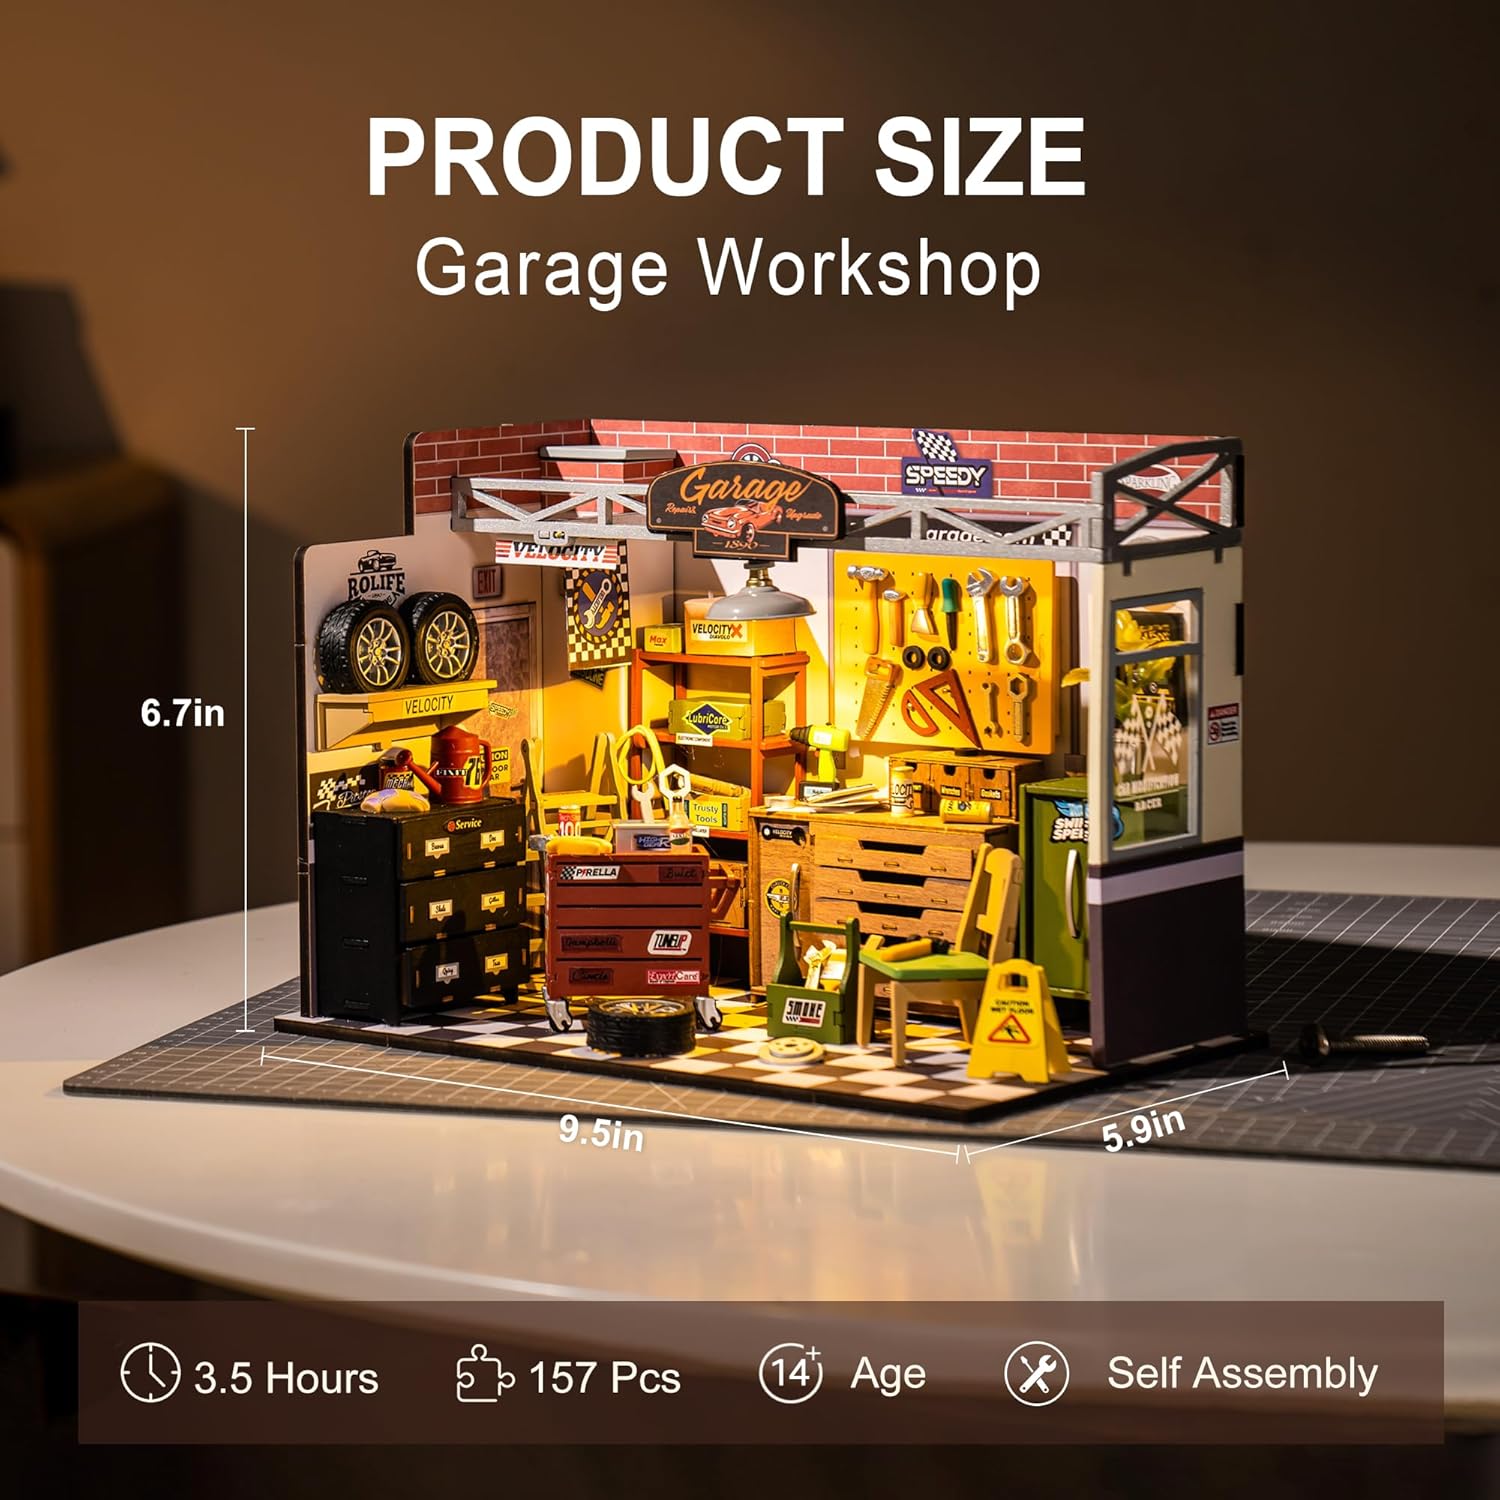
Image 7.1: Diagram illustrating the assembled dimensions of the Miniature Garage Workshop: 9.5 inches in length, 5.9 inches in width, and 6.7 inches in height.
7.2. DIY Wooden Drum Kit
- Model Name: DIY Wooden Drum Kit
- Approximate Assembled Dimensions: 7.5 inches (L) x 5.3 inches (W) x 4.3 inches (H)
- Number of Pieces: 246
- Estimated Assembly Time: 2 hours
- Recommended Age: Not explicitly stated, but generally suitable for ages 8+ with adult supervision due to small parts and complexity.

Image 7.2: Diagram illustrating the assembled dimensions of the DIY Wooden Drum Kit: 7.5 inches in length, 5.3 inches in width, and 4.3 inches in height.
8. Safety Information
- Small Parts Warning: These kits contain small parts which may pose a choking hazard. Keep out of reach of children under 3 years of age.
- Sharp Edges: Exercise caution when detaching wooden pieces from sheets, as some edges may be sharp. Adult supervision is recommended for younger builders.
- Adhesive Use: If using glue, ensure it is non-toxic and used in a well-ventilated area. Follow the adhesive manufacturer's safety instructions.
- Disposal: Dispose of waste materials and packaging responsibly.
9. Warranty and Support
ROBOTIME products are manufactured to high-quality standards. For any issues regarding missing parts, damaged components, or assembly difficulties, please contact ROBOTIME customer support.
Please retain your proof of purchase for warranty claims. Specific warranty terms and conditions may vary; refer to the product packaging or the official ROBOTIME website for detailed information.
Contact Information:
- Website: www.robotimeonline.com
- Email: Refer to product packaging or website for customer service email.


