
Introduction
Thank you for choosing the Zgrmbo 5502 Digital Wall Clock with Remote. This manual provides essential information for the proper setup, operation, and maintenance of your new clock. Please read these instructions carefully before use and retain them for future reference.
Safety Information
- This clock is USB powered and NOT battery operated for its main function. Ensure it is connected to a stable power source.
- The remote control requires batteries (not included). Insert them correctly according to polarity markings.
- Do not expose the clock to extreme temperatures, direct sunlight, or high humidity.
- Avoid dropping the clock or subjecting it to strong impacts.
- Do not attempt to disassemble or repair the clock yourself. Contact qualified service personnel for assistance.
- Keep the clock and remote control out of reach of children.
Package Contents
- Zgrmbo 5502 Digital Wall Clock (1 unit)
- Remote Control (1 unit)
- USB Power Cable (1 unit)
- User Manual (this document)
Product Overview
The Zgrmbo 5502 is a multifunctional digital wall clock designed for clear visibility and ease of use. It features a large LED display, remote control operation, and various display modes.
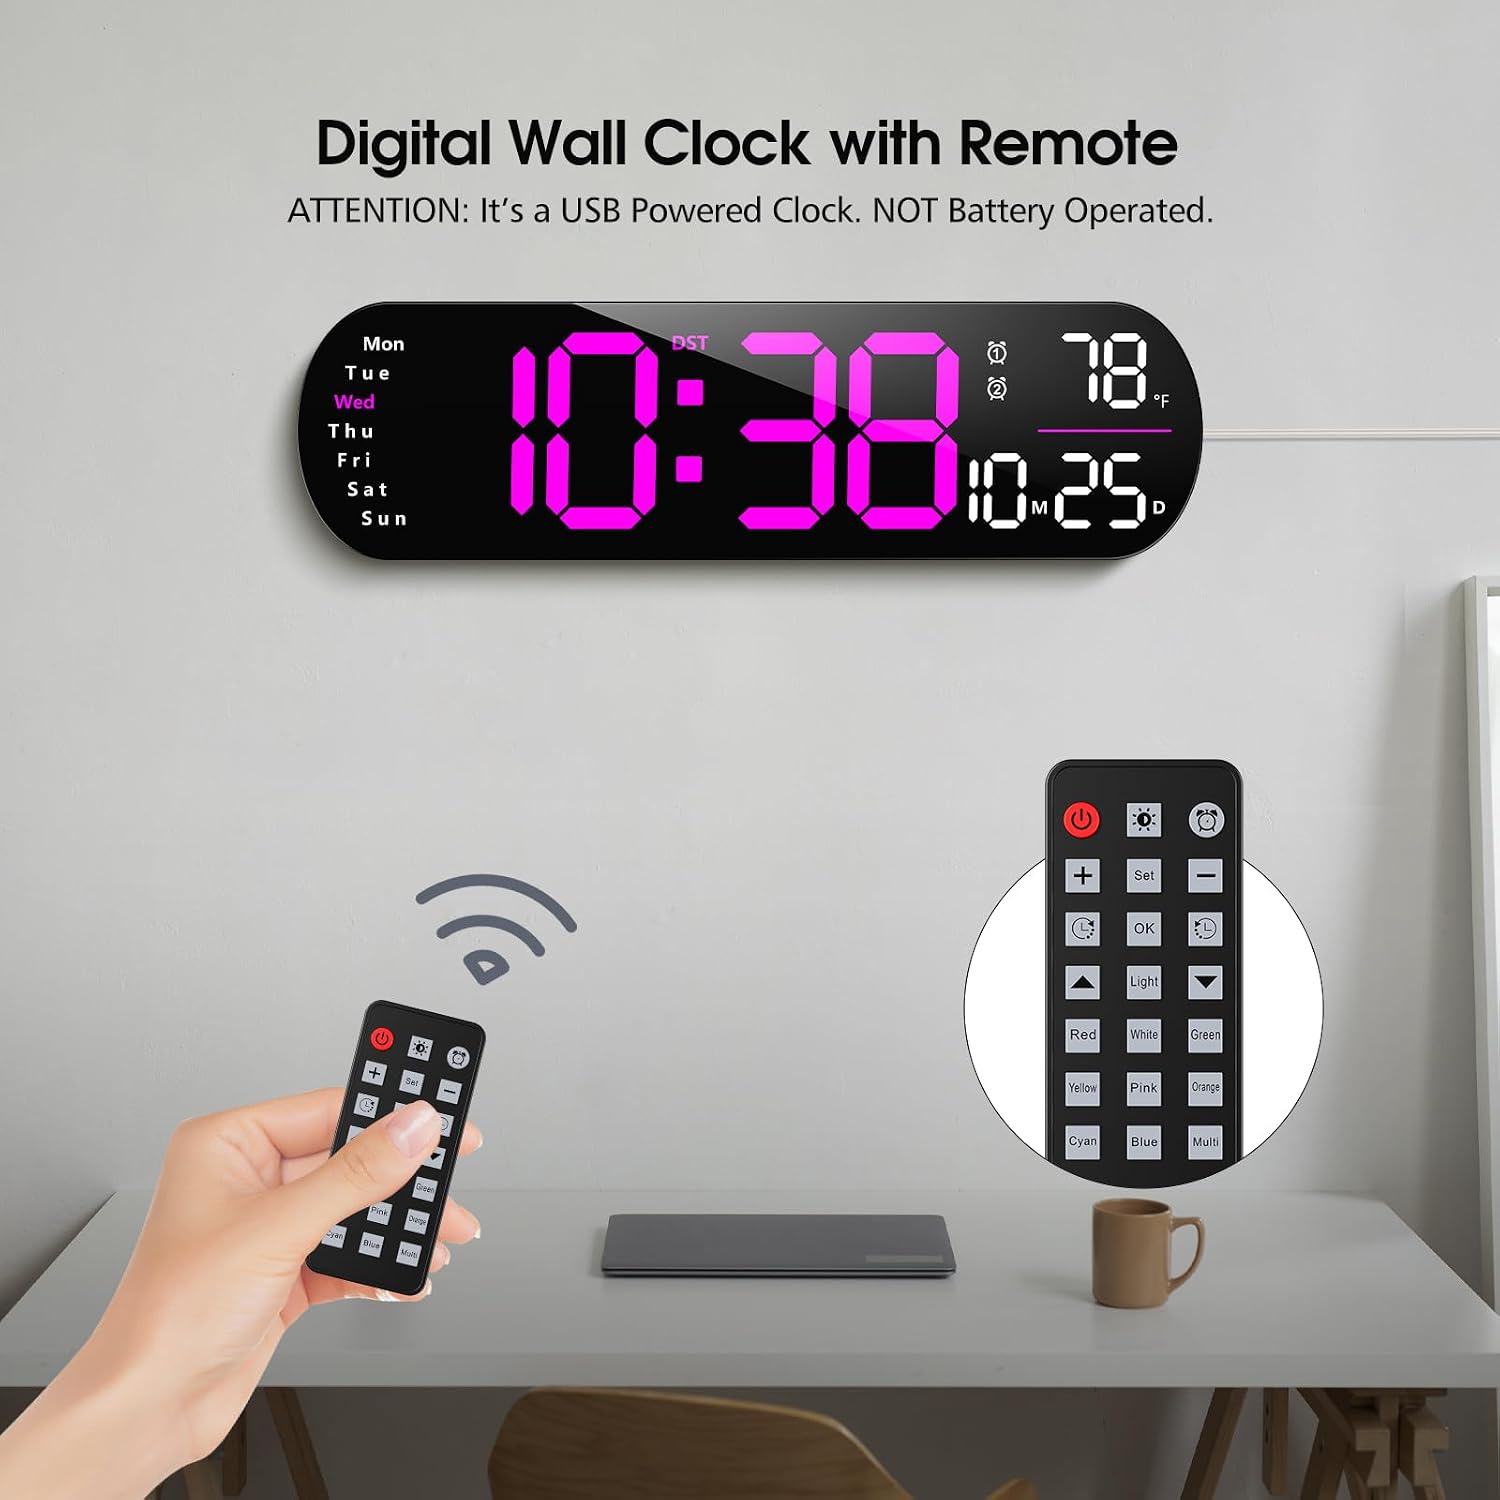
Image: The Zgrmbo 5502 Digital Wall Clock displaying time, date, day, and temperature, accompanied by its remote control. The clock is shown on a wall above a desk.
Clock Features:
- Large 3-inch LED digits for time display.
- Displays time (12/24H format), date, day of the week, and indoor temperature (°C/°F).
- Automatic dimming feature and 10-level custom brightness adjustment.
- 8 ambient light color modes.
- Timer function.
- Daylight Saving Time (DST) indicator.

Image: An illustration highlighting the key features of the Zgrmbo 5502 clock, including 3-inch digits, remote control, 12/24H format, indoor temperature, date display, week display, auto dimmable, and timer functions.
Setup
1. Remote Control Battery Installation
The remote control requires 2 AAA batteries (not included). Open the battery compartment on the back of the remote, insert the batteries according to the polarity markings (+/-), and close the compartment.
2. Powering the Clock
Connect the provided USB power cable to the clock's power input port. Plug the other end of the USB cable into a compatible USB power adapter (not included) or a USB port. The clock will power on and display the default time.
3. Initial Time and Date Setting
Upon first power-on, you may need to set the correct time and date. Use the remote control to navigate the settings. Refer to the 'Operating Instructions' section for detailed steps on setting time, date, and other parameters.
4. Mounting the Clock
The clock can be placed on a flat surface or mounted on a wall. For wall mounting, use appropriate hardware (not included) and ensure the mounting location is secure and can support the clock's weight. The clock has keyhole slots on the back for easy hanging.
Operating Instructions
Basic Display Functions:
- Time Display: The large digits show the current time.
- Date Display: The date (MM.DD) is displayed below the time.
- Day of Week: The current day (Mon-Sun) is indicated on the left side.
- Temperature Display: The indoor temperature (°F or °C) is shown on the right side.
Using the Remote Control:
The remote control allows access to all clock functions. Point the remote directly at the clock for optimal response.
- Power Button (U): Turns the clock display on/off.
- SET Button: Enters setting mode. Press repeatedly to cycle through time, date, alarm, and other settings.
- +/- Buttons: Adjust values up or down during setting mode.
- OK Button: Confirms selection or exits setting mode.
- Light Button: Cycles through ambient light modes or turns them off.
- Color Buttons (Red, White, Green, Pink, Yellow, Orange, Cyan, Blue, Multi): Directly select an ambient light color.
Setting Time and Date:
- Press the SET button. The hour digits will flash.
- Use +/- buttons to adjust the hour.
- Press SET again to move to minutes, then adjust with +/-.
- Continue pressing SET to adjust year, month, day, and day of the week.
- Press OK to save and exit.
12/24 Hour Format:
While in time setting mode, or by pressing a dedicated button on the remote (if available, otherwise cycle through SET options), you can switch between 12-hour (with AM/PM indicator) and 24-hour formats.
Daylight Saving Time (DST):
Press the DST button on the remote to activate or deactivate Daylight Saving Time. An indicator will appear on the display when DST is active.
Temperature Unit (°C/°F):
Press the °C/°F button on the remote to toggle between Celsius and Fahrenheit temperature display.
Brightness Adjustment (Auto Dimmable & Custom):
The clock features an auto-dimming function that adjusts brightness based on ambient light. You can also manually set the brightness.

Image: The clock display showing 'L-AU' for auto-dimming and a slider indicating brightness levels from 20% to 100%. Below, examples of 10 custom brightness levels (L-01 to L-10) are shown.
- Auto Dimmable: The clock automatically adjusts its brightness. This is typically the default mode. The display may show 'L-AU'.
- Custom Brightness: Press the Light button or a dedicated brightness button on the remote to cycle through 10 levels of manual brightness (L-01 to L-10).
Ambient Light Modes:
The clock offers 8 different ambient light colors to suit your preference.

Image: Eight different displays of the Zgrmbo 5502 clock, each showing a different ambient light color emanating from the bottom of the clock, including red, white, green, pink, yellow, orange, cyan, and blue.
Use the dedicated color buttons on the remote (Red, White, Green, Pink, Yellow, Orange, Cyan, Blue) to select a specific color. The 'Multi' button may cycle through a sequence of colors or a multi-color display. The 'Light' button can also cycle through these options.
Flashing Colon (FL OF/FL ON):
You can choose whether the two dots (colon) in the middle of the time display flash or remain static.

Image: The clock display showing 'FL OF' indicating the flashing colon is off, and 'FL ON' indicating it is on. A person is shown giving a thumbs-up next to the clock.
- To turn off the flashing colon, select 'FL OF'.
- To turn on the flashing colon, select 'FL ON'.
Refer to the remote control layout for the specific button to toggle this feature, or cycle through the SET options.
Alarm and Timer Functions:
The clock includes alarm and timer functionalities. Use the SET button to navigate to the alarm or timer settings. Follow the on-screen prompts and use the +/- buttons to set the desired time, and OK to confirm.
Maintenance
- Cleaning: Wipe the clock and remote control with a soft, dry cloth. Do not use abrasive cleaners, solvents, or chemical sprays, as these can damage the surfaces.
- Power: Always disconnect the power before cleaning or if the clock will not be used for an extended period.
- Remote Batteries: Replace remote control batteries when the remote's range decreases or it stops responding. Dispose of used batteries responsibly.
Troubleshooting
- Clock not powering on: Ensure the USB power cable is securely connected to both the clock and a working power adapter/USB port. Try a different power source.
- Remote control not working: Check if the batteries are inserted correctly and are not depleted. Ensure there are no obstructions between the remote and the clock. Point the remote directly at the clock.
- Incorrect time/date: Re-enter the setting mode and adjust the time and date as per the 'Operating Instructions'.
- Temperature display is inaccurate: Ensure the clock is placed in an area with good air circulation, away from direct heat sources or cold drafts, which could affect sensor readings.
- Display is too dim/bright: Adjust the brightness using the remote control or ensure auto-dimming is enabled if preferred.
- One of the LED segments stopped working: This indicates a potential hardware issue. Contact customer support for assistance.
Specifications
| Brand | Zgrmbo |
| Model Number | 5502 |
| Display Type | Digital LED |
| Power Source | Corded Electric (USB) |
| Special Features | Auto Dimmable, Remote Control, Temperature Display, Date Display, Week Display, Timer, 8 Ambient Light Colors |
| Room Type | Living Room (suitable for various rooms) |
| Shape | Rectangular |
| Batteries Included | No (for remote control) |
Warranty and Support
Zgrmbo products are designed for reliability and performance. For warranty information, technical support, or service inquiries, please refer to the contact information provided at the point of purchase or visit the official Zgrmbo website. Please have your model number (5502) and purchase details ready when contacting support.

