
MSI MAG 325CQRF-QD
MSI MAG 325CQRF-QD Curved Gaming Monitor User Manual
Model: MAG 325CQRF-QD
Brand: MSI
1. Introduction
The MSI MAG 325CQRF-QD is a 32-inch curved gaming monitor designed to provide an immersive visual experience with its 2K Wide Quad HD resolution, 170 Hz refresh rate, and 1ms response time. This manual will guide you through the essential steps to set up and utilize your monitor effectively.
Key features include a 1000R curvature, Less Blue Light, Anti-Flicker, Night Vision, FreeSync, Anti-Glare, Wide Color Gamut, and a 5-way OSD navigation joystick. It supports multiple connectivity options including HDMI, DisplayPort, USB Hub, and USB-C.
2. Setup
2.1 Unpacking the Monitor
Carefully remove all components from the packaging. Ensure all parts listed in the packing list are present. Keep the packaging materials for future transport or storage.
2.2 Attaching the Stand
Place the monitor face down on a soft, clean surface to prevent scratches. Align the stand neck with the mounting slot on the back of the monitor and secure it with the provided screws. Then, attach the base to the stand neck and tighten the thumb screw.

Figure 2.2.1: MSI MAG 325CQRF-QD monitor with stand assembled. This image shows the monitor from a front-side perspective, highlighting its curved screen and the attached stand, ready for connection.
2.3 Connecting Cables
Connect the necessary cables to the monitor's input ports. The monitor supports HDMI, DisplayPort, and USB-C for video input, and includes a USB Hub for peripheral connections.
- Power Cable: Connect the power cable to the monitor's power input and then to a power outlet.
- Video Cable: Choose between HDMI, DisplayPort, or USB-C to connect your computer to the monitor. Ensure the cable is securely inserted into both the monitor and your computer's graphics card.
- USB Upstream Cable: For the integrated USB Hub functionality, connect a USB upstream cable from the monitor to your computer. This enables the monitor's USB ports for devices like keyboards, mice, or external drives.

Figure 2.3.1: Rear view of the monitor displaying its input ports. This image illustrates the arrangement of the HDMI, DisplayPort, USB-C, and USB Hub connections on the back panel, along with the power input.
2.4 Powering On
Press the power button located on the monitor to turn it on. The power indicator light will illuminate. If no image appears, ensure all cables are connected correctly and the input source on your computer is set to the correct output.
3. Operating the Monitor
3.1 On-Screen Display (OSD) Navigation
The monitor features a 5-way OSD navigation joystick, typically located on the back or bottom-right of the monitor. This joystick allows you to access and navigate the OSD menu to adjust various settings.
- Push: Enter/Confirm selection.
- Up/Down: Navigate menu options.
- Left/Right: Adjust values or navigate sub-menus.
3.2 Picture Settings
Within the OSD, you can adjust settings such as brightness, contrast, sharpness, and color temperature to optimize your viewing experience. The monitor's Wide Color Gamut ensures realistic and refined colors.
3.3 Gaming Features
- Refresh Rate: The monitor supports up to a 170 Hz refresh rate for ultra-smooth gameplay. Ensure your graphics card and system settings are configured to utilize this refresh rate.
- Response Time: With a 1ms response time, ghosting and motion blur are significantly reduced, crucial for fast-paced games.
- FreeSync: This technology synchronizes the monitor's refresh rate with your GPU's frame rate, eliminating screen tearing and stuttering. Enable FreeSync in the OSD and your graphics card control panel.
- Night Vision: Enhance visibility in dark areas of games by adjusting the Night Vision setting in the OSD.
3.4 Eye Care Technology
The monitor incorporates several technologies to reduce eye strain during prolonged use:
- Less Blue Light: Reduces the emission of harmful blue light.
- Anti-Flicker: Prevents screen flickering, which can cause eye fatigue.
- Anti-Glare Display: Minimizes reflections from ambient light sources.
4. Maintenance
4.1 Cleaning the Screen
To clean the screen, gently wipe it with a soft, lint-free cloth. For stubborn marks, slightly dampen the cloth with water or a specialized screen cleaner. Avoid using harsh chemicals, abrasive materials, or spraying liquid directly onto the screen.
4.2 General Care
Keep the monitor in a well-ventilated area. Avoid exposing it to direct sunlight, high humidity, or extreme temperatures. Do not block the ventilation openings on the monitor's casing.
5. Troubleshooting
This section addresses common issues you might encounter with your monitor.
- No Power:
- Ensure the power cable is securely connected to both the monitor and the power outlet.
- Verify the power outlet is functional. - No Signal:
- Check that the video cable (HDMI, DisplayPort, USB-C) is firmly connected to both the monitor and your computer.
- Ensure your computer's display output is enabled and set to the correct resolution and refresh rate.
- Use the OSD to confirm the correct input source is selected on the monitor. - Image Flickering or Distorted:
- Check the video cable for damage or loose connections.
- Adjust the refresh rate in your computer's display settings.
- Ensure FreeSync is correctly configured in both the monitor OSD and your graphics card control panel. - OSD Not Responding:
- Power cycle the monitor (turn off, unplug, wait 30 seconds, plug back in, turn on).
- Ensure the OSD joystick is not stuck.
If the issue persists after attempting these solutions, please refer to the Warranty and Support section for further assistance.
6. Specifications
| Feature | Specification |
|---|---|
| Product Dimensions | 9 x 24 x 28 inches |
| Item Weight | 30 pounds |
| Manufacturer | MSI |
| Item Model Number | MAG 325CQRF-QD |
| Date First Available | February 15, 2024 |
| Standing Screen Display Size | 32 Inches |
| Aspect Ratio | 16:9 |
| Resolution | 2560 x 1440 Pixels (QHD Wide 1440p) |
| Image Brightness | 300 Nits |
| Screen Surface Description | Glossy |
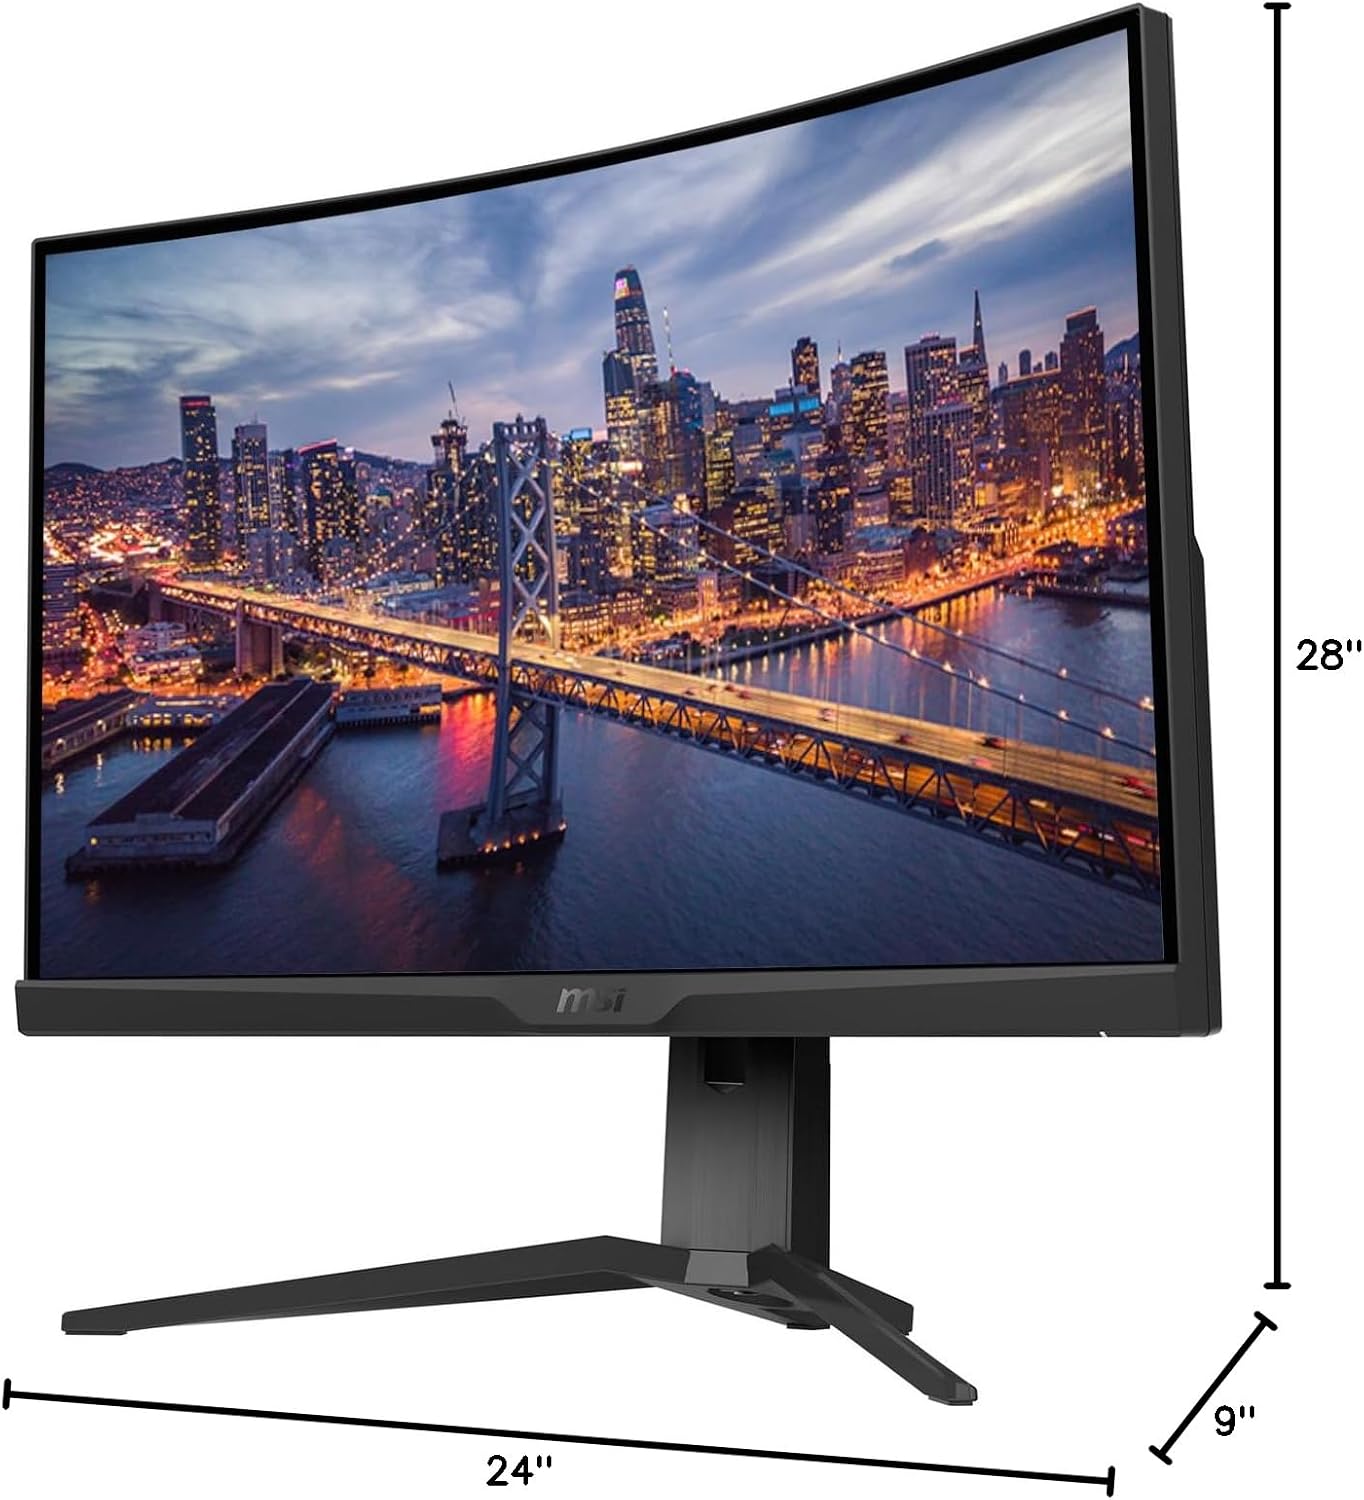
Figure 6.1: Monitor dimensions. This diagram provides a visual representation of the monitor's physical dimensions, including height, width, and depth.
7. Warranty and Support
7.1 Return Policy
This product is subject to a 30-day return policy from the date of purchase. Please refer to your retailer's specific return terms for details on eligibility and process.
7.2 Protection Plans
Extended protection plans may be available for this product, such as a 4-Year Protection Plan or a Complete Protect monthly plan. These plans offer additional coverage beyond the standard warranty. Please check with your retailer for availability and terms.
7.3 Technical Support
For technical assistance, driver downloads, or further product information, please visit the official MSI support website. You can typically find support resources by searching for your monitor model (MAG 325CQRF-QD) on the MSI website.
MSI Official Website: www.msi.com
Related documentsMAG 325CQRF-QD


Ask a question about this manual
Ask about setup, troubleshooting, compatibility, parts, safety, or missing instructions. Manuals+ will review the question and use this page’s manual context to help answer it.