
1. Introduction
This manual provides comprehensive instructions for the installation, operation, and maintenance of your A-Tech 32GB DDR4 2933MHz memory module. This module is designed to enhance the performance of compatible desktop computer systems by expanding available memory resources, reducing bottlenecks, and improving overall system responsiveness.
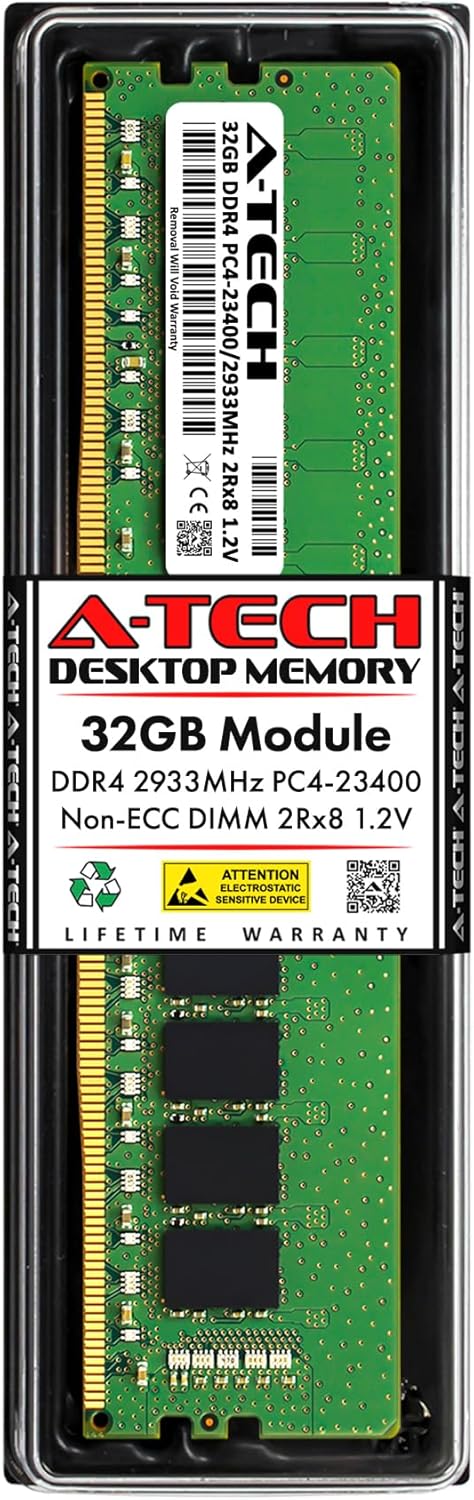
Image: A-Tech 32GB DDR4 RAM module in its retail packaging, showing the product label and protective casing.
2. Compatibility
The A-Tech 32GB DDR4 2933MHz memory module is specifically designed and tested for compatibility with the following Lenovo Legion Gaming Desktop models:
- Lenovo Legion R5 28IMB05 (Machine Types: 90NE, 90NJ, 90NC, 90NK)
- Lenovo Legion T5 28IMB05 (Machine Types: 90NE, 90NJ, 90NC, 90NK)
This module is intended for desktop computers only and is NOT COMPATIBLE with laptop computers. Always refer to your system's manual to confirm memory specifications and compatibility before installation.

Image: A banner emphasizing compatibility, showing two desktop computer setups and stating the module is designed for desktop PCs.
3. Specifications
| Feature | Specification |
|---|---|
| RAM Capacity | 32 GB |
| RAM Technology | DDR4 |
| Memory Speed | 2933 MHz (PC4-23400) |
| Module Type | DIMM 288-Pin |
| Error Correction | Non-ECC Unbuffered (UDIMM) |
| Rank | 2Rx8 (Dual Rank x8) |
| Voltage | 1.2 Volts |
| Dimensions (LxWxH) | 5.25 x 1.23 x 0.15 inches (133.35 x 31.24 x 3.81 mm) |
| Item Weight | 0.8 ounces |

Image: A technical drawing illustrating the precise physical dimensions of the A-Tech DDR4 RAM module.
4. Setup and Installation
Installing RAM is a straightforward process, but requires careful handling to prevent damage to the module or your computer. Please follow these steps diligently.
4.1. Safety Precautions
- Power Off and Unplug: Before opening your computer case, ensure the system is completely powered off and disconnected from the wall outlet.
- Discharge Static Electricity: Static electricity can damage electronic components. Before touching any internal components, ground yourself by touching an unpainted metal surface of the computer chassis. Consider using an anti-static wrist strap.
- Handle with Care: Hold the memory module by its edges, avoiding contact with the gold connectors or the chips on the module.
4.2. Installation Steps
- Open the Computer Case: Refer to your computer's manual for instructions on how to safely open its case. This usually involves removing screws and sliding off a side panel.
- Locate RAM Slots: Inside your computer, locate the DIMM slots on the motherboard. These are typically long slots with clips on either end. Your system may have empty slots or existing modules.
- Prepare Slots (if necessary): If you are replacing existing modules, gently push down the clips on both ends of the slot to release the old module. If installing into an empty slot, ensure the clips are open.
- Insert the New Module: Align the notch(es) on the bottom edge of the A-Tech memory module with the corresponding key(s) in the DIMM slot. This ensures correct orientation.
- Apply Even Pressure: With the module correctly aligned, press down firmly and evenly on both ends of the module until the clips on the slot snap into place, securing the module. Do not force the module if it does not seat easily; re-check alignment.
- Verify Seating: Ensure the module is fully seated and the clips are locked. There should be no gold contacts visible between the module and the slot.
- Close the Computer Case: Once all modules are installed, carefully reattach the side panel and secure any screws.
- Reconnect Power: Plug your computer back into the wall outlet and power it on.

Image: The A-Tech 32GB DDR4 RAM module, removed from its packaging, showing the green PCB and memory chips.
5. Operating Principles and Performance Benefits
Once installed, your A-Tech memory module will be automatically recognized by your computer's system. The primary function of RAM (Random Access Memory) is to provide fast, temporary storage for data that the CPU (Central Processing Unit) needs to access quickly. By upgrading your system's RAM, you will experience several key performance improvements:
- Improved Multitasking: More RAM allows your computer to run more applications simultaneously without slowing down.
- Faster Loading Times: Applications and large files will load more quickly as more data can be held in active memory.
- Reduced Bottlenecks: Adequate RAM prevents the system from relying heavily on slower storage (like an SSD or HDD) for active data, which can cause performance bottlenecks.
- Enhanced Gaming and Content Creation: Demanding applications such as modern games, video editing software, and 3D rendering programs benefit significantly from increased memory capacity and speed.

Image: The A-Tech 32GB DDR4 RAM module, highlighting its 2933MHz speed and the benefit of boosting system performance.

Image: A person working efficiently across two computer monitors, illustrating the ease of multitasking with expanded memory.

Image: A banner promoting performance upgrade, showing two A-Tech RAM modules and text about reducing bottlenecks and improving data processing.
6. Maintenance
Memory modules are generally maintenance-free components. However, adhering to general computer maintenance practices will help ensure their longevity and optimal performance:
- Keep System Clean: Regularly clean the interior of your computer case to prevent dust buildup, which can lead to overheating and component degradation. Use compressed air to gently clear dust from fans and components.
- Ensure Proper Ventilation: Make sure your computer has adequate airflow to dissipate heat. Avoid blocking vents.
- Avoid Physical Shock: Protect your computer from drops or impacts, as physical shock can dislodge or damage internal components, including RAM modules.
- Software Updates: Keep your operating system and drivers updated. While not directly related to RAM hardware, updated software can optimize memory usage and system stability.
7. Troubleshooting
If you encounter issues after installing your A-Tech memory module, consider the following troubleshooting steps:
7.1. System Does Not Boot or Display
- Re-seat the Module: Power off and unplug the computer. Open the case and gently press down on both ends of the memory module until the clips snap into place. Ensure it is fully seated.
- Check Other Slots: Try installing the module in a different DIMM slot on the motherboard.
- Single Module Test: If you installed multiple modules, try booting with only one A-Tech module installed at a time to identify if a specific module is faulty.
- Clear CMOS: Refer to your motherboard manual for instructions on how to clear the CMOS (BIOS settings). This can sometimes resolve memory recognition issues.
7.2. System Instability or Blue Screens (BSOD)
- Run Memory Diagnostic: Most operating systems have built-in memory diagnostic tools (e.g., Windows Memory Diagnostic). Run this tool to check for errors.
- Check BIOS/UEFI Settings: Ensure that your system's BIOS/UEFI is updated to the latest version, as this can improve memory compatibility and stability. Verify that memory settings (like XMP/DOCP profiles) are correctly configured or set to default.
- Verify Compatibility: Double-check that the memory module is indeed compatible with your specific motherboard model and CPU.
8. Warranty and Support
A-Tech memory modules are built to the highest standards of quality and reliability. Your A-Tech 32GB DDR4 2933MHz memory module is backed by A-Tech's Limited Lifetime Warranty.
For detailed warranty information, product registration, or technical assistance, please visit the official A-Tech website or contact their support team. You can also scan the QR code found on the product packaging for quick access to support resources.
For more information and support, visit: https://atechmemory.com/pages/qr

Image: A banner emphasizing reliability, showing a person working on a computer and stating that A-Tech modules undergo extensive quality control testing.


