
1. Introduction
Thank you for choosing the Voopoo Argus Pro 2 Pod System Kit. This manual provides detailed instructions on how to set up, operate, and maintain your device to ensure optimal performance and a safe vaping experience. The Argus Pro 2 is designed for both Direct Lung (DL) and Restricted Direct Lung (RDL) vaping, featuring a powerful 3000 mAh battery, the intelligent GENE.TT chip, and versatile operating modes. Please read this manual thoroughly before using the device.
2. Product Overview and Components
The Voopoo Argus Pro 2 Kit is a compact and ergonomic device, combining a sleek design with advanced functionality. Familiarize yourself with the main components and features:
- Device Body: Features a soft leather back for comfortable grip and a durable zinc alloy frame.
- PnP X Pod DTL: 5.0 ml capacity pod for e-liquid.
- 0.96-inch TFT Color Display: Shows vaping data, battery level, and settings.
- Function Buttons: For power on/off, wattage adjustment, and mode selection.
- Lock Switch: Prevents accidental activation.
- USB Type-C Port: For charging the device.
- Top Airflow Control (AFC): Adjustable airflow for customized vaping experience.

Figure 2.1: Front view of the Voopoo Argus Pro 2 Kit.
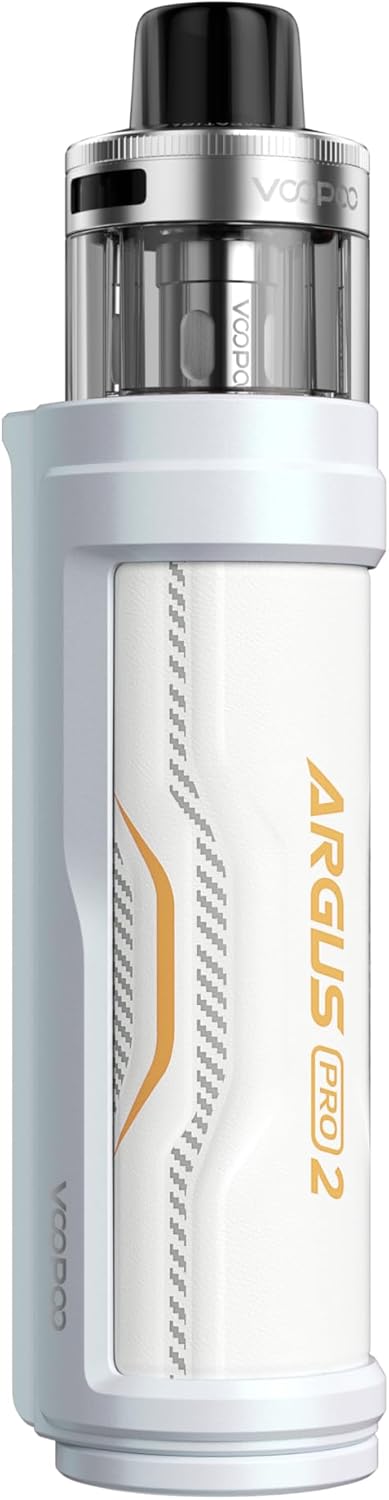
Figure 2.2: Back view of the Voopoo Argus Pro 2 Kit.

Figure 2.3: Design features of the Argus Pro 2.

Figure 2.4: Key features overview.
3. Setup Guide
3.1 Initial Charging
Before first use, fully charge the device. Connect the included USB Type-C cable to the charging port on the device and plug the other end into a 5V/2A power adapter. The display will indicate the charging status. A full charge typically takes approximately 90 minutes.
3.2 Coil Installation
The Argus Pro 2 uses PnP X series coils. To install a coil:
- Pull the PnP X Pod DTL out from the device.
- Invert the pod and firmly push the new PnP X coil into the bottom of the pod until it is securely seated.
- Ensure the coil is properly aligned to prevent leaks.
3.3 Filling the Pod
The PnP X Pod DTL features a convenient side-fill system:
- Locate the silicone plug on the side of the pod.
- Gently lift the silicone plug to reveal the filling port.
- Insert the nozzle of your e-liquid bottle into the port and fill the pod. Do not overfill.
- Securely close the silicone plug to prevent leaks.
- After filling, wait 5-10 minutes for the coil to become fully saturated with e-liquid before first use to prevent dry hits.
4. Operating Instructions
4.1 Power On/Off
Press the fire button 5 times rapidly to turn the device on or off.
4.2 Wattage Adjustment
Use the '+' and '-' adjustment buttons below the display to increase or decrease the wattage. The wattage range is 5-80W. The device will automatically suggest an optimal wattage in Smart mode based on the installed coil.
4.3 Mode Selection
The Argus Pro 2 features multiple operating modes:
- Smart Mode: Automatically detects the coil resistance and sets the optimal wattage, preventing coil burnout. Recommended for beginners.
- RBA Mode: Allows full manual control over wattage settings, suitable for experienced users.
- Turbo Mode: Provides a 25% increase in vapor volume in one second for an intensified flavor and vapor experience.
To switch between modes, press the fire button 3 times rapidly to enter the mode selection interface, then use the '+' and '-' buttons to navigate and the fire button to confirm.

Figure 4.1: Advanced Chip Safe Operation modes.

Figure 4.2: Turbo Mode and Dynamic Switch.
4.4 Lock Switch
The Argus Pro 2 features a physical lock switch. Slide the switch up or down to lock or unlock the device, preventing accidental firing or setting changes.
4.5 Airflow Control
Adjust the top airflow ring on the pod to customize your vaping experience from a more open Direct Lung (DL) draw to a more restricted Restricted Direct Lung (RDL) draw.
5. Maintenance
5.1 Cleaning the Device
Regularly clean your device to ensure optimal performance and longevity:
- Wipe the device body with a soft, dry cloth.
- Clean the pod connection area on the device and the bottom of the pod with a cotton swab to remove any e-liquid condensation.
- Do not use harsh chemicals or abrasive materials for cleaning.
5.2 Coil Replacement
Coils are consumable parts and need to be replaced regularly, typically every 1-2 weeks depending on usage and e-liquid. Replace the coil when you notice a burnt taste, reduced vapor production, or diminished flavor. Refer to section 3.2 for coil installation instructions.
6. Troubleshooting
If you encounter issues with your Argus Pro 2 Kit, refer to the following common problems and solutions:
| Problem | Possible Cause | Solution |
|---|---|---|
| Device not turning on | Low battery; Device off; Faulty device | Charge the device; Press fire button 5 times rapidly; Contact support if issue persists. |
| No vapor production | No e-liquid; Coil not installed correctly; Coil burnt out; Low battery; Device locked | Refill pod; Reinstall coil; Replace coil; Charge device; Unlock device. |
| Burnt taste | Coil not saturated; Coil burnt out; Wattage too high; Low e-liquid level | Wait 5-10 mins after filling; Replace coil; Adjust wattage down; Refill pod. |
| Leaking from pod | Coil not installed correctly; Silicone plug not sealed; Overfilling; Worn out coil/seals | Reinstall coil; Ensure plug is sealed; Do not overfill; Replace coil/pod. |
| Display not working | Device fault; Low battery | Charge device; Contact support if issue persists. |
7. Specifications
Detailed technical specifications for the Voopoo Argus Pro 2 Kit:
| Feature | Specification |
|---|---|
| Dimensions | 127.4 mm x 29.8 mm x 35.5 mm |
| Battery Capacity | 3000 mAh (Built-in) |
| Output Power | 5 - 80 W |
| Charging | USB Type-C, 5V / 2A |
| Resistance Range | 0.1 - 3.0 Ohm |
| Display | 0.96 inch TFT Color Display |
| Pod Capacity | 5.0 ml (DTL) |
| Compatible Coils | PnP X Series Coils |
| Material | Leather, Zinc Alloy |

Figure 7.1: Argus Pro 2 Specifications Diagram.
8. What's in the Box
Your Voopoo Argus Pro 2 Kit package includes the following items:
- 1x Voopoo Argus Pro 2 Mod Battery Carrier
- 1x Voopoo PnP X Pod DTL
- 1x Voopoo PnP X Coil 0.15 Ohm (pre-installed)
- 1x Voopoo PnP X Coil 0.3 Ohm
- 1x Voopoo PnP X Platform Info Card
- 1x USB Type-C Charging Cable
- 1x User Manual
Figure 8.1: Package Contents.
9. Safety Information and Legal Notices
Please read the following safety information carefully before using the device:
- This product is intended for adult users only.
- This product is nicotine-free.
- Keep out of reach of children and pets.
- Do not expose the device to extreme temperatures, direct sunlight, or water.
- Use only the provided charging cable and a compatible power adapter.
- Do not disassemble or modify the device.
- Dispose of the device and its components responsibly according to local regulations.
10. Warranty and Support
Specific warranty details for the Voopoo Argus Pro 2 Kit may vary by region and retailer. Please refer to the warranty card included in your package or contact your point of purchase for detailed warranty information.
For technical support, troubleshooting assistance, or any other inquiries, please contact VOOPOO customer service or visit their official website. Contact information can typically be found on the product packaging or VOOPOO's official website.