
Introduction
The IN WIN D5 is a mid-tower computer chassis designed to accommodate E-ATX motherboards up to 12" x 10", including the latest back-connector motherboards. It features a widely perforated front panel for optimized airflow and a modular, rotatable PCI-E slot bracket for flexible GPU installation. This manual provides essential information for the proper assembly, operation, and maintenance of your D5 chassis.
Key features include support for back-connect motherboards, a modular PCI-E bracket, a concealed headphone hanger, premium airflow design, and an integrated cable shroud for efficient cable management.
Package Contents
Before beginning assembly, please verify that all components are present:
- IN WIN D5 Mid Tower Chassis
- Accessory Box (screws, standoffs, cable ties, etc.)
- One pre-installed Neptune AN120 ARGB fan
- User Manual (this document)

Image: Front view of the IN WIN D5 chassis, showcasing the perforated front panel and IN WIN logo.
Setup and Installation
Follow these steps for proper installation of your computer components into the D5 chassis.
1. Preparing the Chassis
- Place the chassis on a flat, stable surface.
- Remove the side panels. The tempered glass side panel can be removed by unscrewing the thumbscrews (if present) or using the quick-release mechanism.

Image: Interior view of the IN WIN D5 chassis, showing the spacious layout for component installation.
2. Motherboard Installation
- Install the necessary motherboard standoffs onto the motherboard tray according to your motherboard's form factor (E-ATX, ATX, Micro-ATX).
- Carefully place your motherboard onto the standoffs, aligning the screw holes.
- Secure the motherboard with screws.
- The D5 supports back-connector motherboards, allowing for cleaner cable routing.

Image: Diagram illustrating the maximum dimensions for E-ATX motherboards, GPUs (up to 365mm), and PSUs (up to 180mm) within the D5 chassis.
3. Power Supply Unit (PSU) Installation
- The D5 features a bottom-mount PSU design with an individual PSU chamber.
- Slide the PSU into its designated compartment from the rear of the chassis.
- Secure the PSU with screws from the rear.
4. Storage Drive Installation
- The chassis supports up to 3 x 3.5" HDDs and 4 x 2.5" SSDs.
- Locate the drive bays and mounting points. Install your storage drives using the provided screws or tool-less mechanisms.

Image: Rear interior view of the IN WIN D5 chassis, highlighting the cable management area and drive bays behind the motherboard tray.
5. Graphics Processing Unit (GPU) Installation
- The D5 features a modular, rotatable PCI-E slot bracket. This allows for both horizontal and vertical GPU mounting without additional brackets.
- For horizontal mounting, remove the necessary PCI-E slot covers and insert your GPU directly into the motherboard's PCI-E slot.
- For vertical mounting, rotate the PCI-E bracket and use a compatible PCI-E riser cable (not included) to connect your GPU to the motherboard.
- A complementary magnetic GPU holder is included to provide additional support for heavier graphics cards.

Image: Diagram showing the modular PCI-E bracket and options for installing a GPU horizontally or vertically. Note: PCI-E riser cable is not included for vertical mounting.
6. Cooling System Installation (Fans & Radiators)
- The D5 comes with one pre-installed Neptune AN120 ARGB fan.
- The chassis supports extensive cooling configurations:
- Front: 3 x 120mm or 3 x 140mm fans / 280mm or 360mm radiator
- Top: 3 x 120mm or 3 x 140mm fans / 280mm or 360mm radiator
- Rear: 1 x 120mm fan
- Install additional fans or radiators as desired, ensuring proper airflow direction.

Image: Diagram illustrating the versatile cooling options of the D5 chassis, including fan and radiator placements at the front, top, and rear.

Image: Close-up of the Neptune AN120 ARGB fan, highlighting its design and customizable lighting.
7. Cable Management
- Utilize the cable shroud on the motherboard tray to channel cables directly from the front to the motherboard, promoting a clean interior and improved airflow.
- Route all power and data cables neatly behind the motherboard tray using the provided cable ties and routing points.
8. Headphone Hanger
- The D5 includes a cleverly concealed headphone hanger. Locate this feature and utilize it to keep your desk space organized.

Image: A composite image showcasing key features of the D5 chassis: individual PSU chamber, integrated headphone hanger, quick-release side panel mechanism, and cable management integration.
Operating Instructions
Once all components are installed and secured, and all cables are connected:
- Ensure all external peripherals (monitor, keyboard, mouse, etc.) are connected.
- Connect the power cable to your PSU and a wall outlet.
- Press the power button on the chassis to start your system.
- The pre-installed Neptune AN120 ARGB fan will illuminate upon power-on. Its ARGB lighting can typically be controlled via your motherboard's software or a dedicated controller (if applicable).
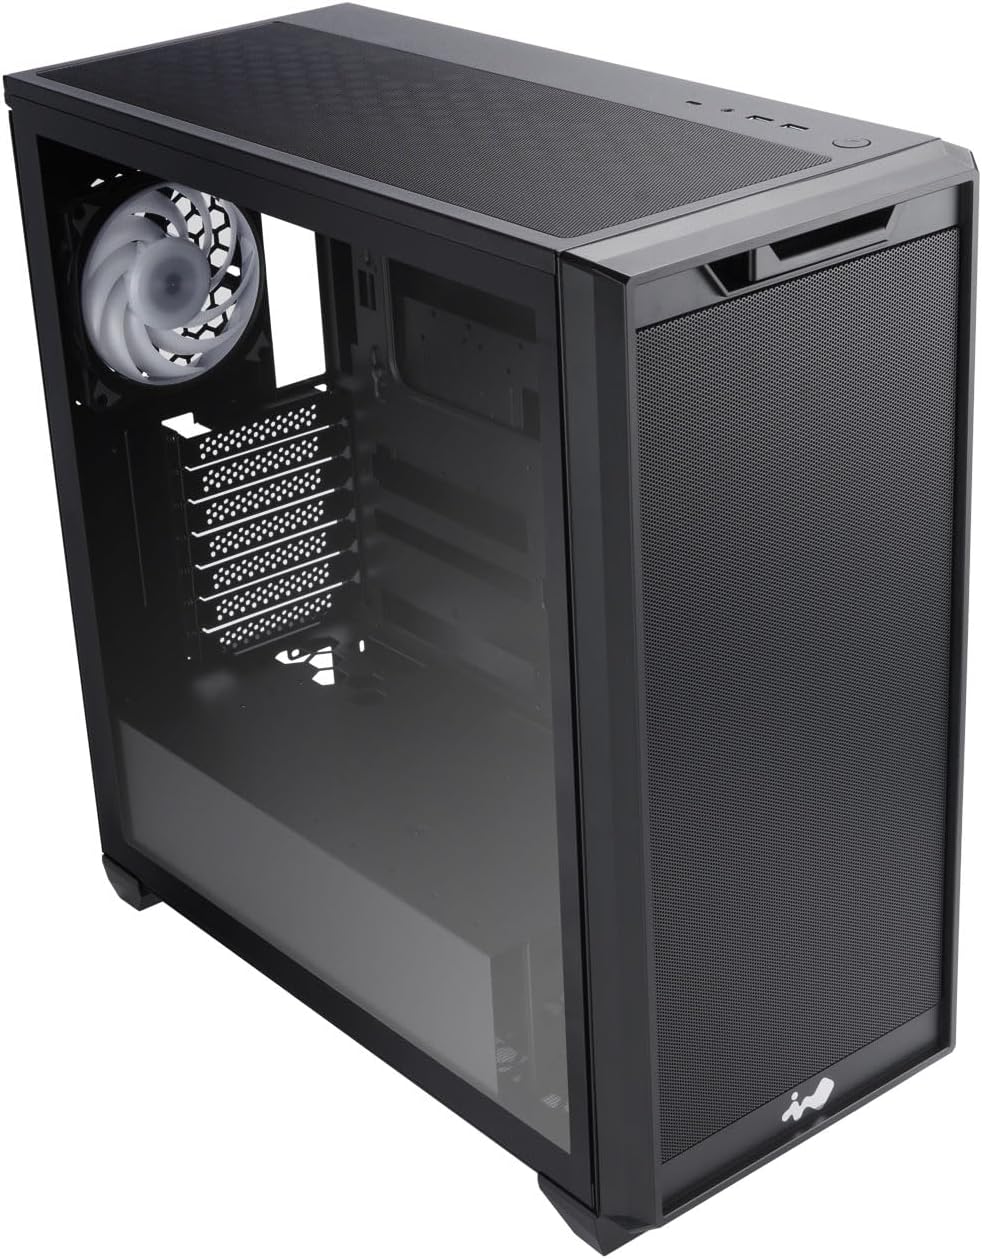
Image: The IN WIN D5 chassis with internal components and ARGB fans illuminated, demonstrating the aesthetic appeal and functional setup on a desk.
Maintenance
Regular maintenance helps ensure optimal performance and longevity of your D5 chassis and its components.
- Dust Cleaning: Periodically clean dust from the perforated front and top panels, as well as any dust filters, using compressed air or a soft brush. This maintains optimal airflow.
- Exterior Cleaning: Wipe the exterior surfaces with a soft, damp cloth. Avoid abrasive cleaners or solvents.
- Cable Management Check: Occasionally inspect internal cables to ensure they remain neatly routed and do not obstruct airflow.
Troubleshooting
This section addresses common issues you might encounter with your chassis.
- System Not Powering On:
- Check all power connections, including the PSU to the wall, PSU to motherboard, and front panel power switch cables to the motherboard.
- Ensure the PSU switch is in the "ON" position.
- Poor Airflow/Overheating:
- Verify that all installed fans are spinning correctly and are oriented for proper intake/exhaust.
- Clean any dust buildup on fan blades and filters.
- Ensure no cables are obstructing airflow paths.
- ARGB Fan Not Lighting Up:
- Check the ARGB cable connection from the fan to the motherboard's ARGB header or a dedicated ARGB controller.
- Ensure ARGB software or controller settings are configured correctly.
Specifications
| Brand | IN WIN |
| Model Name | D5 |
| Item Model Number | IW-CS-D5BLK-1AN120 |
| Case Type | Mid Tower |
| Motherboard Compatibility | E-ATX (up to 12" x 10"), ATX, Micro-ATX |
| Material | Metal, Tempered Glass |
| Color | Black |
| Product Dimensions (LxWxH) | 19.4 x 8.7 x 18.6 inches (49.3 x 22.1 x 47.2 cm) |
| Item Weight | 18.3 pounds (8.3 kg) |
| Power Supply Mounting Type | Bottom Mount |
| Cooling Method | Air, Water |
| Pre-installed Fans | 1 x Neptune AN120 ARGB fan |
| Max GPU Length | 365 mm |
| Max CPU Heatsink Height | 165 mm |
| Max PSU Length | 180 mm |
| Drive Bays | 3 x 3.5" HDD, 4 x 2.5" SSD |

Image: Dimensional drawing of the IN WIN D5 chassis, showing its height, width, and depth.
Warranty Information
For detailed warranty terms and conditions, please refer to the official IN WIN website or the warranty card included with your product. Warranty coverage typically includes manufacturing defects for a specified period from the date of purchase.
Support
For technical support, troubleshooting assistance, or any inquiries regarding your IN WIN D5 chassis, please visit the official IN WIN website:
You may also contact IN WIN customer service directly through the contact information provided on their website.


