Introduction
This manual provides essential information for the safe and efficient operation, maintenance, and troubleshooting of your VEVOR Stand Airless Paint Sprayer with Cart. Please read this manual thoroughly before initial use to ensure proper handling and to prevent damage or injury.

Figure 1: VEVOR Stand Airless Paint Sprayer with Cart and included accessories.
Important Safety Information
Always adhere to the following safety guidelines to prevent injury or damage:
- Always use a wrench to securely tighten the hose and machine to prevent leaks during operation.
- Do not use the sprayer with high-viscosity paints, paints containing large particles or solid pigments, or for special coating requirements.
- Always follow the paint manufacturer's instructions for dilution and usage.
- Always put gun trigger safety in SAFETY ON position when not spraying.
- Always relieve pressure before you check or spray.
- Never use components rated less than Maximum Working Pressure.
- Never aim at yourself or anyone else.
- Avoid splashback of fluid while spraying; make sure the spray gun is assembled with the correct gasket for the fluid being sprayed.
- The gun may recoil when triggered.
- Do not spray flammable or combustible materials near an open flame, pilot lights, or any other similar sources of ignition.
- Ensure the spray area is well ventilated.
Components and Accessories
The VEVOR Stand Airless Paint Sprayer with Cart includes the following components:
- Main Sprayer Unit with Cart
- Spray Gun
- High-Pressure Hose (50 ft / 15 m)
- Nozzle (Model: 517)
- Extension Pole (18.9 inch / 48 cm)
- Pressure Gauge
- 2 x Wrenches (17/19)
- 2 x Filters (Imported + Spray Gun Filter)
- Cleaning Brush

Figure 2: Detailed view of included components and product dimensions.
Setup Instructions
Follow these steps to set up your airless paint sprayer:
- Unpack Components: Carefully remove all components from the packaging.
- Assemble Spray Gun: Attach the nozzle and any desired extension poles to the spray gun. Ensure all connections are securely tightened with the provided wrenches to prevent leaks.
- Connect High-Pressure Hose: Connect one end of the high-pressure hose to the spray gun and the other end to the main sprayer unit. Tighten firmly.
- Prepare Paint: Ensure your paint is properly mixed and diluted according to the paint manufacturer's instructions. Use the appropriate filters to prevent clogs.
- Connect Power: Plug the sprayer into a grounded outlet.

Figure 3: The wheeled design allows for easy movement of the sprayer.
Operating Instructions
The VEVOR airless paint sprayer is designed for efficient and uniform painting. It is up to 5 times faster than rolling and 12 times faster than brushing.
- Power and Pressure: Equipped with a 950W motor, it delivers up to 3000 PSI pressure and a maximum flow rate of 2.0 LPM.
- Paint Compatibility:
- Solvent-based paints (petroleum, ketone, ether-based)
- Water-based paints (latex, acrylic)
- Low solids paints (polyamide, epoxy)
- Anticorrosive paints
- Wood coatings (varnishes, phenolic paints, sealants)
- Adjustable Speed Control: Adjust the speed according to the painting scenario, material type, and thickness requirements. Use lower gears for large areas to reduce paint consumption.
- Uniform Application: Professional accessories and fan-shaped atomization technology ensure an even and fine finish.

Figure 4: The sprayer provides efficient painting, covering large areas quickly.
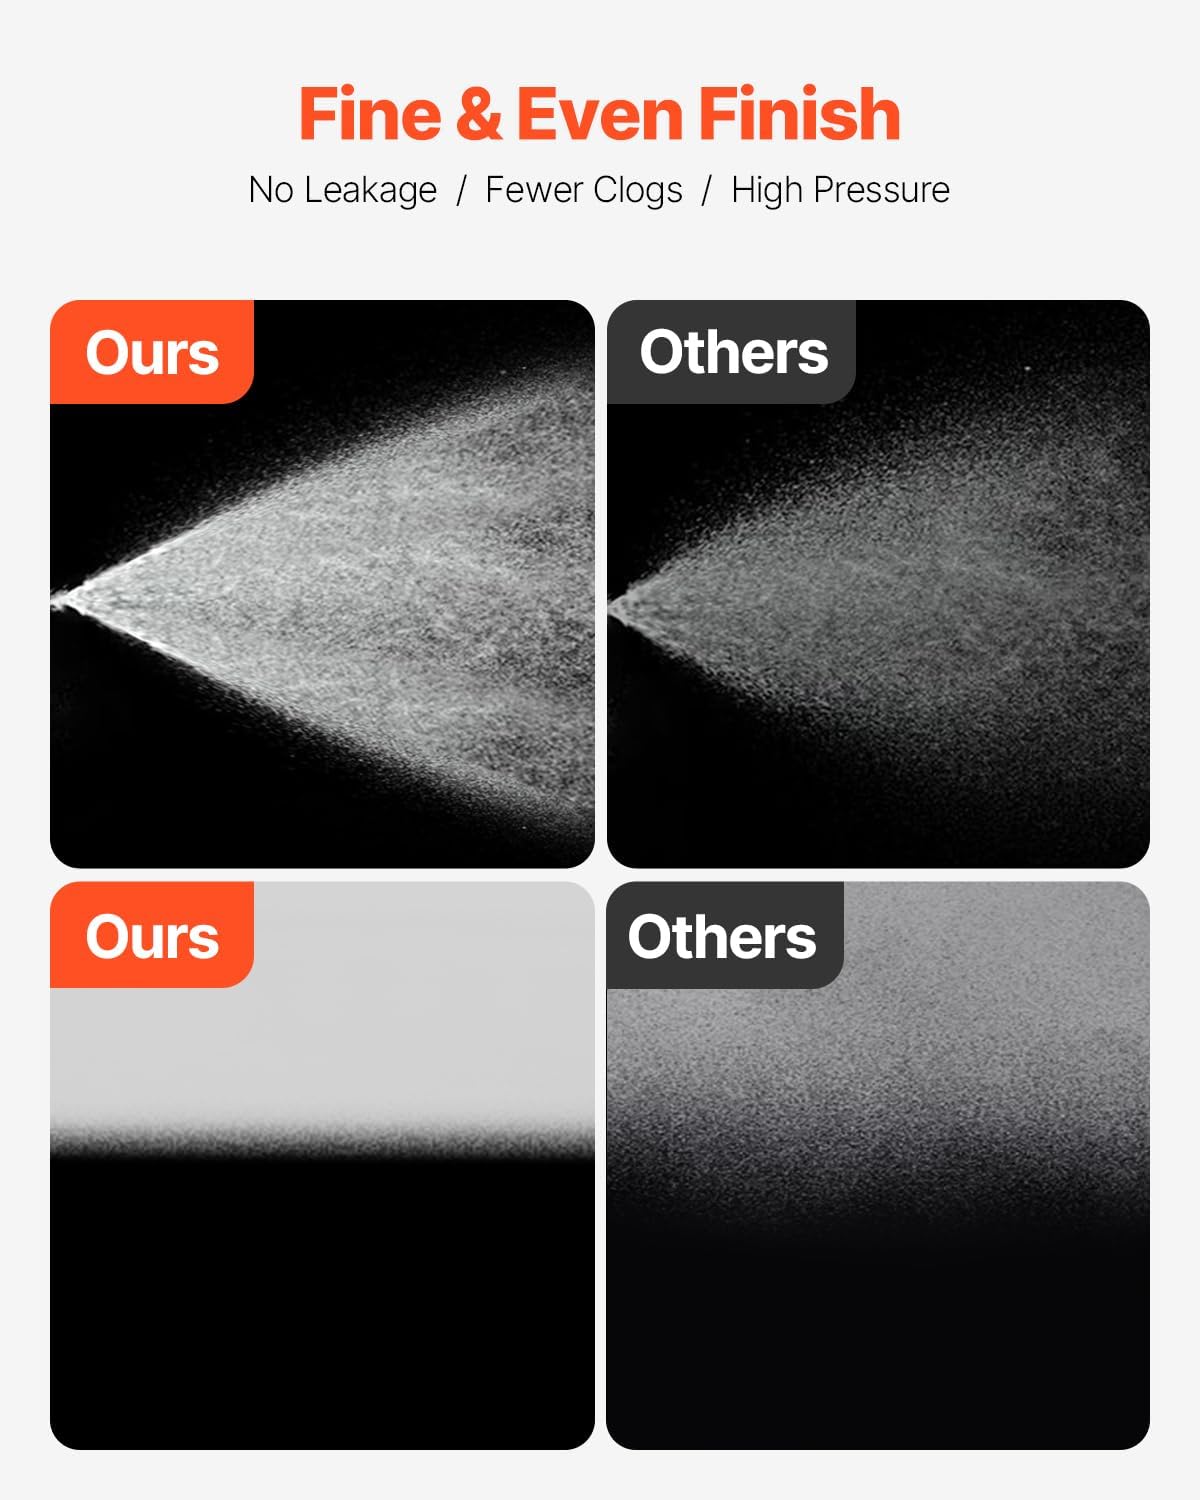
Figure 5: The sprayer delivers a fine and even finish, minimizing clogs and leaks.

Figure 6: Adjust the sprayer's gear for various painting needs, from fine to fast application.
Maintenance and Cleaning
Regular cleaning and maintenance are crucial for the longevity and optimal performance of your paint sprayer.
- Detachable Pump Body: The pump body is designed to be detachable for easy cleaning and maintenance.
- Cleaning Brush: Use the included cleaning brush to clean crevices and corners of the spray gun and nozzle.
- Filter Cleaning: Regularly clean the filters to prevent clogs and ensure consistent spray quality.
- Hose and Gun Cleaning: Flush the hose and spray gun with appropriate cleaning solution (water for water-based paints, solvent for oil-based paints) after each use until clear.
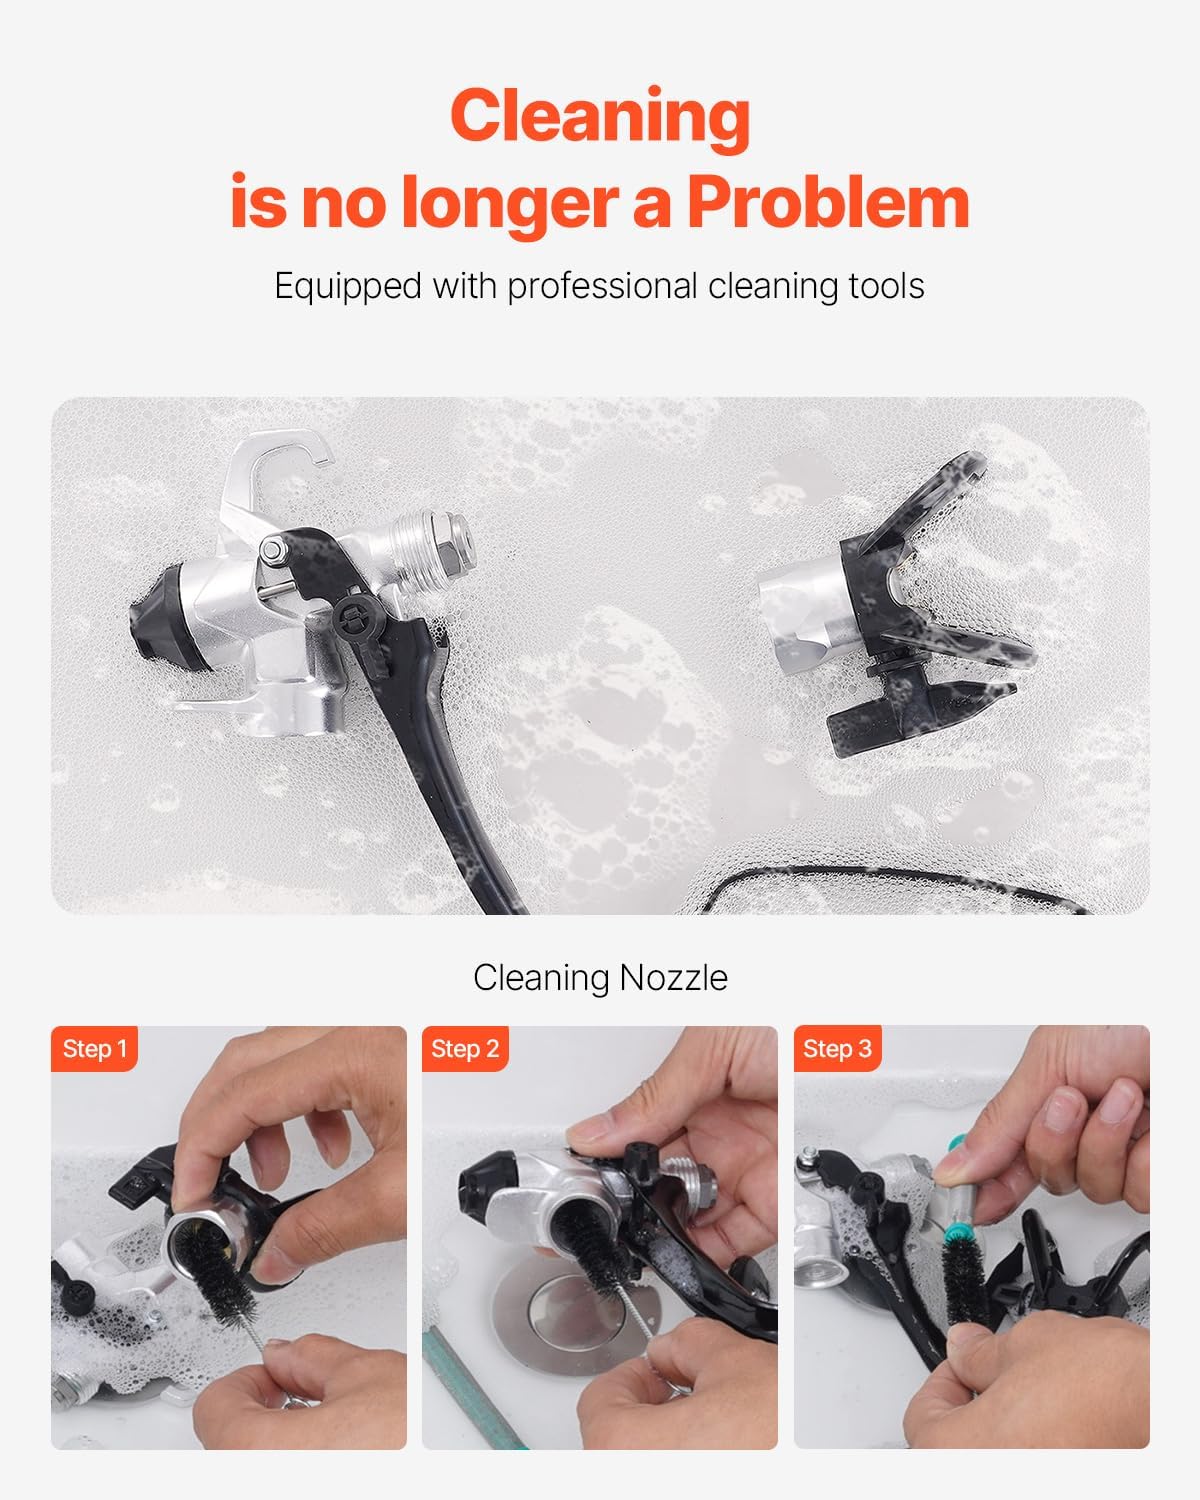
Figure 7: Cleaning the spray gun nozzle is made easy with the provided tools.
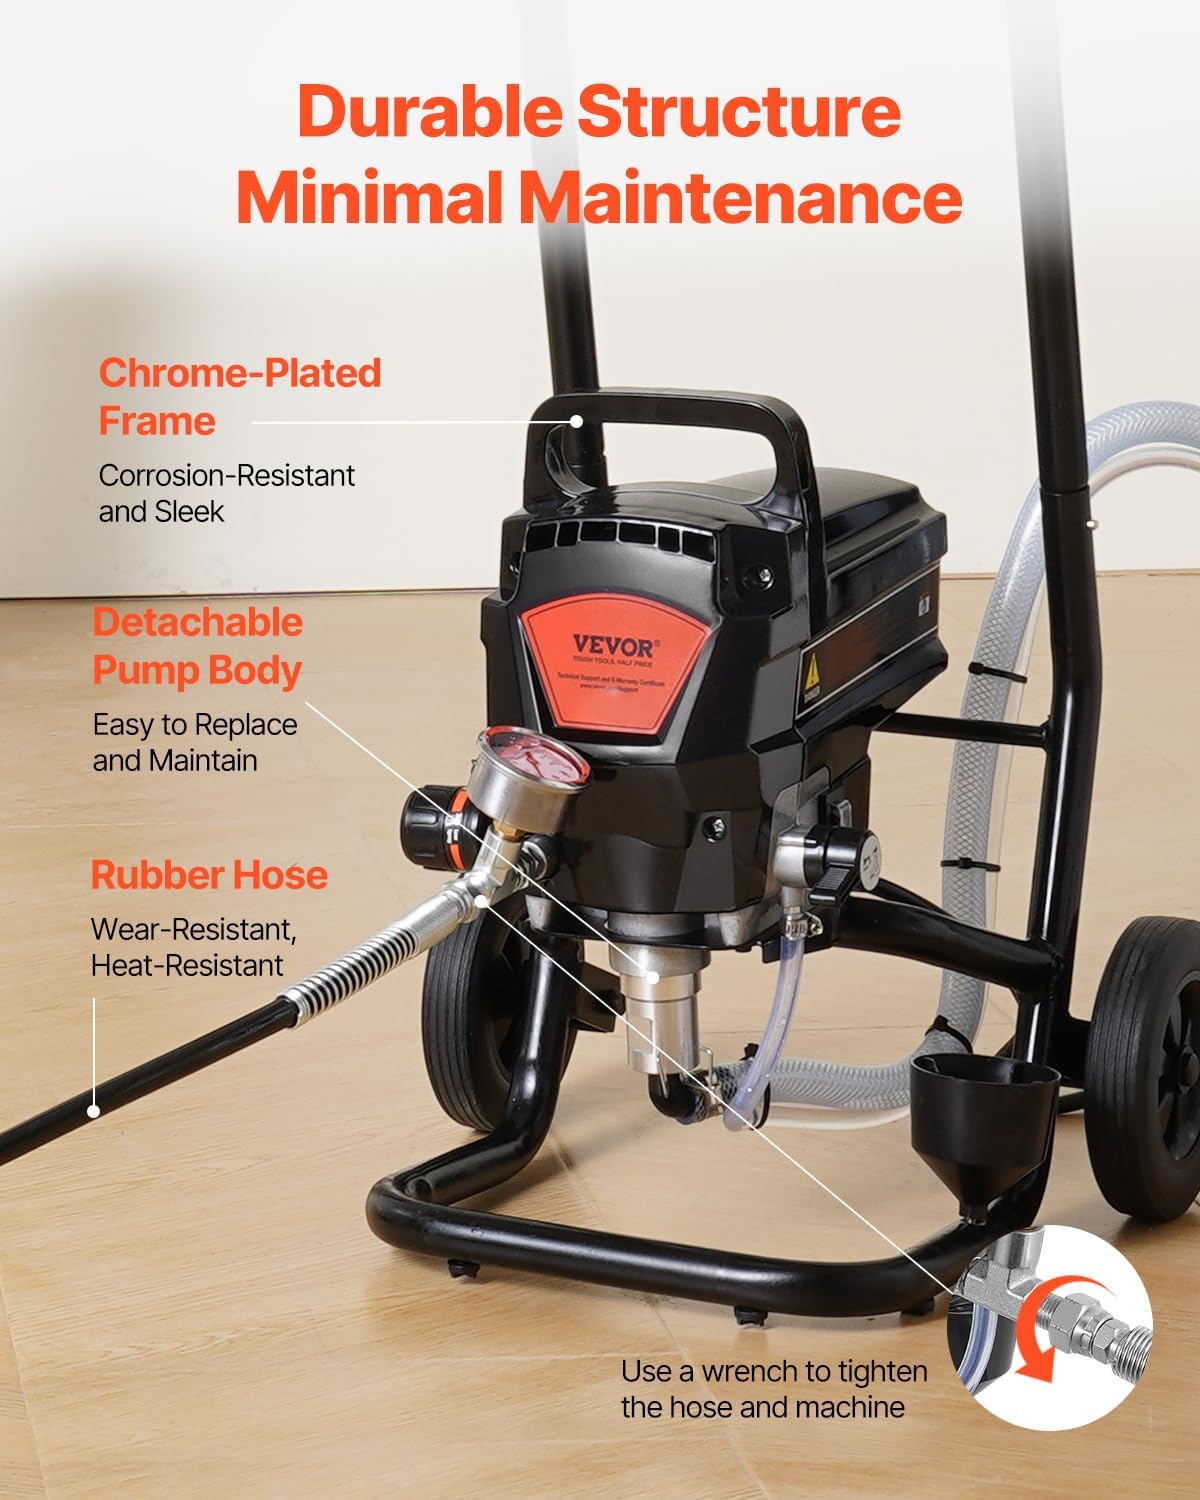
Figure 8: The sprayer features a durable structure with a chrome-plated frame, detachable pump body, and wear-resistant rubber hose for minimal maintenance.
Troubleshooting
| Problem | Possible Cause | Solution |
|---|---|---|
| No spray or low pressure | Clogged nozzle or filter; insufficient paint; air in system. | Clean nozzle and filters; ensure sufficient paint supply; prime the pump to remove air. |
| Uneven spray pattern | Worn or dirty nozzle; incorrect pressure setting; paint too thick. | Clean or replace nozzle; adjust pressure; dilute paint according to manufacturer's instructions. |
| Leaks from connections | Loose connections; worn O-rings/gaskets. | Tighten all connections with a wrench; inspect and replace worn O-rings/gaskets. |
| Sprayer not starting | No power; motor issue. | Check power connection; consult VEVOR support if motor issues persist. |
Technical Specifications
| Specification | Value |
|---|---|
| Model Number | RP8628 plus |
| Power | 950W |
| Maximum Pressure | 3000 PSI |
| Max Flow Rate | Not less than 2.0 LPM |
| High-Pressure Hose Length | 50 ft / 15 m |
| Nozzle Model | 517 |
| Product Dimensions (W x H) | 15.75"W x 37.4"H (approx. 400mm x 950mm) |
| Item Weight | 28.7 lbs / 13 kg |
| Power Source | Corded Electric |
| Material | Metal |
Warranty and Support
For technical support and e-warranty certificate, please visit the official VEVOR support website:
VEVOR is committed to providing quality tools. For any issues or inquiries, please contact VEVOR customer service.


