1. Introduction
This manual provides essential information for the proper installation, operation, and maintenance of your Hilitand Level Transmitter. Please read this manual thoroughly before using the device to ensure safe and efficient operation.
Product Features:
- Durable Construction: The liquid sensor probe features IP68 multi-layer protection, ensuring a long service life and reliable operation.
- Corrosion Resistance: Constructed from 304 stainless steel with an integrated cable, the water sensor probe is suitable for water detection and ensures safe use in non-corrosive liquids.
- Stable Output: The transmitter utilizes a full digital conditioning circuit and provides a stable 4-20mA output.
- Accurate Sensing: Equipped with input transmitters and silicon diffusers, this water transmitter provides accurate monitoring of water levels.
- Non-Clogging Design: The liquid transmitter is built with premium materials and a robust structure to prevent bending and clogging, facilitating easy cleaning.
2. Specifications
Refer to the following table for detailed technical specifications of the Hilitand Level Transmitter.
| Parameter | Value |
|---|---|
| Power Supply Voltage | 24VDC |
| Measured Medium | Water (non-corrosive liquid for stainless steel) |
| Measurement Accuracy | 0.2% FS - 0.5% FS (conventional) |
| Output | 4-20mA |
| Medium Temperature Range | -20°C to 75°C |
| Ambient Temperature Range | -30°C to 80°C |
| Temperature Compensation | -10°C to 70°C |
| Protection Rating | IP68 |
| Temperature Source Error | ±0.01%FS/°C |
| Long Term Stability | ±0.2%FS/year |
| Machine Impact Resistance | 20g (20-5000Hz) |
| Item Weight | 1.43 pounds (approx. 0.65 kg) |
| Product Dimensions | 9.45 x 9.06 x 1.97 inches (approx. 24 x 23 x 5 cm) |
| Measurement Range | 0-2 meters |
3. Setup and Installation
Follow these steps for proper installation of the level transmitter.
3.1 Unpacking and Inspection
- Carefully remove the transmitter from its packaging.
- Inspect the device for any visible damage that may have occurred during shipping. If damage is found, do not proceed with installation and contact customer support.
- Verify that all components listed in the package contents are present.
3.2 Mounting the Transmitter
The Hilitand Level Transmitter is designed for submersible applications. Ensure the sensor probe is fully immersed in the liquid for accurate readings.
- Identify a suitable location for deployment where the sensor can freely hang and measure the liquid level without obstruction.
- Secure the cable at the desired suspension point, ensuring the sensor probe reaches the lowest measurement point required.
- Ensure the cable is not kinked or subjected to excessive tension.
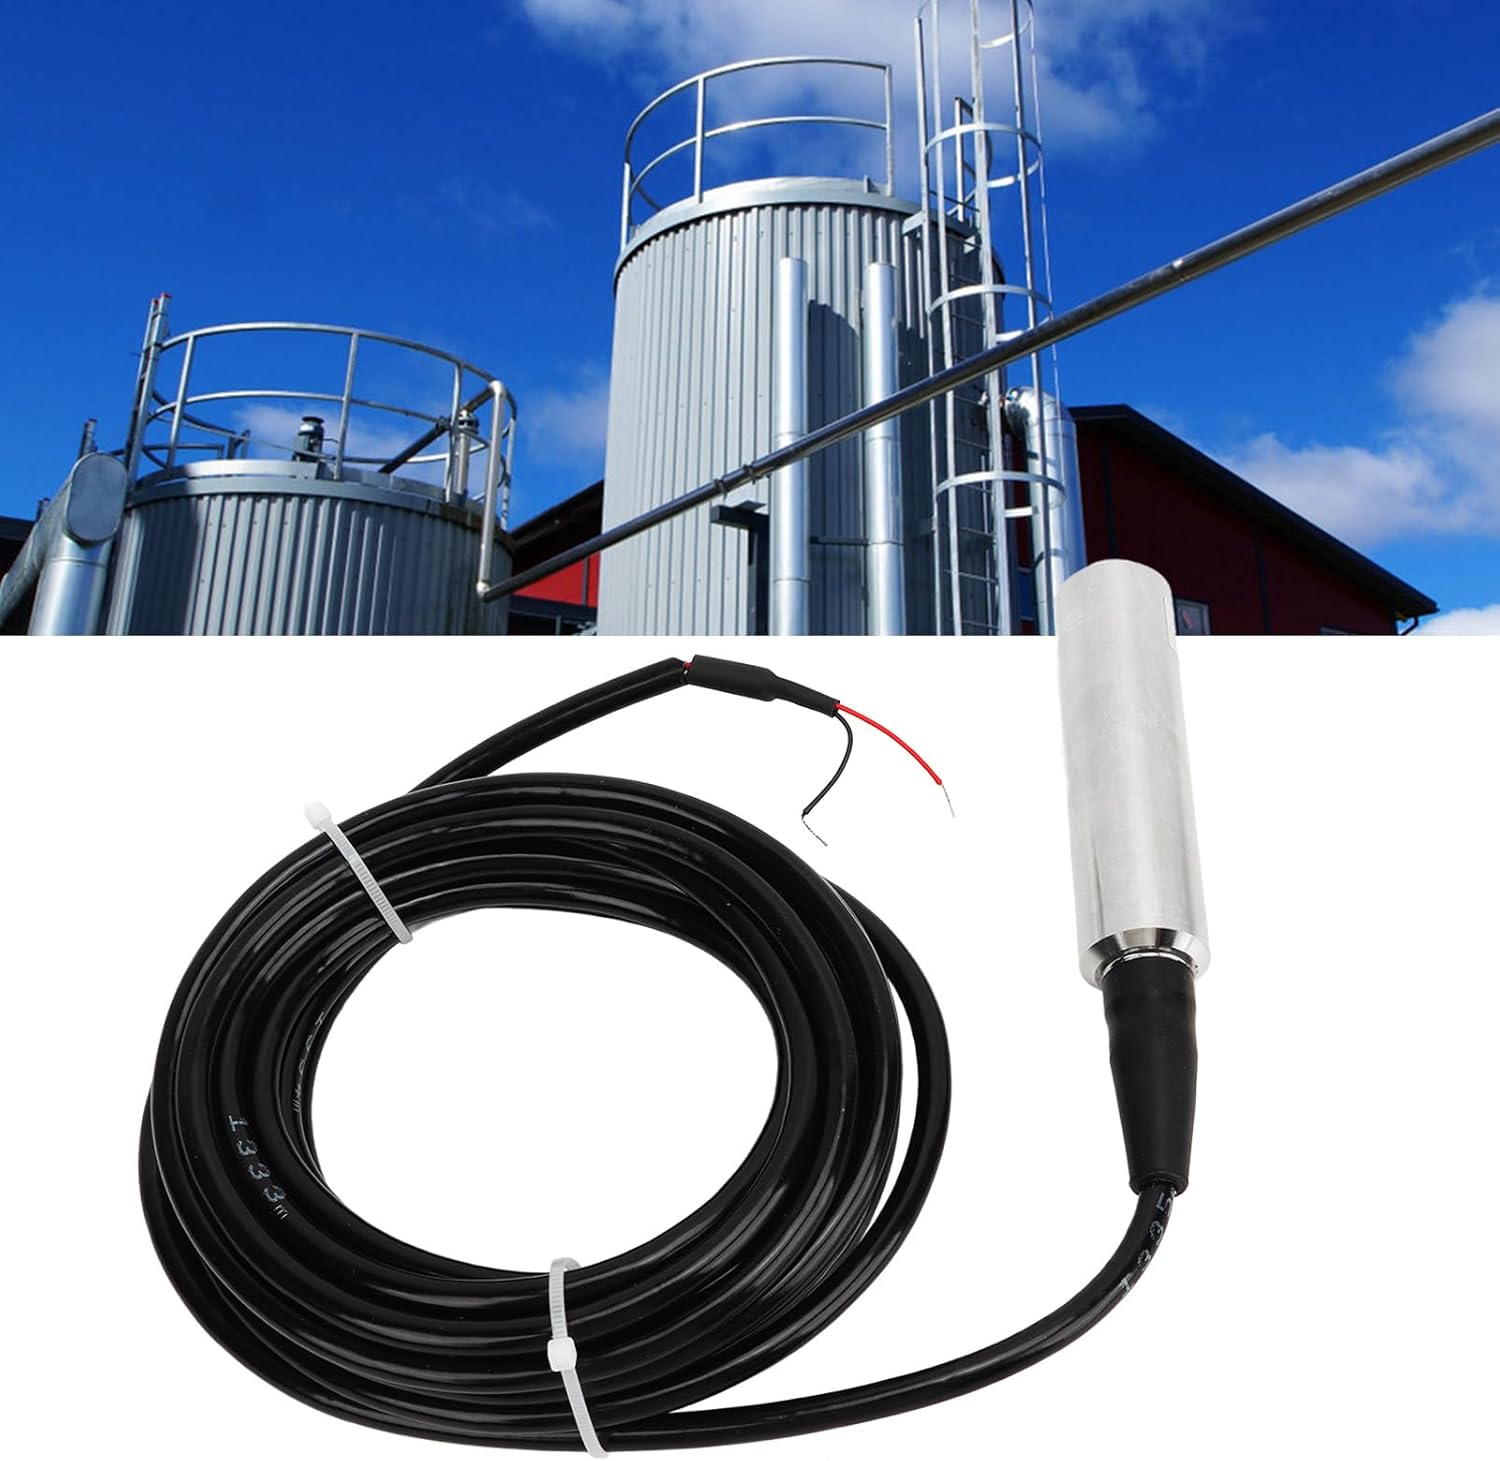
Figure 1: Hilitand Level Transmitter shown in an industrial tank environment, demonstrating typical installation.
3.3 Electrical Connection
Connect the transmitter to a 24VDC power supply and your monitoring system using the 4-20mA output.
- Power Supply: Connect the red wire to the positive (+) terminal of a 24VDC power supply.
- Signal Output: Connect the black wire to the negative (-) terminal of the 24VDC power supply and also to the signal input of your monitoring device (e.g., PLC, display unit).
- Ensure all connections are secure and properly insulated to prevent short circuits.
- Verify the power supply voltage matches the device's requirement (24VDC).

Figure 2: Detailed view of the transmitter's cable and exposed red and black wires for electrical connection.
4. Operation
Once installed and powered, the Hilitand Level Transmitter will continuously measure the liquid level and provide a 4-20mA output signal.
4.1 Reading the Output Signal
- The 4-20mA output signal corresponds to the measured liquid level within the 0-2 meter range.
- A 4mA output typically represents the minimum level (0 meters), while a 20mA output represents the maximum level (2 meters).
- Your monitoring system should be configured to interpret this 4-20mA signal and convert it into a readable liquid level measurement.
4.2 Initial Calibration (if required by your system)
While the transmitter provides a standard 4-20mA output, your specific monitoring system may require initial calibration or scaling to accurately display the liquid level.
- Refer to the documentation of your monitoring system (e.g., PLC, HMI) for instructions on scaling 4-20mA analog inputs.
- Typically, you will set the lower range (4mA) to 0 meters and the upper range (20mA) to 2 meters.
5. Maintenance
Regular maintenance ensures the longevity and accuracy of your Hilitand Level Transmitter.
5.1 Cleaning
- Periodically remove the sensor from the liquid and inspect the probe for any buildup of debris, sediment, or foreign material.
- Clean the sensor probe gently with a soft cloth and mild detergent if necessary. Avoid abrasive materials or harsh chemicals that could damage the stainless steel or sensor elements.
- Rinse thoroughly with clean water before re-deploying.
5.2 Inspection
- Regularly inspect the cable for any signs of wear, cuts, or damage.
- Check electrical connections for corrosion or looseness.
- Ensure the mounting point is secure and the sensor is properly suspended.

Figure 3: Top-down view of the level transmitter, useful for inspecting the sensor head and cable condition.
6. Troubleshooting
This section addresses common issues you might encounter with the Hilitand Level Transmitter.
| Problem | Possible Cause | Solution |
|---|---|---|
| No output signal (0mA) | No power supply; Incorrect wiring; Damaged cable. | Check 24VDC power supply; Verify wiring connections; Inspect cable for damage. |
| Inaccurate readings | Sensor probe fouled; Incorrect calibration in monitoring system; Sensor not fully immersed. | Clean sensor probe; Re-calibrate monitoring system; Ensure sensor is fully submerged. |
| Output stuck at 4mA or 20mA | Sensor range exceeded (liquid too low/high); Sensor fault. | Verify liquid level is within 0-2m range; If problem persists, contact support. |
| Intermittent signal | Loose electrical connections; Cable damage; Electrical interference. | Secure all connections; Inspect and replace damaged cable; Ensure proper grounding and shielding. |
7. Warranty and Support
For warranty information or technical support, please refer to the product packaging or contact Hilitand customer service through your purchase platform. Please have your model number (Hilitandgkir6y8mvo-11) and purchase date available when contacting support.


