1. Introduction
The HIKMICRO ECO-V Handheld Thermography Camera is a versatile thermal imaging device designed for various professional applications. It offers thermal, bi-spectrum image fusion, and visible light modes to meet diverse business needs. This manual provides essential information for the safe and effective operation of your ECO-V camera.
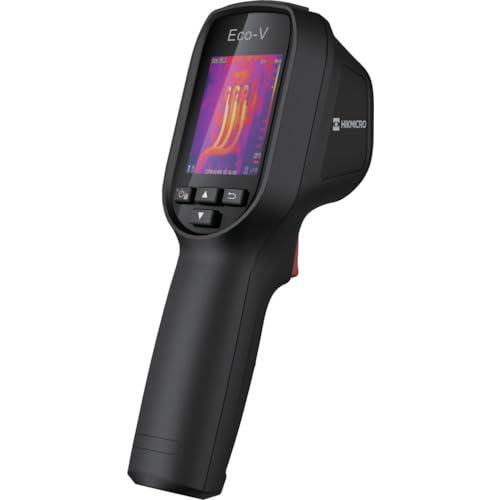
Figure 1: HIKMICRO ECO-V Handheld Thermography Camera
2. Safety Information
Please read and understand all safety warnings and instructions before using this product. Failure to follow these instructions may result in electric shock, fire, or serious injury.
General Safety Precautions
- Do not operate the device in explosive atmospheres, such as in the presence of flammable liquids, gases, or dust.
- Keep the device away from water and other liquids.
- Do not attempt to open or modify the device. Refer all servicing to qualified personnel.
- Use only HIKMICRO-approved accessories.
- Avoid direct exposure of the thermal lens to strong light sources (e.g., sun, laser) as this may damage the detector.
Battery Safety
- The device contains a built-in Lithium-ion battery. Do not expose the battery to excessive heat, direct sunlight, or fire.
- Do not puncture, open, or disassemble the battery.
- Charge the battery only with the provided USB cable and a compatible power adapter.
- Dispose of batteries according to local regulations.
3. Package Contents
The HIKMICRO ECO-V package includes the following items:
- HIKMICRO Handheld Thermography Camera ECO-V
- USB Type-C Cable
- Quick Start Guide (not explicitly mentioned but standard)
- Calibration Certificate (not explicitly mentioned but standard)
Video 3.1: Unboxing the HIKMICRO M-Series (similar to ECO-V, showing typical package contents and device appearance).
4. Device Overview
Familiarize yourself with the physical components and interface of your HIKMICRO ECO-V camera.
Appearance and Interface
The ECO-V features a compact, ergonomic design for comfortable handheld use. Key components include the thermal lens, optical lens, laser indicator, white light, trigger button, navigation buttons, and a 2.4-inch display.
Video 4.1: This video demonstrates the physical appearance and interface of a HIKMICRO M-Series camera, which shares similar design elements and interface components with the ECO-V.
5. Setup
5.1 Charging the Device
Before initial use, fully charge the device's built-in Lithium-ion battery.
- Connect the provided USB Type-C cable to the device's USB port.
- Connect the other end of the USB cable to a compatible power adapter (5V2A recommended) and plug it into a power outlet.
- The charging indicator will show red during charging and turn green when fully charged.
Video 5.1: This HIKMICRO ECO operation video demonstrates the charging process for the device.
5.2 Power On/Off
To power on the device, press and hold the power button for more than 6 seconds. To power off, press and hold the power button again until the device shuts down.
Video 5.2: This HIKMICRO ECO operation video demonstrates how to power on the device.
6. Operating Instructions
This section covers the basic and advanced operational features of your ECO-V camera.
6.1 Image Capture and Display
To capture a thermal image, aim the camera at the target and press the trigger button. The captured image will be saved to the internal EMMC storage. To view saved images, navigate to the 'Albums' section in the menu.
Video 6.1: This HIKMICRO ECO operation video demonstrates image capture and viewing saved snapshots.
6.2 Measurement Tools
The ECO-V provides various measurement tools to analyze thermal images:
- Hot Spot: Automatically identifies and displays the highest temperature point.
- Cold Spot: Automatically identifies and displays the lowest temperature point.
- Center Spot: Displays the temperature at the center of the screen.
Video 6.2: This HIKMICRO ECO operation video demonstrates the use of measurement tools like hot, cold, and center spots.
6.3 SuperIR Image Enhancement
SuperIR technology enhances the thermal image resolution, providing more detail for analysis. You can enable or disable this feature in the settings menu.
Video 6.3: This HIKMICRO ECO operation video demonstrates how to enable and use the SuperIR image enhancement feature.
6.4 Image Modes
The ECO-V supports multiple image modes for different inspection needs:
- Thermal: Displays only the thermal image.
- Fusion: Blends the thermal and visible light images for enhanced detail.
- PIP (Picture-in-Picture): Overlays a smaller thermal image on a visible light image.
- Optical: Displays only the visible light image.
Video 6.4: This HIKMICRO B10S product video demonstrates switching between different image modes, including Thermal, Fusion, PIP, and Optical.
6.5 Parallax Correction
When using fusion modes, adjust the parallax correction based on the distance to the target to ensure accurate alignment between thermal and visible images.
Video 6.5: This HIKMICRO B10S product video demonstrates how to adjust parallax correction for accurate image fusion.
6.6 Palette Adjustment
Select from various color palettes (e.g., White Hot, Black Hot, Rainbow, Ironbow) to visualize temperature differences more effectively. This can be adjusted in the settings menu.
Video 6.6: This HIKMICRO B10S product video demonstrates how to adjust color palettes.
6.7 Emissivity and Distance Settings
For accurate temperature measurements, it is crucial to set the correct emissivity value for the target material and the distance to the target. Refer to the general emissivity reference table in the specifications section.
Video 6.7: This HIKMICRO ECO operation video demonstrates setting emissivity and distance for accurate temperature readings.
6.8 Laser Pointer
The built-in laser pointer helps to precisely identify the measurement target. It can be enabled or disabled in the settings menu.
Video 6.8: This HIKMICRO ECO operation video demonstrates how to enable and use the laser pointer.
6.9 High Temperature Alarm
Set a high temperature alarm threshold to be notified when temperatures exceed a predefined limit. This feature is useful for identifying potential overheating issues.
Video 6.9: This HIKMICRO B10S product video demonstrates how to set a high temperature alarm.
6.10 Hotspot Connection
The ECO-V can connect to a mobile device via Wi-Fi hotspot for live viewing and data transfer. Enable the Wi-Fi hotspot function in the device settings and connect your mobile device.
Video 6.10: This HIKMICRO M-Series video demonstrates how to establish a hotspot connection with a mobile device.
6.11 HIKMICRO Viewer App Connection
Download the HIKMICRO Viewer app on your mobile device to access live view, manage images and videos, and generate reports. Connect the device to your phone via Wi-Fi.
Video 6.11: This HIKMICRO Pocket series video demonstrates connecting the device to the HIKMICRO Viewer app for various functions.
7. Maintenance
7.1 Cleaning
- Wipe the device body with a soft, damp cloth. Do not use abrasive cleaners or solvents.
- Gently clean the lenses with a lens cleaning cloth. Avoid touching the lens surface with bare hands.
7.2 Storage
- Store the device in a cool, dry place, away from direct sunlight and extreme temperatures.
- If storing for an extended period, ensure the battery is partially charged (around 50%) and recharge it every few months to maintain battery health.
8. Troubleshooting
If you encounter issues with your HIKMICRO ECO-V, refer to the following common problems and solutions:
| Problem | Possible Cause | Solution |
|---|---|---|
| Device does not power on | Low battery; Device malfunction | Charge the battery; Contact support |
| Inaccurate temperature readings | Incorrect emissivity/distance settings; Dirty lens | Adjust emissivity/distance; Clean the lens |
| Cannot connect to Wi-Fi hotspot | Incorrect password; Hotspot not enabled | Verify password; Enable hotspot in settings |
9. Specifications
Detailed technical specifications for the HIKMICRO ECO-V camera:
| Feature | Specification |
|---|---|
| Model | ECO-V |
| Measurement Temperature Range | -20°C to 550°C |
| Minimum Temperature Display | 0.1°C |
| Field of View (FOV) | 50° × 50° |
| Spatial Resolution (IFOV) | 8.89 mrad |
| Operating Temperature Range | -10°C to 50°C |
| Storage Temperature Range | -40°C to 70°C |
| Display Size | 2.4 inches |
| Power Source | Built-in Lithium-ion battery |
| Battery Operating Time | 8 hours |
| Wi-Fi | Not available |
| Protection Level | IP54 |
| Interface | USB Type-C |
| Pixel Pitch | 12μm |
| Measuring Wavelength | 7.5-14μm |
| NETD | < 40 mK (@ 25°C, F#=1.0) |
| Focal Length | 1.35 mm |
| Aperture | F1.0 |
| Minimum Focus Distance | 0.1m (0.33ft) |
| Frame Rate | 25Hz |
| Focus System | Focus-free |
| Recording Media | EMMC (4GB) |
| Image Storage Capacity | 30,000 images |
| Image File Format | BMP (includes measurement data) |
| Thermal Image Resolution | 96×96 (9,216 pixels) |
| Visible Image Resolution | 640×480 |
| Accuracy | ±2°C or ±2% (whichever is greater), when ambient temperature is 15°C to 35°C and target temperature is 0°C or above. |
| Materials | Polycarbonate, ABS resin |
| Weight | 360g |
General Emissivity Reference
| Material | Emissivity |
|---|---|
| Human Skin | 0.98 |
| PCB | 0.91 |
| Cement Concrete | 0.95 |
| Ceramics | 0.92 |
| Rubber | 0.95 |
| Paint | 0.93 |
| Wood | 0.85 |
| Brick | 0.96 |
| Sand | 0.90 |
| Soil | 0.92 |
| Cotton | 0.98 |
| Cardboard | 0.90 |
| White Paper | 0.96 |
| Water | 0.96 |
10. Warranty and Support
HIKMICRO products are covered by a limited warranty. For detailed warranty terms and conditions, please refer to the official HIKMICRO website or contact your local distributor.
Customer Support
If you require technical assistance, troubleshooting, or have questions about your ECO-V camera, please contact HIKMICRO customer support through their official website or the contact information provided in your product packaging.


