
GRAUGEAR G-M2U4-40G-F
GRAUGEAR 40Gbps M.2 NVMe SSD Enclosure User Manual
Model: G-M2U4-40G-F
1. Introduction
This manual provides detailed instructions for the installation, operation, and maintenance of your GRAUGEAR 40Gbps M.2 NVMe SSD Enclosure. This high-performance enclosure is designed for M.2 NVMe SSDs, offering ultra-fast data transfer speeds up to 40Gbps via USB4 and Thunderbolt 4/3 compatibility. It features an advanced cooling system with a built-in fan and dual-pipe heatsink to ensure optimal performance and longevity of your SSD.

Figure 1: GRAUGEAR 40Gbps M.2 NVMe SSD Enclosure with included cables.
2. Package Contents
Please verify that all items listed below are included in your package. If any items are missing or damaged, please contact GRAUGEAR customer support.
- GRAUGEAR 40Gbps M.2 NVMe SSD Enclosure (G-M2U4-40G-F)
- USB-C to USB-C Cable
- Screw driver
- Screw set
- Thermal pad
- User Manual (this document)
- Service Card

Figure 2: The retail packaging of the GRAUGEAR enclosure, indicating included accessories.
3. Features
- 40Gbps Ultra High Speed: Supports USB 4.0 with ASM2464PD chipset for data transmission speeds up to 40Gbps. Compatible with Thunderbolt 4/3 and backward compatible with USB 3.2/3.1/3.0/2.0.
- Efficient Heat Dissipation: Features a built-in cooling fan, copper heat pipes, and an aluminum heatsink to prevent SSD overheating and maintain high transfer rates.
- Optimal Cooling: Highly optimized 30mm fan with low-noise operation reduces M.2 SSD heat by up to 60%.
- Direct Touch Heatpipes: Dual copper heat pipes with Direct Touch Heatpipes (DTH) technology ensure even and fast heat conduction from the SSD.
- Stability and Safety: Advanced ASM2464PD controller provides short-circuit, over-current, and multi-protection for data safety.
- Auto Sleep Function: Automatically enters sleep mode after 10 minutes of inactivity to conserve power and extend SSD lifespan.

Figure 3: Key features of the GRAUGEAR 40Gbps M.2 NVMe SSD Enclosure, including speed, chip, auto-sleep, heat pipe, and fan.

Figure 4: Illustration of the direct contact heat pipe technology for efficient heat transfer.
4. Compatibility
4.1 Supported SSD Types
The GRAUGEAR enclosure exclusively supports M.2 NVMe SSDs with a form factor of 2280mm (22mm width, 80mm length). It does not support M.2 SATA/SATA SSDs or other NVMe SSD sizes (e.g., 2230, 2242, 2260).

Figure 5: Visual guide indicating support for 2280 M-Key NVMe/PCIe SSDs only.
4.2 Compatible Devices and Operating Systems
The enclosure is compatible with a wide range of devices and operating systems, leveraging its USB-C (USB4) interface.

Figure 6: Overview of compatible devices (Desktop, Laptop, PS5, iPad, iPhone, Smart TV, Router, Computer, Tablet) and operating systems (Windows, macOS, iPadOS, Android, Linux).

Figure 7: Detailed system requirements for various operating systems and CPU architectures.
For optimal 40Gbps transfer speeds, ensure your device has a USB 4.0 or Thunderbolt 4 interface and that your operating system and NVMe firmware are updated to the latest versions. Backward compatibility will limit the speed, and some older devices may not recognize the enclosure.
5. Setup and Installation
Follow these steps to install your M.2 NVMe SSD into the GRAUGEAR enclosure.
- Prepare the Enclosure: Using the provided screwdriver, carefully remove the screws securing the enclosure's cover. Gently slide open the enclosure to reveal the internal M.2 slot.
- Install the SSD: Align your 2280 M.2 NVMe SSD with the M-Key slot inside the enclosure. Insert the SSD firmly but gently into the slot at an angle. Once seated, press down the end of the SSD and secure it with the provided screw.
- Apply Thermal Pad: Peel off the protective films from both sides of the thermal pad. Carefully place the thermal pad onto the top surface of the installed SSD, ensuring it covers the main controller chip and NAND flash modules for effective heat transfer.
- Reassemble the Enclosure: Carefully slide the enclosure cover back into place, ensuring it aligns correctly. Secure the cover with the screws you removed earlier.
- Connect to Device: Use the provided USB-C to USB-C cable to connect the enclosure to your computer or compatible device.
Important Note:
- Ensure the SSD is correctly oriented before insertion to prevent damage.
- Only 2280 M-Key NVMe SSDs are supported. Attempting to install other types may damage the enclosure or SSD.
- For new SSDs, you may need to initialize and format the drive through your operating system's Disk Management (Windows) or Disk Utility (macOS) before it can be used.
6. Operating Instructions
6.1 Connecting and Disconnecting
Connect the enclosure to your device using the supplied USB-C cable. The enclosure is plug-and-play and should be recognized automatically by compatible operating systems. To safely disconnect, always eject the drive through your operating system's safe removal procedure before unplugging the cable.
6.2 Data Transfer
Once connected and recognized, the SSD in the enclosure will appear as an external drive. You can drag and drop files, copy, paste, and perform other file operations as you would with any other storage device.
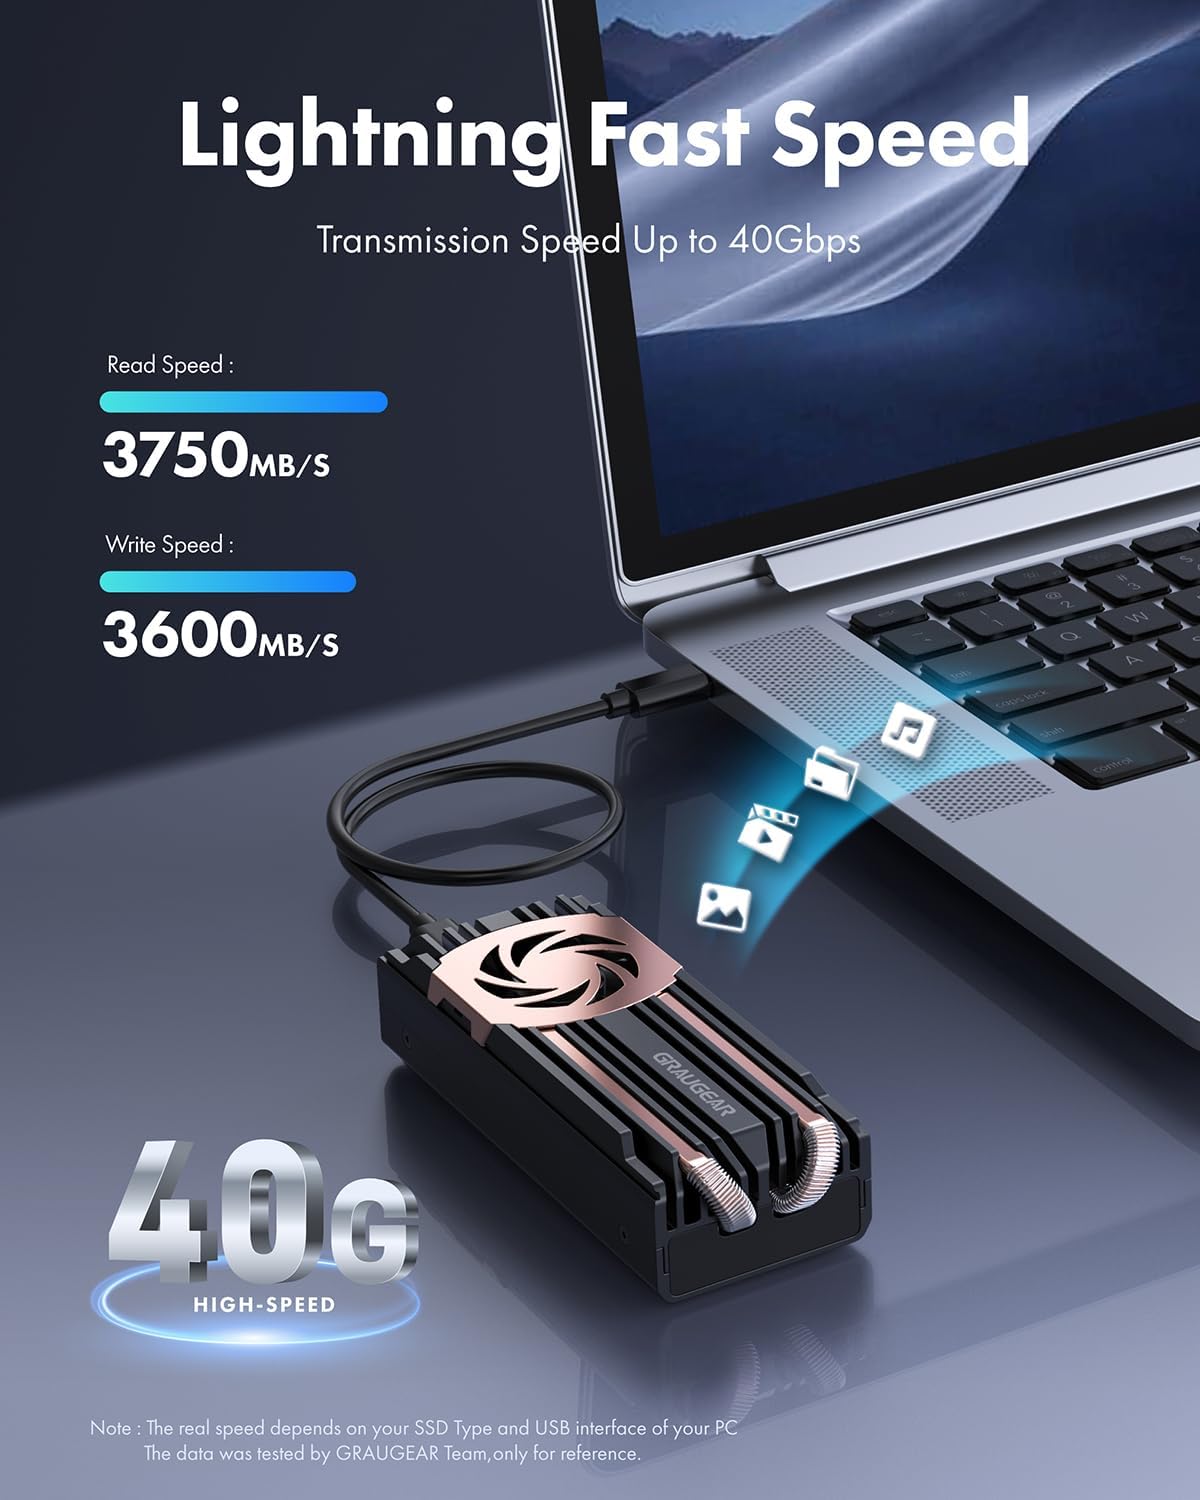
Figure 8: The enclosure connected to a laptop, demonstrating high-speed data transfer capabilities (up to 40Gbps).

Figure 9: Example of measured transmission speeds, showcasing the enclosure's performance with a high-end SSD.
6.3 LED Indicator
The enclosure features an LED indicator for power and activity status. Refer to the following table for LED behavior:
| LED Status | Meaning |
|---|---|
| Solid Blue | Power On / Idle |
| Flashing Blue | Data Transfer / Activity |
| Off | No Power / Sleep Mode |
7. Maintenance
Proper maintenance ensures the longevity and optimal performance of your GRAUGEAR SSD enclosure.
- Cleaning: Use a soft, dry cloth to clean the exterior of the enclosure. Avoid liquid cleaners or abrasive materials.
- Cooling System: The built-in fan and heatsink are designed for efficient cooling. Ensure the fan vents are not obstructed to allow proper airflow.
- Temperature Management: While the enclosure has an active cooling system, avoid operating it in excessively hot environments or direct sunlight.
- Firmware Updates: Periodically check the GRAUGEAR website (www.graugear.de) for any firmware updates for the enclosure's controller chip (ASM2464PD) to ensure continued compatibility and performance.

Figure 10: Graph illustrating the temperature reduction achieved by the built-in cooling fan compared to other solutions.
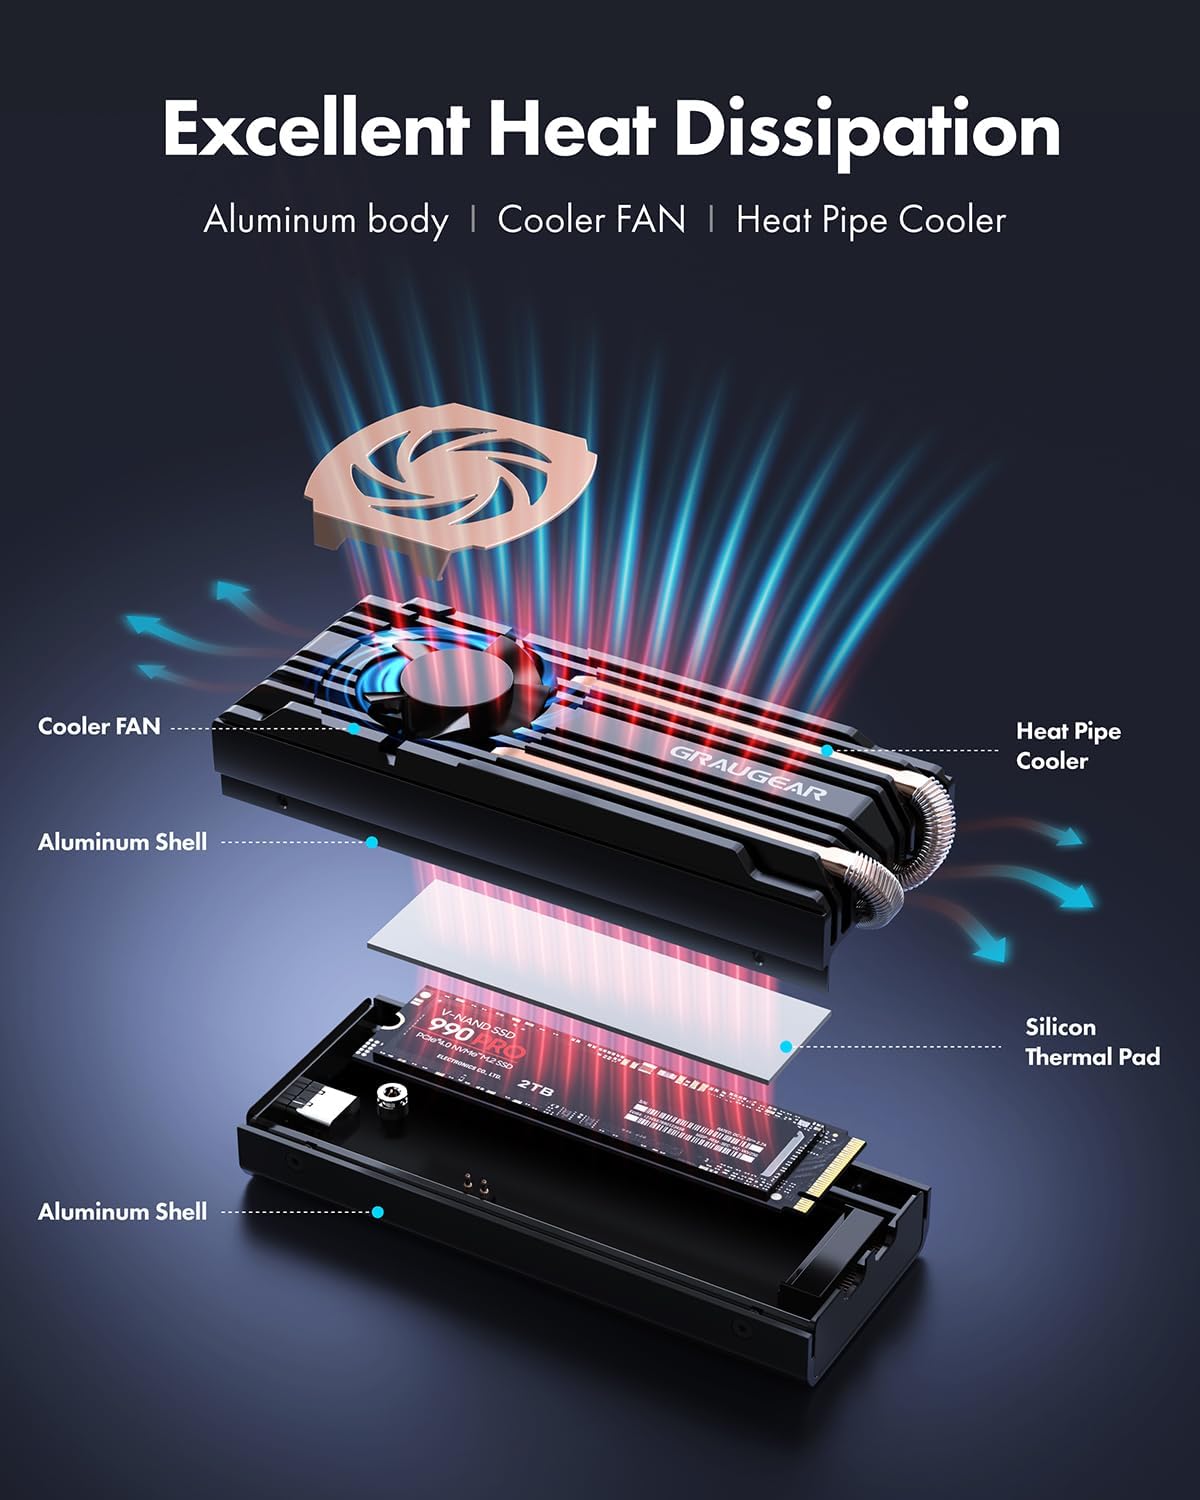
Figure 11: Exploded view showing the aluminum body, cooler fan, heat pipe cooler, and silicon thermal pad contributing to excellent heat dissipation.
8. Troubleshooting
If you encounter issues with your GRAUGEAR SSD enclosure, refer to the following common problems and solutions:
| Problem | Possible Cause / Solution |
|---|---|
| Enclosure not recognized by computer. |
|
| Slow data transfer speeds. |
|
| Enclosure feels hot. |
|
| Fan making unusual noise. |
|
9. Specifications
Detailed technical specifications for the GRAUGEAR 40Gbps M.2 NVMe SSD Enclosure (Model: G-M2U4-40G-F).
| Feature | Detail |
|---|---|
| Model Number | G-M2U4-40G-F |
| Internal Interface | M.2 M-Key (PCIe Gen4x4) |
| External Interface | USB4 (USB-C) |
| Controller Chipset | ASM2464PD |
| Supported SSD | M.2 NVMe SSD 2280 |
| Max Data Transfer Rate | 40Gbps (USB4) |
| Max Memory Storage Capacity | 8 TB |
| Cooling System | Built-in 30mm Fan, Dual Copper Heat Pipes, Aluminum Heatsink |
| Material | Aluminum, Metal |
| Color | Black |
| Product Dimensions (L x W x H) | 3.21" x 1.65" x 1.02" (8.15 cm x 4.19 cm x 2.59 cm) |
| Item Weight | 9.6 ounces (272 grams) |
| Cable Length | 35 cm / 13.78 inches |
| Manufacturer | CHAB GmbH |

Figure 12: Diagram showing the physical dimensions and key specifications of the enclosure.
10. Warranty and Support
GRAUGEAR products come with a standard warranty. For specific warranty terms and conditions, please refer to the service card included in your package or visit the official GRAUGEAR website.
For technical support, troubleshooting assistance, or warranty claims, please contact GRAUGEAR customer service:
- Website: www.graugear.de
- Email: info@graugear.de
- Phone: +49 (0)40 7163 6372 (Germany)
Please have your model number (G-M2U4-40G-F) and purchase information ready when contacting support.
Related documentsG-M2U4-40G-F


Ask a question about this manual
Ask about setup, troubleshooting, compatibility, parts, safety, or missing instructions. Manuals+ will review the question and use this page’s manual context to help answer it.