1. Introduction
This user manual provides detailed instructions for the installation, operation, maintenance, and troubleshooting of the MACHINIST LGA 1151 H110 Motherboard. Please read this manual carefully before proceeding with installation to ensure proper functionality and to avoid potential issues.
2. Product Overview
The MACHINIST H110 motherboard is designed to support Intel 6th/7th generation Core i3/i5/i7, Pentium, and Celeron Series processors with an LGA 1151 socket. It features dual-channel DDR4 memory support, NVME/SATA M.2 interfaces, and various I/O ports for a versatile desktop computing experience.
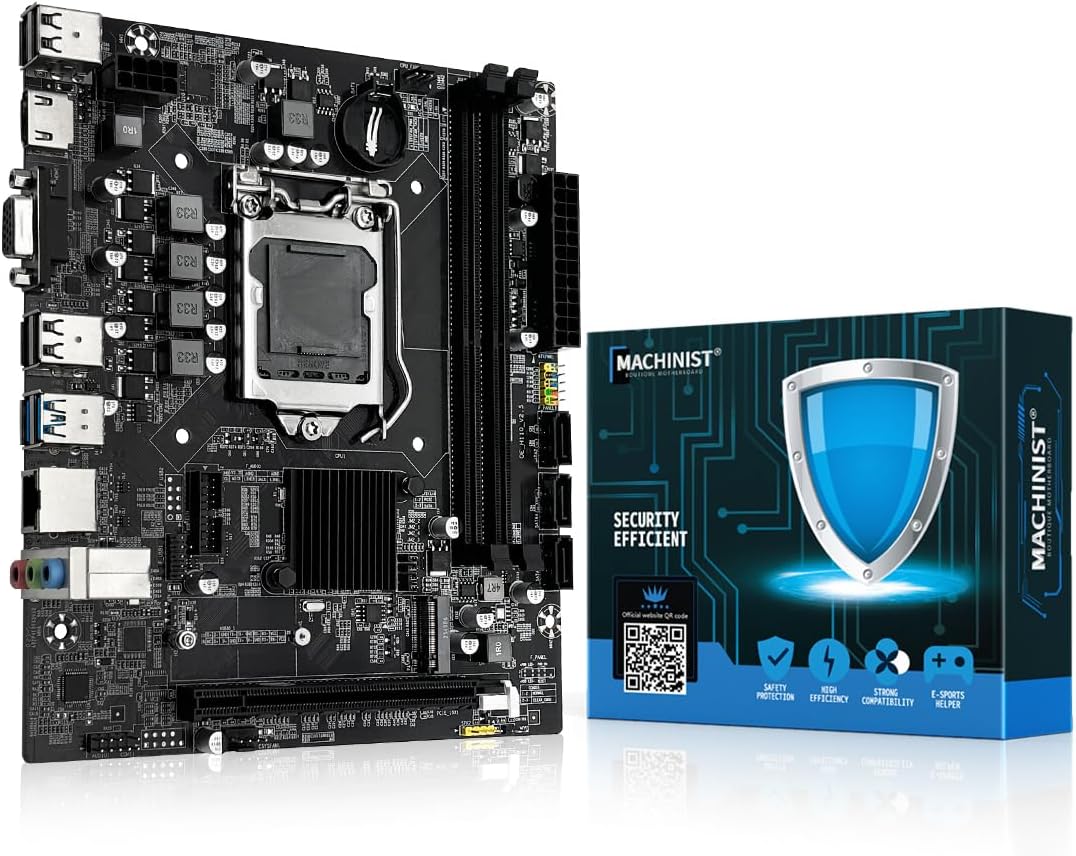
Figure 2.1: The MACHINIST H110 Motherboard alongside its retail packaging.
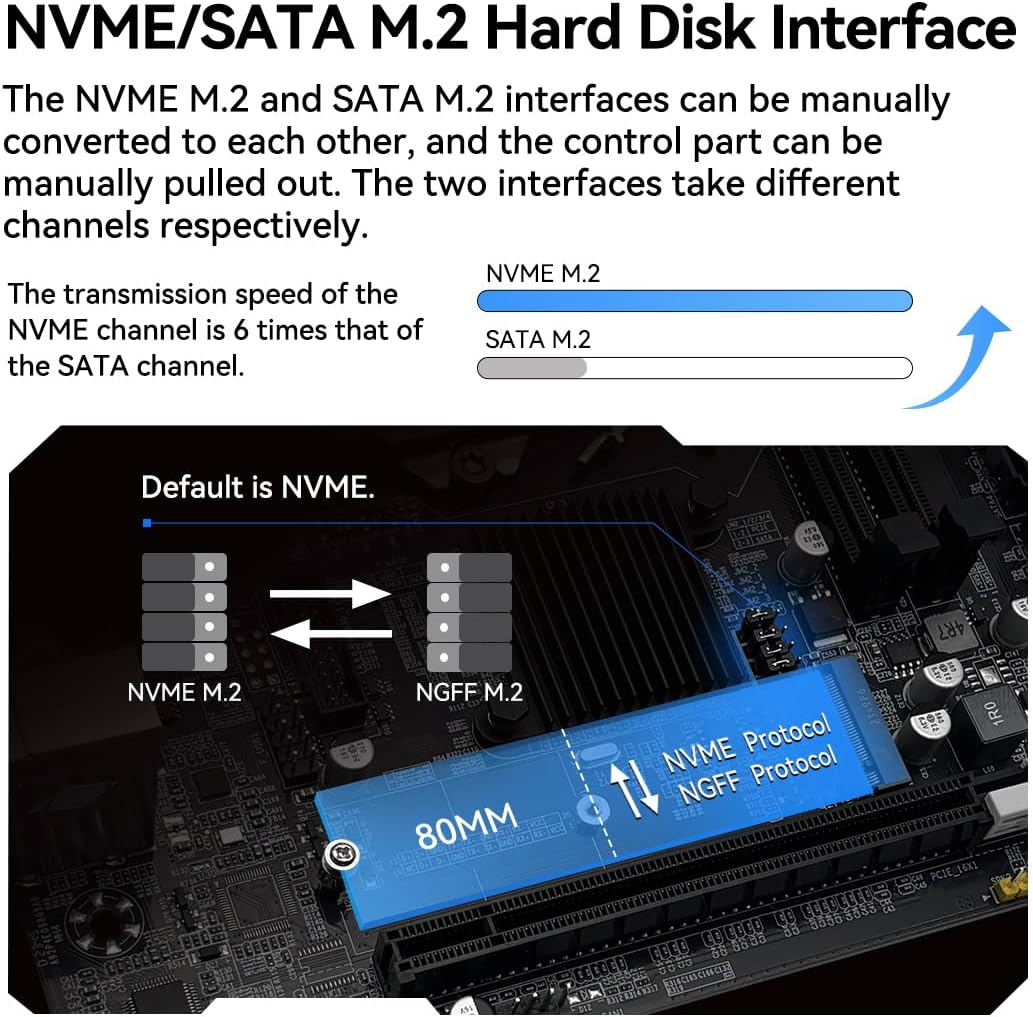
Figure 2.2: Detailed diagram of the H110 Motherboard's various interfaces and ports.
3. Key Features
- LGA 1151 Socket: Compatible with Intel 6th/7th gen Core i3/i5/i7, Pentium, Celeron Series processors. Note: Core i7 compatibility may vary; confirm your processor model.
- Dual Channel DDR4 Slot: Equipped with 2 DDR4 Non-ECC memory slots, supporting up to 2400MHz and a maximum capacity of 2x16GB (32GB total).
- NVME/SATA M.2 Interface: Supports both NVME M.2 (PCIe channel) and SATA M.2 (SATA channel) drives. These interfaces can be manually converted.
- Other Interfaces: Includes PCIe 2.0 X16 Slot, SATA 3.0, USB 3.0, VGA, and High Definition Multimedia Interface (HDMI) for 1080P video output without a dedicated graphics card (requires CPU with integrated graphics).
- Power Supply: Features a 4+1 phase power supply design with PWM Controller RT3607BC.
- PCB: Constructed with a 6-layer PCB for enhanced stability and performance.
- Network: Integrated Realtek 8111H Gigabit network card for 100M LAN connectivity.

Figure 3.1: Close-up view of the LGA 1151 CPU socket.

Figure 3.2: Illustration of the dual-channel DDR4 memory slots.

Figure 3.3: Diagram showing the NVME/SATA M.2 interface and conversion options.

Figure 3.4: Illustration of the VGA and HDMI output ports.
4. Setup and Installation
4.1. CPU Installation
- Carefully open the CPU socket retention arm.
- Align the triangular mark on your Intel LGA 1151 processor with the corresponding mark on the socket.
- Gently place the CPU into the socket without forcing it.
- Close the retention arm to secure the CPU.
- Install the CPU cooler according to its manufacturer's instructions.
4.2. Memory Installation
- Open the clips on both ends of the DDR4 memory slots.
- Align the notch on the DDR4 memory module with the key in the slot.
- Press down firmly on both ends of the memory module until the clips snap into place.
4.3. Storage Installation (M.2)
- Locate the NVME/SATA M.2 slot on the motherboard.
- If necessary, adjust the control part for NVME or SATA mode.
- Insert the M.2 drive into the slot at an angle.
- Gently push down the drive and secure it with the provided screw.
4.4. Power Connections
- Connect the 24-pin ATX power connector from your power supply to the main 24-pin power socket on the motherboard.
- Connect the 4-pin CPU power connector from your power supply to the 4-pin CPU power socket near the CPU.
4.5. I/O Connections
Connect your peripherals (USB devices, audio cables, display cables) to the appropriate ports on the motherboard's rear I/O panel. Ensure all connections are secure.
4.6. Important Note: CR2032 Battery
The CR2032 battery for the motherboard's CMOS has been removed for shipping and is not included in the package. Please purchase and install a CR2032 battery yourself before first use.
5. Operating System and Drivers
After assembling your system, install your preferred operating system. For optimal compatibility and performance, Windows 10 is recommended. Drivers for the motherboard components can often be automatically installed by Windows 10. If manual driver installation is required, tools like 'Driver Talent' are recommended for driver detection and installation.
6. Maintenance
6.1. CMOS Reset Procedure
A CMOS reset can resolve various system issues, including boot problems or incorrect BIOS settings. Follow these steps to reset the CMOS:
- Install Battery, Cut Off Power: Ensure the CR2032 battery is installed and disconnect the power supply from the motherboard.
- Short Both Pins: Locate the CMOS clear jumper (usually labeled 'CMOS1' or 'CLR_CMOS'). Use metal tweezers or another metal object to short the two pins for approximately 5 seconds to complete the reset.

Figure 6.1: Visual guide for performing a CMOS reset.
7. Troubleshooting
7.1. Common Issues and Solutions
- System Won't Power On / Fans Don't Spin:
- Verify motherboard and CPU power connections are secure.
- Confirm CPU and memory model compatibility and condition.
- Ensure memory modules are properly seated in their slots.
- If issues persist, clear the CMOS (refer to Section 6.1).
- No Display (Fans Spin, Keyboard Lights Unresponsive):
- Verify motherboard and CPU power connections.
- Ensure memory modules are properly seated.
- Confirm CPU/memory model compatibility and condition.
- If issues persist, clear the CMOS (refer to Section 6.1).
- No Display (Fans Spinning, Caps Lock Indicator Lights Up):
- Verify the monitor is powered on and the display data cable is securely connected.
- If no external graphics card (GPU) is installed, confirm your CPU supports integrated graphics.
- If an external GPU is installed, ensure the data cable is connected to its output port.
- Check the condition of the display cable, GPU, and monitor.
- If issues persist, clear the CMOS (refer to Section 6.1).
8. Specifications
| Feature | Specification |
|---|---|
| Brand | MACHINIST |
| Model Name | H110 V2.5 |
| CPU Socket | LGA 1151 |
| Compatible Processors | Intel 6-7th Gen Core i3/i5 Pentium, Celeron Series Processors on LGA 1151 Socket |
| Chipset Type | Intel H110 |
| RAM Memory Technology | DDR4 |
| Memory Clock Speed | 2 GHz (Up to 2400MHz) |
| Max Memory Capacity | 32GB (2x16GB) |
| Storage Interface | NVME/SATA M.2, SATA 3.0 (3 ports) |
| USB Interface | USB 3.0, USB 2.0 |
| Video Output | VGA, HDMI (supports 1080P) |
| LAN | 100M (Realtek 8111H Gigabit) |
| PCIe Expansion Slot | PCIe 2.0 X16 |
| Audio | Realtek LAC887 chip (Front audio, Rear audio) |
| Package Dimensions | 8.78 x 8.03 x 2.2 inches |
| Item Weight | 1.21 pounds |
| Country of Origin | China |
9. Warranty and Support
A physical user manual is not included in the product package. This digital manual serves as the primary source of information. For further support, driver downloads, or product information, please visit the official MACHINIST website:


