
1. Safety Information
Operating a plasma cutter involves significant risks. Always prioritize safety to prevent injury or damage. Read and understand all safety warnings before use.
1.1 General Safety Precautions
- Always wear appropriate Personal Protective Equipment (PPE), including a welding helmet with proper shade, flame-resistant clothing, heavy-duty gloves, and safety glasses.
- Ensure adequate ventilation in the work area to disperse fumes and gases.
- Keep a fire extinguisher readily available.
- Never operate the plasma cutter in wet conditions or near flammable materials.
- Ensure the workpiece is properly grounded.
- Do not touch live electrical parts or hot metal.
- Keep children and unauthorized personnel away from the work area.
1.2 Electrical Safety
- Connect the machine to a properly grounded power supply.
- Inspect power cords and cables for damage before each use. Do not use if damaged.
- Ensure the correct voltage (120V or 240V) is selected and the appropriate adapter is used.
1.3 Arc Ray Safety
- The plasma arc produces intense UV and IR radiation. Never look at the arc without proper eye protection.
- Protect exposed skin from arc rays to prevent burns.
2. Product Overview
The FLARING FC650D is a powerful and portable 65A plasma cutter designed for efficient metal cutting. Featuring advanced IGBT inverter technology, it offers a maximum severance cut of 4/5" (20 mm) and a clean cut of 1/2" (12.7 mm) with a 60% duty cycle. Its dual voltage capability (120V/240V) allows for versatile use in various settings without manual power source relinking. The machine is lightweight and suitable for cutting a wide range of metals, making it ideal for both DIY enthusiasts and professional applications.
2.1 Key Features
- Advanced IGBT Inverter Technology: Ensures stable and efficient cutting performance.
- High Cutting Capacity: Max severance cut up to 20mm (4/5"), ideal clean cut up to 12.7mm (1/2").
- Dual Voltage (120V/240V): Automatic voltage sensing for flexible power input.
- Wide Material Compatibility: Suitable for aluminum, magnesium alloys, brass, stainless steel, cast iron, steel, copper, and titanium.
- Portable & Lightweight: Weighs only 6.74 kg (8.4 lbs machine only), easy to transport.
- Automatic Arc Control: Reduces user fatigue and improves cutting consistency.

Figure 1: FLARING FC650D Plasma Cutter main unit.
3. Package Contents
Verify that all items listed below are included in your package:
- FC650D Plasma Cutter Equipment
- PT31 Torch and flexible cable with quick connect
- Heavy-duty work clamp and flexible cable with quick connect
- Air regulator and hose
- Extra 4 electrodes
- Extra 4 tips
- Power adapter for 120V/240V conversion
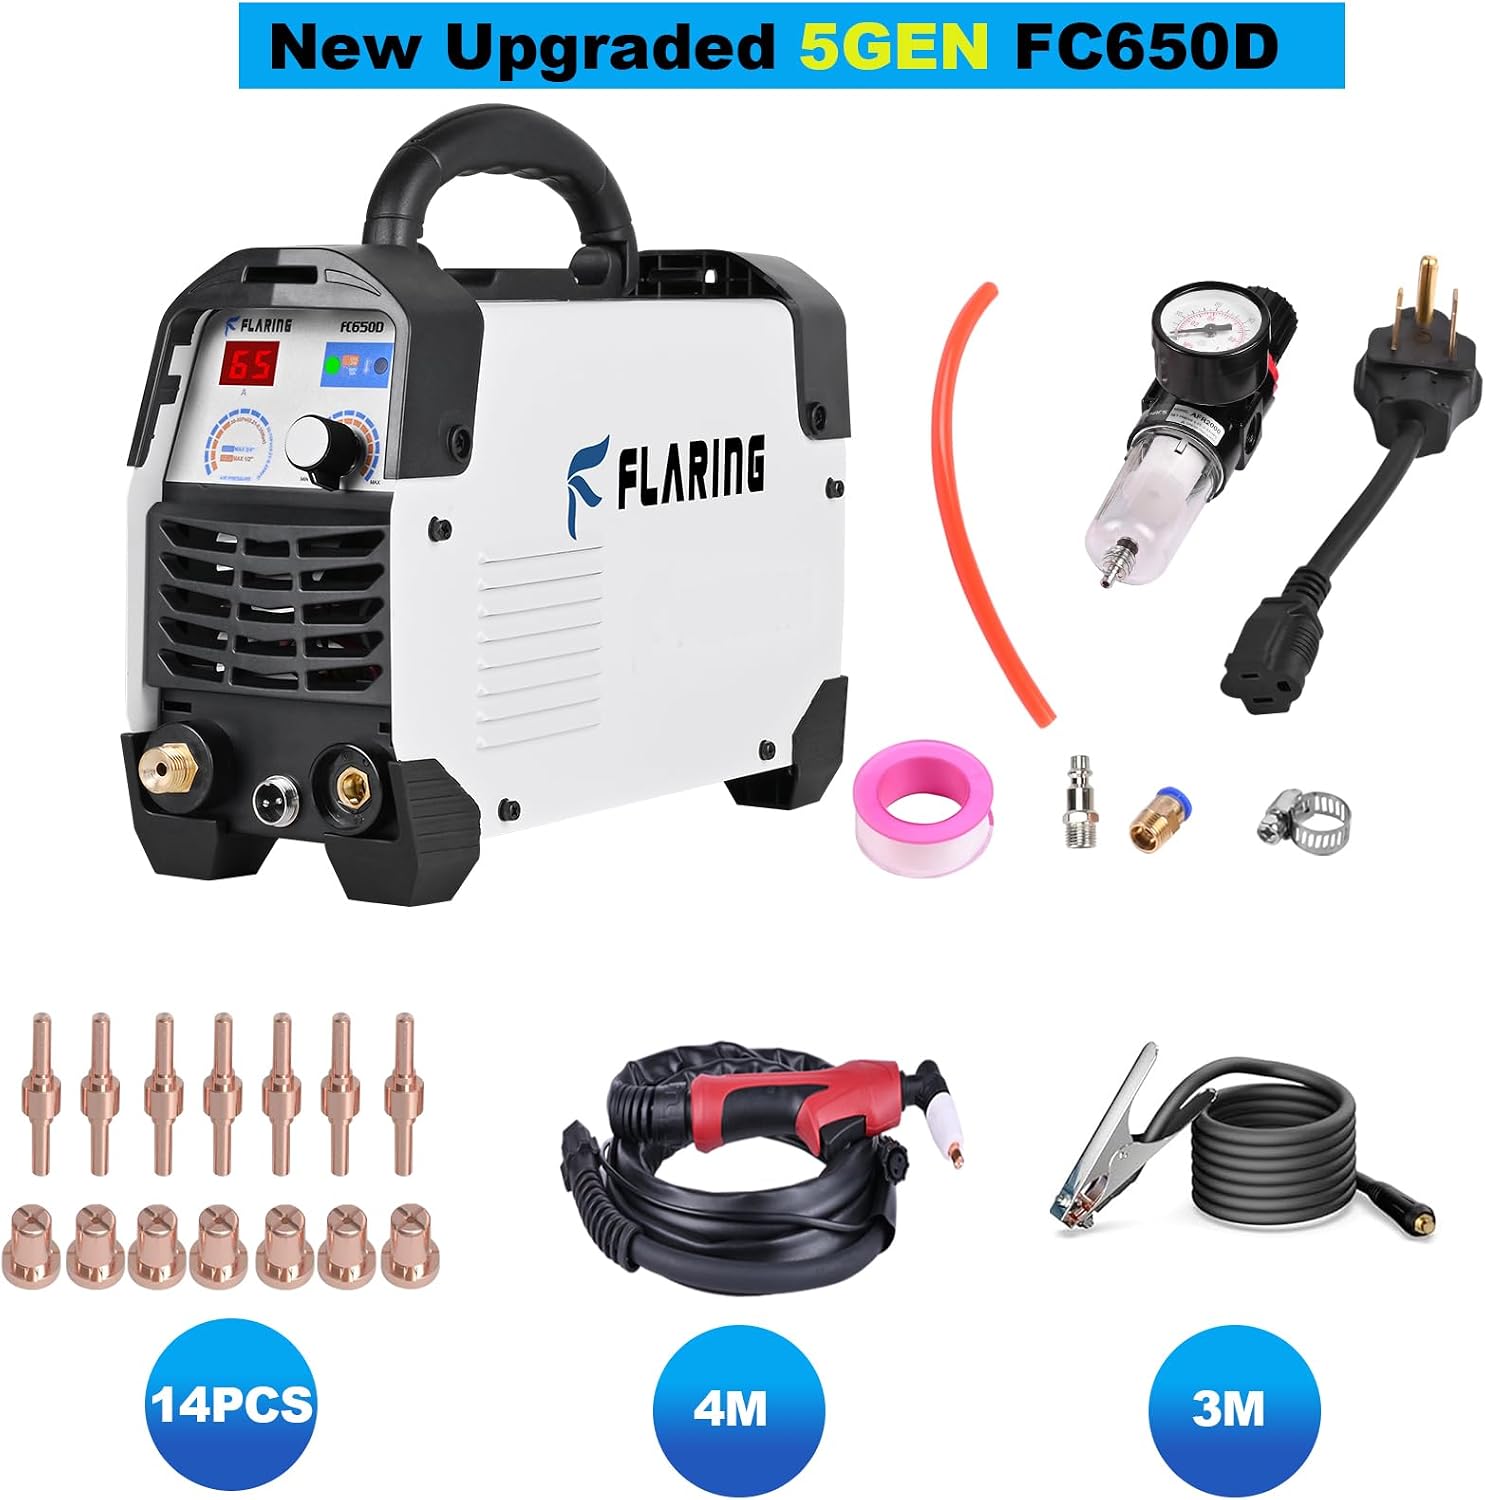
Figure 2: All included accessories with the plasma cutter.
4. Setup
Follow these steps to set up your FLARING FC650D Plasma Cutter:
4.1 Connecting the Torch and Ground Clamp
- Connect the PT31 Torch to the designated torch connector on the front panel of the plasma cutter. Ensure it is securely tightened.
- Connect the heavy-duty work clamp cable to the ground terminal on the front panel. Securely attach the clamp to the workpiece or a clean, bare metal part of the work table.

Figure 3: Front panel showing torch and ground clamp connections.
4.2 Air Compressor and Filter Connection
A clean, dry air supply is crucial for optimal performance and longevity of your plasma cutter.
- Attach the air regulator and hose to the air inlet on the rear panel of the plasma cutter.
- Connect your air compressor to the air regulator. Ensure the air pressure is set according to the recommended specifications (refer to Section 8: Specifications).
Video 1: Demonstrates the proper connection of the air compressor filter to a plasma cutter.
4.3 Power Connection
The FC650D supports dual voltage input (120V or 240V).
- Identify your power source (120V or 240V).
- Use the appropriate power cable and adapter provided. The machine automatically detects the voltage.
- Plug the power cable into a properly grounded electrical outlet.
5. Operating Instructions
Before operating, ensure all safety precautions are followed and the setup is complete.
5.1 Basic Operation
- Turn on the plasma cutter using the power switch.
- Adjust the amperage knob to the desired setting based on the material thickness and type. Refer to the cutting chart in Section 8: Specifications for guidance.
- Position the torch nozzle approximately 1/8" to 1/4" (3-6mm) from the workpiece. For touch arc models, the nozzle can lightly touch the material.
- Press the torch trigger to initiate the plasma arc. Move the torch steadily along the desired cut line.
- Maintain a consistent travel speed. Too slow will result in a wide, rough cut; too fast will result in an incomplete cut.
- Release the trigger to stop the arc.

Figure 4: Proper technique for cutting metal with the plasma torch.
5.2 Cutting Thickness Guidelines
The FC650D is capable of cutting various thicknesses depending on the power input:
- 240V Input: Up to 20mm (4/5") severance cut, 12.7mm (1/2") clean cut.
- 120V Input: Reduced capacity, typically up to 15mm (3/5") severance cut, 9.5mm (3/8") clean cut.

Figure 5: Visual representation of cutting capabilities at different thicknesses.
Video 2: Demonstrates the FLARING Touch Arc Plasma Cutter cutting aluminum sheet.
Video 3: Shows the FC650DL model cutting 20mm thick material at 220V.
6. Maintenance
Regular maintenance ensures the longevity and optimal performance of your plasma cutter.
6.1 Consumable Replacement
The torch consumables (electrode, tip, swirl ring, shield cup) wear out over time and need to be replaced. Worn consumables can lead to poor cut quality and reduced performance.
- Ensure the machine is powered off and disconnected from the power supply.
- Unscrew the shield cup from the torch head.
- Remove the old tip and electrode.
- Install new electrode and tip, ensuring they are seated correctly.
- Reattach the shield cup.
Video 4: Guide on replacing PT31 cutting torch consumables.
Video 5: Shows a kit of plasma cutter tips and electrodes, useful for understanding replacement parts.
6.2 Air Filter Maintenance
Periodically check and drain the moisture from the air filter/regulator. If the filter element becomes clogged, replace it to ensure a clean air supply.
6.3 General Cleaning
Keep the machine clean and free from dust and metal particles. Use compressed air to blow out internal components if necessary, ensuring the machine is unplugged.
7. Troubleshooting
This section addresses common issues you might encounter with your plasma cutter.
| Problem | Possible Cause | Solution |
|---|---|---|
| No arc or weak arc | Worn consumables (electrode/tip), insufficient air pressure, poor ground connection, incorrect amperage setting. | Replace consumables, check air pressure (30-60 PSI recommended), ensure solid ground connection, adjust amperage. |
| Machine trips circuit breaker (especially on 120V) | Overload, insufficient circuit capacity, using too high amperage on 120V. | Reduce amperage, ensure dedicated circuit, use 240V if possible for higher power demands. |
| Rough or inconsistent cut quality | Worn consumables, incorrect travel speed, improper torch height, contaminated air supply. | Replace consumables, adjust travel speed, maintain consistent torch height, check air filter for moisture/debris. |
| Machine powers off unexpectedly | Overheating (thermal overload), internal fault. | Allow machine to cool down, ensure proper ventilation, check for internal damage if problem persists. |
8. Specifications
| Feature | Detail |
|---|---|
| Brand | FLARING |
| Model Number | FC650D-29CA-01 (FC650D) |
| Input Voltage | 120V / 240V (Dual Voltage) |
| Input Frequency | 50/60 Hz |
| Output Current | 65A Max |
| Max Severance Cut | 20mm (4/5") |
| Ideal Clean Cut | 12.7mm (1/2") |
| Duty Cycle | 60% |
| Technology | IGBT Inverter, Touch ARC |
| Product Dimensions | 30 x 10.92 x 21.01 cm |
| Item Weight | 6.74 kg |
| Included Components | Plasma cutter, PT31 Torch, Work Clamp, Air Regulator & Hose, Consumables (Electrodes, Tips) |
9. Warranty & Support
FLARING products are manufactured to high-quality standards. For warranty information, technical support, or service inquiries, please refer to the contact information provided with your purchase documentation or visit the official FLARING website.
Please retain your proof of purchase for warranty claims.


