
Jorest AJJOER1101ORDJPR1
JOREST Watch Repair Tool Kit: Comprehensive Guide for Battery Replacement, Strap Adjustment, and Watch Maintenance
Model: AJJOER1101ORDJPR1
1. Introduction
This manual provides instructions for the JOREST Watch Repair Tool Kit. This kit is designed for individuals to perform common watch maintenance tasks such as battery replacement, strap adjustment, and case opening. Familiarize yourself with each tool and its proper use before beginning any repair work.

Figure 1: Overview of the JOREST Watch Repair Tool Kit components within its storage case.
2. Kit Contents
The JOREST Watch Repair Tool Kit includes a variety of tools for different watch repair needs. Please ensure all components are present upon receipt.
- Adjustable Watch Opener (Upgraded)
- Multifunctional Screwdriver with various bits
- Watch Link Remover
- Watch Case Holder
- Spring Bar Tool
- Precision Tweezers
- Watch Hammer
- Cleaning Cloth
- Assorted Pins and Accessories
- Storage Case
3. Setup and Preparation
Before beginning any watch repair, ensure you have a clean, well-lit, and stable workspace. Lay out a soft cloth or mat to protect your watch and tools from scratches. Identify the specific tools required for your task.

Figure 2: A clean and organized workspace with the JOREST kit and a watch.
4. Operating Instructions
4.1. Opening Watch Back Covers
This kit supports opening three main types of watch back covers: screw-on, pry-off, and screw-fixed.
4.1.1. Using the Adjustable Watch Opener (for Screw-On Backs)
The upgraded adjustable watch opener is designed for screw-on watch backs with grooves. It offers improved grip and stability compared to older versions.
- Select the appropriate jaw shape from the three available options to match the grooves on your watch back.
- Place the watch securely in a watch case holder (not included in all kits, but recommended for stability).
- Adjust the opener's jaws to fit snugly into the notches on the watch back.
- Apply gentle, even pressure and rotate counter-clockwise to unscrew the back cover.

Figure 3: The upgraded adjustable watch opener provides better grip and stability for screw-on watch backs.
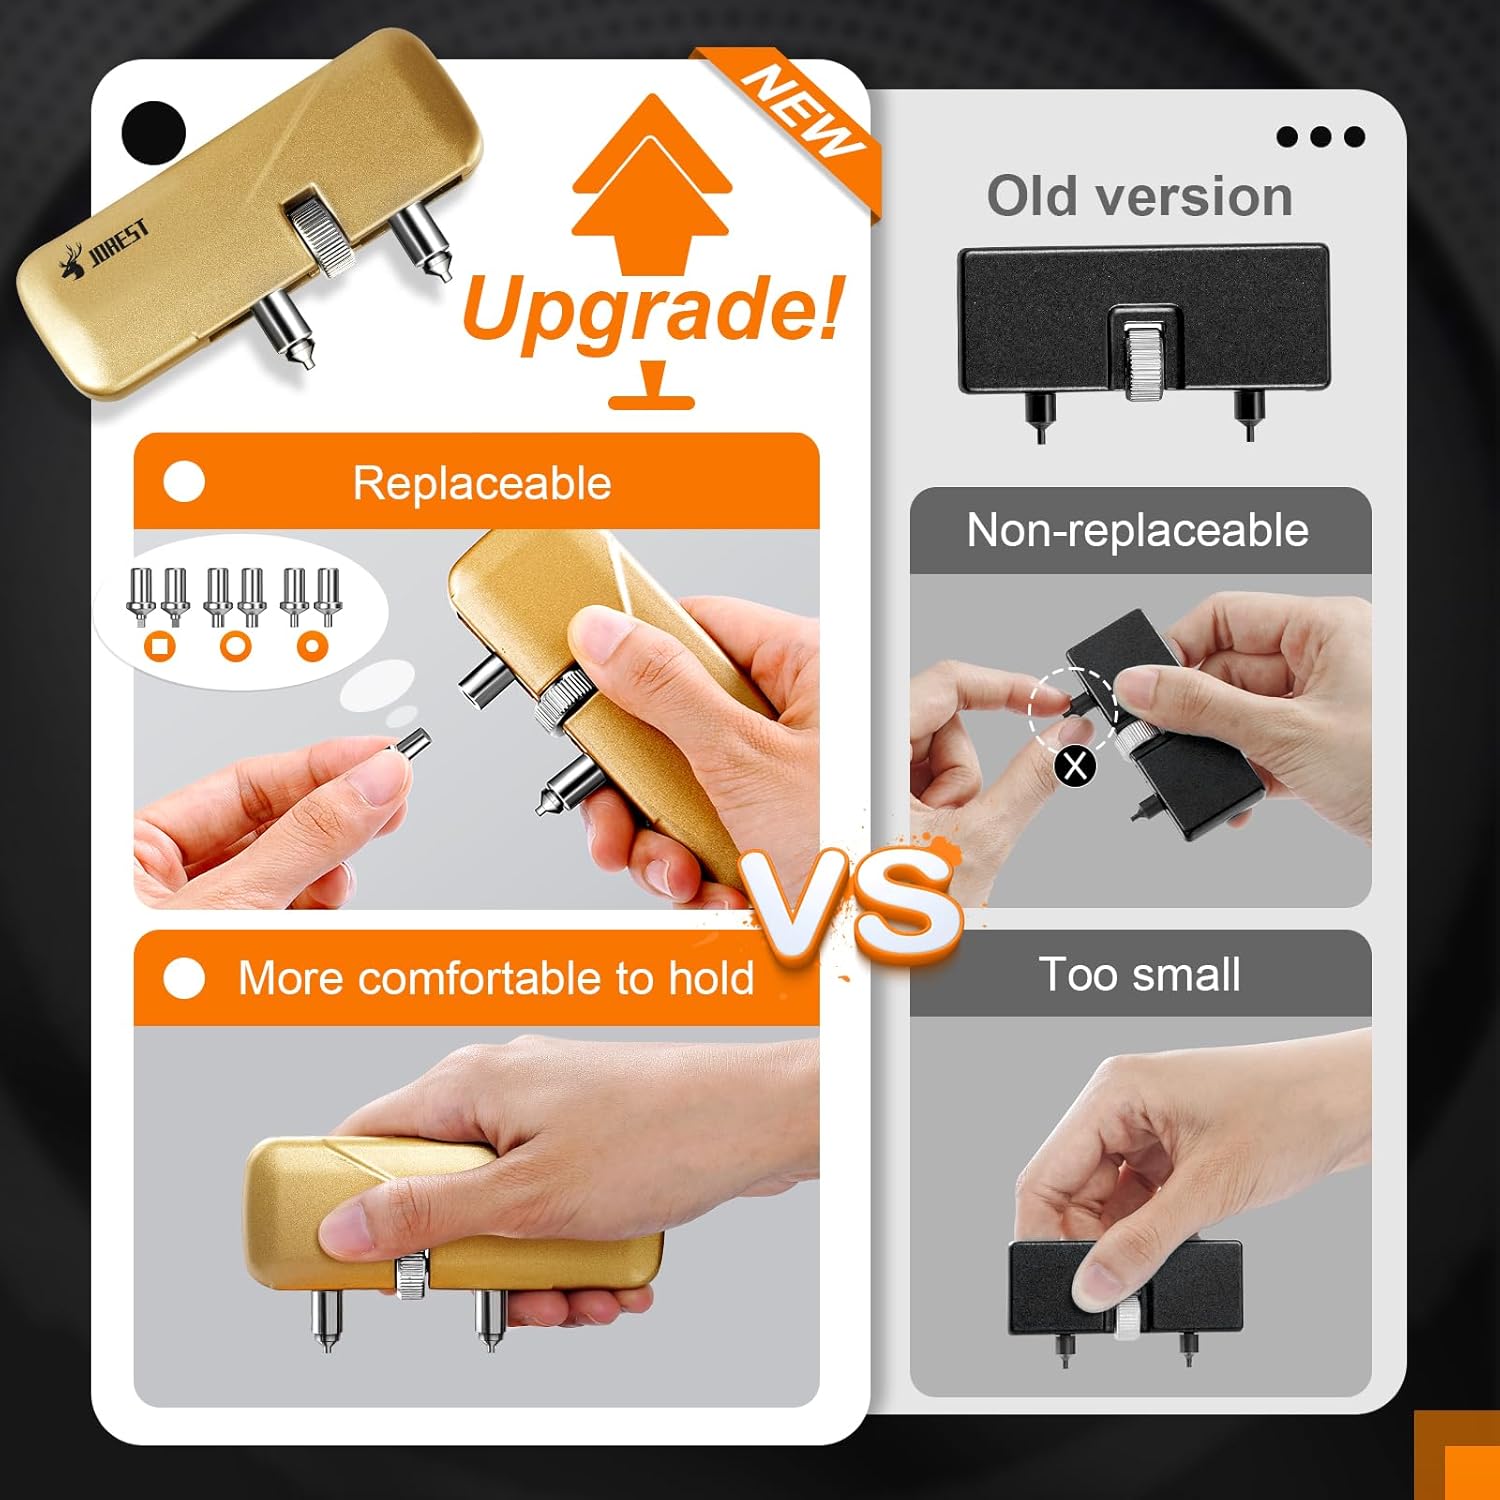
Figure 4: The upgraded watch opener features replaceable pins and an ergonomic design for comfortable use.

Figure 5: Using the adjustable watch opener to carefully unscrew a watch back.
4.1.2. Using the Multifunctional Screwdriver (for Pry-Off and Screw-Fixed Backs)
The multifunctional screwdriver is versatile, featuring different heads for various tasks, including prying open watch covers and removing small screws.
- For Pry-Off Backs: Use the "Arc pry tool" head. Locate the small notch on the watch case. Carefully insert the pry tool into the notch and gently twist to lift the back cover.
- For Screw-Fixed Backs: Select the appropriate screwdriver bit (e.g., Phillips or flathead) from the kit. Unscrew the small screws holding the back cover in place.

Figure 6: The multifunctional screwdriver with interchangeable heads for diverse applications.

Figure 7: Applying the pry tool to open a watch back, utilizing the lever principle for minimal effort.
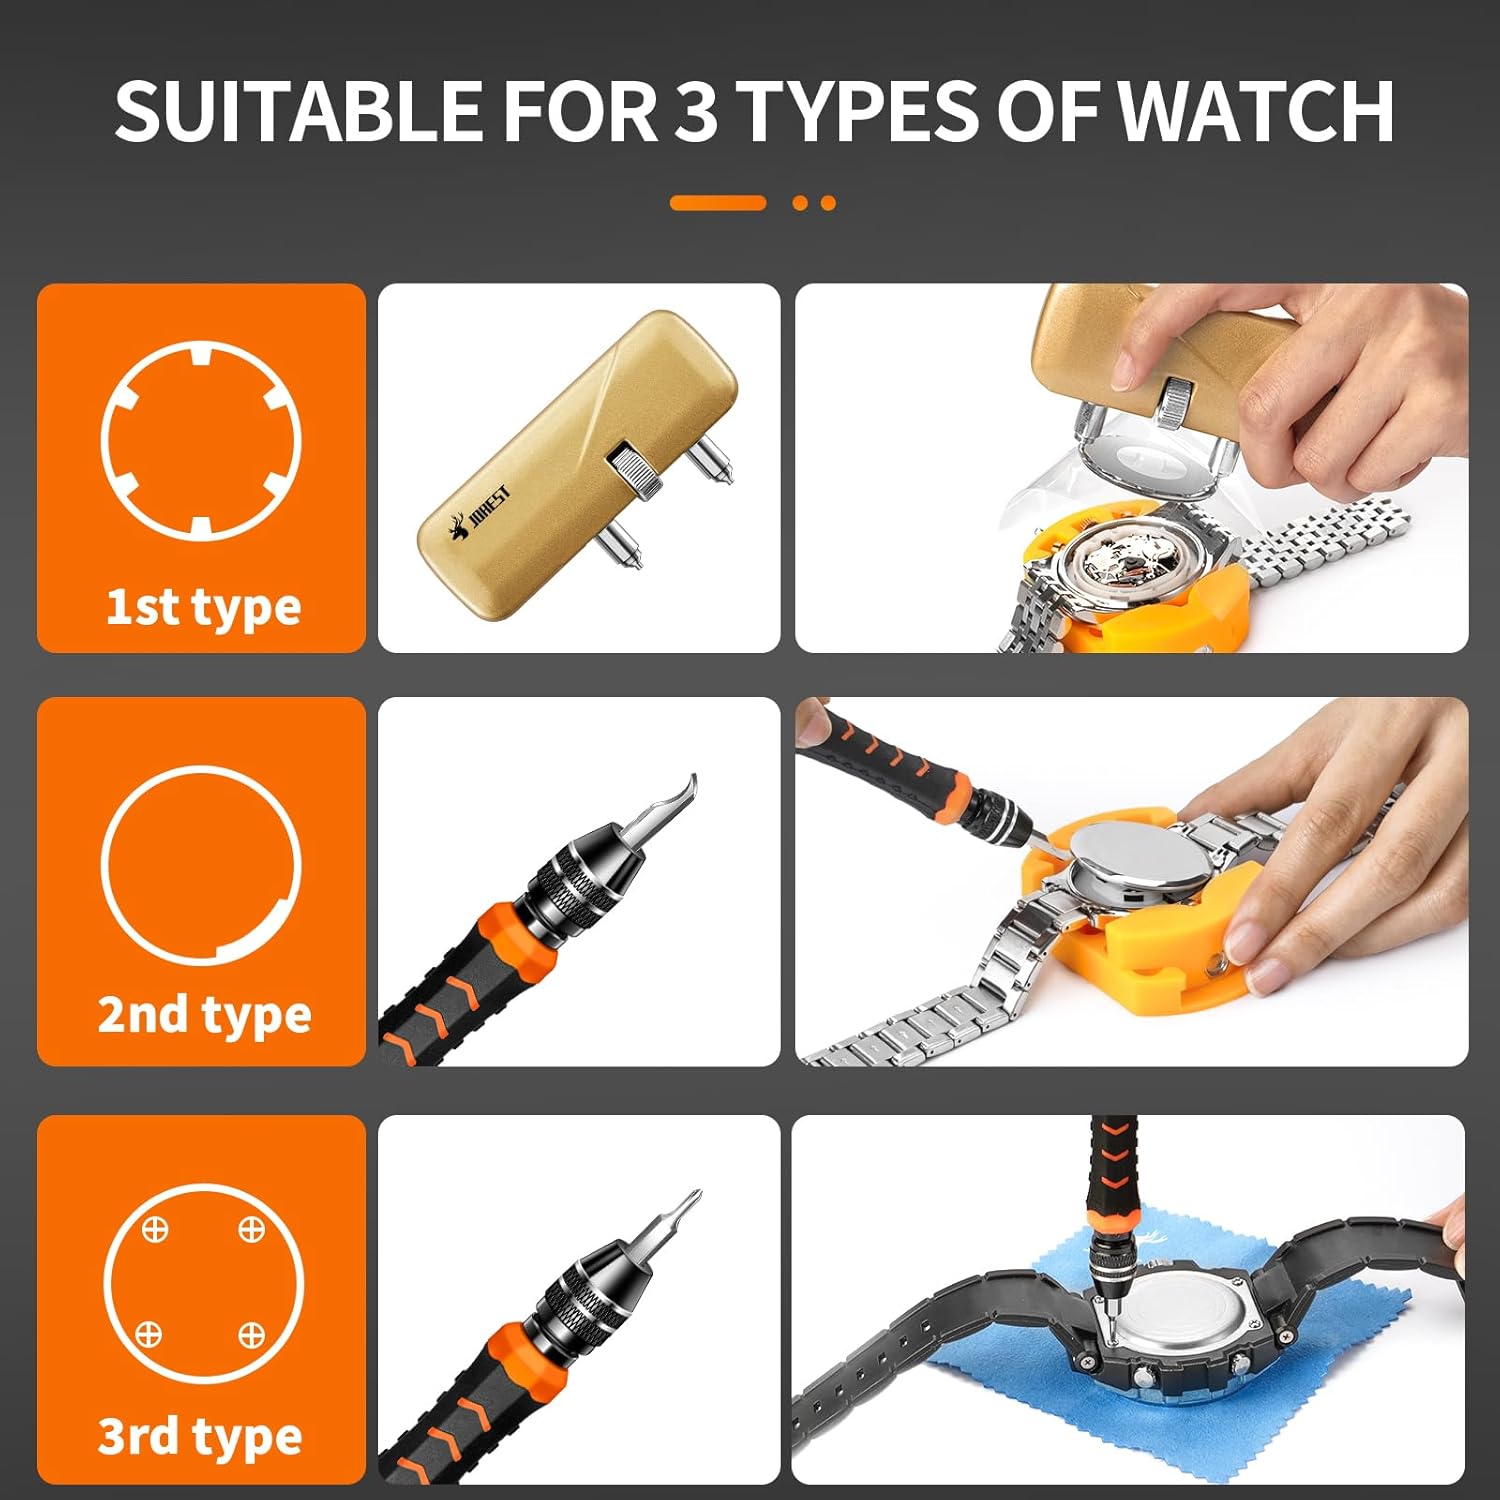
Figure 8: Demonstrations for opening different watch back types using the appropriate tools.
4.2. Replacing Watch Batteries
Once the watch back is open, you can access the battery. Note the battery type and orientation before removal.
- Carefully remove any battery clamps or covers using tweezers or a small screwdriver.
- Gently lift out the old battery. Avoid touching the new battery with bare hands to prevent transferring oils.
- Insert the new battery with the correct orientation (usually positive side up).
- Replace any clamps or covers.
- Reattach the watch back cover, ensuring it is securely fastened.

Figure 9: Accessing the watch battery using the adjustable watch opener.
4.3. Adjusting Watch Bands (Link Removal)
To adjust the length of a metal watch band, you will typically need to remove links using the link remover tool and watch hammer.
- Identify the removable links on your watch band. These usually have small arrows indicating the pin removal direction.
- Place the watch band into the link remover tool, aligning the pin with the tool's pusher.
- Slowly turn the screw on the link remover to push the pin out. Alternatively, use the watch hammer and a pin punch to gently tap the pin out in the direction of the arrow.
- Remove the desired number of links.
- Reassemble the band by inserting the pin in the opposite direction, gently tapping it back into place with the hammer if necessary.

Figure 10: Steps for adjusting a watch band by removing and installing links.

Figure 11: Using the link remover tool to push out a watch band pin.

Figure 12: Using the watch hammer and pin punch for stubborn pins.

Figure 13: Gently tapping a pin back into the watch band to secure links.
4.4. Replacing Watch Spring Bars
The multifunctional screwdriver also includes a spring bar tool head for removing and installing watch straps.
- Locate the spring bar at the connection point between the watch case and the strap.
- Use the forked end of the spring bar tool to compress the spring bar, releasing it from the lug hole.
- To install a new strap, insert one end of the spring bar into a lug hole, then compress the other end with the tool and guide it into the opposite lug hole.
5. Maintenance and Care
- After each use, clean tools with a soft, dry cloth to remove any dust or debris.
- Store all tools in the provided storage case to prevent loss and damage.
- Keep the kit in a dry environment to prevent rust or corrosion.
- Ensure screwdriver bits and watch opener jaws are securely stored to avoid dulling or bending.

Figure 14: The kit's convenient storage case helps keep tools organized and protected.
6. Troubleshooting
| Problem | Possible Cause | Solution |
|---|---|---|
| Watch back difficult to open. | Incorrect tool used, watch back is seized, or tool not properly aligned. | Ensure the correct opener/pry tool is selected. Verify tool alignment with grooves/notch. Apply firm, even pressure. If extremely tight, professional assistance may be required. |
| Watch band pins are stuck. | Pin is bent, or corrosion is present. | Ensure you are pushing in the direction of the arrow. Use the watch hammer with gentle, consistent taps. Do not force excessively to avoid damage. |
| Watch not working after battery replacement. | Battery inserted incorrectly, new battery is dead, or watch movement issue. | Check battery orientation. Test the new battery if possible. Ensure all internal components are correctly seated. If the issue persists, consult a professional. |
7. Specifications
- Model Number: AJJOER1101ORDJPR1
- Manufacturer: JOREST
- Item Weight: 1.14 pounds
- Package Dimensions: 9.45 x 6.06 x 1.42 inches
- Adjustable Watch Opener Range: 18-60 mm (approximate)
- Batteries Included: No
8. Warranty and Support
For warranty information or product support, please refer to the documentation included with your purchase or contact JOREST customer service directly. Specific warranty details are not provided in this manual.
You can also visit the official Jorest Store for more information: Jorest Store on Amazon.
Ask a question about this manual
Ask about setup, troubleshooting, compatibility, parts, safety, or missing instructions. Manuals+ will review the question and use this page’s manual context to help answer it.