
1. Introduction
This manual provides comprehensive instructions for the installation, operation, and maintenance of the RWRAPS REX-C410 Digital PID Temperature Controller. The REX-C410 is a versatile programmable temperature controller designed for precise temperature regulation in various industrial and scientific applications. It supports multiple thermocouple and RTD inputs and features relay output for heating or cooling control.
2. Safety Information
Read all instructions carefully before installation and operation. Failure to follow these instructions may result in equipment damage, personal injury, or improper operation.
- Ensure the power supply voltage matches the controller's specifications (85-265V AC).
- Disconnect power before making any wiring connections or performing maintenance.
- All wiring should be performed by qualified personnel in accordance with local electrical codes.
- Do not operate the controller in environments with excessive moisture, dust, or corrosive gases.
- Avoid exposing the controller to strong vibrations or mechanical shock.
- Do not attempt to repair or modify the controller. Refer to qualified service personnel.
3. Product Overview
The REX-C410 is a digital PID temperature controller featuring a dual display for process value (PV) and set value (SV). It offers precise temperature control with various input and output options.
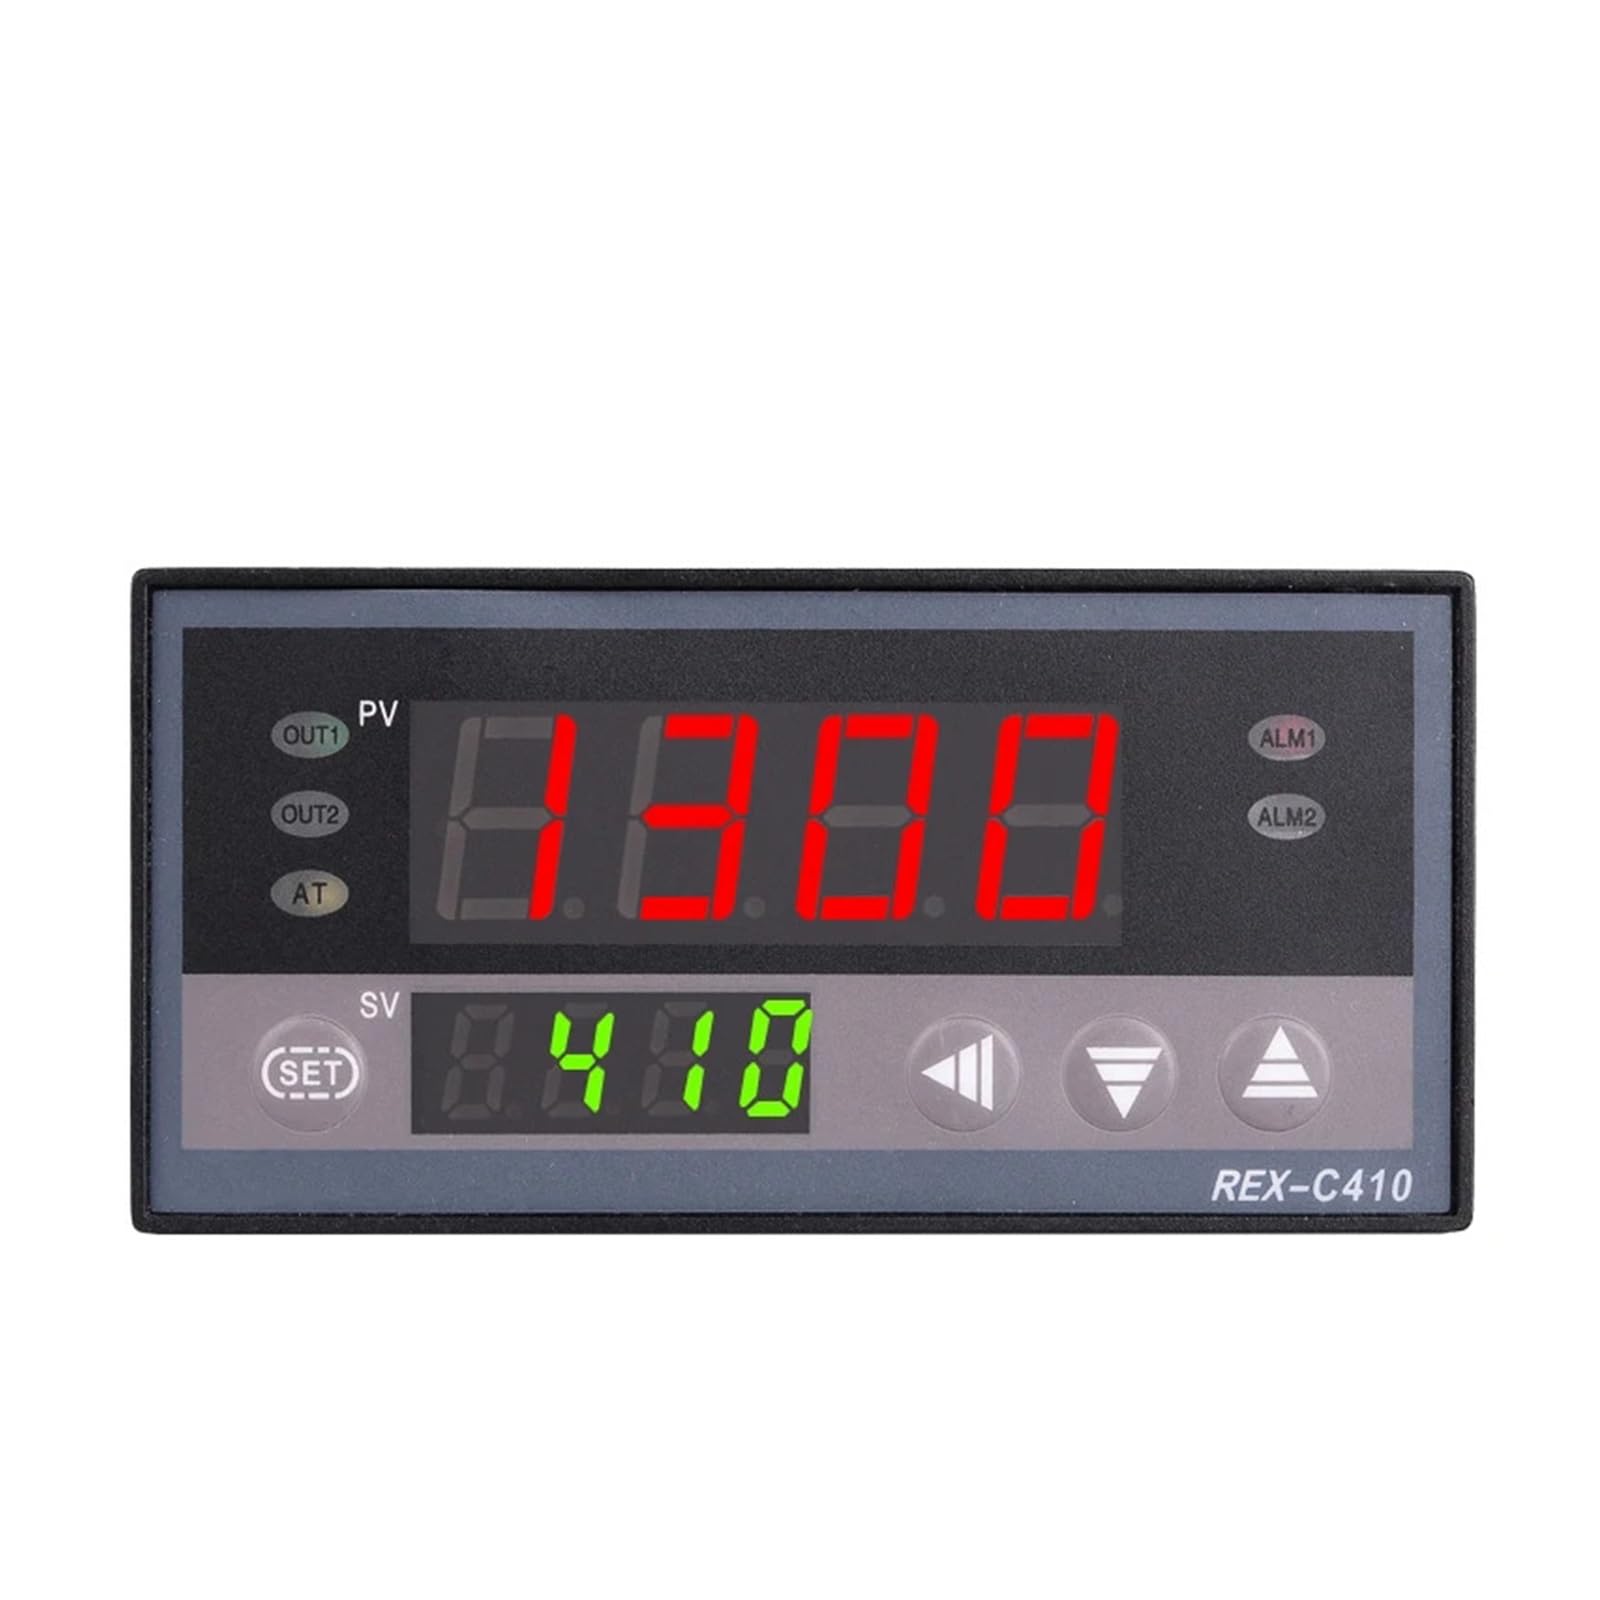
Figure 3.1: Front view of the REX-C410 controller. The upper red display shows the Process Value (PV), and the lower green display shows the Set Value (SV). Control buttons are located below the displays.

Figure 3.2: Angled front view of the REX-C410 controller, showing the display and control buttons, along with the side profile where mounting clips would attach.
Key Features:
- Dual Display: Simultaneous display of Process Value (PV) and Set Value (SV) in Celsius.
- Universal Input: Supports various thermocouple types (K, J, S, E, R, B, N, T) and RTD types (PT100, Cu50).
- Main Output: Relay output for PID cooling/heating control.
- Alarm Output: One relay alarm output with 7 configurable modes (high, low, deviation, etc.).
- PID Control: Individually programmable PID control parameters (P, I, d, controlling period, digital filter coefficient).
- Dimensions: 48mm x 96mm horizontal panel mount.
4. Setup and Installation
4.1. Mounting
The REX-C410 is designed for panel mounting. Ensure adequate space for ventilation and wiring connections at the rear of the unit.

Figure 4.1: The REX-C410 controller shown with its included mounting clips, which secure the unit into a panel cutout.
4.2. Wiring Connections
Refer to the wiring diagrams below for proper connection of power, sensor input, and control outputs. Always ensure power is disconnected before wiring.

Figure 4.2: Rear view of the REX-C410 showing the terminal block and a simplified wiring diagram. Terminals 1 and 2 are for AC power (AC100-240V). Terminals 3 and 4 are for the main output (OUT). Terminals 5, 6, 7, 8 are for sensor input (TC or RTD). Terminals 9, 10, 11 are for alarm output (ALM1).

Figure 4.3: Close-up of the rear terminals and product label. The label indicates model C410FK02-M*AN, range 0-400°C, output RELAY, and supply 100-240V AC, 50/60Hz.
Power Supply:
- Connect the AC power supply (85-265V AC, 50/60Hz) to terminals 1 and 2.
Sensor Input:
- For Thermocouple (TC) input (e.g., K type): Connect the positive lead to terminal 7 and the negative lead to terminal 8.
- For Resistance Temperature Detector (RTD) input (e.g., Pt100): Connect according to the specific RTD type (e.g., 3-wire Pt100 to terminals 5, 6, 7). Refer to the detailed wiring diagram on the unit or in the full product documentation for specific RTD connections.
Main Output (Relay):
- Connect the load to be controlled (e.g., heating element, cooling device) to terminals 3 and 4. This is a relay contact, so ensure the load's power requirements are within the relay's capacity (250V/3A AC or 30V/3A DC).
Alarm Output (ALM1):
- Connect alarm devices to terminals 9, 10, and 11. This is a normal open contact with a capacity of 250V/3A AC or 30V/3A DC.
5. Operating Instructions
5.1. Basic Operation (Setting Temperature)
After proper installation and power-on, the controller will display the current process value (PV) on the upper red display and the set value (SV) on the lower green display.
- Press the SET button once. The SV display will begin to flash.
- Use the Up (▲) and Down (▼) arrow buttons to adjust the desired set temperature.
- Press the SET button again to confirm the new set value. The SV display will stop flashing, and the controller will begin to regulate the temperature to the new set point.
5.2. Parameter Settings (Advanced)
The REX-C410 allows for advanced configuration of control parameters, including PID constants (P, I, d), control period, digital filter coefficient, and alarm modes. These settings are typically adjusted by experienced users or control theory experts to optimize performance for specific applications.
To access advanced parameters:
- Press and hold the SET button for approximately 3-5 seconds until the parameter menu appears on the PV display.
- Use the SET button to cycle through the different parameters.
- Use the Up (▲) and Down (▼) arrow buttons to adjust the value of the selected parameter.
- Press and hold the SET button again to save changes and exit the parameter menu.
Refer to the full technical manual for a detailed explanation of each parameter and its function. Incorrect parameter settings can lead to unstable control or damage to the controlled system.
6. Maintenance
The REX-C410 controller is designed for reliable operation with minimal maintenance. Follow these guidelines to ensure longevity:
- Cleaning: Periodically clean the front panel with a soft, dry cloth. Do not use abrasive cleaners or solvents.
- Inspection: Regularly inspect wiring connections for tightness and signs of corrosion or damage.
- Environment: Ensure the operating environment remains within specified temperature and humidity ranges.
- Calibration: While the controller is factory calibrated, if precise accuracy drifts over time, professional recalibration may be required. This typically involves specialized equipment and procedures.
7. Troubleshooting
This section addresses common issues you might encounter with the REX-C410 controller.
| Problem | Possible Cause | Solution |
|---|---|---|
| Controller does not power on. | No power supply; incorrect wiring; blown fuse (internal). | Check power connections (terminals 1 & 2). Verify power source. Ensure correct voltage. If fuse is suspected, contact support. |
| PV display shows "HHHH" or "LLLL". | Sensor open circuit; sensor short circuit; incorrect sensor type setting; sensor not connected. | Check sensor wiring (terminals 5-8). Verify sensor type matches controller settings. Replace faulty sensor if necessary. |
| Temperature control is unstable (overshoot/undershoot). | PID parameters not optimized for the system; incorrect control mode. | Adjust PID parameters (P, I, d) or perform auto-tuning if available (refer to full manual). Ensure correct control mode (heating/cooling) is selected. |
| Output relay does not activate. | Wiring error; set value not reached; output disabled; faulty relay. | Check output wiring (terminals 3 & 4). Verify SV is set correctly. Check output parameters. If relay is faulty, contact support. |
For issues not listed here or if troubleshooting steps do not resolve the problem, please contact RWRAPS customer support.
8. Specifications
| Model | REX-C410 |
| Display | Dual display for Process Value (PV) and Set Value (SV) in Celsius (°C) |
| Temperature Range | 0-400°C (with K type thermocouple) |
| Thermocouple Input | K, J, S, E, R, B, N, T |
| Thermo Resistor Input | PT100, Cu50 |
| Main Output | Relay: PID cooling/heating control |
| Alarm Output | 1 RELAY alarm: Normal open, capacity 250V/3A AC or 30V/3A DC. 7 alarm modes. |
| Accuracy | 0.5% |
| Power Supply | 85-265V AC, 50/60Hz |
| Power Consumption | < 5VA |
| Dimensions | 48mm x 96mm x 900mm (Depth) |
| Weight | Approximately 300g (10.6 ounces) |
9. Warranty and Support
For warranty information, technical support, or service inquiries, please contact the manufacturer, RWRAPS, directly through their official channels. Keep your purchase receipt as proof of purchase.