
1. Introduction
This manual provides detailed instructions for the installation, operation, and maintenance of your CHICIRIS PTZ Camera Keyboard Controller. This device is designed to provide accurate and stable control over PTZ (Pan-Tilt-Zoom) cameras in various surveillance environments. Please read this manual thoroughly before using the product to ensure proper functionality and to prevent damage.
2. Safety Information
- Ensure the power supply voltage matches the product's requirements (100-240V).
- Do not expose the device to moisture, rain, or extreme temperatures.
- Avoid placing the device in direct sunlight or near heat sources.
- Do not attempt to disassemble or repair the unit yourself. Refer all servicing to qualified personnel.
- Keep the device away from strong electromagnetic fields.
3. Package Contents
Verify that all items are present in the package:
- 1 x CHICIRIS PTZ Camera Keyboard Controller
- 1 x Power Plug (US Plug 100-240V)
4. Product Overview
The CHICIRIS PTZ Camera Keyboard Controller is a robust device designed for efficient control of surveillance cameras. It features a 3D joystick for precise camera movement and zoom, an LCD display for status information, and a comprehensive keypad for various functions.

Figure 4.1: Angled view of the CHICIRIS PTZ Camera Keyboard Controller.
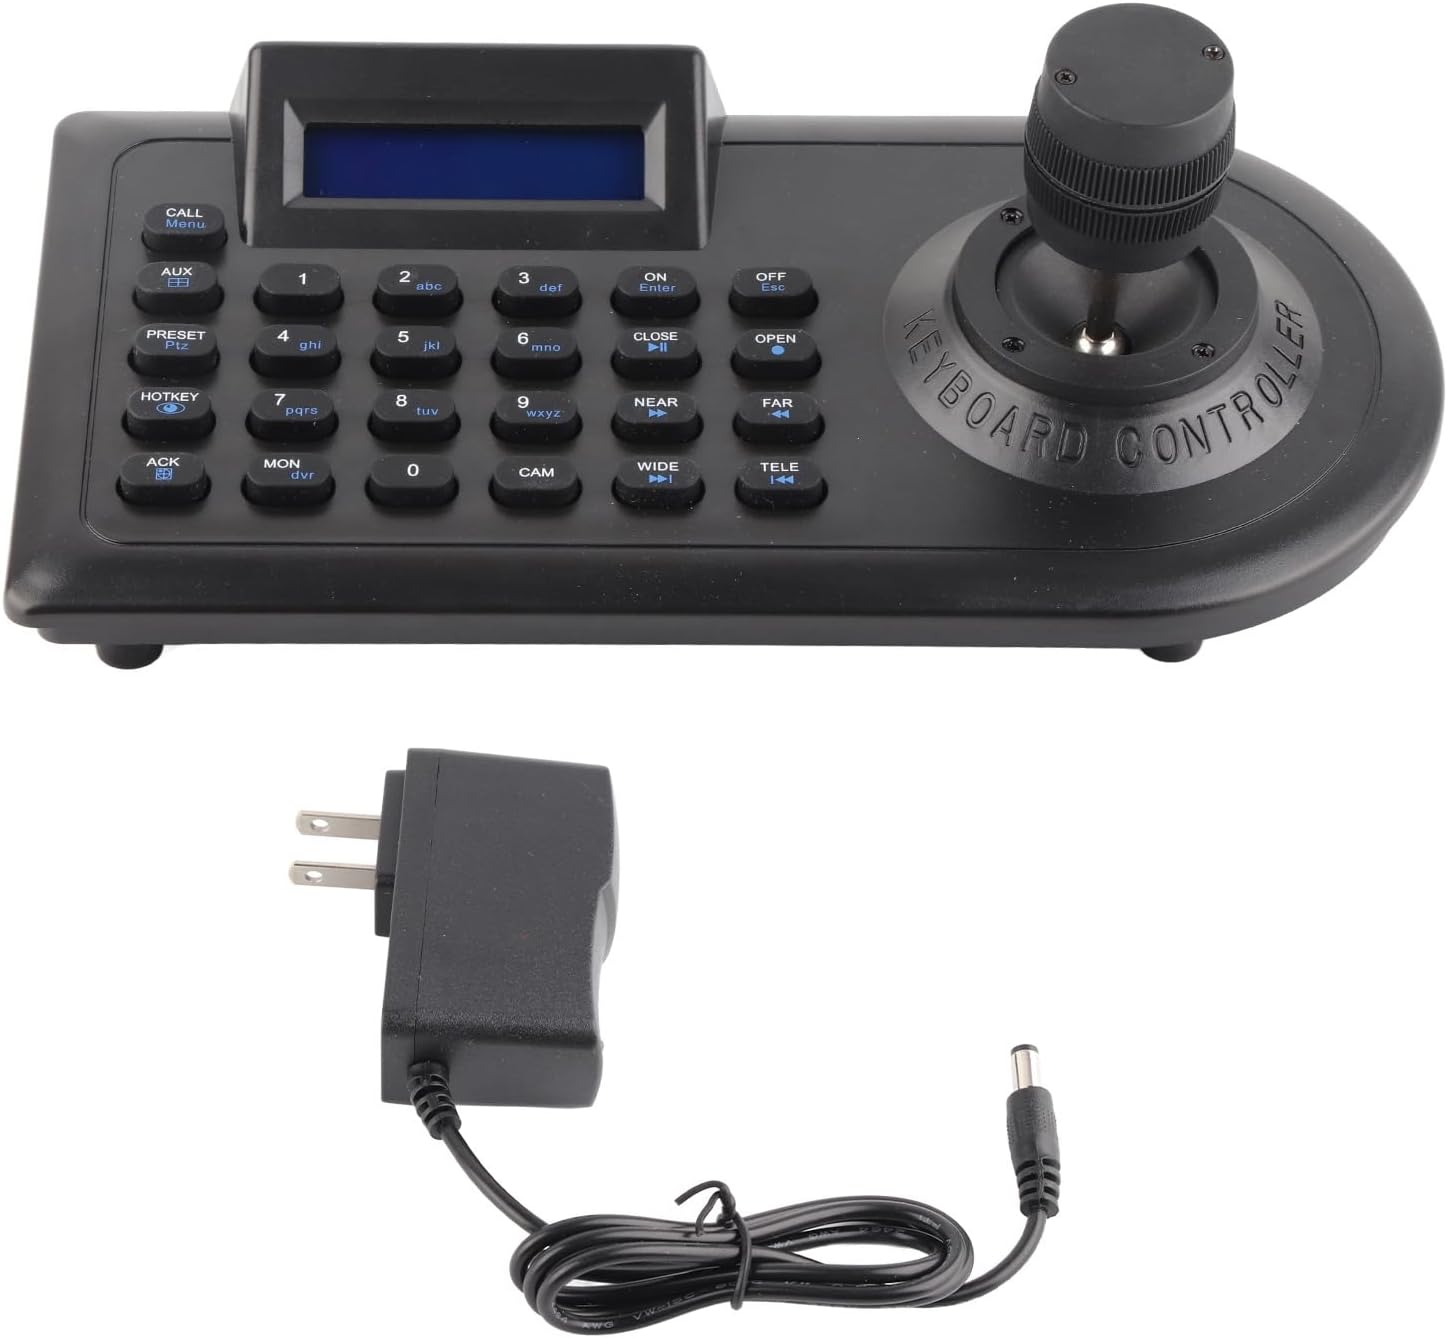
Figure 4.2: The PTZ Camera Keyboard Controller shown with its included power adapter.
Key Features:
- Standard Network Monitoring Protocol Support: Ensures broad compatibility with various network dome cameras.
- Wide Compatibility: Linux-based system compatible with most dome security and monitoring IP cameras. Supports preset mode and AB scanning.
- Intuitive Control: Features a 3D joystick for precise pan, tilt, and zoom control, along with an LCD display for easy operation.
- Versatile Application: Suitable for public security, surveillance, government, telecommunications, banking, education, and other critical environments.
- Easy Integration: Designed with accessible input and output communication interfaces for seamless integration into existing CCTV security systems.
5. Setup
Follow these steps to set up your PTZ Camera Keyboard Controller:
- Power Connection: Connect the provided power adapter to the DC12V input port on the rear of the controller. Plug the adapter into a standard 100-240V AC power outlet.
- Communication Connection: Connect the controller to your PTZ camera(s) or DVR system using the RS485 bus communication interface. Ensure proper wiring for the RS485 connection.
- Network Connection (Optional): If your system requires network communication, connect an Ethernet cable to the RJ45 port on the controller.
- Baud Rate Configuration: Ensure the communication baud rate of the keyboard controller matches that of your DVR or camera system. The default baud rate is typically 9600bps. Supported baud rates include 1200, 2400, 4800, 9600, and 19200. Communication parameters are 8 data bits, 1 stop bit, and no verification.

Figure 5.1: Side view illustrating the power input (12VDC), communication interface (RS485), and extension interface.

Figure 5.2: Interface description diagram. The keyboard control DVR communication baud rate is 9600bps, not optional. The DVR internal communication baud rate must also be 9600bps for proper operation.
6. Operating Instructions
The controller provides intuitive controls for managing your PTZ cameras.

Figure 6.1: Top view of the controller, highlighting the joystick, LCD display, and keypad.
6.1. Joystick Control
- Pan/Tilt: Move the 3D joystick in the desired direction (up, down, left, right) to control the camera's pan and tilt movements.
- Zoom: Twist the joystick clockwise or counter-clockwise to control the camera's zoom function (telephoto or wide-angle).

Figure 6.2: Close-up of the 3D joystick, used for pan, tilt, and zoom control.
6.2. Keypad Functions
The keypad provides access to various camera functions and settings.

Figure 6.3: Close-up of the keypad and LCD display, showing various function buttons.
- CALL/Menu: Access the camera's menu or call specific functions.
- AUX: Auxiliary function button.
- PRESET/Ptz: Set or recall camera presets.
- HOTKEY: Assign and use hotkeys for quick actions.
- ACK: Acknowledge or confirm actions.
- MON/dvr: Monitor or DVR related functions.
- CAM: Select camera.
- ON/Enter: Power on or confirm selection.
- OFF/Esc: Power off or escape from a menu.
- CLOSE/►►: Close a function or move right.
- OPEN/◄◄: Open a function or move left.
- NEAR/▲: Adjust focus near or move up.
- FAR/▼: Adjust focus far or move down.
- WIDE/◄◄: Zoom wide.
- TELE/►►: Zoom telephoto.
- Numeric Keys (0-9): Input numbers for camera selection, preset numbers, etc.
6.3. Communication Protocols
The controller supports multiple communication protocols for broad compatibility:
- PELCO D
- PELCO P
- VISCA
- AD
Ensure the selected protocol on the controller matches that of the connected PTZ camera or DVR.
7. Specifications
| Feature | Specification |
|---|---|
| Item Type | PTZ Camera Joystick Controller |
| Material | ABS |
| Input Voltage | DC12V 500mA |
| Power Consumption | Less than 5W |
| Communication Interface | RS485 bus |
| Communication Distance | Approx. 1500m / 4921.3ft (0.5mm twisted pair) |
| Communication Protocols | PELCO D, PELCO P, VISCA, AD |
| Baud Rates | 1200, 2400, 4800, 9600, 19200 |
| Communication Parameters | 8 data bits, 1 stop bit, no verification |
| Joystick | 3D (Pan, Tilt, Zoom by twisting) |
| Display | LCD |
| Voltage | 100-240V (US Plug) |
| Dimensions | 11.02 x 5.51 x 4.72 inches |
| Weight | 1.83 pounds |
| Color | Black |
| Compatible Devices | IP Camera, Network Dome Camera |
| Controller Type | Button Control, Joystick Control |
8. Maintenance
- Cleaning: Use a soft, dry cloth to clean the surface of the controller. Do not use liquid cleaners or abrasive materials.
- Storage: Store the controller in a cool, dry place away from direct sunlight and extreme temperatures when not in use.
- Cable Inspection: Periodically check all cables for signs of wear or damage. Replace damaged cables immediately.
9. Troubleshooting
- No Power:
- Ensure the power adapter is securely connected to both the controller and a working power outlet.
- Verify the power outlet is functional.
- No Camera Control:
- Check the RS485 communication cable connections for proper wiring.
- Confirm that the controller's baud rate and communication protocol match those of the connected camera or DVR. Refer to Section 5.
- Ensure the camera is powered on and functioning correctly.
- Joystick Not Responding:
- Restart the controller and the camera system.
- Ensure no physical obstructions are preventing joystick movement.
- LCD Display Not Working:
- Check power connection.
- If the issue persists, contact customer support.
10. Warranty and Support
For warranty information or technical support, please refer to the documentation provided at the time of purchase or contact CHICIRIS customer service through their official channels. Keep your purchase receipt as proof of purchase.