
Introduction
The RESTMO 2-Zone Programmable Water Timer is designed to automate your garden, lawn, and drip irrigation watering schedules. Featuring a durable brass inlet and independent zone control, this timer offers flexible programming options including automatic, manual, and rain delay modes to ensure efficient water management.
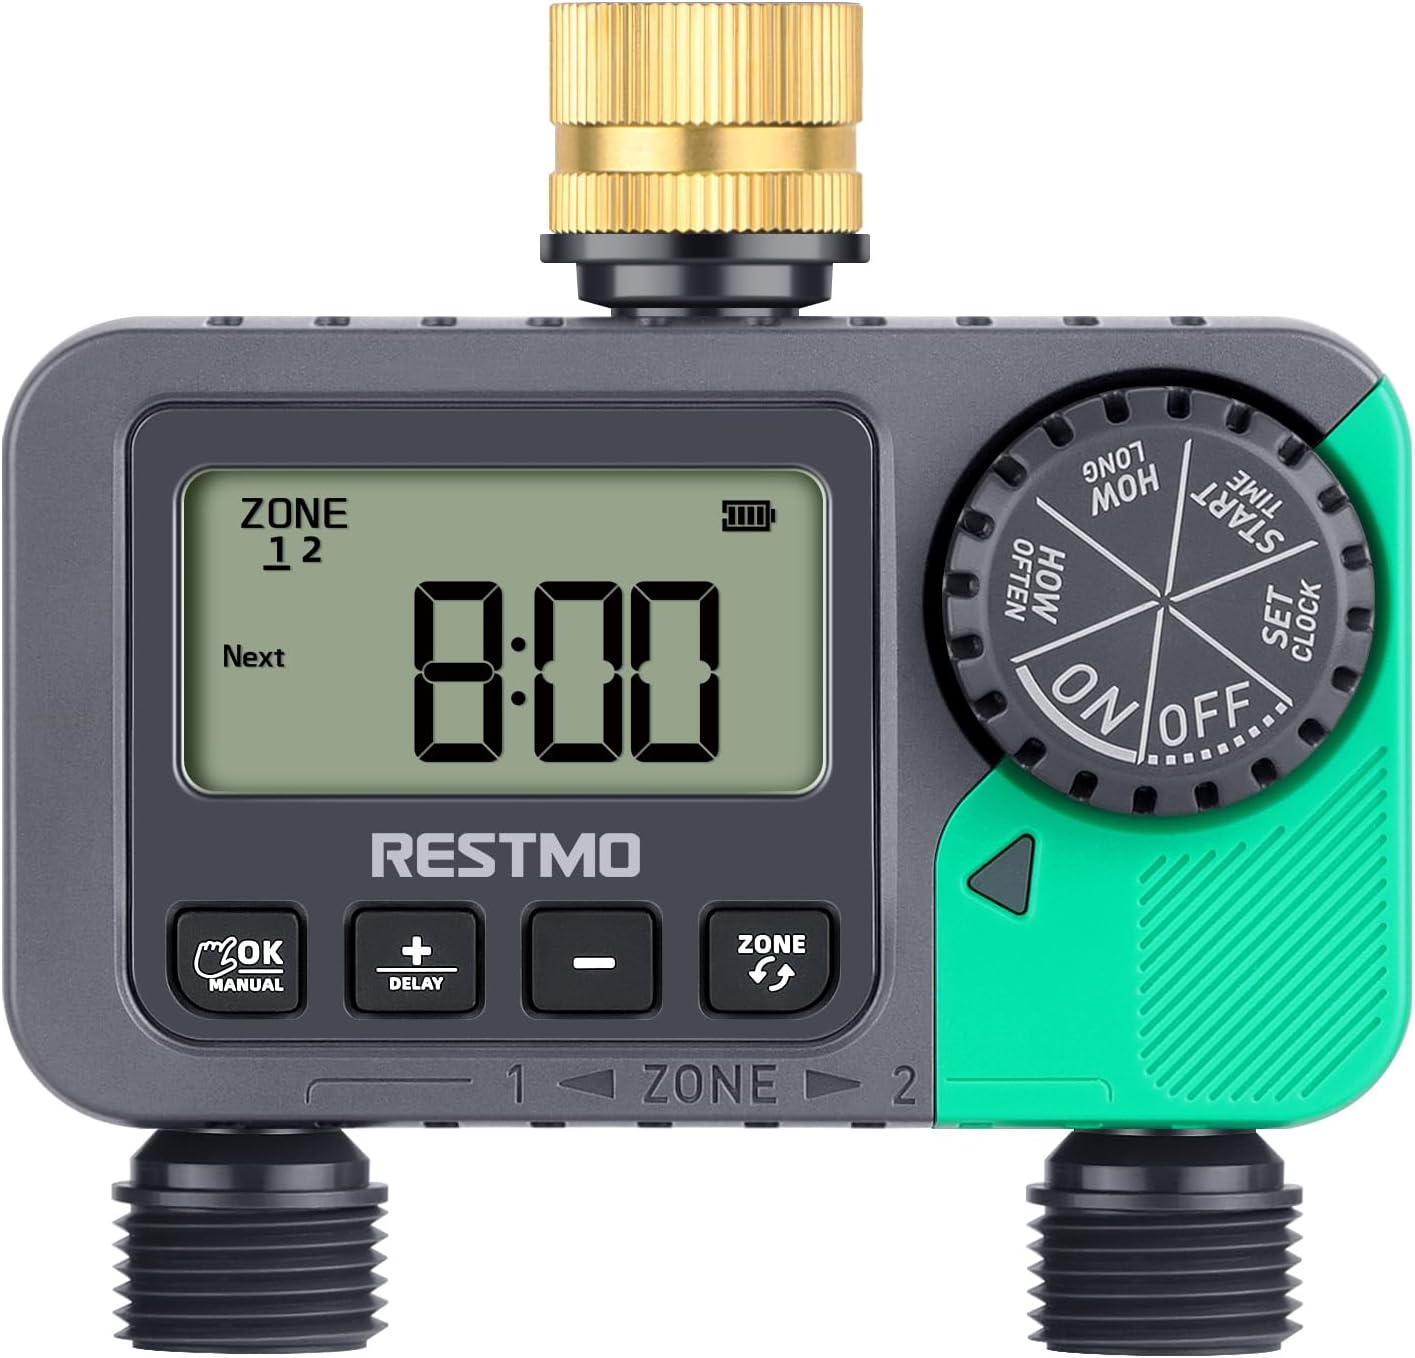
Front view of the RESTMO 2-Zone Sprinkler Timer, showing the digital display, control buttons, and dual outlets.
Product Features
- Reliable & Leak-Proof Design: Equipped with a pure brass swivel inlet and heavy-duty weatherproof, UV-resistant construction, ensuring durability and preventing water leakage.
- 2 Independent Zones: Allows for separate watering schedules for two distinct areas from a single faucet, providing ultimate control for your garden, yard, or lawn.
- Multi-Functional Modes: Offers Auto, Manual, and Rain Delay modes.
- Auto Mode: Watering duration from 1 minute to 239 minutes, frequency from 1 hour to 12 hours, or 1 day to 7 days.
- Manual Mode: Water plants from 1 minute to 7 hours 59 minutes as needed.
- Rain Delay Mode: Choose from 0, 24, 48, or 72 hours to pause watering during rainy periods.
- Easy To Use Interface: Features a large dial and 4 clear buttons for straightforward programming and reading.
- Wide Application: IP54 waterproof and leakproof, suitable for outdoor gravity drip irrigation, garden hose watering, lawn sprinkler control, greenhouse mist systems, pool filling, and more.

The timer features a pure brass inlet thread and a waterproof battery compartment for enhanced durability and leak protection.

An overview of the timer's key features, including its pure brass inlet, dual independent zones, LCD display, timed watering, manual watering, rain delay, compact design, and IP54 waterproof rating.
Setup
- Install Batteries: Open the battery compartment on the back of the timer. Insert two (2) AAA 1.5V batteries (not included), ensuring correct polarity. Close the compartment securely.

The battery compartment requires two AAA batteries.
- Attach to Faucet: Connect the brass swivel inlet of the timer to your outdoor faucet. Hand-tighten until secure. For optimal leak prevention, wrap Teflon tape around the faucet threads before attaching the timer.

Detailed diagram illustrating the timer's dimensions, pure brass inlet, outlet threads, and control buttons.
- Connect Hoses: Attach your garden hoses or drip irrigation lines to the two independent outlets (Zone 1 and Zone 2) at the bottom of the timer.
- Set Current Time: Rotate the main dial to "SET CLOCK". Use the "+" and "-" buttons to adjust the hour and minute. Press "OK/Manual" to confirm each setting.
Operating Instructions
Programming Automatic Watering
The timer allows you to set independent schedules for Zone 1 and Zone 2.
- Select Zone: Press the "ZONE" button to select either "ZONE 1", "ZONE 2", or "ZONE 1+2" (if you want both zones to follow the same schedule). The selected zone will be indicated on the display.
- Set Start Time: Rotate the dial to "START TIME". Use "+" and "-" to set the desired watering start time. Press "OK/Manual" to confirm.
- Set Watering Duration ("HOW LONG"): Rotate the dial to "HOW LONG". Use "+" and "-" to set the duration from 1 minute to 239 minutes. Press "OK/Manual" to confirm.
- Set Watering Frequency ("HOW OFTEN"): Rotate the dial to "HOW OFTEN". Use "+" and "-" to set the frequency from 1 hour to 12 hours, or 1 day to 7 days. Press "OK/Manual" to confirm.
- Activate Program: Rotate the dial to "ON". The timer will now operate according to your programmed schedule.

Visual guide for setting watering duration (How Long) and frequency (How Often).

The timer's display showing automatic watering settings for duration and frequency.
Manual Watering
To water immediately without affecting your programmed schedule:
- Activate Manual Mode: Long press the "OK/Manual" button. The display will show "MANUAL".
- Set Manual Duration: Use the "+" and "-" buttons to set the desired manual watering duration (from 1 minute to 7 hours 59 minutes).
- Start Manual Watering: Press "OK/Manual" again to start watering. The timer will automatically stop after the set duration.
- Stop Manual Watering (Early): To stop manual watering before the set time, rotate the dial to "OFF".

Instructions for activating manual watering by long-pressing the OK/Manual button, and for activating rain delay by long-pressing the +/Delay button.

The timer's display showing manual watering duration settings.
Rain Delay Function
To temporarily pause your watering schedule due to rain:
- Activate Rain Delay: Long press the "+/DELAY" button. The display will show "DELAY".
- Set Delay Duration: Use the "+" and "-" buttons to select the desired delay period (0, 24, 48, or 72 hours).
- Confirm Delay: Press "OK/Manual" to confirm. The timer will pause for the selected duration and resume its programmed schedule afterward.

The timer's display showing options for rain delay: 0, 24, 48, and 72 hours.
Stopping All Watering
To completely stop all watering programs and manual operations:
- Turn Off: Rotate the main dial to "OFF". The display will show "OFF", and all watering will cease.

The timer's dial turned to the "OFF" position to stop all watering.
Maintenance
- Battery Replacement: Replace batteries when the low battery indicator appears on the display. Always use fresh AAA 1.5V alkaline batteries.
- Cleaning: Periodically check the inlet filter for debris and clean if necessary to maintain optimal water flow.
- Winterization: Before freezing temperatures, disconnect the timer from the faucet and hoses. Drain any remaining water and store the timer indoors in a dry, protected area to prevent damage.
Troubleshooting
| Problem | Possible Cause | Solution |
|---|---|---|
| Timer not watering. | Low batteries, incorrect program, low water pressure, dial set to OFF. | Replace batteries, check program settings, ensure water pressure is within 8-120 PSI, turn dial to ON. |
| Water leakage from connections. | Loose connection, worn washer, missing Teflon tape. | Ensure connections are hand-tight, check and replace rubber washers if worn, apply Teflon tape to faucet threads. |
| Display is blank or unreadable. | Dead batteries, extreme temperatures. | Replace batteries. If exposed to direct sunlight, move to a shaded area to cool down. |
Specifications
- Model Number: O-HT
- Color: Green
- Material: Brass (inlet)
- Product Dimensions: 2"D x 5"W x 2"H
- Item Weight: 1.1 Pounds
- Number of Settings: 18
- Screen Size: 5.7 Inches
- Inlet Thread: 3/4" NH Female (pure brass)
- Outlet Thread: 3/4" NH Male
- Independent Outlets: 2
- Watering Frequency: 1-12 hours or 1-7 days
- Watering Duration: 1 minute to 7 hours 59 minutes (Manual), 1 minute to 239 minutes (Auto)
- Working Pressure: 8 - 120 PSI (0.5 - 8 Bar)
- Maximum Flow Rate: 10 GPM (35 LPM)
- Working Temperature: 38 - 120°F (3 - 50°C)
- Waterproof Rating: IP54
- Power Source: 2*AAA 1.5V batteries (not included)
Warranty and Support
For warranty information and customer support, please refer to the product packaging or visit the official Restmo website. You can also find additional resources and contact information on the Restmo Store on Amazon.


