1. Product Overview
This manual provides instructions for the installation, operation, and maintenance of the CKPSMS Lubricating Oil Pump, Part Number 183850-101. This component is designed to ensure proper lubrication for compatible Brother industrial sewing machines, which is crucial for their efficient operation and longevity.
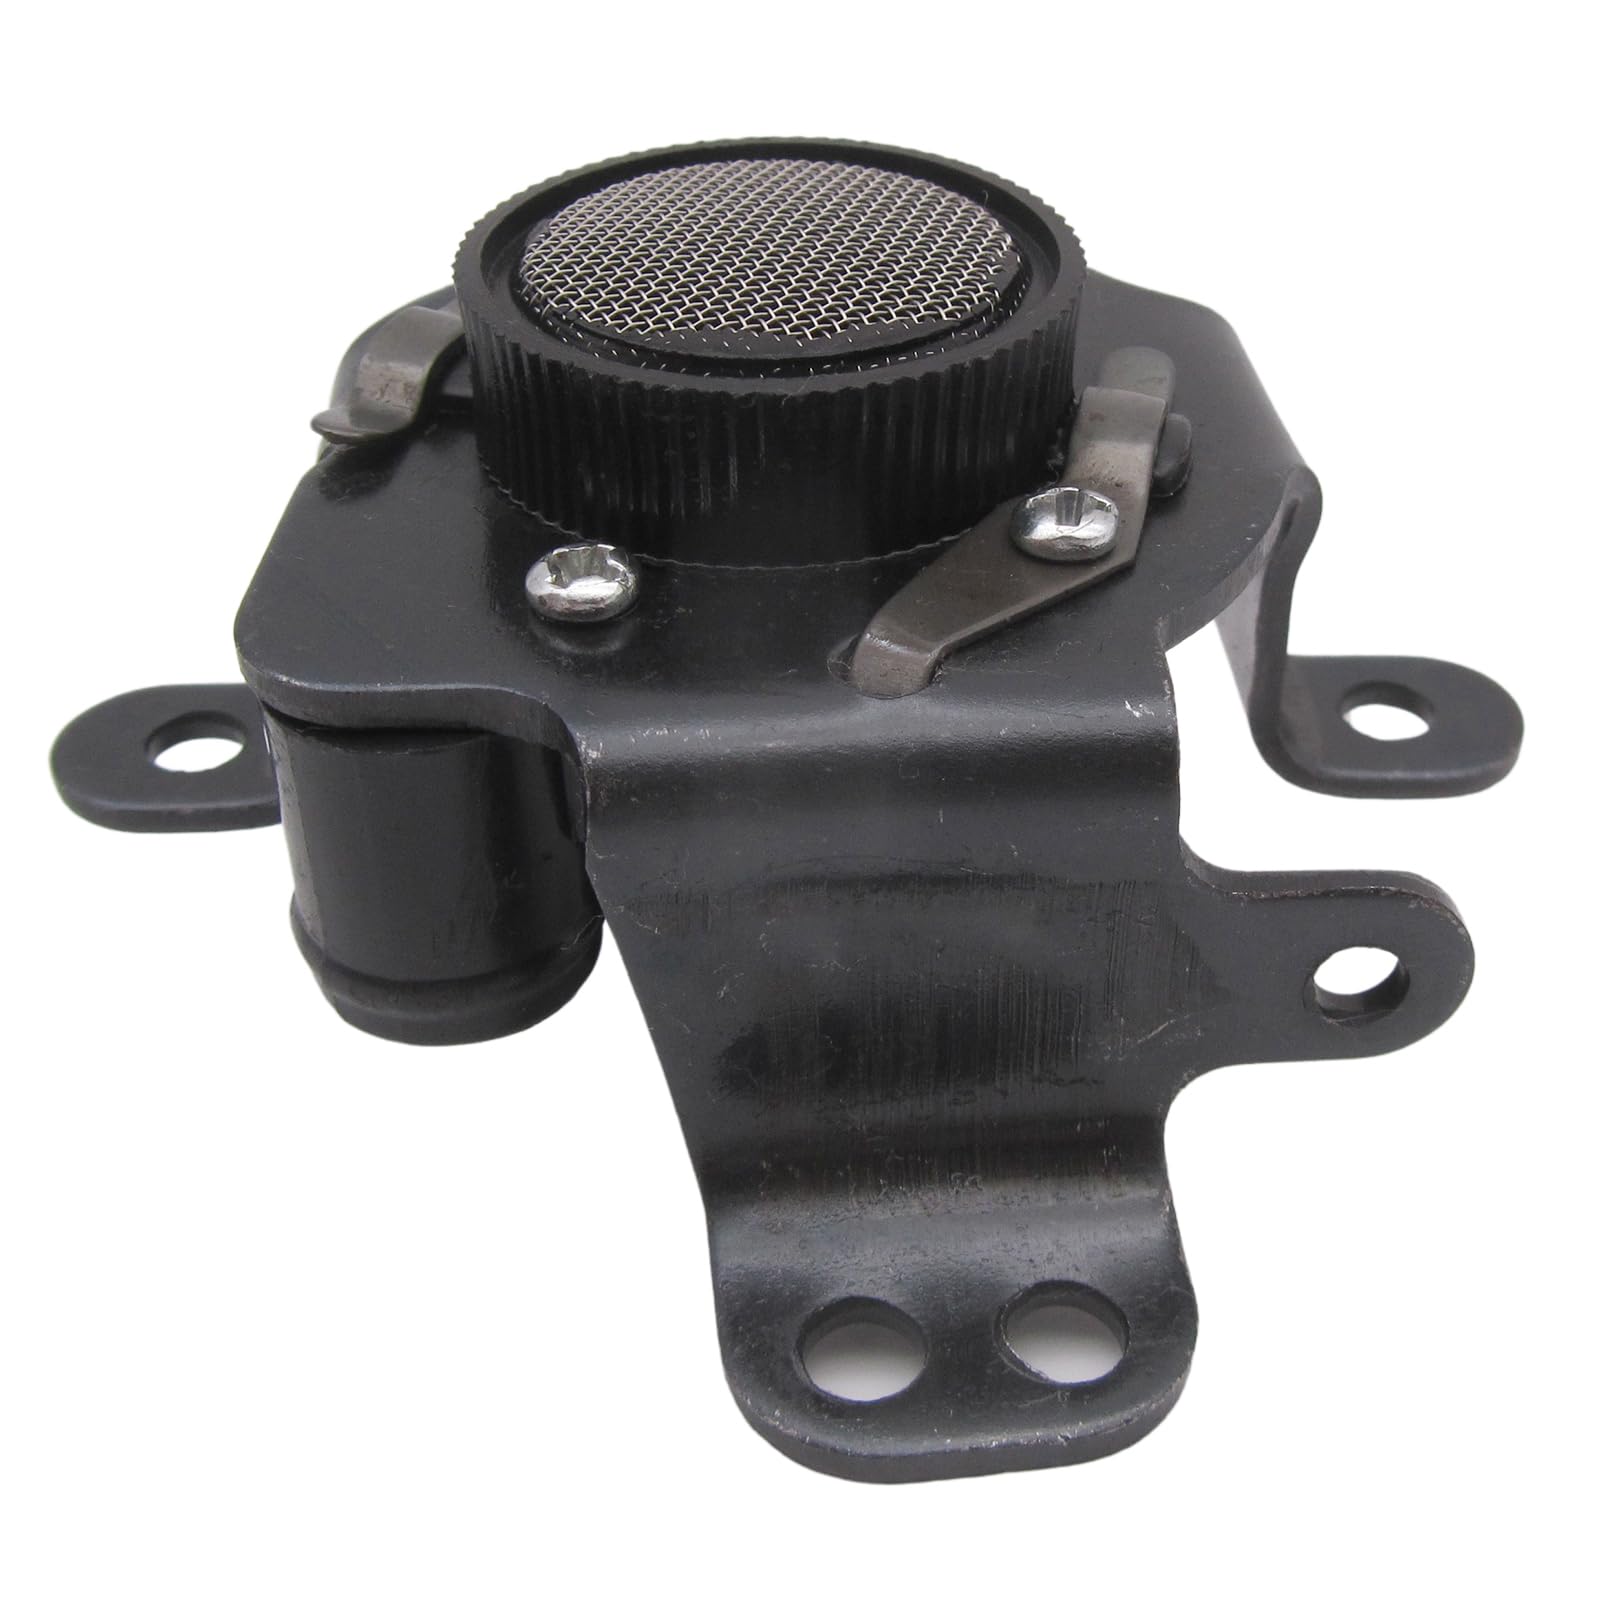
Image 1.1: The CKPSMS Lubricating Oil Pump, Part Number 183850-101. This image shows the pump assembly from an angled view, highlighting its main components and mounting brackets.
2. Safety Information
Always observe the following safety precautions to prevent injury and damage to the machine:
- Disconnect Power: Before performing any installation, maintenance, or inspection, always ensure the sewing machine is disconnected from its power source.
- Professional Installation: Installation of internal machine components should ideally be performed by a qualified technician.
- Use Correct Tools: Use appropriate tools for installation and removal to avoid damaging the pump or other machine parts.
- Handle with Care: The oil pump contains delicate parts. Handle it carefully to prevent damage.
3. Package Contents
The package includes:
- 1 x CKPSMS Lubricating Oil Pump Assembly (Part #183850-101)

Image 3.1: The CKPSMS Lubricating Oil Pump as received in its packaging. The pump is visible through a clear plastic bag with the CKPSMS logo.
4. Compatibility
This Lubricating Oil Pump (Part #183850-101) is compatible with the following Brother brand industrial sewing machine models:
- Brother DB2-C101
- Brother DB2-C201
- Brother SL-737A
- Brother SL-777B
- Brother SL-1110
- Brother S-6200A
- Brother S-7550A
- Brother SN-7210
- Brother SN-7220
- Brother SN-7230
- Brother SN-7240
Alternative part numbers for this component include: 183850101, 183850001, 183850021.
5. Setup and Installation
The installation of the oil pump requires careful attention. It is recommended that this procedure be performed by a qualified sewing machine technician.
- Power Disconnection: Ensure the sewing machine is completely powered off and unplugged from the electrical outlet.
- Access Panel Removal: Locate and carefully remove the necessary access panels or covers on your sewing machine to expose the existing oil pump assembly. Refer to your specific sewing machine's service manual for detailed instructions on accessing internal components.
- Old Pump Removal: Disconnect any oil lines or electrical connections attached to the old oil pump. Unfasten the mounting screws or clips securing the old pump and carefully remove it from its position.
- New Pump Installation: Position the new CKPSMS Lubricating Oil Pump (Part #183850-101) in the designated location. Ensure it aligns correctly with the mounting points. Secure the pump using the appropriate screws or clips.
- Connections: Reconnect all oil lines and electrical connections to the new pump. Ensure all connections are secure and free from leaks.
- Reassembly: Replace all access panels and covers that were removed.
- Initial Check: Before operating the machine, perform a visual inspection to ensure all components are correctly installed and no tools or debris are left inside the machine.

Image 5.1: A close-up view of the CKPSMS Lubricating Oil Pump. This image provides a detailed look at the pump's structure, including its inlet, outlet, and mounting points, which are critical for correct installation.
6. Operation
Once installed, the lubricating oil pump operates automatically to supply oil to the moving parts of the sewing machine. Its primary function is to maintain a consistent flow of lubricant, reducing friction and wear, and ensuring smooth operation of the machine.
- Oil Level: Ensure the machine's oil reservoir is filled to the recommended level with the appropriate type of sewing machine oil.
- First Use: After installation, run the machine at a slow speed for a few minutes to allow the oil to circulate throughout the system.
- Monitor Lubrication: Observe the machine during operation to confirm that oil is being distributed correctly to all necessary points.
7. Maintenance
Regular maintenance of the oil pump and the lubrication system is essential for the longevity of your sewing machine:
- Check Oil Levels: Regularly check the oil level in the machine's reservoir and refill as needed.
- Oil Quality: Use only high-quality, recommended sewing machine oil. Contaminated or incorrect oil can damage the pump and machine.
- Inspect Oil Lines: Periodically inspect oil lines for kinks, blockages, or leaks. Repair or replace as necessary.
- Clean Filters: If your machine has oil filters, clean or replace them according to the machine's maintenance schedule.
- Listen for Unusual Noises: Any unusual sounds from the pump area could indicate a problem.
8. Troubleshooting
If you encounter issues with the oil pump, consider the following:
- No Oil Flow:
- Check oil reservoir level.
- Inspect oil lines for blockages or kinks.
- Ensure the pump is correctly installed and connected.
- Verify the pump is receiving power (if applicable).
- Unusual Noise from Pump:
- Could indicate air in the system or a worn component.
- Check for proper oil level.
- If noise persists, professional inspection is recommended.
- Oil Leaks:
- Inspect all connections and seals for proper seating.
- Ensure the pump housing is not cracked or damaged.
For complex issues, consult a professional sewing machine technician.
9. Specifications
| Part Number | 183850-101 |
| Alternative Part Numbers | 183850101, 183850001, 183850021 |
| Product Dimensions | 15 x 12 x 1 inches |
| Manufacturer | CKPSMS |
| Compatibility | Brother Industrial Sewing Machines (DB2-C101, DB2-C201, SL-737A, SL-777B, SL-1110, S-6200A, S-7550A, SN-7210, SN-7220, SN-7230, SN-7240) |
10. Warranty and Support
For warranty information, technical assistance, or further support regarding your CKPSMS Lubricating Oil Pump, please contact CKPSMS customer service through their official channels. Keep your purchase receipt for warranty claims.
For additional resources and product information, you may visit the CKPSMS Store on Amazon.


