
CONTIA 620A
CONTIA 620A Digital Smart Multimeter User Manual
Model: 620A | Brand: CONTIA
Introduction
Thank you for choosing the CONTIA 620A Digital Smart Multimeter. This True RMS multimeter is designed for accurate measurement of AC/DC current, voltage, capacitance, resistance, and temperature. It features a 6000-count display and automatic range selection, making it an essential tool for electrical testing and troubleshooting. Please read this manual thoroughly before use to ensure safe and proper operation.
Important Safety Information
Always observe safety precautions when using electrical testing equipment. Failure to do so may result in injury or damage to the meter or equipment under test.
- Do not exceed the maximum input values specified for each measurement range.
- Ensure the test leads are in good condition and properly connected before making measurements.
- Do not use the meter if it appears damaged or is not operating properly.
- Exercise extreme caution when working with live circuits.
- Always disconnect power to the circuit before measuring resistance, capacitance, or continuity.
- Keep hands and fingers behind the probe barriers during testing.
Product Features
- 6000 Counts True RMS Digital Display
- Automatic Range Selection
- Measures AC/DC Current and Voltage
- Capacitance and Resistance Measurement
- Temperature Measurement
- Transistor Testing Capability
- Automatic Shut-down (15 minutes)
- HD LCD Digital Display Screen
Product Anatomy

Figure 1: Exploded view of the 620A Smart Multimeter, highlighting key components such as the 6000-count HD LCD digital display screen, circuit board, burn-proof fuse, test lead jacks, battery cover, and anti-drop silicone protective layer.
The CONTIA 620A Multimeter is designed with user safety and durability in mind. Key components include:
- HD LCD Digital Display Screen: Provides clear, 6000-count readings.
- Circuit Board: The main electronic assembly.
- Burn-proof Fuse: Provides protection against overcurrent.
- Test Lead Jacks: Input terminals for test leads.
- Battery Cover: Secures the battery compartment.
- Anti-drop Silicone Protective Layer: Enhances durability and provides shock absorption.
Setup
Battery Installation
The CONTIA 620A Multimeter requires two (2) 1.5V AAA batteries for operation (batteries not included). To install the batteries:
- Locate the battery cover on the back of the multimeter (refer to Figure 1).
- Use a screwdriver to open the battery compartment.
- Insert two 1.5V AAA batteries, ensuring correct polarity (+ and -).
- Replace the battery cover and secure it with the screw.
Note: Remove batteries if the meter is not used for an extended period to prevent leakage.
Operating Instructions

Figure 2: Front view of the 620A Multimeter with button functions labeled.
Button Functions
- Power Button (⏻):
- Single click: Power on the device.
- Long press: Power off the device.
- Hold/Backlight Button (H ☀️):
- Single click: Data hold function (freezes the current reading on the display).
- Long press: Activates/deactivates the backlight for the display.
- NCV/Flashlight Button (NCV 🔦):
- Single click: Enters NCV (Non-Contact Voltage) mode.
- Long press: Turns the built-in flashlight on/off.
- Function Switching Button (SEL):
- Single click: Switches between different measurement functions within a mode (e.g., AC/DC, Resistance/Continuity).
General Measurement Steps
- Turn on the multimeter by single-clicking the Power button.
- Connect the test leads to the appropriate input jacks (COM and VΩmA for most measurements, 10A for high current).
- Select the desired measurement function using the SEL button. The meter will automatically select the range.
- Apply the test probes to the circuit or component to be measured.
- Read the measurement value on the LCD display.
- After use, disconnect the test leads and long-press the Power button to turn off the meter. The meter will also automatically shut down after 15 minutes of inactivity.
Specifications
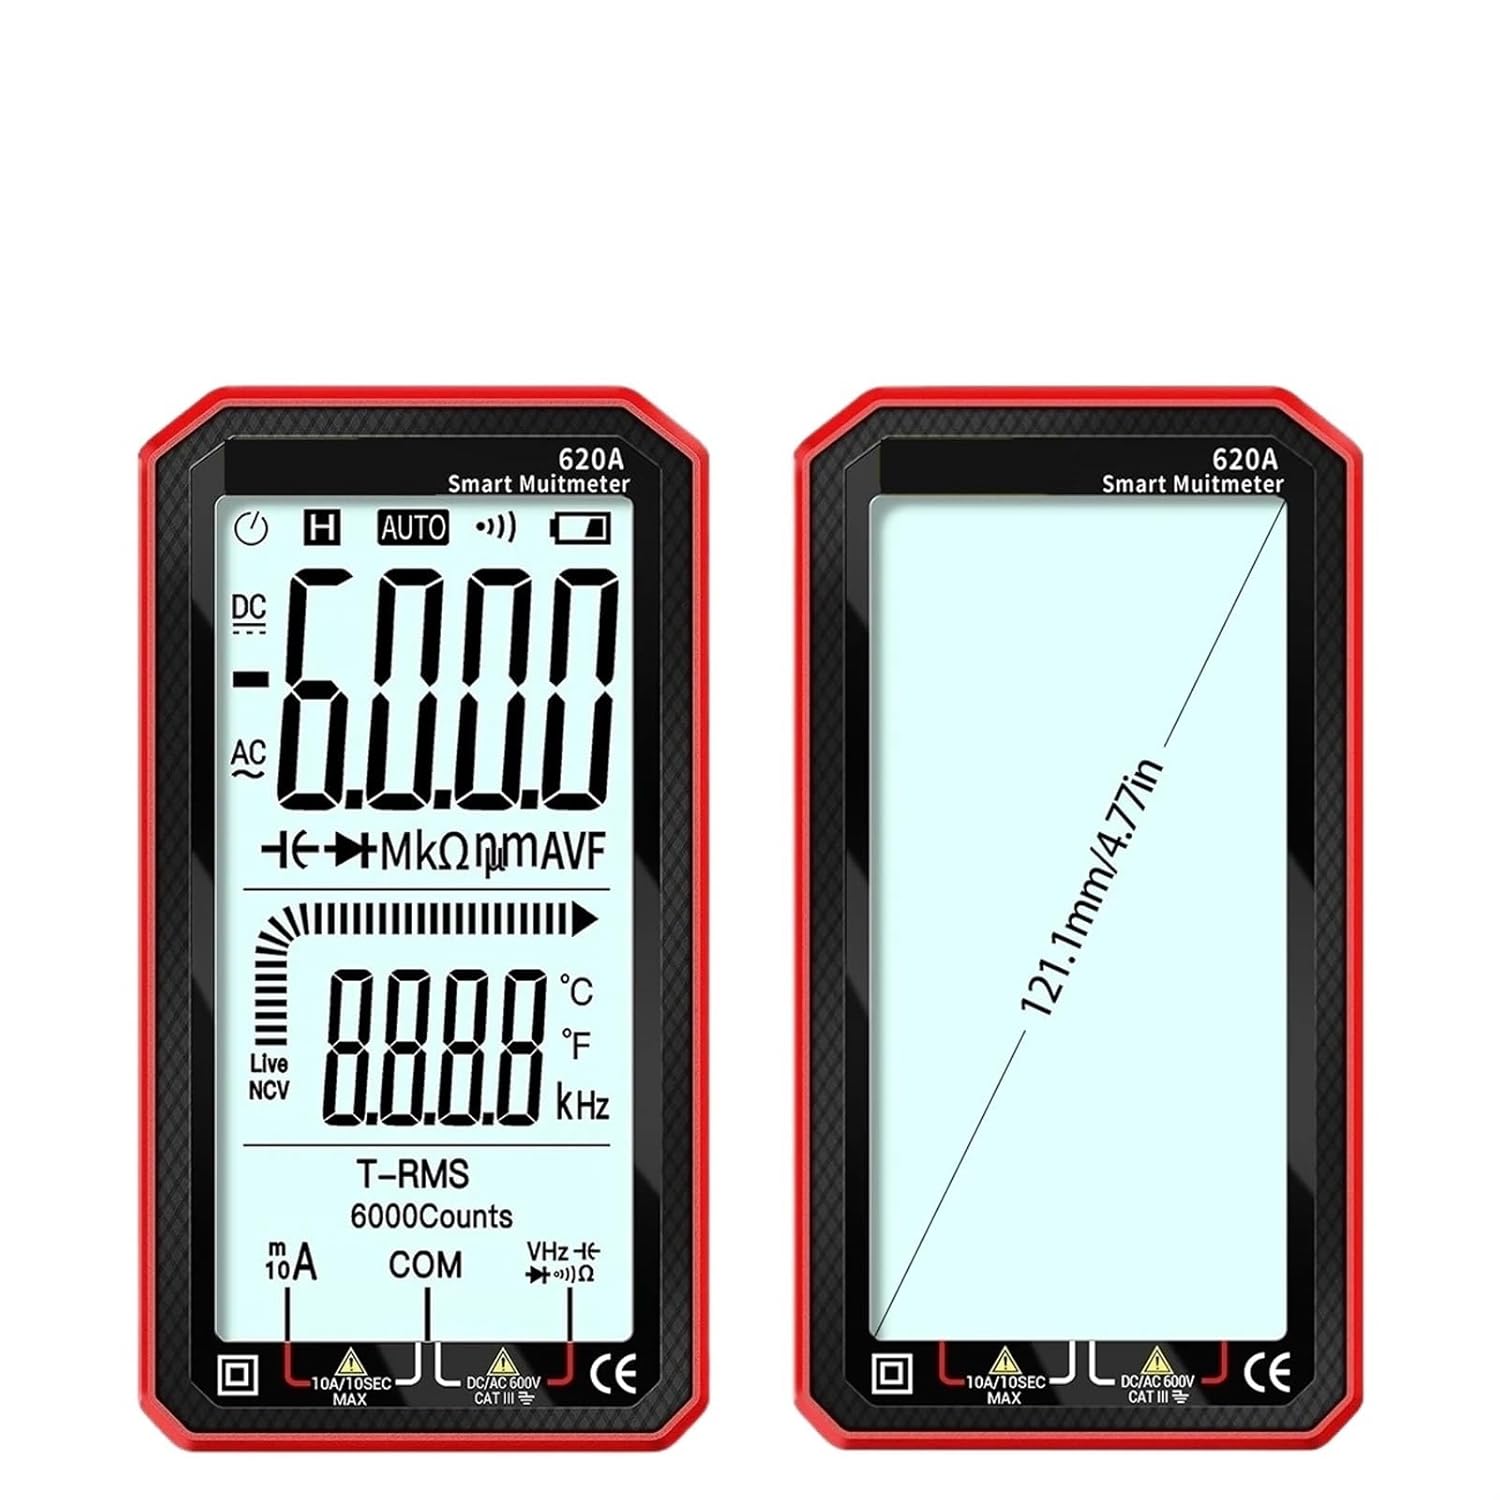
Figure 3: Dimensions of the 620A Multimeter.
| Parameter | Value |
|---|---|
| Display | LCD, 6000 digit Max. display value |
| Automatic Shut-down Time | 15 minutes |
| Power Supply | 2 x 1.5V AAA Battery (not included) |
| Calibration Cycle | One year (under 18~28°C, <75% RH) |
| Model | 620A |
| Weight | 181g (approx. 6.38 oz) |
| Material | ABS / Silicone |
| Color | Black (as per current product variant) |
| Dimensions (L x W x H) | 140mm x 75mm x 22mm (5.51in x 2.95in x 0.86in) |
Maintenance
Cleaning
Wipe the meter's casing with a damp cloth and mild detergent. Do not use abrasives or solvents. Ensure the meter is off and disconnected from any circuits before cleaning.
Calibration
The instrument specifies one year as a calibration cycle. It shall be re-calibrated under 18~28°C, with relative humidity less than 75%. For professional calibration services, please contact CONTIA customer support.
Battery Replacement
Replace batteries when the low battery indicator appears on the display. Refer to the "Battery Installation" section for instructions.
Troubleshooting
| Problem | Possible Cause | Solution |
|---|---|---|
| Meter does not power on. | Dead or incorrectly installed batteries. | Check battery polarity or replace batteries. |
| No reading or "OL" displayed. | Open circuit, out of range, or incorrect function selected. | Check connections, ensure measurement is within range, or select appropriate function. |
| Inaccurate readings. | Low battery, dirty test leads, or meter needs calibration. | Replace batteries, clean test leads, or consider professional calibration. |
Warranty and Support
For warranty information and technical support, please refer to the documentation provided with your purchase or visit the official CONTIA website. Please have your product model number (620A) and purchase details ready when contacting support.
Ask a question about this manual
Ask about setup, troubleshooting, compatibility, parts, safety, or missing instructions. Manuals+ will review the question and use this page’s manual context to help answer it.