
Andonstar AD269S
Andonstar AD269S HDMI Digital Microscope User Manual
Model: AD269S | Brand: Andonstar
Introduction
This manual provides comprehensive instructions for the setup, operation, and maintenance of your Andonstar AD269S HDMI Digital Microscope. Designed for versatility, this powerful tool combines features of a stereo microscope, compound microscope, and a lab handheld digital microscope, making it suitable for a wide range of applications including biological studies, coin collecting, electronics repair, and more.

Figure 1: Andonstar AD269S Digital Microscope with its 10.1-inch LCD screen, multiple lenses, endoscope, and other included accessories.
What's in the Box
Upon opening the package, verify that all listed components are present:
- 10.1 inch Microscope Monitor
- Lens A (pre-installed on the microscope)
- Lens sets B, C, M
- Lens L
- Endoscope
- Adjustable arm
- Endoscope accessories
- Base
- Column
- External LED lights
- X-Y Moveable stage
- Backdrop board (3 pieces)
- Remote control
- Power adapter
- HDMI cable
- USB cable
- Power cable
- Biological slides kit (5 prepared slides)
- Tweezers
- Observation box
- 32GB Micro SD card
- User manual

Figure 2: A complete overview of all included accessories and components for the AD269S microscope, ready for assembly and use.
Setup Instructions
1. Assembling the Microscope Stand
The AD269S features an integrated metal stand designed for stability and reduced shake, especially with high-magnification lenses. Securely attach the column to the base.
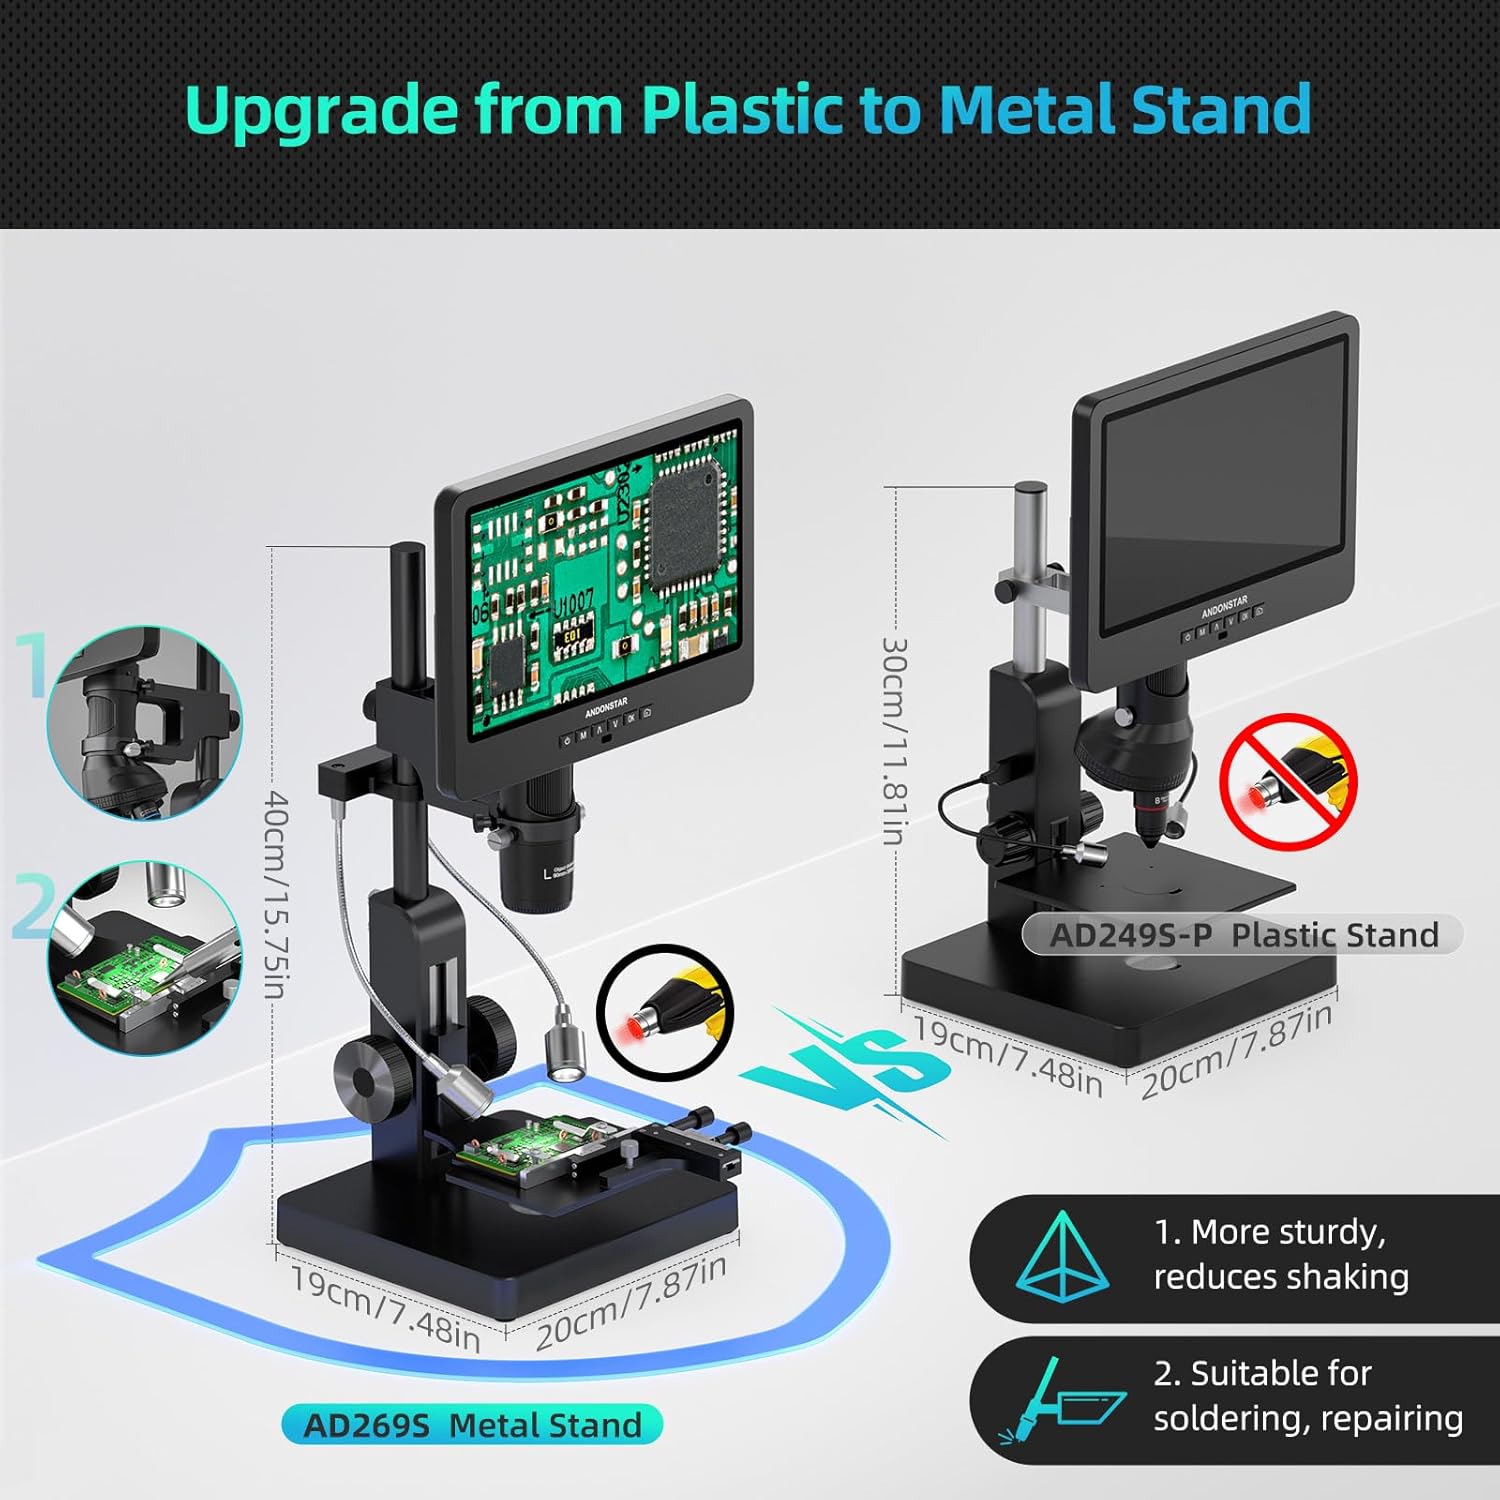
Figure 3: The upgraded metal stand of the AD269S (left) provides enhanced stability and durability compared to previous plastic models (right).
2. Attaching the X-Y Moveable Stage
Attach the X-Y moveable stage to the microscope base. This stage allows for precise movement of specimens along the X and Y axes, simplifying observation and positioning.

Figure 4: The X-Y moveable stage enables fine adjustments for specimen positioning, crucial for detailed examination.
3. Installing Lenses
The microscope comes with multiple lenses for various applications. Lens A is typically pre-installed. To change lenses, carefully remove the existing lens by unscrewing it and install the desired lens by screwing it into place. Ensure it is securely fastened.

Figure 5: Overview of the five interchangeable lenses and their recommended applications, from wide-view coin inspection to high-magnification biological observation and soldering.
4. Connecting Power and Display
Connect the power adapter to the microscope and a power outlet. The 10.1-inch LCD screen will power on. For external display, connect the HDMI cable from the microscope to an HDMI-compatible monitor or TV. The microscope supports UHD 2160P video output via HDMI.

Figure 6: The microscope's 10.1-inch IPS LCD monitor provides a clear, wide-angle view and supports 2160P video recording.

Figure 7: The microscope can output to an external HDMI monitor for larger viewing or connect to a Windows PC for advanced measurement and capture functions. Note: The endoscope does not support PC output.
5. Software Installation (for Windows PC)
To utilize measurement, photo, and video capture features on a Windows PC, download and install the professional measurement software. Connect the microscope to your PC using the provided USB cable (not the one with the dimmer). On the microscope screen, select 'PC Camera' mode when prompted.

Figure 8: Steps for installing the PC software and connecting the microscope for advanced functions, including measurement and data capture.
Operating Instructions
1. Basic Controls
The microscope features intuitive controls on the monitor and a remote control for convenient operation.
- Power On/Off: Use the dedicated button on the monitor.
- Mode/Menu: Access different modes and settings.
- Digital Zoom: Adjust magnification using the Up/Down buttons.
- Record/Capture: Use the OK/Start recording button for videos and the Take pictures button for still images.
- Focusing: Rotate the focusing wheel on the microscope body to achieve a clear image.
- Object Distance: Adjust the bracket knob to set the appropriate distance between the lens and the object.

Figure 9: Front and rear views of the 10.1-inch LCD monitor, detailing button functions and port locations for power, USB, and HDMI connections.
2. Using Different Lenses
The AD269S includes five distinct lenses, each optimized for specific observation types:
- Lens A: Ideal for full views of coins, plants, stones, and other larger objects. Magnification range: 4.5-180x (on screen), 18-720x (on 28-inch HDMI monitor).
- Lens B, C, M: Designed for biological slides, offering high magnification for detailed cellular observation.
- Lens B: 390-510x (on screen), 1560-2040x (on 28-inch HDMI monitor).
- Lens C: 690-1020x (on screen), 2760-4080x (on 28-inch HDMI monitor).
- Lens M: 3600-5100x (on screen).
- Lens L: Best suited for soldering and repairing circuit boards, providing a clear view of small electronic components. Magnification range: 15-60x (on screen), 60-240x (on 28-inch HDMI monitor).

Figure 10: Examples of magnification levels, from 20x for a full coin view to 5000x for microscopic details of a biological specimen, demonstrating the microscope's wide magnification range.
3. Utilizing the Endoscope
The included endoscope allows for observation of components' sides and inside pipes, providing a 360° view without blind spots. Connect the endoscope to its dedicated interface on the microscope. You can switch between endoscope and microscope views on the screen.

Figure 11: The endoscope provides flexible viewing for intricate details and hidden areas, such as inside coils or under components on a circuit board.

Figure 12: The monitor allows seamless switching between the main microscope view, the endoscope view, or a combined display for comprehensive observation.
4. Adjusting Lighting
The microscope offers versatile lighting options to suit different observation needs:
- External LED Lights: These are ideal for use with Lens A and L, providing illumination for observing coins and repairing circuit boards.
- Bottom Lights: Designed for high-magnification lens sets B, C, and M, these lights are crucial for examining biological slides where light needs to pass through the specimen.

Figure 13: The microscope features both external LED lights for reflective illumination and bottom lights for transmitted illumination, catering to various specimen types and observation methods.
Maintenance
1. Cleaning
To ensure optimal performance and longevity of your microscope, regular cleaning is recommended:
- Lenses: Use a soft, lint-free cloth specifically designed for optical lenses. For stubborn smudges, a small amount of lens cleaning solution can be applied to the cloth, not directly to the lens.
- Body and Screen: Wipe the microscope body and LCD screen with a soft, dry cloth. Avoid abrasive cleaners or solvents.
- Dust: Use a blower brush to remove dust from lenses and other delicate parts.
2. Storage
When not in use, store the microscope in a clean, dry, and dust-free environment. It is advisable to cover the microscope with a dust cover to protect it from environmental elements.
Troubleshooting
This section addresses common issues you might encounter with your Andonstar AD269S microscope. If you experience problems not covered here, please contact customer support.
| Problem | Possible Cause | Solution |
|---|---|---|
| No image on screen/external monitor | Power not connected; Cables loose; Incorrect input source on external monitor. | Ensure power adapter is securely connected. Check HDMI/USB cable connections. Select correct HDMI input on external monitor. |
| Image blurry/out of focus | Focusing wheel not adjusted; Incorrect object distance; Dirty lens. | Rotate the focusing wheel until the image is clear. Adjust the bracket knob to change object distance. Clean the lens carefully. |
| No light from LEDs | Lights turned off; Cable connection issue; Brightness too low. | Check light power switch/controls. Ensure external LED cables are connected. Adjust brightness settings. |
| Cannot connect to PC | Incorrect USB cable; Driver not installed; Microscope not in PC Camera mode. | Use the correct USB cable (not the dimmer one). Install the measurement software and drivers. Select 'PC Camera' mode on the microscope screen. |
| Remote control not working | Batteries low/dead; Obstruction between remote and receiver; Remote out of range. | Replace batteries. Ensure clear line of sight to the remote signal receiver. Operate within recommended range. |
Specifications
| Feature | Detail |
|---|---|
| Product Dimensions | 7.9 x 7.5 x 16 inches (7.9"L x 7.5"W x 16"H) |
| Item Weight | 8.38 pounds |
| Model Number | AD269S |
| Display | 10.1'' LCD IPS Display |
| Video Output | UHD 2160P (HDMI), FHD 1920x1080 (PC) |
| Magnification (On Screen) | Lens A: 4.5-180x; Lens B: 390-510x; Lens C: 690-1020x; Lens M: 3600-5100x; Lens L: 15-60x |
| Magnification (On 28-inch HDMI Monitor) | Lens A: 18-720x; Lens B: 1560-2040x; Lens C: 2760-4080x; Lens L: 60-240x |
| Light Source Type | LED (External and Bottom) |
| Storage | Micro SD card (32GB included) |
| Compatible Devices | Laptop, Personal Computer (Windows), Television |
| Manufacturer | ShenZhen Andonstar Technology Co., Ltd |
Warranty and Support
Andonstar provides professional after-sales service for its products. For any inquiries, technical assistance, or warranty claims, please contact Andonstar customer support. Refer to the product packaging or the official Andonstar website for the most current contact information.
The product is manufactured by ShenZhen Andonstar Technology Co., Ltd.
Protection plans may be available for purchase separately to extend coverage beyond the standard warranty. Please check with your retailer for details on available protection plans.
Related documentsAD269S


Ask a question about this manual
Ask about setup, troubleshooting, compatibility, parts, safety, or missing instructions. Manuals+ will review the question and use this page’s manual context to help answer it.