
1. Introduction
This manual provides comprehensive instructions for the proper setup, operation, and maintenance of your Mitlvge 1.2 Cu Ft Home Safe. Please read this manual thoroughly before using the safe to ensure optimal security and functionality. Keep this manual for future reference.
2. Product Overview
The Mitlvge 1.2 Cu Ft Home Safe is designed to protect your valuables with its robust construction and advanced security features. It features a digital keypad for programmable access, emergency keys, and an anti-theft alarm system. The interior includes a removable shelf for organized storage.

Image: The Mitlvge 1.2 Cu Ft Home Safe, showcasing its interior capacity for various valuables and the included fireproof bag.
Key Features:
- Construction: 50 mm extra-thick explosion-proof steel door, 3*20 mm high-strength solid locking bolts, pry-proof concealed hinges.
- Access: Digital combination lock with programmable keypad and emergency keys.
- Capacity: 1.2 Cubic Feet interior space.
- Interior: Removable shelf for organization, built-in sensor light.
- Security: Anti-theft alarm system, external power box for emergency battery replacement.
- Included: Fireproof and water-resistant document bag.
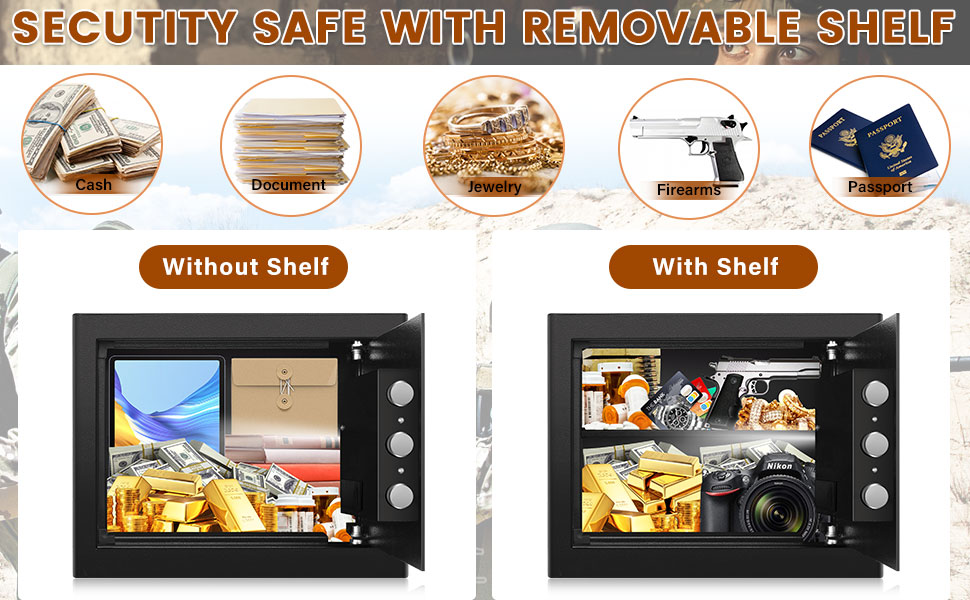
Image: Illustration of the safe's interior with and without the removable shelf, demonstrating versatile storage options for various items.
3. Setup
3.1 Unpacking and Initial Inspection
Carefully remove the safe from its packaging. Inspect the safe for any signs of damage. Ensure all included components are present: 1 safe box, 1 fireproof waterproof document bag, 2 emergency keys, 1 external battery box, 4 expansion screws, 1 user manual, 1 felt mat.
3.2 Battery Installation
The safe requires 4 AA batteries (not included) for the digital keypad. Locate the battery compartment on the inside of the safe door. Insert the batteries, ensuring correct polarity. Close the compartment cover.
3.3 Initial Password Setting
The initial password for the safe is "159". To open the safe for the first time:
- Insert one of the emergency keys into the keyhole on the keypad and turn it clockwise.
- Turn the knob clockwise to open the safe door.
- With the door open, press the red reset button located on the inside of the door (usually near the hinge).
- Enter your desired 3-8 digit code on the keypad, then press "#" to confirm.
- Test the new code with the door open before closing it.
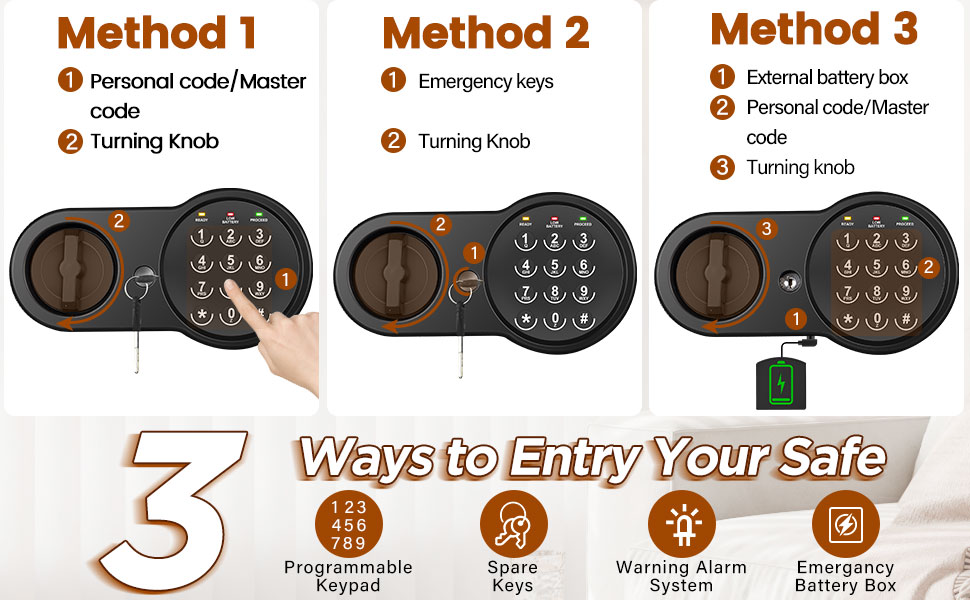
Image: Visual guide to the three methods of safe access: digital code, emergency key, and external battery box with code.
3.4 Mounting the Safe
For enhanced security, the safe can be bolted to a wall or floor. Locate the pre-drilled holes inside the safe. Use the provided expansion screws to secure the safe to a solid surface. Ensure the mounting location is stable and can support the weight of the safe and its contents.

Image: Step-by-step instructions for wall or floor mounting the safe, illustrating how it can be discreetly installed.
4. Operation
4.1 Opening the Safe with Digital Keypad
- Enter your programmed 3-8 digit code.
- Press "#" to confirm. The green "PROCEED" light will illuminate.
- Within 5 seconds, turn the knob clockwise to open the safe door.
4.2 Opening the Safe with Emergency Key
In case of forgotten password or dead batteries, use the emergency key:
- Locate the emergency keyhole, usually hidden behind a removable cover on the keypad.
- Insert the emergency key and turn it clockwise.
- Turn the knob clockwise to open the safe door.
Important: Do not store emergency keys inside the safe.
4.3 Changing the Password
- Open the safe door using your current code or emergency key.
- Press the red reset button on the inside of the door.
- Enter your new 3-8 digit code on the keypad, then press "#" to confirm.
- Test the new code with the door open before closing it.
4.4 Silent Mode
To enable or disable silent mode (mutes keypad beeps):
- With the safe door open, press the "*" button.
- The keypad will confirm the change in mode.
4.5 Anti-Theft Alarm System
The safe is equipped with an alarm system to deter unauthorized access:
- Incorrect Password Alarm: If an incorrect password is entered 3 times consecutively, the system will lock for 20 seconds. If an incorrect password is entered 6 times consecutively, it will lock for 5 minutes.
- Vibration Alert: The safe may trigger an alarm if subjected to violent vibrations or tampering.
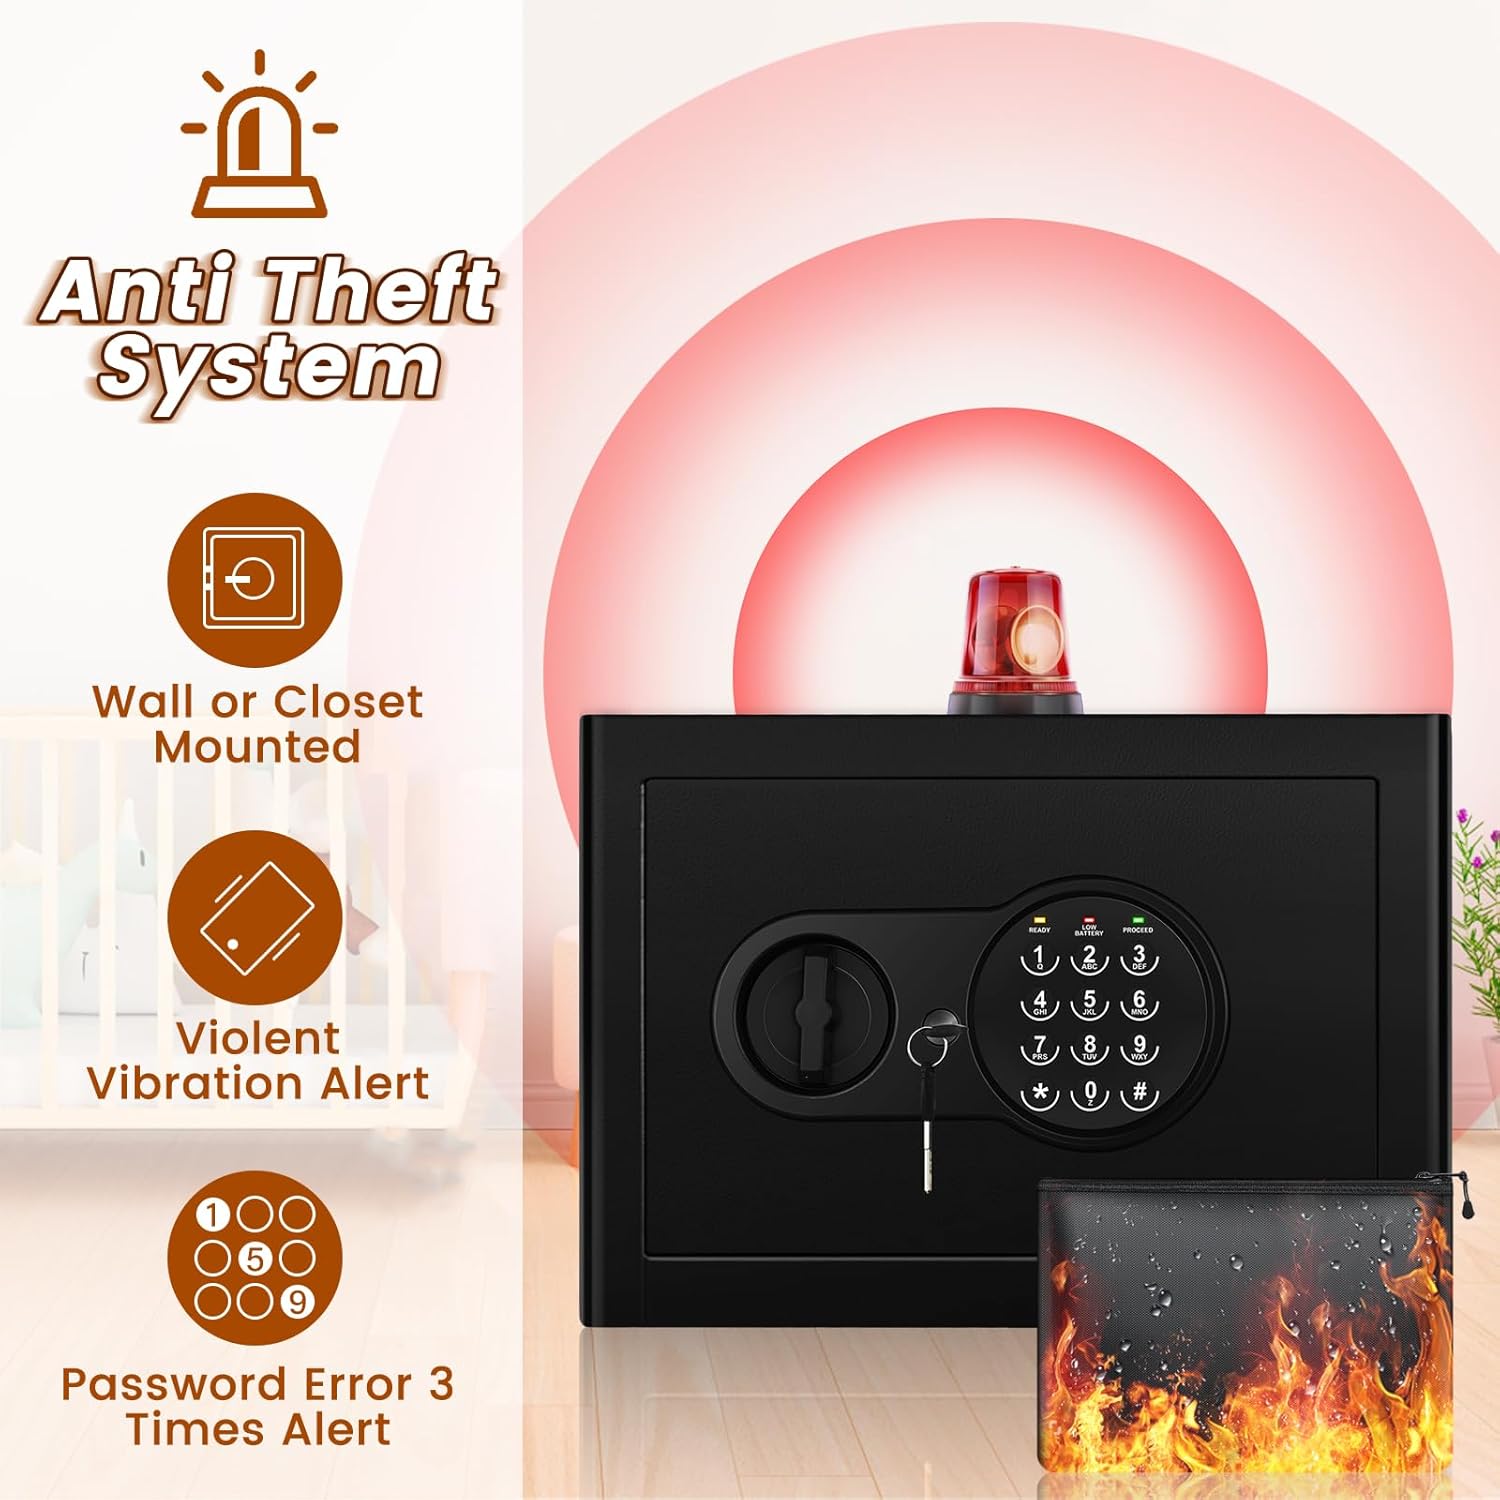
Image: Visual representation of the safe's anti-theft system, highlighting its alarm features for incorrect password attempts and violent vibrations.
5. Maintenance
5.1 Battery Replacement
When the batteries are low, the "LOW BATTERY" indicator light will illuminate. Replace all 4 AA batteries promptly to ensure continuous operation. If batteries die while the safe is locked, use the external battery box:
- Insert 4 AA batteries into the external battery box.
- Plug the external battery box into the port on the keypad.
- Enter your code and open the safe as usual.
- Replace the internal batteries immediately after opening.
5.2 Cleaning
Clean the safe's exterior with a soft, damp cloth. Avoid using abrasive cleaners or solvents, as these can damage the finish. Do not spray cleaning solutions directly onto the keypad or lock mechanism.
6. Troubleshooting
- Safe does not open with code:
- Ensure batteries are not low; replace if necessary. Use the external battery box if internal batteries are completely dead.
- Verify the code entered is correct. Remember to press "#" after entering the code.
- If the keypad is locked due to multiple incorrect entries, wait for the lockout period to expire. - Keypad is unresponsive:
- Check battery installation and replace batteries if needed.
- Use the emergency key to open the safe. - Emergency key does not work:
- Ensure the key is fully inserted and turned correctly. If the key is bent or damaged, contact customer support. - Alarm sounds unexpectedly:
- Check for any impacts or vibrations that might have triggered the alarm.
7. Specifications
| Feature | Specification |
|---|---|
| Brand | Mitlvge |
| Model Number | ET |
| Product Dimensions | 9.84"D x 13.78"W x 9.84"H |
| Lock Type | Electronic Combination Lock, Key |
| Color | Black |
| Capacity | 1.2 Cubic Feet |
| Material | Alloy Steel |
| Special Features | Alarm System, Anti-Theft, Combination Lock, Removable Shelf |
| Mounting Type | Wall Mount, Floor Mount |
| Item Weight | 14.19 pounds |
| Water Resistance Level | Waterproof (with included bag) |
| Batteries Required | Yes (4 x AA, not included) |

Image: Detailed view of the safe's dimensions and a checklist of all items included in the package.
8. Warranty and Customer Support
Mitlvge provides customer support for your product. If you encounter any issues or have questions regarding your safe, please contact our support team. We aim to provide 24-hour online service to ensure your satisfaction.
- Customer Support: Available 24 hours online.
- Included Components: 1 x safe box, 1 x fireproof waterproof document bag, 2 x emergency keys, 1 x external battery box, 4 x expansion screws, 1 x user manual, 1 x felt mat.