1. Introduction
The Team Associated RC8B4.1 Team Kit is a high-performance 1/8 scale nitro off-road buggy designed for competitive racing. This kit requires assembly and additional components to be fully operational. This manual provides essential information for the assembly, operation, maintenance, and troubleshooting of your RC8B4.1 Team Kit.
1.1 Key Features
- RC8B4.1 RWB Chassis and Side Guards
- Low CG and Lightweight Aluminum Shock Towers
- 16mm Front and Rear Shock Bodies
- Durable Rear Hub Design with Wide Footprint
- 47T Machined Spur Gear

2. Assembly and Setup
This section outlines the general steps for assembling your RC8B4.1 Team Kit. Refer to the detailed assembly manual included in your kit for specific instructions and part numbers. Ensure you have all necessary tools before beginning assembly.
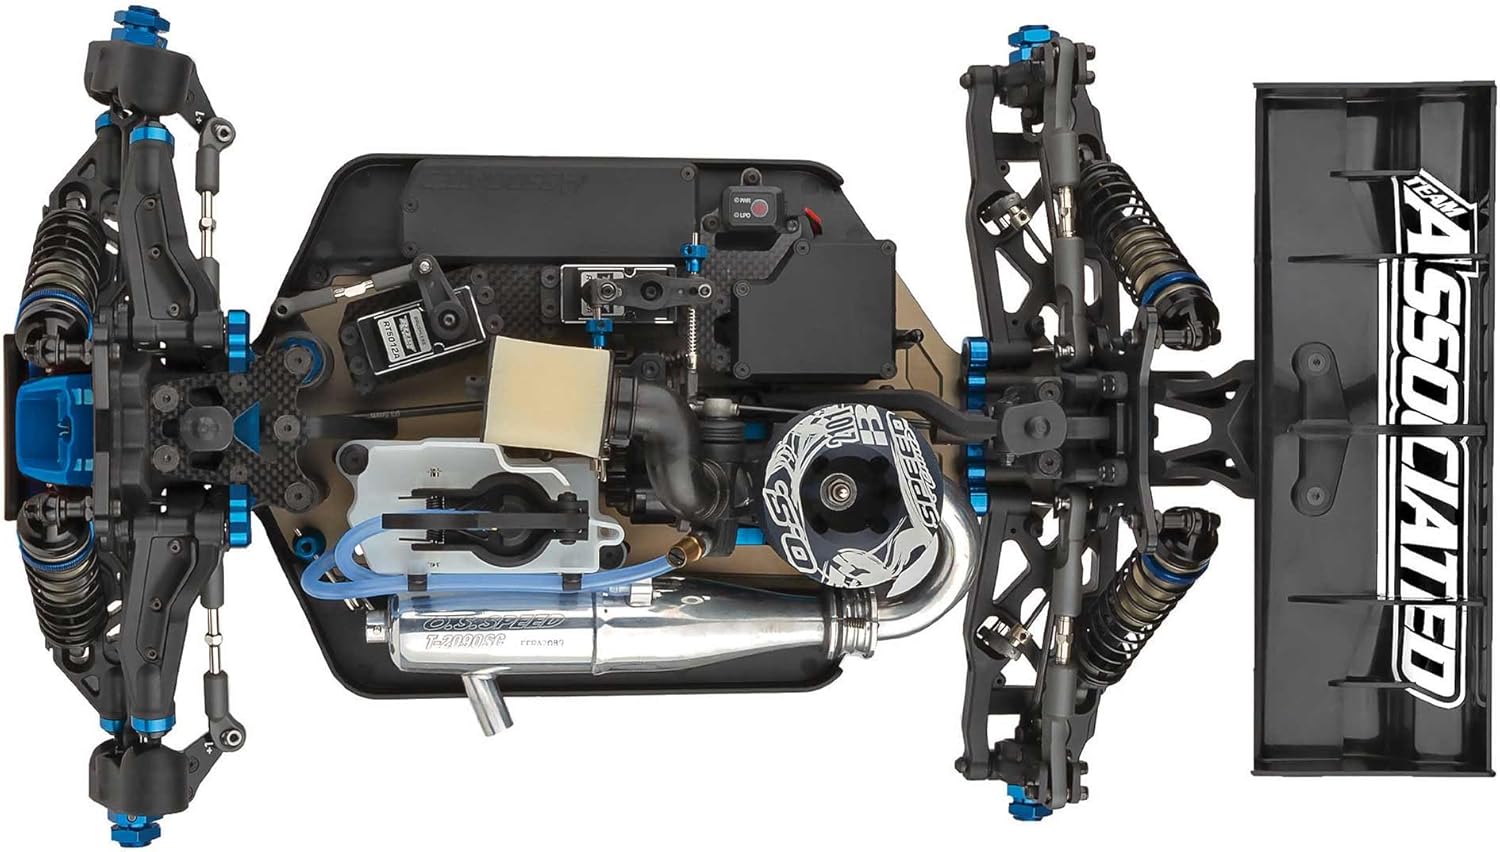
2.1 Chassis Assembly
Begin by assembling the main chassis components. The RC8B4.1 features a new RWB chassis design with a tapered profile for enhanced stiffness and predictable handling. Carefully attach the side guards and ensure all screws are tightened to specification.

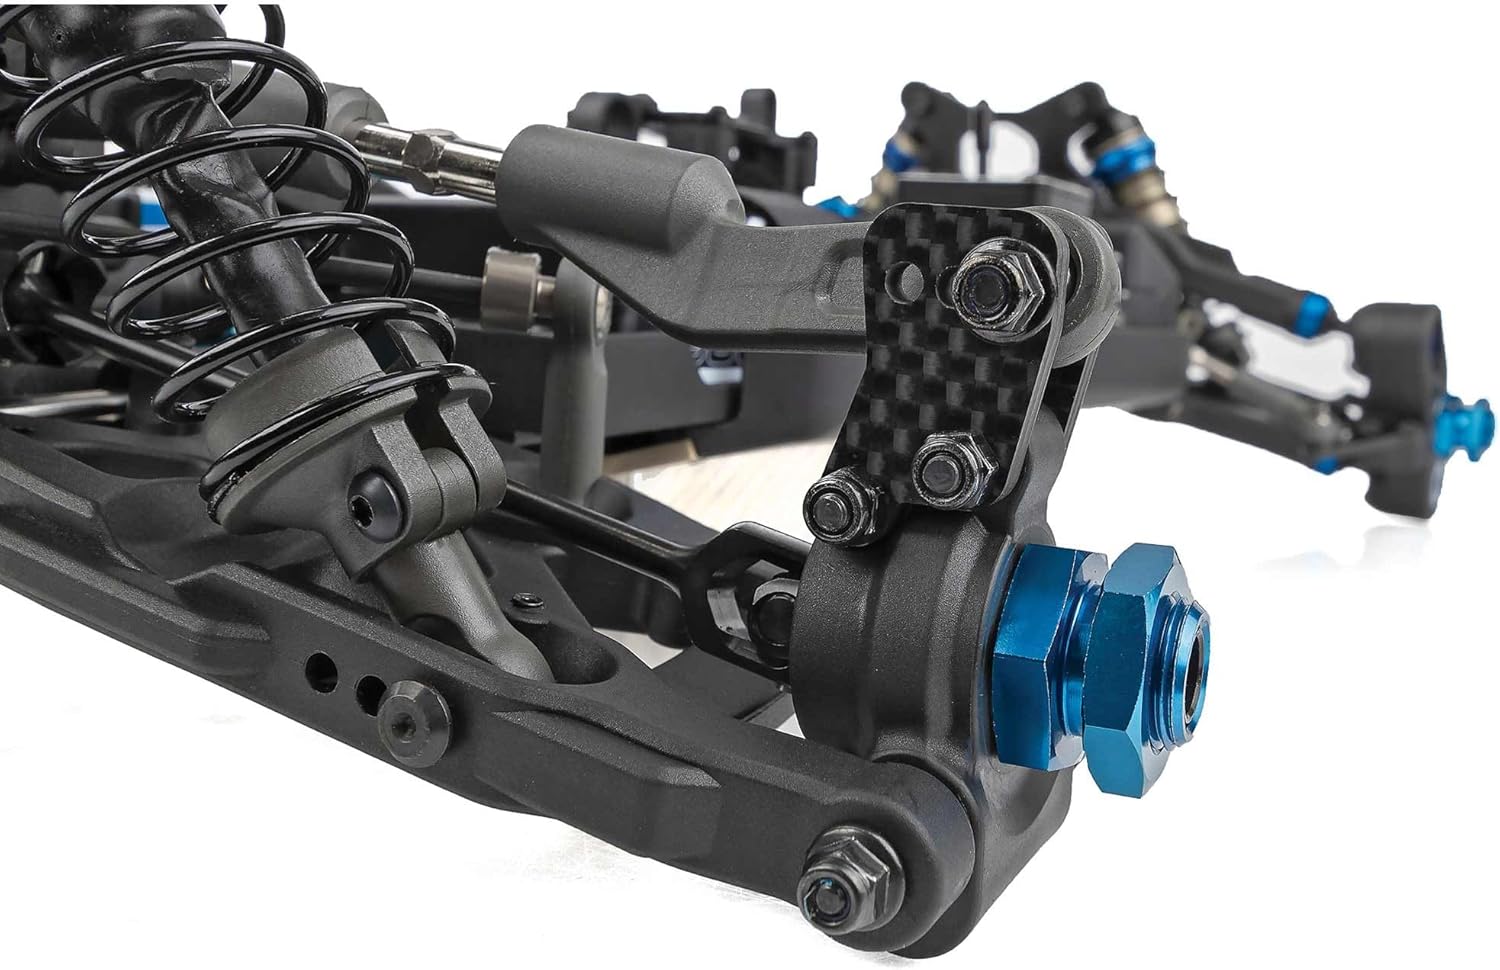
2.2 Suspension System
Assemble the front and rear suspension arms, shock towers, and shock absorbers. The kit includes new low-CG aluminum shock towers and shorter 16mm shock bodies. Pay close attention to the orientation of the 3-hole rear suspension arms and the installation of the emulsion shock cap seals.

2.3 Drivetrain Components
Install the universal joints, 44/13 bevel gears, and the 47T spur gear. Ensure all bearings are properly seated and lubricated. Correct assembly of the drivetrain is crucial for smooth power delivery and durability.

2.4 Engine and Fuel System Installation
Mount your chosen nitro engine and connect the fuel tank, fuel lines, and exhaust system. Ensure all connections are secure and leak-free. Proper routing of fuel lines is essential for reliable engine operation.

2.5 Radio System Installation
Install your receiver, servos, and battery pack. Ensure all wires are neatly routed and secured to prevent interference or damage during operation. Calibrate your radio system according to its manufacturer's instructions.
2.6 Initial Adjustments
After assembly, perform initial adjustments for ride height, camber, toe, and shock settings. These adjustments are critical for optimal performance and handling. Consult the detailed kit manual for recommended starting settings.
3. Operating Your RC8B4.1
This section provides guidance on safely operating your RC8B4.1 Team Kit. Always operate your RC vehicle in a safe and responsible manner.
3.1 Pre-Run Checklist
- Check fuel level and condition.
- Ensure all radio batteries are fully charged.
- Inspect all screws and fasteners for tightness.
- Verify proper operation of steering and throttle servos.
- Check tire condition and pressure.
3.2 Engine Starting Procedure
- Prime the engine by covering the exhaust and pulling the starter cord until fuel reaches the carburetor.
- Attach a glow plug igniter to the glow plug.
- Pull the starter cord firmly and smoothly until the engine starts.
- Allow the engine to warm up for a few minutes before driving.
3.3 Driving Tips
- Start with gentle throttle inputs to familiarize yourself with the vehicle's response.
- Practice steering and braking in an open area.
- Avoid prolonged full-throttle operation, especially during the break-in period.
- Be aware of your surroundings and avoid obstacles or other people.
3.4 Post-Run Procedures
- Turn off the engine and radio transmitter.
- Remove any remaining fuel from the tank.
- Clean the vehicle thoroughly to remove dirt and debris.
- Inspect for any damage or loose parts.
4. Maintenance Guide
Regular maintenance is crucial for the longevity and performance of your RC8B4.1 Team Kit.
4.1 Regular Cleaning
After each run, clean the buggy using a soft brush, compressed air, or a damp cloth. Pay attention to areas where dirt and debris can accumulate, such as around the suspension and drivetrain components.

4.2 Drivetrain Maintenance
- Inspect gears for wear and replace as needed.
- Clean and re-grease universal joints and differentials periodically.
- Check bearings for smooth operation and replace any rough or seized bearings.
4.3 Suspension Maintenance
- Inspect shock shafts for bends or damage.
- Check shock oil levels and replace as necessary.
- Ensure suspension arms move freely without excessive play.
4.4 Engine Care
- Clean the air filter regularly.
- Inspect the glow plug and replace if worn.
- Ensure all engine mounting screws are tight.
- After each run, apply after-run oil to the engine to prevent corrosion.
4.5 Storage
When storing your RC8B4.1, ensure it is clean and dry. Remove batteries from the radio and vehicle. Store in a cool, dry place away from direct sunlight.
5. Troubleshooting Common Issues
This section addresses common problems you might encounter with your RC8B4.1 Team Kit.
5.1 Engine Related Issues
- Engine won't start: Check glow plug, fuel level, fuel lines for clogs, and carburetor settings. Ensure the engine is properly primed.
- Engine stalls frequently: Adjust carburetor settings (idle, high-speed, low-speed needles). Check for air leaks in fuel lines or engine seals.
- Lack of power: Inspect air filter for clogs, check glow plug, and verify carburetor tuning.
5.2 Handling and Performance Issues
- Poor steering response: Check steering servo operation, linkages for binding, and front suspension settings (toe, camber).
- Unstable handling: Verify shock oil viscosity, spring rates, and overall suspension setup. Ensure tires are in good condition and properly inflated.
- Excessive noise from drivetrain: Inspect gears for wear, check differential fluid levels, and ensure all bearings are smooth.
5.3 Radio System Issues
- Loss of control: Check transmitter and receiver battery levels. Ensure antenna is properly extended and free from obstruction. Re-bind transmitter and receiver if necessary.
- Erratic servo movement: Check for loose connections, damaged wires, or interference.
6. Product Specifications
Below are the key specifications for the Team Associated RC8B4.1 Team Kit (ASC80949).
| Specification | Value |
|---|---|
| Product Dimensions | 20.1 x 10 x 6.6 inches |
| Item Weight | 1 pounds |
| ASIN | B0CS9634KD |
| Item Model Number | ASC80949 |
| Manufacturer Recommended Age | 14 months and up |
| Manufacturer | Team Associated |
7. Warranty and Customer Support
Team Associated products are manufactured to high standards. For specific warranty information, please refer to the documentation included with your kit or visit the official Team Associated website. Warranty terms typically cover manufacturing defects.
7.1 Customer Support
If you encounter any issues or have questions regarding your RC8B4.1 Team Kit, please contact Team Associated customer support directly. Their contact information can typically be found on their official website or in the kit's packaging.
Website: www.associatedelectrics.com


