
1. Introduction
Thank you for choosing the ROOMTEC Frameless Double Sliding Shower Door. This manual provides essential information for the safe and correct installation, operation, and maintenance of your new shower door. Please read all instructions carefully before beginning installation and retain this manual for future reference.
2. Safety Information
WARNING: Improper installation or use of this product can result in serious injury or property damage. Always follow these safety guidelines:
- Heavy Glass: Shower door glass panels are extremely heavy. Always use at least two people for lifting and positioning glass panels.
- Tempered Glass: This product uses tempered glass, which is designed to shatter into small, relatively harmless pieces if broken. However, handle with care to avoid chipping edges, which can lead to spontaneous breakage.
- Sharp Edges: Be cautious of sharp edges on glass and metal components during handling and installation. Wear appropriate personal protective equipment, including safety glasses and heavy-duty gloves.
- Structural Integrity: Ensure that the wall structure where the shower door will be installed is capable of supporting the significant weight of the glass panels and hardware. Reinforcement may be necessary.
- Professional Installation Recommended: Due to the complexity and weight of the components, professional installation is highly recommended.
- Use Correct Hardware: Only use the provided mounting hardware or suitable alternatives approved by a professional for your specific wall type.
- Water Sealing: Proper sealing with silicone sealant is critical to prevent water leakage. Ensure all gaps are adequately sealed.
3. Product Features
- Frameless Design: Provides a modern and spacious aesthetic for your bathroom.
- Safe & Durable: Constructed with premium 3/8" (10mm) thick tempered glass for enhanced safety and durability. The glass features a Nano Technology protective layer for easy cleaning and resistance to stains and scratches.
- Double Sliding Operation: Allows for flexible entry and exit from either side, accommodating various bathroom layouts.
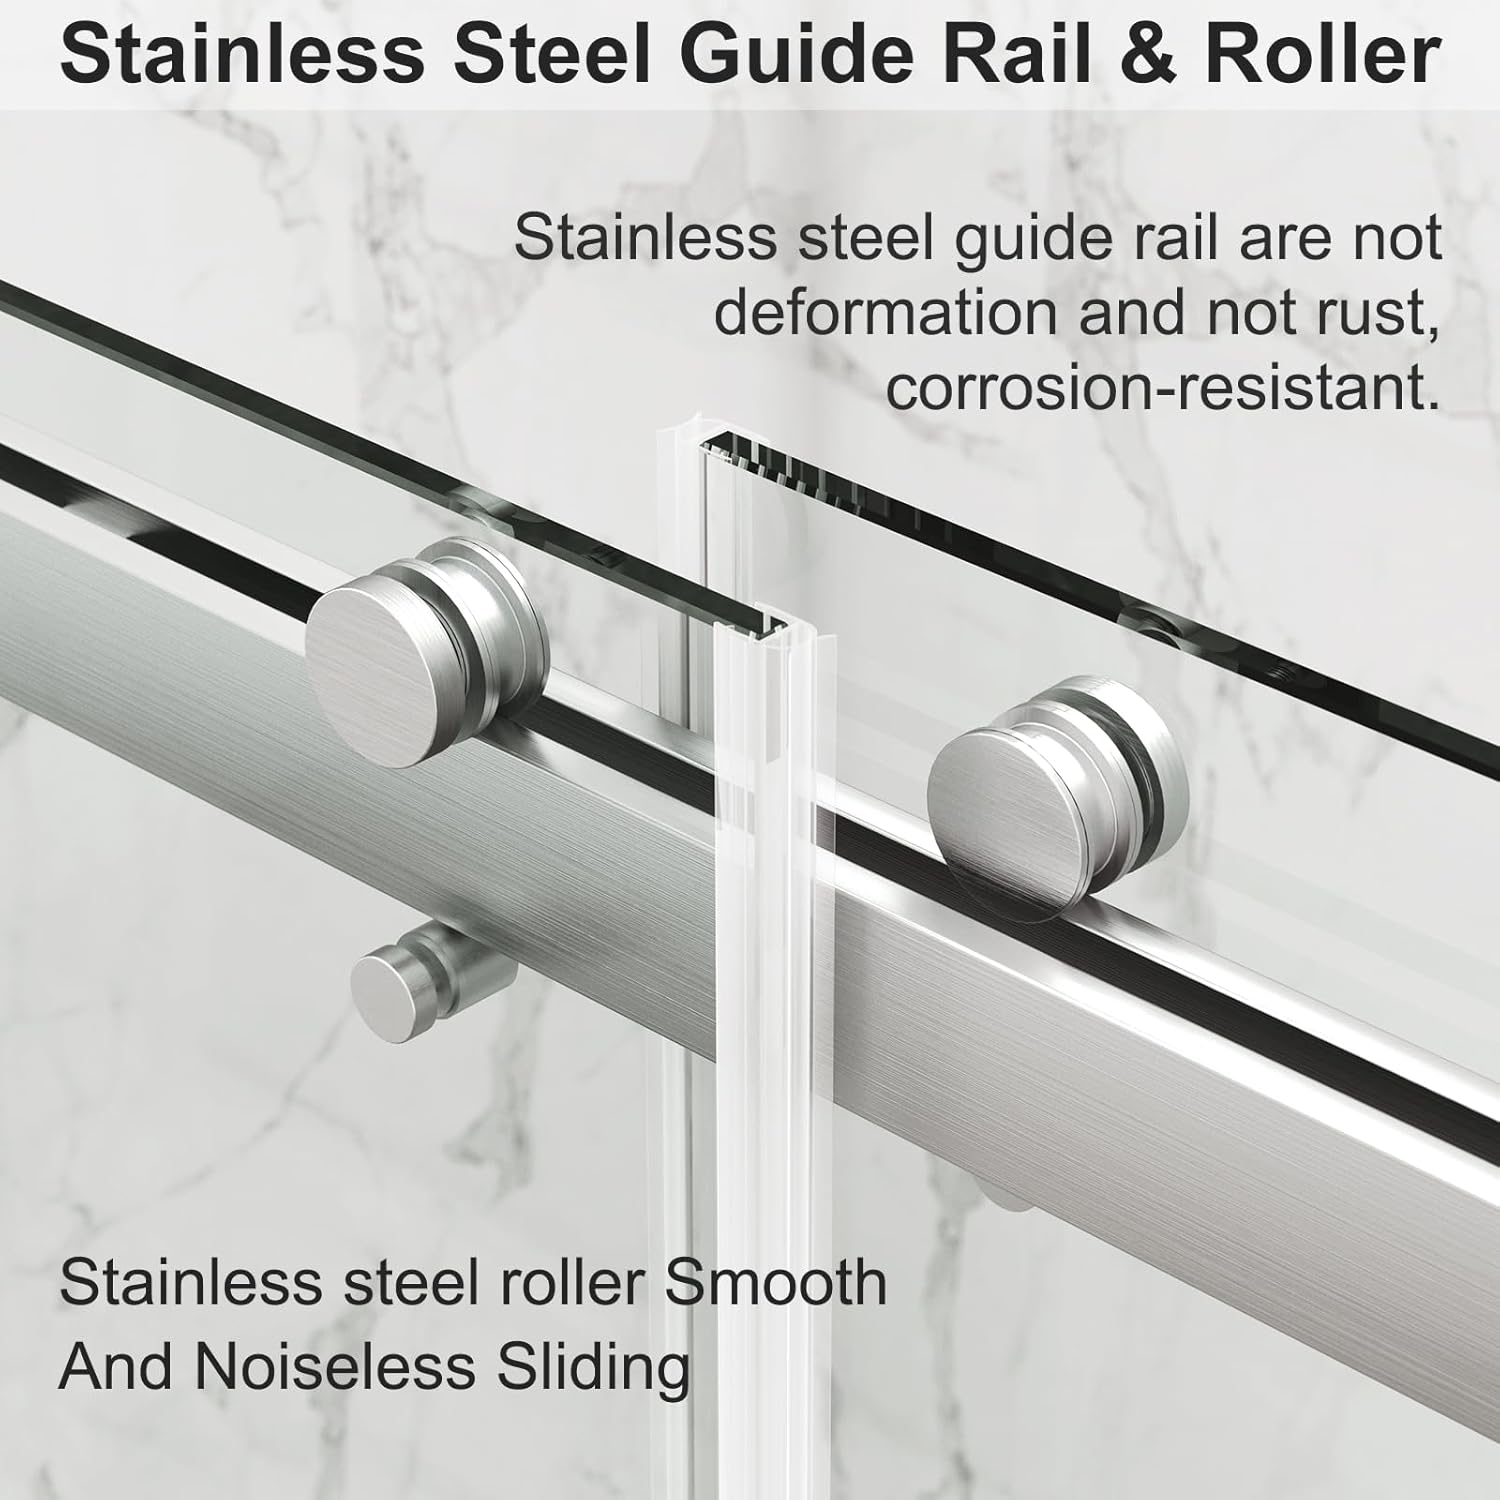
- Corrosion-Resistant Hardware: High-quality stainless steel hardware ensures long-lasting performance and resistance to corrosion.
- Waterproof Design: Equipped with full-length clear seal strips and water retaining strips at the bottom to prevent water leakage and keep your bathroom dry.
- Smooth and Quiet Operation: Stainless steel rollers provide effortless and silent sliding of the glass panels.
4. Package Contents
Please verify that all components are present and undamaged before beginning installation. Refer to your product packaging for a detailed list of included parts.
- Tempered Glass Panels (x2)
- Top Guide Rail (x1)
- Rollers/Hangers (set)
- Handles (set)
- Wall Profiles/Brackets (set)
- Bottom Guide/Water Retaining Strips (set)
- Vertical Seal Strips (set)
- Mounting Hardware (screws, anchors, washers, etc.)
5. Tools Required for Installation
The following tools are typically required for the installation of this shower door:
- Measuring Tape
- Pencil
- Level (long and short)
- Drill and Drill Bits (suitable for wall material)
- Screwdrivers (Phillips and Flathead)
- Caulk Gun
- Silicone Sealant (mildew-resistant, clear)
- Utility Knife
- Safety Glasses
- Gloves
- Stud Finder (if applicable)
6. Installation Instructions
This section provides general installation steps. Always refer to the detailed instructions and diagrams included with your product packaging for precise measurements and component-specific guidance. Professional installation is strongly recommended.
6.1 Pre-Installation Checks
- Ensure the shower base or curb is level and plumb.
- Verify that the walls are plumb and capable of supporting the shower door's weight.
- Unpack all components and inspect for any damage or missing parts.
6.2 Step-by-Step Installation
- Measure and Mark: Carefully measure the width and height of your shower opening. Mark the positions for the wall profiles and top guide rail according to the product's specific dimensions.
- Install Wall Profiles: Secure the vertical wall profiles to the shower walls using appropriate screws and anchors. Ensure they are plumb and aligned.
- Install Top Guide Rail: Attach the top guide rail to the wall profiles, ensuring it is perfectly level. This rail supports the sliding glass panels.

- Attach Rollers to Glass Panels: Carefully attach the rollers to the top edge of each glass panel as per the instructions.
- Hang Glass Panels: With assistance, lift and carefully hang the glass panels onto the top guide rail. Ensure the rollers engage smoothly with the rail.

- Install Handles: Securely attach the handles to the designated holes in the glass panels.
- Install Bottom Guide/Water Retaining Strips: Install the bottom guide and water retaining strips to ensure proper door alignment and water containment.
- Apply Sealant: Apply a continuous bead of mildew-resistant silicone sealant along all exterior seams where the shower door frame meets the wall and shower base. Allow adequate curing time before use.
Video 1: An overview of the sliding shower door in a bathroom setting, demonstrating its frameless design and smooth operation.
7. Operating Instructions
The ROOMTEC Double Sliding Shower Door is designed for ease of use and smooth operation.
- To open or close the door, gently grasp the handle and slide the glass panel along the top guide rail.
- Avoid forcing the doors, as this can damage the rollers or guide rail.
- Ensure the doors are fully closed before showering to prevent water leakage.
8. Maintenance and Care
Regular cleaning and maintenance will ensure the longevity and appearance of your shower door.
- Glass Cleaning: The Nano Technology coating on the glass makes it easy to clean. Use a soft cloth or sponge with mild, non-abrasive glass cleaner or a mixture of white vinegar and water. Avoid harsh chemicals or abrasive pads that can damage the coating.
- Hardware Cleaning: Clean stainless steel hardware with a soft cloth and mild soap and water. Do not use abrasive cleaners or steel wool, which can scratch the finish.
- Seal Inspection: Periodically inspect the seal strips and silicone sealant for any signs of wear, damage, or mildew. Replace worn seals and reapply sealant as needed to prevent leaks.
- Roller Maintenance: Keep the top guide rail and rollers free of debris and soap scum to ensure smooth sliding. Lubricate rollers with a silicone-based lubricant if they become stiff.
9. Troubleshooting
This section addresses common issues you might encounter with your shower door.
9.1 Door Does Not Stay Closed or Slides Open
If a glass panel slides open on its own, it often indicates an issue with the levelness of the installation or the weight distribution.
- Check Levelness: Use a level to verify that the top guide rail is perfectly horizontal. Even a slight incline can cause the heavy glass panels to slide. Adjust the wall profiles or rail as necessary.
- Inspect Rollers: Ensure all rollers are properly seated in the guide rail and are not damaged or obstructed. Clean any debris from the rollers and rail.
- Verify Bottom Guide: Confirm that the bottom guide and water retaining strips are correctly installed and aligned, providing proper support and guidance for the doors.
- Professional Adjustment: If the issue persists, professional adjustment or re-installation may be required to correct any underlying structural or installation imperfections.
Video 2: This video demonstrates a common issue where a shower door slides open due to potential weight distribution or leveling problems. It highlights the importance of proper installation.
9.2 Water Leakage
If water is leaking from your shower enclosure:
- Check Seal Strips: Inspect all vertical and horizontal seal strips for proper placement and condition. Replace any damaged or worn seals.
- Examine Sealant: Look for gaps or cracks in the silicone sealant along the perimeter of the shower door. Clean and reapply mildew-resistant silicone sealant as needed.
- Verify Water Retaining Strips: Ensure the bottom water retaining strips are correctly installed and free from obstructions.
10. Specifications
| Attribute | Detail |
|---|---|
| Brand | ROOMTEC |
| Model Number | 431D005238 |
| Dimensions (W x H) | 56 to 60'' W x 76'' H |
| Glass Thickness | 3/8'' (10mm) |
| Glass Type | Tempered Glass with Nano Coating |
| Material | Tempered Glass, Stainless Steel |
| Color | Brushed Silver (Hardware) |
| Item Weight | 190 Pounds |
| Style | Modern |
| Assembly Required | Yes |
| UPC | 737694988580 |
11. Warranty and Customer Support
ROOMTEC is dedicated to providing high-quality products and excellent customer service. For specific warranty details, please refer to the warranty card included with your product or contact ROOMTEC customer support.
If you have any questions, concerns, or require assistance with your purchase, our customer service team is available to help you. Please contact us via the details provided on our official website or product packaging.
