
1. Product Overview
The Lifewit 4 Tier Printer Stand is designed to maximize storage efficiency in home and office environments. Its multi-level design and integrated features provide a versatile solution for organizing various office equipment and supplies.
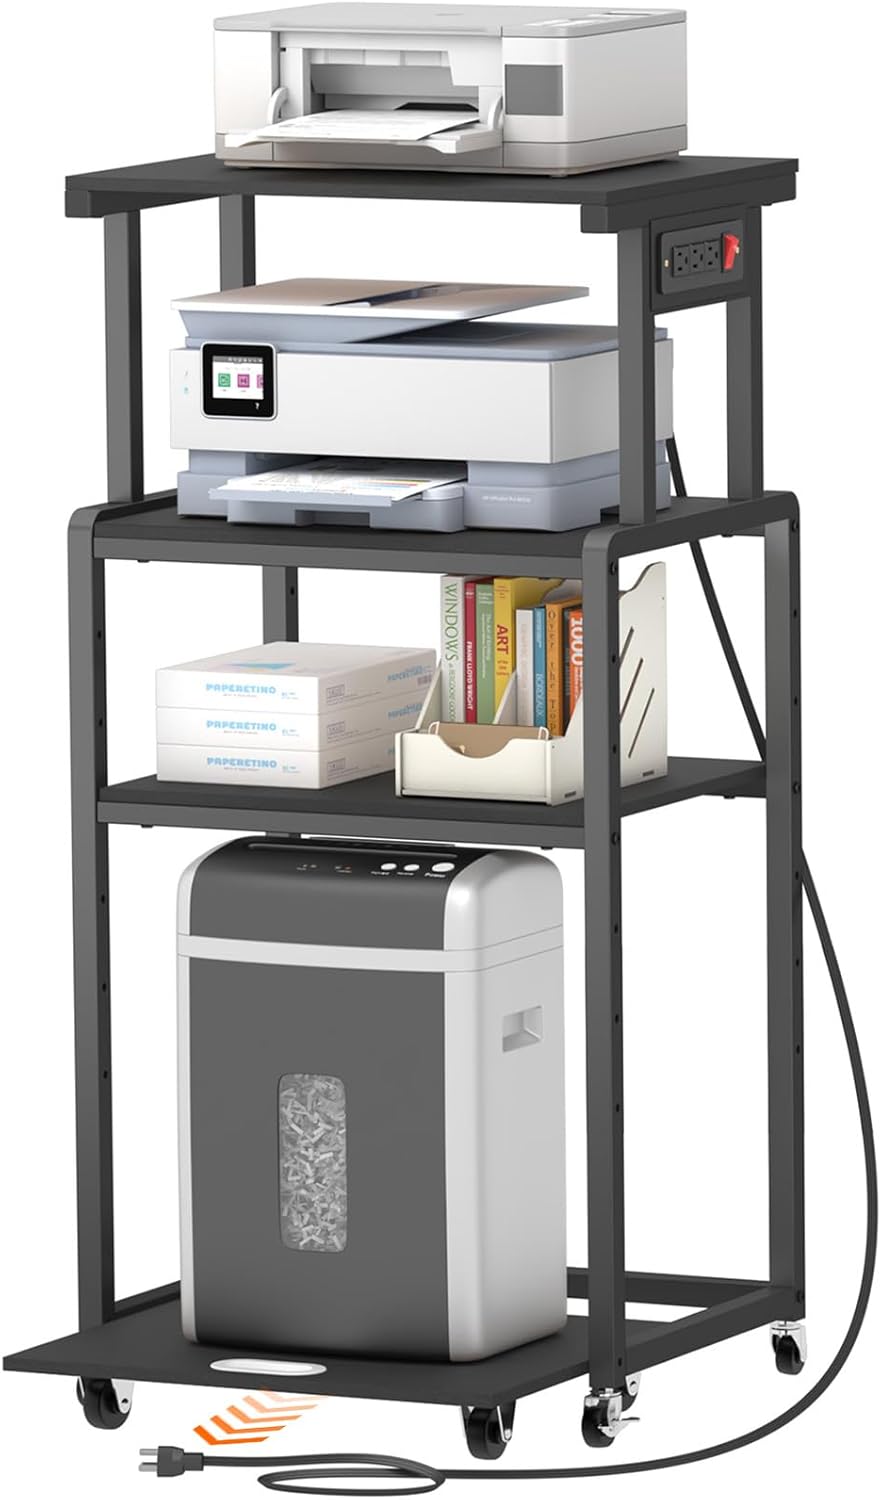
Image: The Lifewit 4 Tier Printer Stand, showcasing its capacity to hold multiple office machines like printers, scanners, and shredders, along with office supplies.
Key Features:
- Space-Saving Design: This four-tier stand, measuring 20.8 x 15.7 x 44.1 inches, is optimized for small spaces, accommodating printers, scanners, shredders, and various office supplies.
- Robust Construction: Features a thick square steel tube frame and thickened, waterproof, scratch-resistant panels for enhanced stability and load-bearing capacity.
- Adjustable Shelving: Two middle shelves offer 6 levels of height adjustment, allowing customization for different-sized devices or storage needs. The third shelf is detachable for increased vertical space.
- Integrated Power Outlets: Equipped with three triple AC outlets and a controllable switch, providing convenient power access for multiple electronic devices.
- Enhanced Mobility: Includes 4 swivel casters, with 2 lockable, for easy movement and secure positioning.
- Pull-out Bottom Shelf: A dedicated rolling shelf at the bottom provides convenient access for items like paper shredders.
2. Setup and Assembly
Before beginning assembly, ensure all components are present and undamaged. A complete set of installation tools, including screws and spare screws, is provided.
Assembly Steps:
- Unpack all components and verify against the parts list (refer to your included physical manual for the detailed list).
- Follow the step-by-step instructions provided in the packaging. Ensure all anchor holes are aligned for secure screw fastening.
- Attach the casters to the base of the stand and the pull-out shelf. Ensure the lockable casters are positioned as desired for easy access.
- Install the power strip unit into its designated slot on the top shelf frame.
- Adjust the height of the second and third shelves as needed for your specific equipment. The shelves offer 6 levels of adjustment.
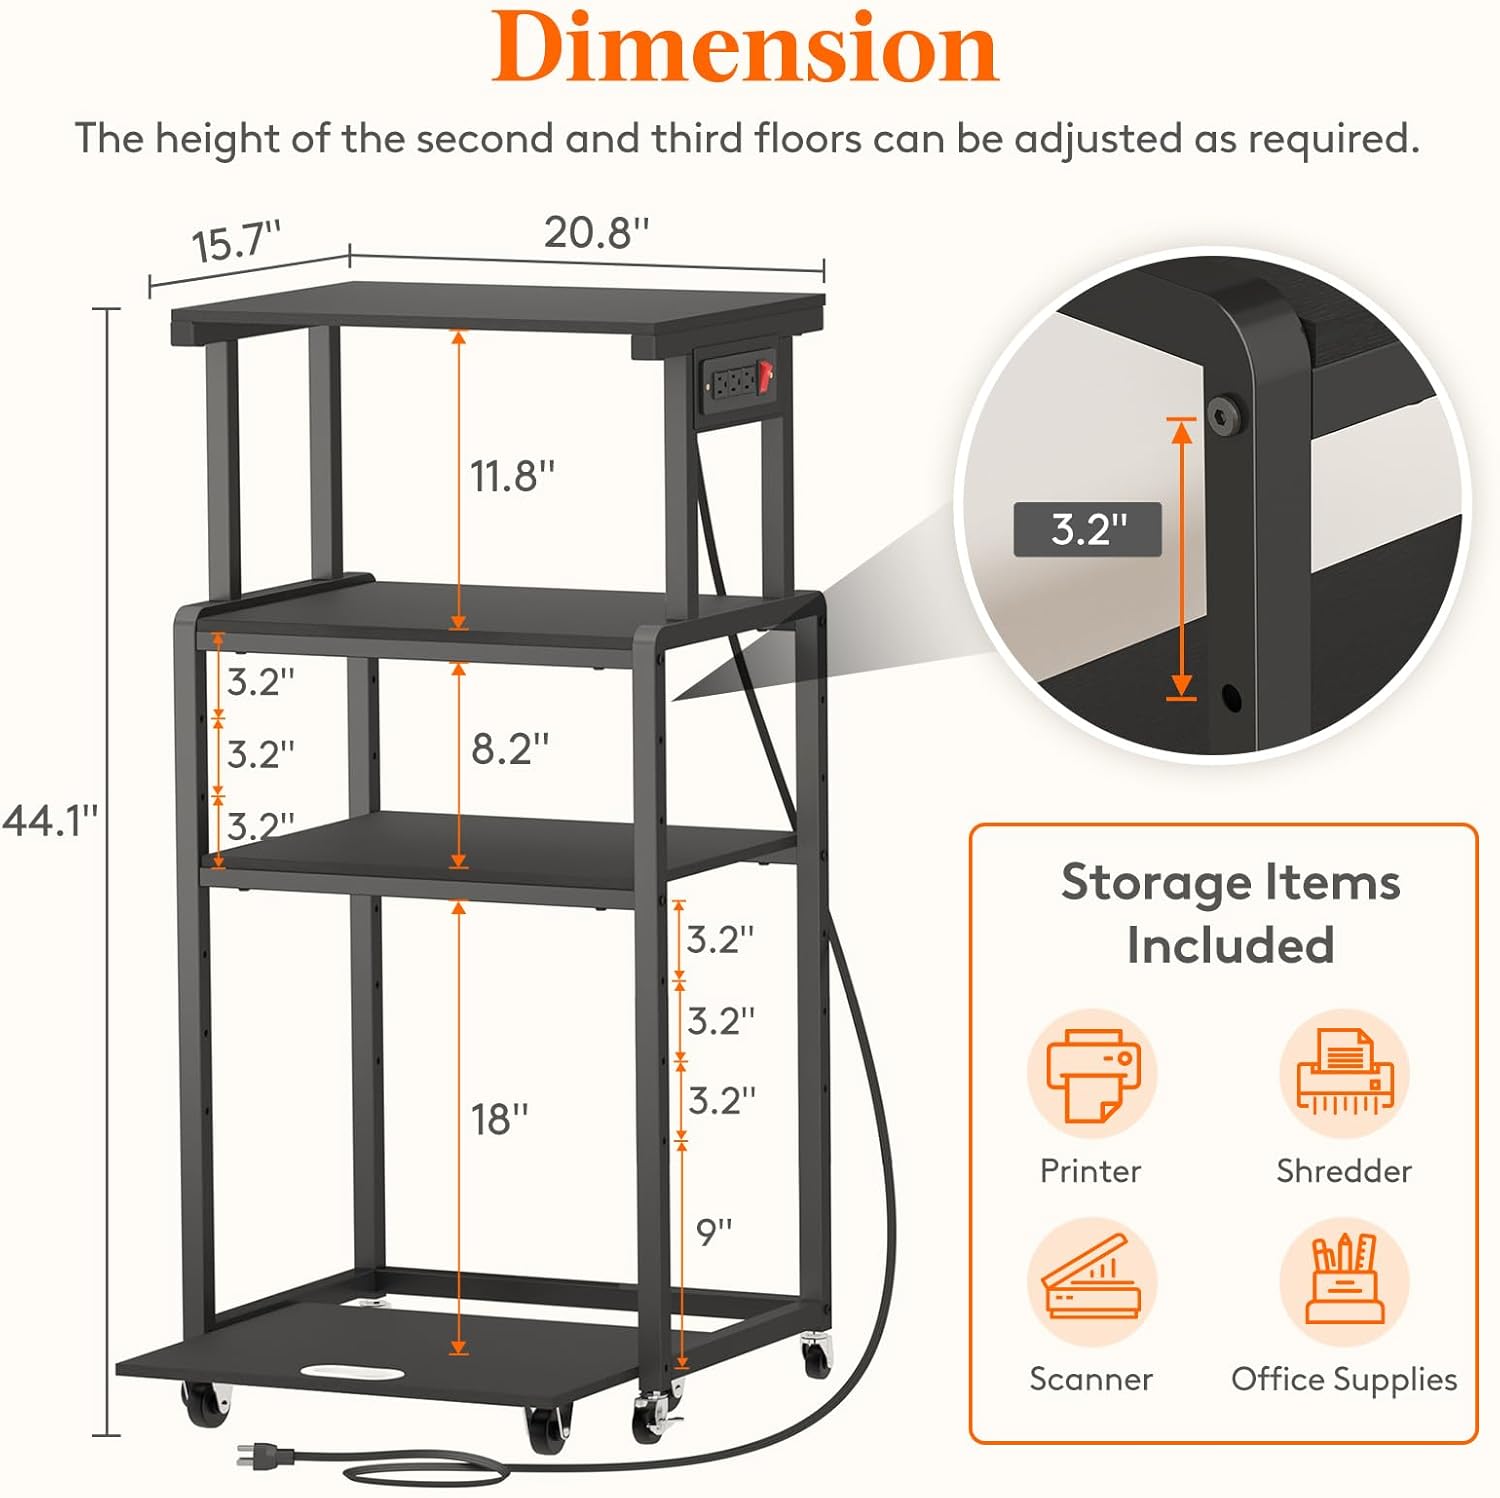
Image: Dimensional diagram of the printer stand, illustrating overall height, width, depth, and the adjustable range for the middle shelves.
Assembly Tips:
- While assembly can be done by one person, having a second person may expedite the process.
- For larger shredders or equipment, consider adjusting the second shelf (from top) to the first available hole and the third shelf to the third or fourth hole to ensure adequate clearance. This may differ from standard instructions to accommodate specific item sizes.
- Ensure all screws are tightened securely for optimal stability.
3. Operating Instructions
Adjusting Shelf Height:
The second and third shelves can be adjusted to 6 different height levels. To adjust, loosen the securing screws on the side of the frame, reposition the shelf to the desired height, and re-tighten the screws firmly. This allows for flexible storage of various items, from tall printers to stacks of paper.
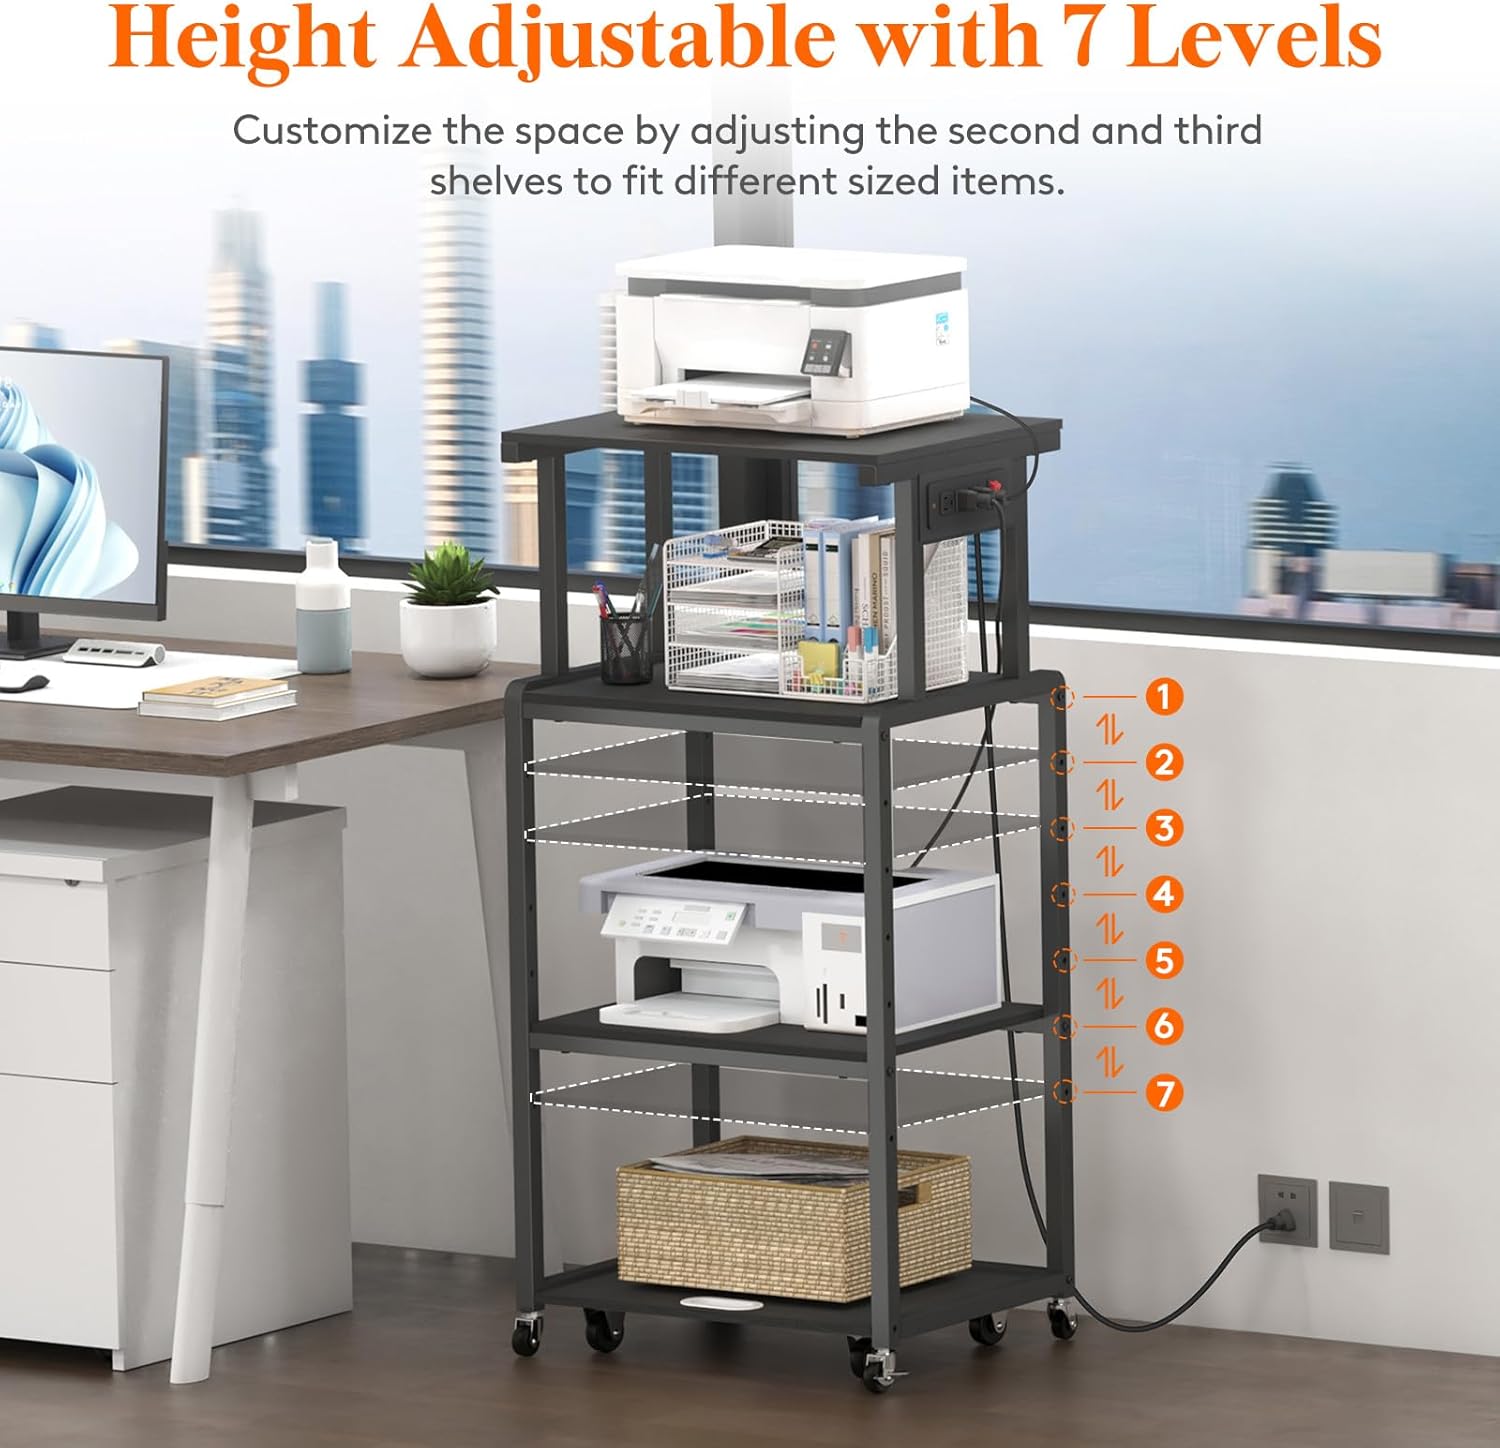
Image: The printer stand with an overlay indicating the 7 possible height levels for the middle shelves, demonstrating the customization options.
Using the Power Outlets:
The stand features three standard AC outlets and a master switch. Plug your printer, scanner, or other electronic devices into these outlets. Use the red switch to conveniently power all connected devices on or off simultaneously. The 4.9-foot power cord provides flexibility in placement.
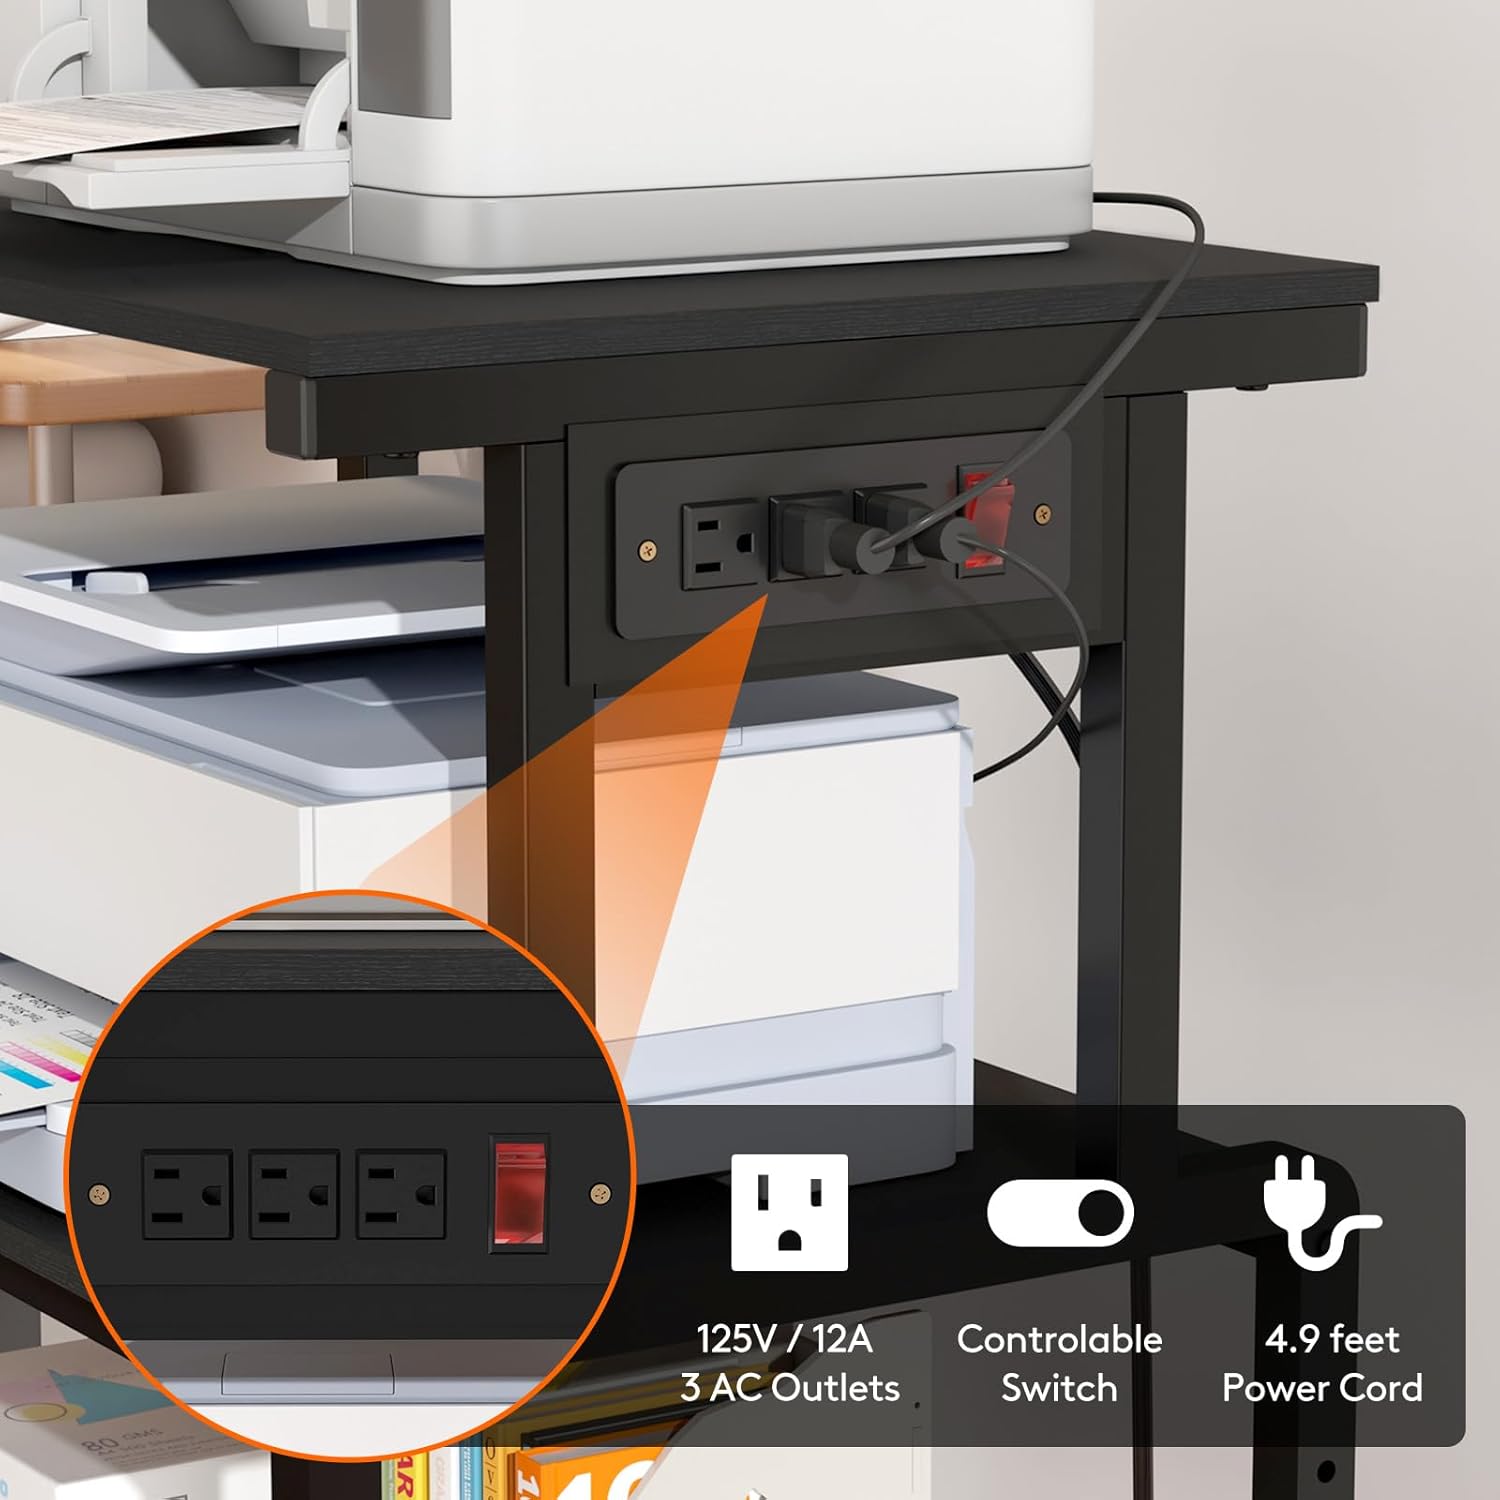
Image: A detailed view of the integrated power strip, highlighting the three AC outlets, the controllable red switch, and the length of the power cord.
Utilizing Mobility and Stability:
The stand is equipped with four 360-degree swivel casters for easy movement. Two of these casters include brakes. To secure the stand in place, press down on the brake levers on the two lockable casters until they click into the 'ON' position. To move the stand, release the brakes by lifting the levers to the 'OFF' position.
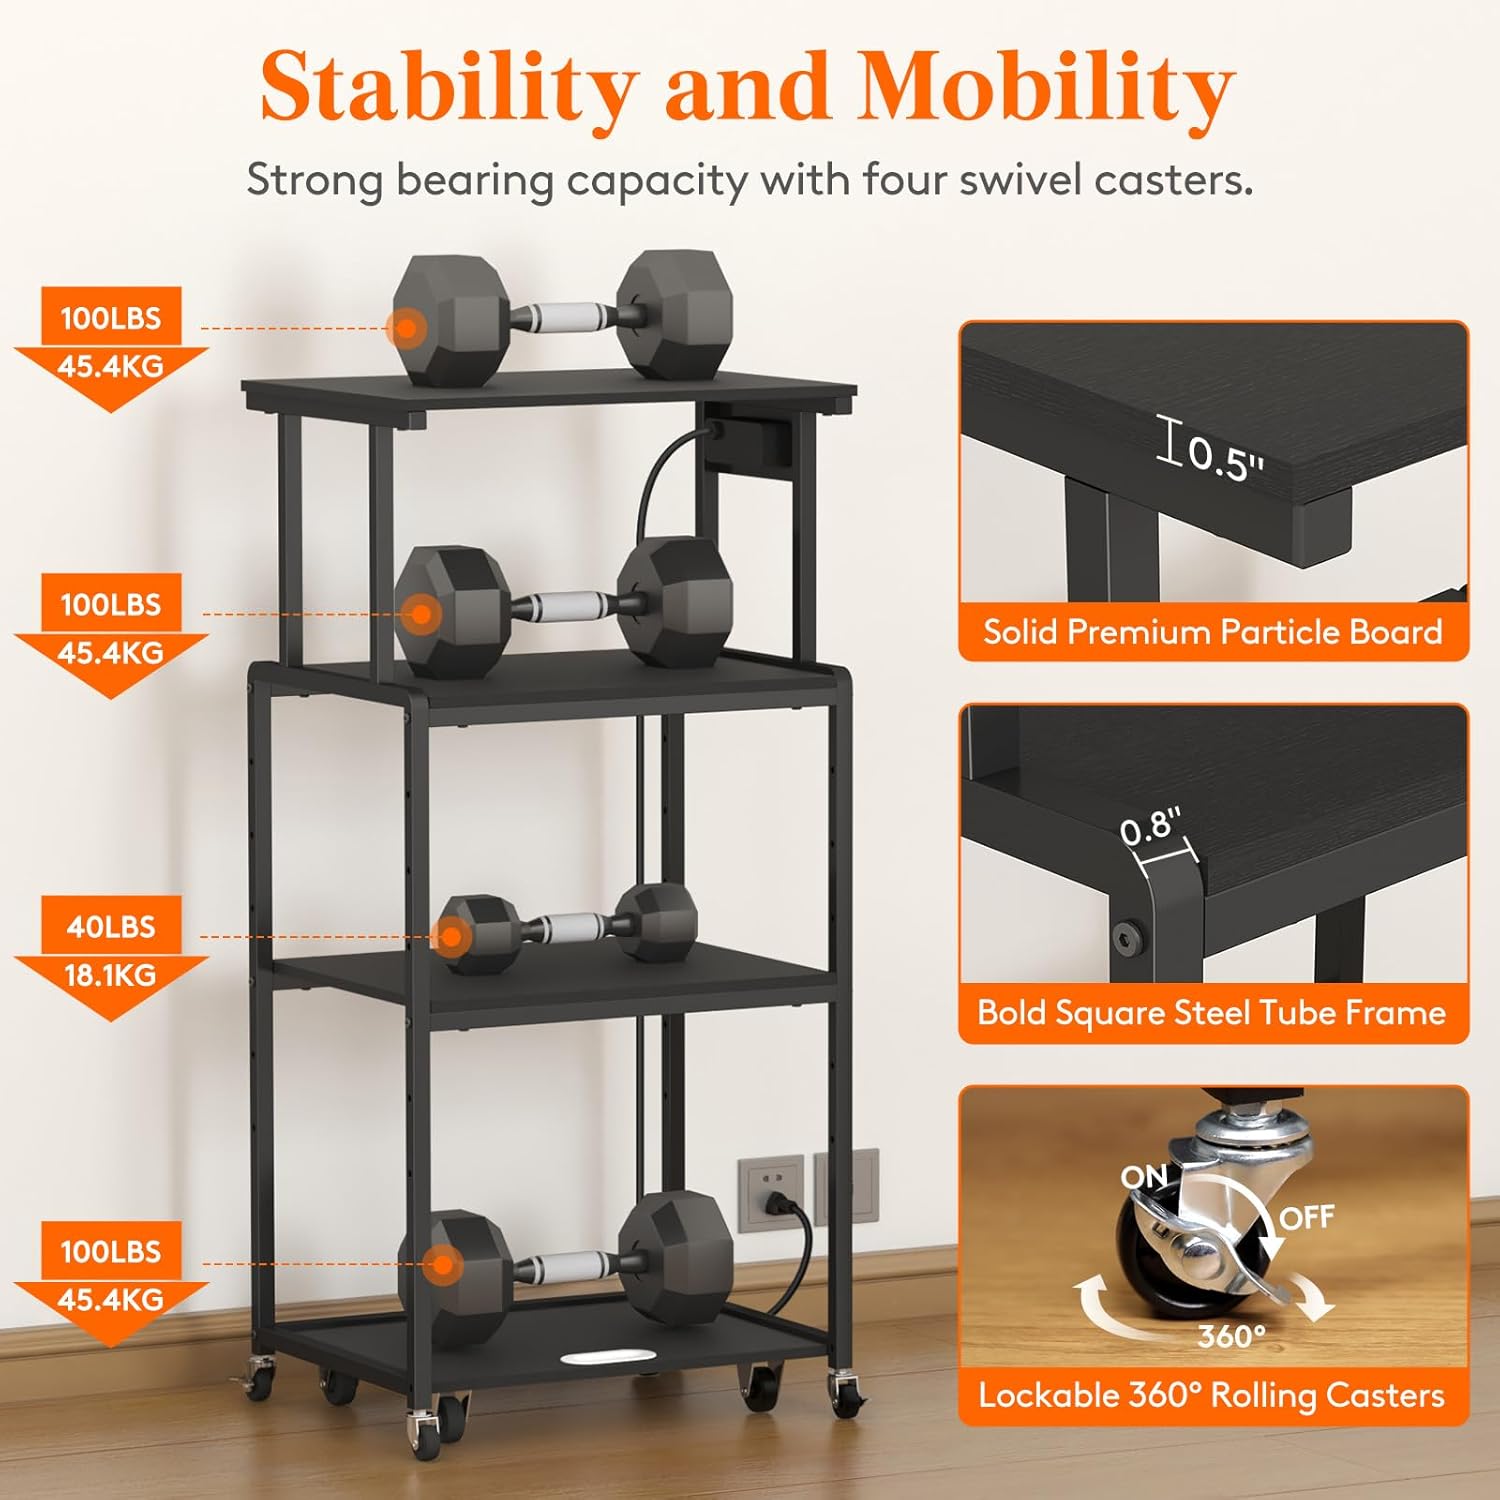
Image: An illustration demonstrating the load capacity of each shelf and a close-up of the 360-degree lockable rolling casters, emphasizing stability and mobility.
Using the Pull-out Shelf:
The bottom shelf is designed to roll out independently, providing convenient access to items placed on it, such as a paper shredder. Simply pull the shelf forward to access the device, and push it back into place when not in use.
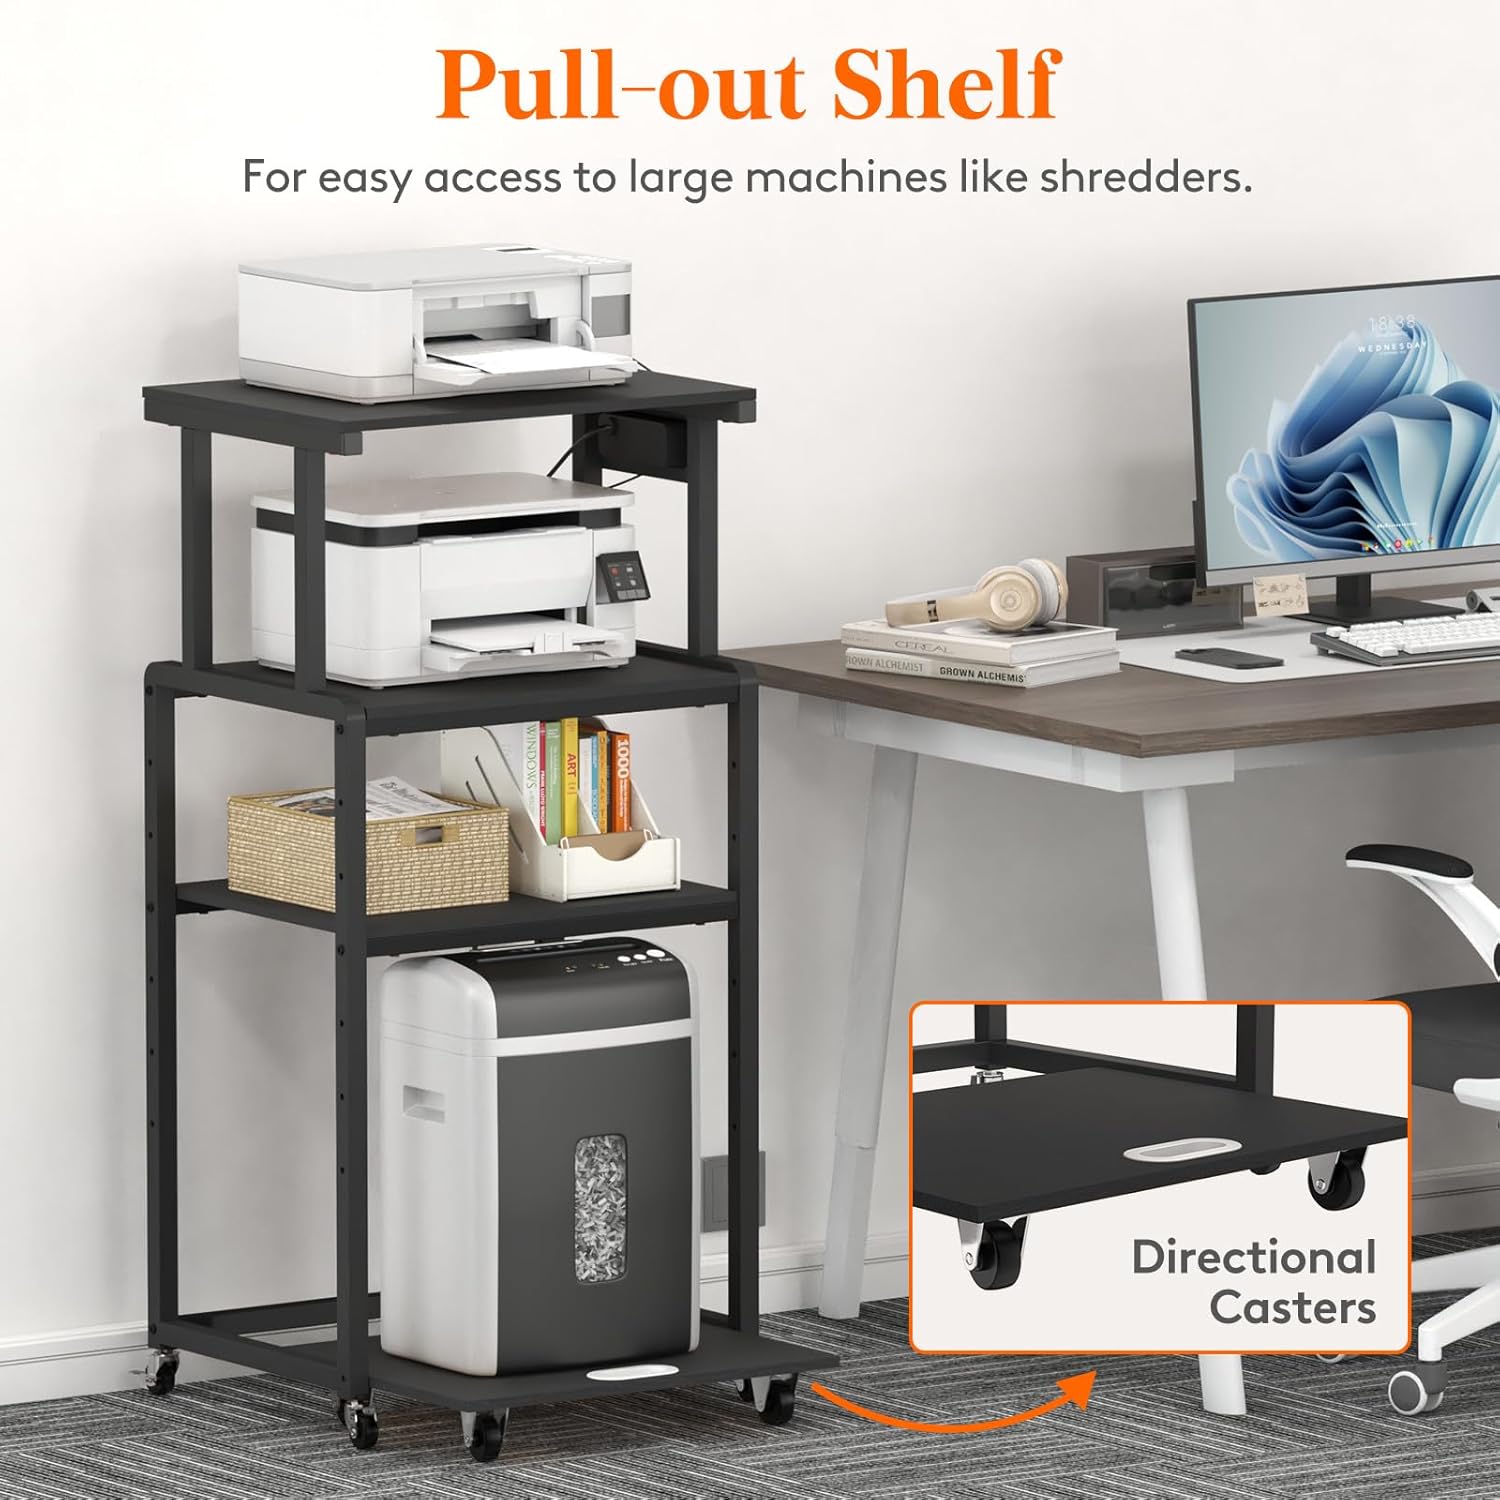
Image: The printer stand with a paper shredder on its pull-out bottom shelf, demonstrating the ease of access provided by the directional casters on this shelf.
4. Maintenance
Proper care and maintenance will ensure the longevity and appearance of your Lifewit Printer Stand.
Cleaning:
- The panels are made from high-quality particle board that is waterproof and scratch-resistant.
- For general cleaning, wipe surfaces with a soft, damp cloth.
- Avoid using harsh chemicals or abrasive cleaners, as these may damage the finish.
- Promptly wipe up any spills to prevent water damage, although the material is water-resistant.
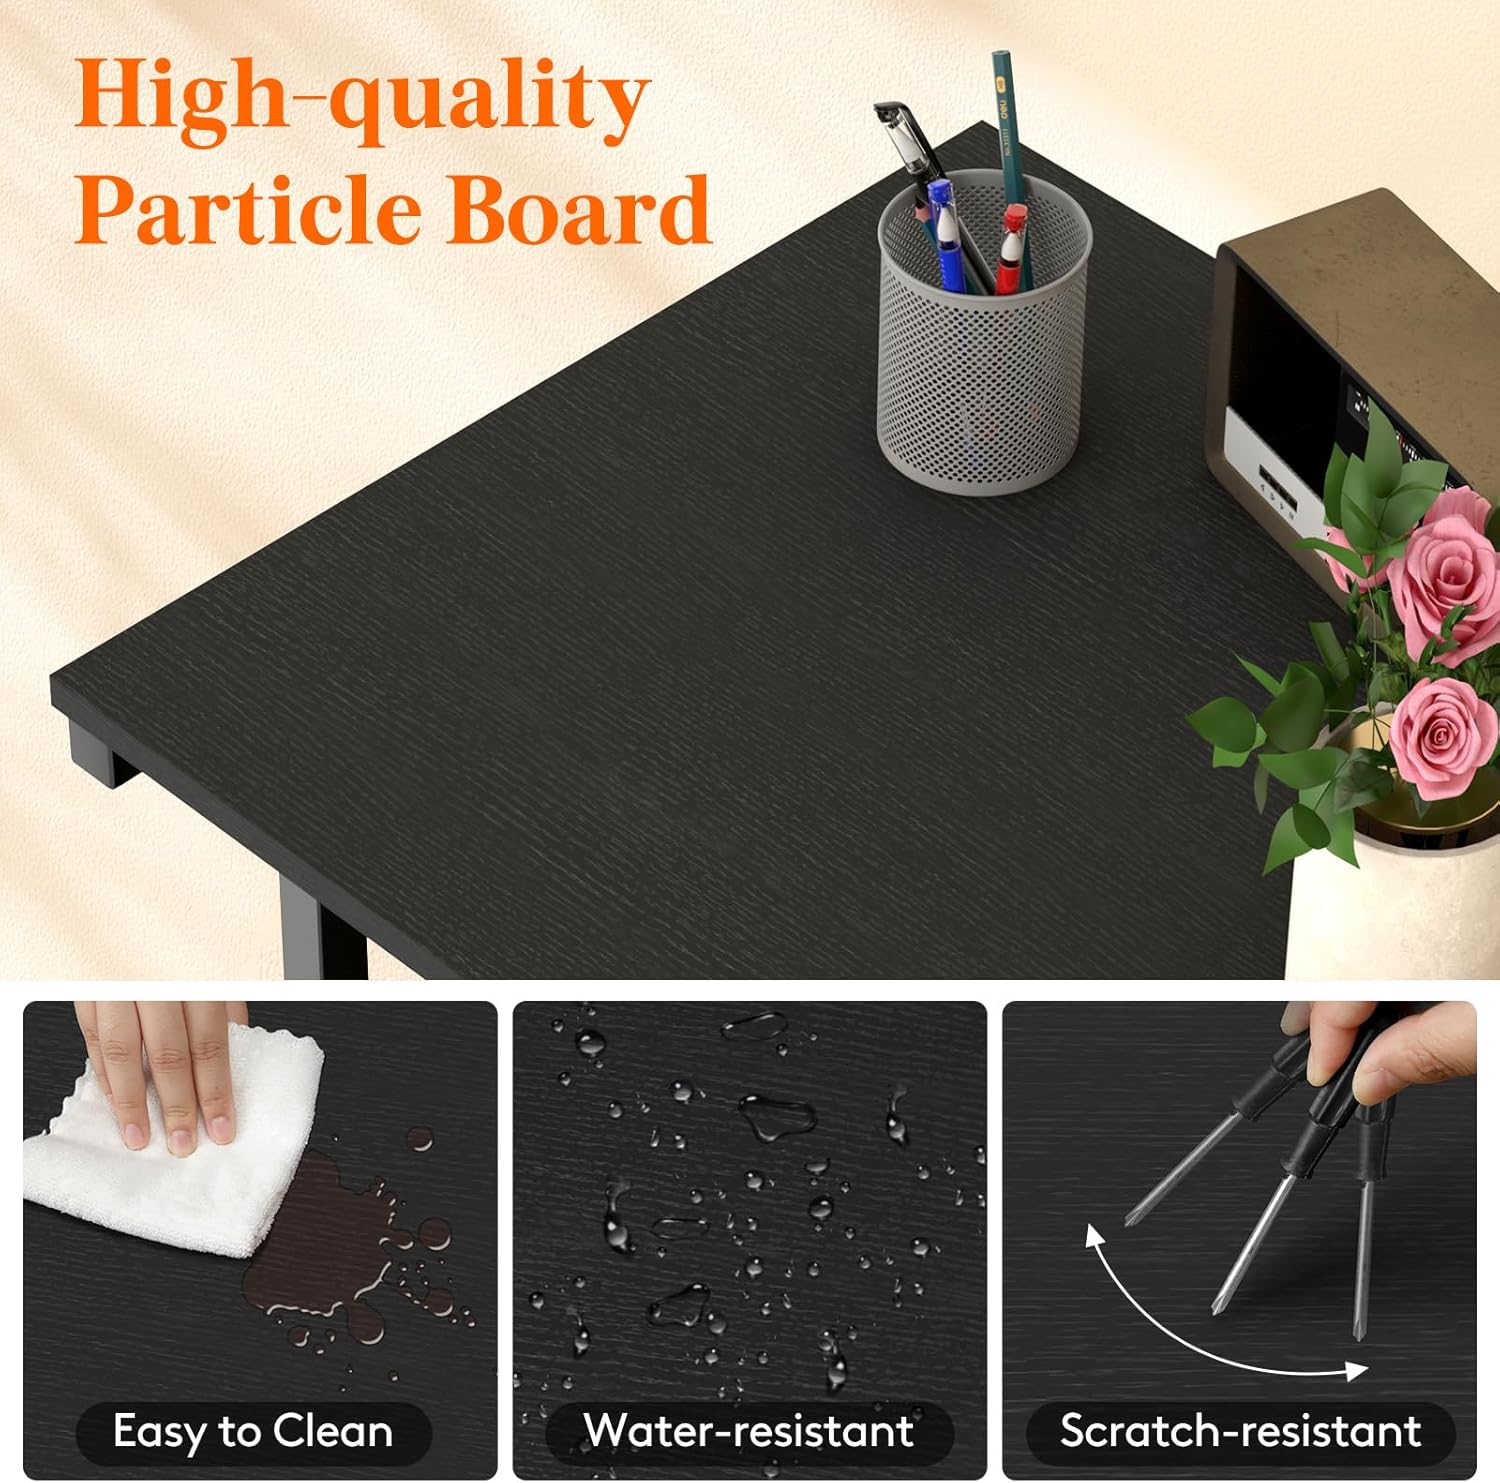
Image: A close-up of the high-quality particle board surface, illustrating its easy-to-clean, water-resistant, and scratch-resistant characteristics.
Structural Integrity:
- Periodically check all screws and fasteners to ensure they remain tight. Re-tighten if necessary to maintain stability.
- Inspect casters for any debris or wear that might impede smooth rolling. Clean as needed.
5. Troubleshooting
This section addresses common issues you might encounter with your printer stand.
Stand Wobbles:
- Check Assembly: Ensure all screws are fully tightened. Loose connections can cause instability.
- Level Surface: Verify that the stand is placed on a flat, level surface. Uneven flooring can cause wobbling.
- Weight Distribution: Ensure that items are distributed evenly on the shelves and that the total weight does not exceed the stand's capacity.
Devices Not Powering On (from integrated outlets):
- Check Power Switch: Ensure the red master switch on the power strip is in the 'ON' position.
- Verify Wall Outlet: Confirm that the stand's power cord is securely plugged into a functioning wall outlet.
- Device Power: Ensure the individual devices plugged into the stand's outlets are switched on and functioning correctly.
Difficulty Moving Stand:
- Unlock Casters: Ensure the brakes on the lockable casters are disengaged (in the 'OFF' position).
- Clear Obstructions: Check for any debris or objects obstructing the casters.
6. Specifications
| Attribute | Detail |
|---|---|
| Product Dimensions | 20.8 x 15.7 x 44.5 inches (L x W x H) |
| Item Weight | 24.8 pounds |
| Manufacturer | Lifewit |
| Model Number (ASIN) | B0CS27S7NM |
| Form Factor | Tower |
| Compatible Devices | Printers, Scanners, Shredders, Fax Machines |
| Mounting Type | Floor Stand |
| Color | Black |
| Power Outlets | 3 AC Outlets (125V / 12A) |
| Power Cord Length | 4.9 feet |
7. Warranty and Support
For specific warranty details, please refer to the documentation included with your purchase or contact Lifewit customer service directly. Lifewit is committed to providing quality products and support.
Customer Support:
If you have any questions, require assistance with assembly, or need to report a defect, please contact the seller or manufacturer:
- Seller: Lifewit Home US
- Lifewit Brand Store: Visit Lifewit Store on Amazon
Please have your model number (B0CS27S7NM) and purchase information ready when contacting support.