1. Introduction
The Avanti 0.3mm Gravity-Feed Dual-Action Airbrush is designed for artists and hobbyists requiring precise control and versatility. This airbrush is suitable for a wide range of applications, working effectively with lacquers, enamels, oil-based, and water-based paints. Its dual-action trigger and gravity-feed system provide consistent performance and fine control over paint and air flow.
2. Product Features
- Precise Dual-Action Trigger Control: Allows for independent control of both air and fluid, enabling fine adjustments for ideal paint mix and spray patterns.
- Gravity-Feed System: Ensures consistent paint flow without delay, utilizing gravity to feed paint from the top-mounted cup to the nozzle.
- Adjustable Fluid Flow Knob: Provides precise control over the amount of paint released, allowing for detailed work and broad coverage.
- Easy-to-Clean Construction: Features smooth brass construction with durable chrome plating for easy cleaning and longevity.
- Easily Removable Aircap: Simplifies access to the needle and nozzle for cleaning and maintenance.
- Material: Constructed from durable brass.
- Air Inlet Size: Standard 1/8 in.-28 NPT for compatibility with most air compressors.
- Working Pressure: Optimal performance between 15-30 PSI.
3. Setup
Before first use, ensure all components are clean and properly assembled. Refer to the diagram below for component identification.
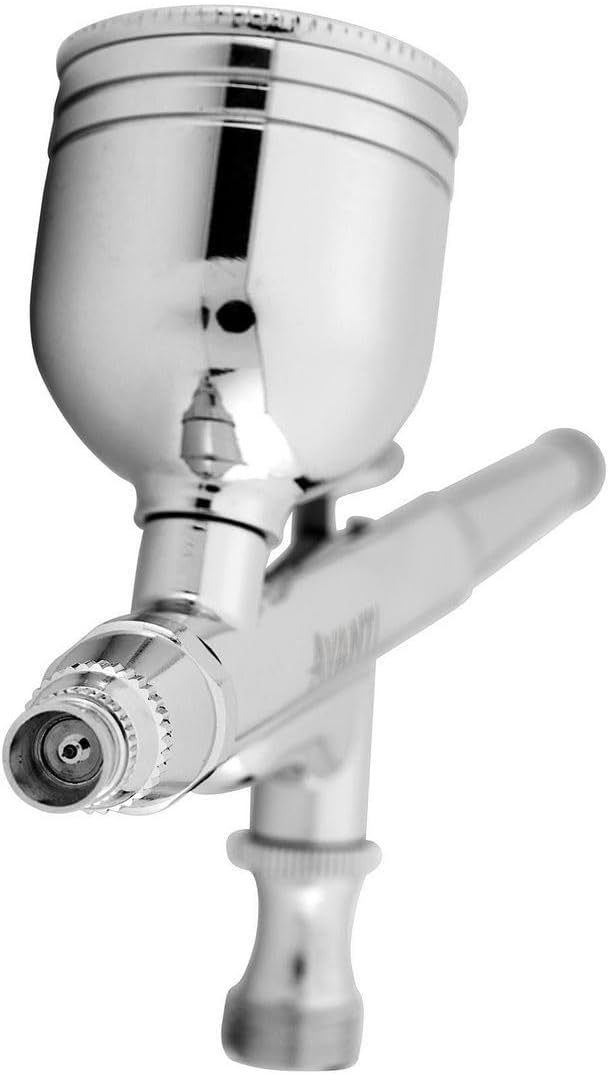
Figure 1: Exploded view of the Avanti 0.3mm Gravity Feed Dual-Action Airbrush components. This image shows the various parts of the airbrush, including the body, nozzle, needle, aircap, and paint cup, illustrating how they fit together.
- Connect Air Hose: Attach a compatible air hose (not included) to the 1/8 in.-28 NPT air inlet at the base of the airbrush handle. Ensure a secure, airtight connection.
- Connect to Air Compressor: Connect the other end of the air hose to your air compressor. Set the compressor to a working pressure between 15-30 PSI.
- Prepare Paint: Thin your paint to the manufacturer's recommended consistency for airbrushing. The ideal consistency is similar to milk.
- Fill Paint Cup: Carefully pour the prepared paint into the gravity-feed cup located on top of the airbrush. Do not overfill.
- Initial Test: Before applying paint to your project, perform a test spray on a scrap surface to check paint consistency and spray pattern.
4. Operating Instructions
The Avanti airbrush features a dual-action trigger for precise control over both air and paint flow.

Figure 2: Proper grip for operating the Avanti 0.3mm Gravity Feed Dual-Action Airbrush. The image shows a hand holding the airbrush with the index finger resting on the dual-action trigger, ready for operation.
- Hold the Airbrush: Grip the airbrush comfortably in your hand, with your index finger resting on the trigger.
- Initiate Air Flow: Press the trigger down to release air. This should be done before any paint is released to ensure proper atomization.
- Release Paint: While holding the trigger down for air, pull the trigger back to release paint. The further back you pull, the more paint will be released.
- Adjust Fluid Flow: Use the adjustable fluid flow knob at the rear of the airbrush to pre-set the maximum amount of paint that can be released, allowing for consistent lines or fills.
- Control Spray Pattern: The distance between the airbrush and the surface, along with the amount of air and paint, will determine the spray pattern. Practice on scrap material to achieve desired effects.
- Stop Spraying: To stop spraying, first push the trigger forward to stop paint flow, then release the trigger upwards to stop air flow. Always stop paint before stopping air to prevent paint from drying in the nozzle.
5. Maintenance
Proper cleaning and maintenance are crucial for the longevity and performance of your airbrush. Clean your airbrush immediately after each use.

Figure 3: Close-up view of the gravity-feed paint cup on the Avanti airbrush. This image highlights the interior of the cup, which should be thoroughly cleaned after each use to prevent paint residue buildup.
5.1. Quick Cleaning (After each color change or session)
- Empty any remaining paint from the cup.
- Add a small amount of appropriate cleaner (water for water-based paints, thinner for solvent-based paints) to the cup.
- Back-flush: Cover the aircap with your finger or a cap and press the trigger for air. This will force air back into the cup, bubbling the cleaner and dislodging paint.
- Spray out the cleaner onto a paper towel until clear. Repeat if necessary.
- Wipe the inside of the paint cup with a cotton swab dipped in cleaner.
5.2. Deep Cleaning (Periodically or when performance degrades)
- Disassemble: Carefully remove the aircap, nozzle, and needle. Be extremely gentle with the needle tip.
- Clean Components: Soak the nozzle and aircap in appropriate cleaner. Use a soft brush or cotton swab to clean the paint cup, needle, and inside of the airbrush body.
- Clean Needle: Wipe the needle clean with a cloth dampened with cleaner. Do not scrape or bend the needle tip.
- Reassemble: Ensure all parts are dry. Carefully reassemble the airbrush in reverse order of disassembly. Do not overtighten components.
Caution: Never use metal tools or harsh abrasives to clean airbrush components, as this can damage delicate parts like the nozzle and needle.
6. Troubleshooting
| Problem | Possible Cause | Solution |
|---|---|---|
| Paint sputtering or inconsistent spray |
|
|
| No paint flow |
|
|
| Air leakage |
|
|
7. Specifications
| Feature | Detail |
|---|---|
| Model Number | AV-AB-02 |
| Nozzle Size | 0.3mm |
| Feed Type | Gravity Feed |
| Action Type | Dual-Action |
| Material | Brass with Chrome Plating |
| Air Inlet Size | 1/8 in.-28 NPT |
| Working Pressure | 15-30 PSI |
| Product Dimensions | 5.98 x 0.43 x 1.79 inches |
| Included Accessories |
|
8. Warranty and Support
For information regarding warranty coverage, technical support, or replacement parts for your Avanti 0.3mm Gravity Feed Dual-Action Airbrush, please refer to the documentation included with your purchase or contact the manufacturer directly. Keep your purchase receipt as proof of purchase.


