
RM
Mirror Dash Cam 4K User Manual
Model: RM
Brand: Generic
Introduction
This manual provides detailed instructions for the installation, operation, and maintenance of your new Generic 4K 12-inch Full Touch Screen Mirror Dash Cam. Please read this manual thoroughly before using the device to ensure proper functionality and to maximize your user experience. This device is designed to enhance driving safety and provide reliable video recording for various situations.
Package Contents
Before proceeding with installation, please verify that all components listed below are present in your package:
- In-Car Camera (Mirror Dash Cam)
- Rear Camera
- Car Charger
- Mount Bracket
- GPS Antenna
- 32GB Memory Card
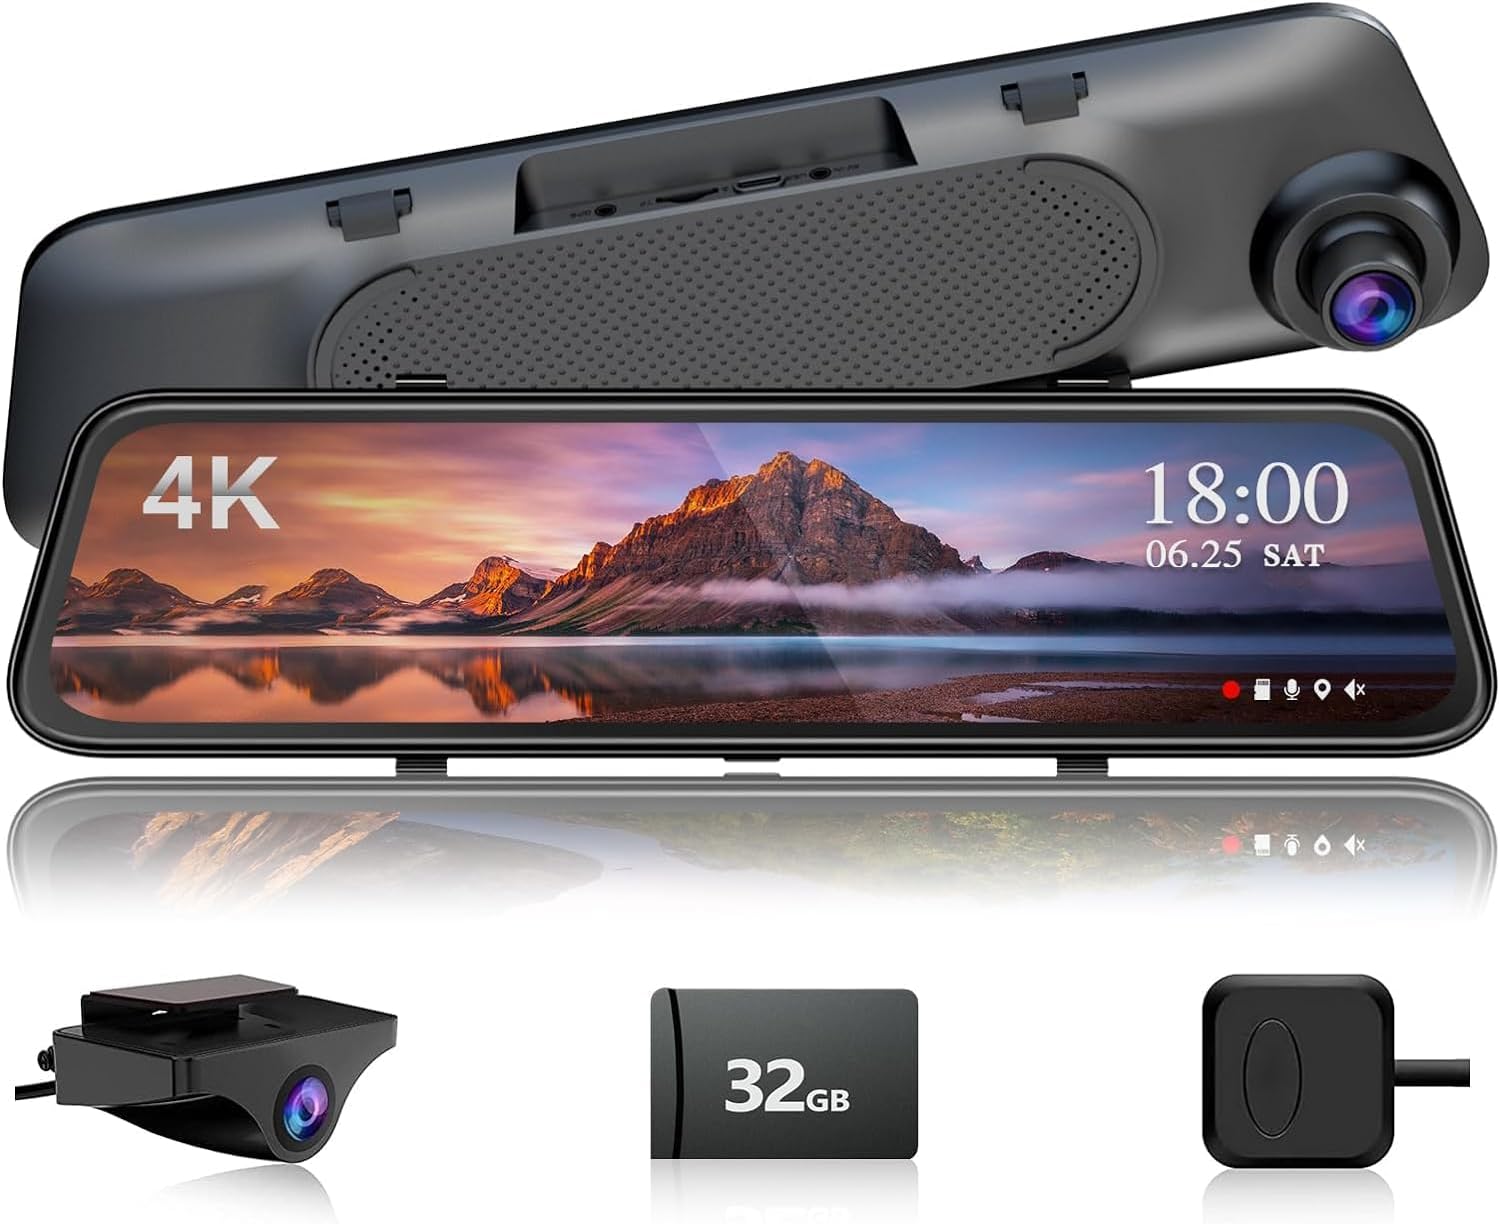
Figure 1: Main components of the Mirror Dash Cam package, including the mirror unit, rear camera, GPS module, and 32GB memory card.
Setup and Installation
1. Inserting the Memory Card
Locate the memory card slot on the side or top of the mirror dash cam. Gently insert the provided 32GB memory card until it clicks into place. Ensure the card is inserted correctly to avoid damage to the device or card. It is recommended to format the memory card within the device settings before first use.
2. Mounting the Mirror Dash Cam
Attach the mirror dash cam to your vehicle's existing rearview mirror using the provided mount brackets. Securely fasten the straps or clips to ensure the dash cam is stable and does not obstruct your view. The hidden interface design allows for a neat installation, tucking plugs and wires behind the main body.

Figure 2: Illustration of the hidden interface design, showing how cables are concealed behind the mirror unit for a clean installation.
3. Installing the Rear Camera
The rear camera can be installed either inside the rear window or externally near the license plate. Connect the rear camera cable to the main mirror dash cam unit. For the reverse monitor feature, connect the signal cable from the rear camera to your vehicle's reversing light power supply. Ensure the camera is mounted securely and provides a clear view of the rear of your vehicle.
4. Connecting the GPS Antenna
Connect the GPS antenna to the designated port on the mirror dash cam. Position the antenna in an area with a clear view of the sky, typically on the dashboard or near the windshield, to ensure optimal signal reception for accurate GPS tracking.
5. Power Connection
Connect the provided car charger to the Type-C port on the mirror dash cam and plug the other end into your vehicle's 12V power outlet (cigarette lighter socket). The device will typically power on automatically when the vehicle starts.
Operating Instructions
1. Powering On/Off
The dash cam will automatically power on and begin recording when your vehicle's ignition is turned on. To manually power off, press and hold the power button located on the device. The device will automatically power off when the vehicle's ignition is turned off.
2. Using the 12" Full Touch IPS Screen
The large 12-inch full touch IPS screen provides a clear and intuitive interface for controlling the dash cam. Swipe gestures and taps are used to navigate menus, adjust settings, and switch display modes. The high resolution of 1920x480P ensures clear visibility.
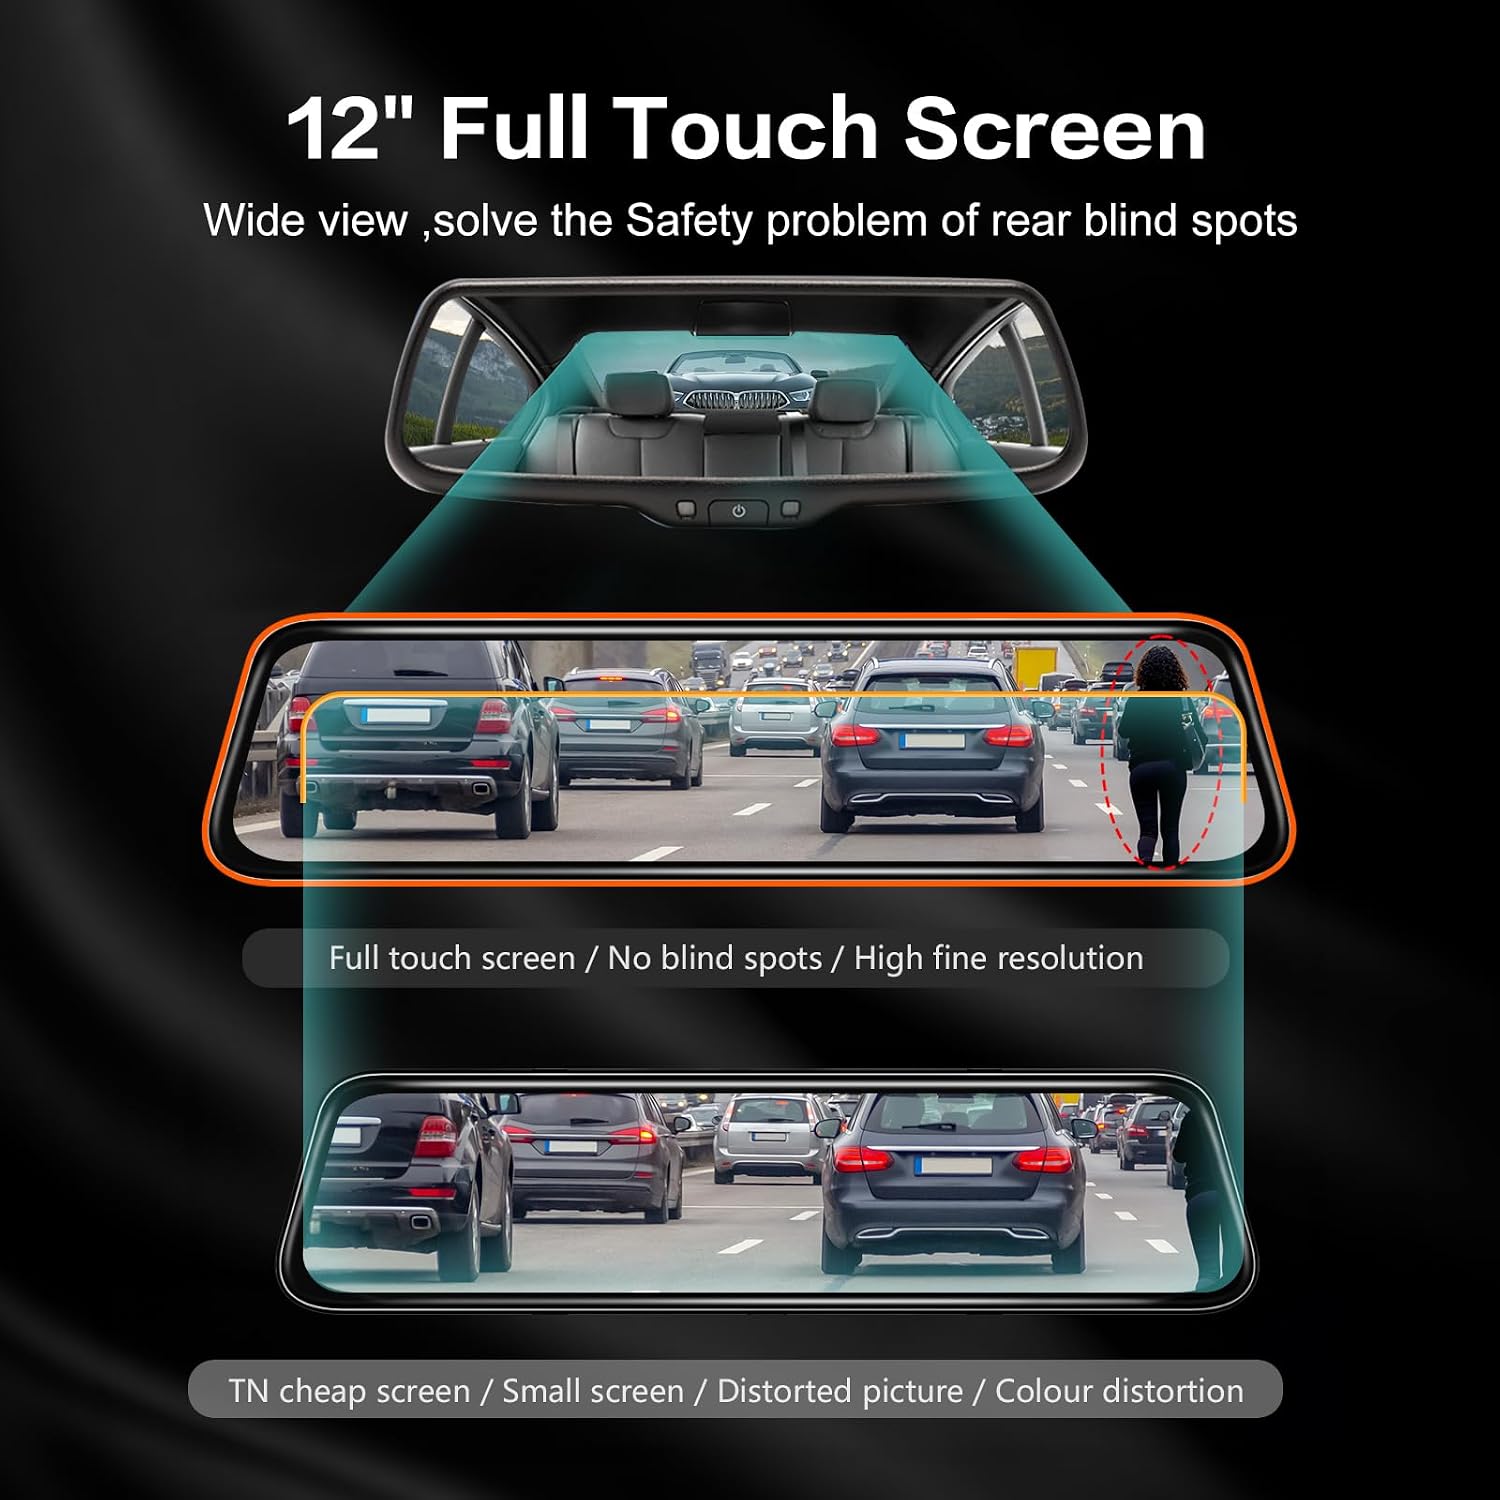
Figure 3: The 12-inch full touch screen provides a wide view, helping to eliminate rear blind spots compared to traditional mirrors.
3. Display Modes
The dash cam offers multiple display modes to suit your preference:
- Display Both Front & Rear View: Shows live feeds from both cameras simultaneously.
- Display Front View: Shows only the live feed from the front camera.
- Display Rear View: Shows only the live feed from the rear camera (Streaming Media Rearview).
- Screen OFF Mode: The screen turns off, but recording continues in the background.

Figure 4: Visual representation of the four available display modes: simultaneous front and rear, front only, rear only, and screen off.
4. Recording Features
- Loop Recording: The dash cam continuously records, overwriting the oldest files when the memory card is full. This ensures uninterrupted recording.
- G-Sensor (Gravity Sensor): Detects sudden movements or impacts (e.g., collisions) and automatically locks the current video segment to prevent it from being overwritten.
- Collision Boot Recording: If an impact is detected while the vehicle is parked, the dash cam will automatically power on and record a short video.
- Enhanced Night Vision: Equipped with a Starvis sensor and WDR&HDR technology, the camera captures clear videos even in low-light conditions, improving visibility of license plates and road details.

Figure 5: The dash cam's enhanced 4K night vision capabilities, highlighting its ability to capture clear footage in dark environments.
5. 24-Hour Parking Monitor
When enabled (requires hardwire kit, not included), the 24-hour parking monitor provides continuous surveillance of your vehicle while parked. The time-lapse mode records at a very low frame rate, conserving power and storage space while ensuring all events are captured.

Figure 6: Visual representation of the 24-hour parking monitoring feature, illustrating continuous surveillance of the vehicle.
6. GPS Tracking
The included GPS antenna allows the dash cam to record your driving speed, routines, and locations. This data is embedded into the recorded video clips, providing additional evidence if needed. The system automatically matches the correct time and date via GPS.

Figure 7: Diagram showing the GPS tracking functionality, which records driving speed, routes, and automatically synchronizes time.
7. Other Smart Functions
- Image Flip: Allows for horizontal or vertical flipping of the camera image, useful for various mounting orientations.
- Adjustable Display View Angle: Customize the viewing angle on the screen to best suit your preference and vehicle.
Maintenance
1. Cleaning the Device
Use a soft, dry cloth to clean the screen and camera lenses. Avoid using abrasive cleaners or solvents, as they may damage the surfaces. Ensure lenses are free of dust and smudges for optimal recording quality.
2. Memory Card Management
Regularly format the memory card (e.g., once a month) through the dash cam's settings to maintain optimal performance and prevent data corruption. Back up any important video files before formatting. Replace the memory card if you notice any issues with recording or data integrity.
Troubleshooting
| Problem | Possible Cause | Solution |
|---|---|---|
| Device does not power on. | No power supply; loose connection; faulty car charger. | Check car charger connection to both the dash cam and the vehicle's 12V outlet. Ensure the vehicle's ignition is on. Try a different 12V outlet or car charger if available. |
| Recording stops or freezes. | Memory card full or corrupted; low-quality memory card; firmware issue. | Format the memory card. Use a high-speed (Class 10 or U3) memory card. Update firmware if available (check manufacturer's website). |
| Poor video quality (blurry, dark). | Dirty lens; protective film still on lens; incorrect settings; low light conditions. | Clean the camera lenses. Remove any protective film. Ensure "Enhanced Night Vision" is active in low light. Adjust exposure settings if available. |
| GPS signal not found. | GPS antenna not connected; antenna obstructed; poor satellite reception. | Ensure GPS antenna is securely connected. Relocate the antenna to an area with a clear view of the sky (e.g., dashboard). Wait for a few minutes for signal acquisition. |
| Screen unresponsive or flickering. | Software glitch; power fluctuation. | Restart the device. Ensure stable power supply. If issues persist, perform a factory reset (refer to settings menu). |
Specifications
| Feature | Detail |
|---|---|
| Product Dimensions | 10.11 x 0.66 x 2.87 inches |
| Item Weight | 2.6 pounds |
| Model Name | RM |
| Display | 12" Full Touch IPS Screen (1920x480P) |
| Video Capture Resolution | 4K (2160p) |
| Connectivity Technology | USB |
| Special Features | 360 Degree (view), Built-In GPS, G-Sensor, Loop Recording, Night Vision, 24H Parking Monitor, Streaming Media Rearview, Image Flip, Adjustable Display View Angle |
| Included Components | Mirror Dash Cam, Rear Camera, Car Charger, Mount Bracket, GPS Antenna, 32GB Memory Card |
| Power Port | Type-C |
Warranty and Support
Your Mirror Dash Cam is backed by a full 1-YEAR after-sales Service. For any questions, technical assistance, or warranty claims, please contact our professional customer service team. We are available 24 hours to assist you.
Please refer to your product packaging or purchase documentation for specific contact details or visit the manufacturer's official website for the most up-to-date support information.
Related documentsRM


Ask a question about this manual
Ask about setup, troubleshooting, compatibility, parts, safety, or missing instructions. Manuals+ will review the question and use this page’s manual context to help answer it.