Introduction
The ORIA Projection Alarm Clock is designed to provide convenient time display and alarm functions with an innovative projection feature. Its large LED screen, adjustable brightness, and rotatable projector make it suitable for various bedroom setups. This manual provides detailed instructions for setup, operation, and maintenance of your new alarm clock.

Figure 1: ORIA 7.9-inch Large Display Projection Alarm Clock.
Features
- 180° Rotatable Projection: Projects time onto the ceiling or wall with adjustable brightness (2 levels) and a projection distance of 1.6ft-16ft.
- Multifunctional Display: Shows time and temperature on a 7.9'' large LED screen with extra-large fonts for easy reading.
- Adjustable Screen Brightness: Four levels of screen brightness (Bright, Medium, Low, Off) can be manually adjusted.
- Night Mode: Automatically dims the screen during a customizable night time period (default 18:00 to 5:59).
- Multiple Alarm Modes: Set up to three alarm modes: Monday to Friday, Monday to Saturday, and Monday to Sunday.
- Snooze Function: Allows for an additional 1-60 minutes of sleep time (default 5 minutes).
- USB Powered with Time Memory: Operates via USB power (adapter not included). A built-in CR2032 battery retains time settings during power outages.
Package Contents
- 1 x ORIA Projection Alarm Clock
- 1 x 1.5m USB Cable
- 1 x CR2032 Battery (pre-installed for memory function)
- 1 x User Manual

Figure 2: Items included in the ORIA Projection Alarm Clock package.
Product Overview

Figure 3: Front and rear view of the alarm clock with key components labeled.
- 1. Display Screen: 7.9-inch LED display for time and temperature.
- 2. Projection Lamp: Projects time onto a surface.
- 3. SNOOZE/LIGHT Button: Activates snooze, adjusts screen brightness.
- 4. PROJECT Button: Adjusts projection brightness or flips projection.
- 5. ALARM Button: Enters alarm setting mode.
- 6. SET Button: Confirms settings.
- 7. UP Button: Increases values, switches 12/24H format.
- 8. DOWN Button: Decreases values, activates/deactivates Night Mode.
- 9. Power Port: USB-C input for power.
- 10. CR2032 Battery Compartment: Houses the memory battery.
- 11. Speaker: For alarm sound.
Setup
1. Power Connection
Connect the provided USB cable to the power port on the back of the alarm clock and plug the other end into a USB power adapter (not included) or a compatible USB port. The screen will illuminate, indicating the clock is powered on.

Figure 4: Connecting the alarm clock to a USB power source.
2. Memory Battery Installation (if not pre-installed)
The CR2032 battery is for time memory function only. It ensures that time settings are retained during power outages. If the battery is not pre-installed, open the battery compartment on the back and insert one CR2032 battery, observing polarity.
Operating Instructions
1. Setting Time
- Press and hold the SET button to enter time setting mode. The hour digits will flash.
- Use the UP or DOWN buttons to adjust the hour.
- Press SET again to confirm the hour and move to minute setting. The minute digits will flash.
- Use the UP or DOWN buttons to adjust the minutes.
- Press SET again to confirm the minutes and exit time setting mode.
- To switch between 12-hour and 24-hour format, briefly press the UP button when not in setting mode.
2. Setting Alarm
- Press the ALARM button to enter alarm setting mode. The alarm hour digits will flash.
- Use the UP or DOWN buttons to adjust the alarm hour.
- Press ALARM again to confirm the alarm hour and move to alarm minute setting. The alarm minute digits will flash.
- Use the UP or DOWN buttons to adjust the alarm minutes.
- Press ALARM again to select the alarm mode (Monday-Friday, Monday-Saturday, or Monday-Sunday).
- Press ALARM again to confirm and exit alarm setting mode.
- To activate/deactivate the alarm, briefly press the ALARM button when not in setting mode. An alarm icon will appear/disappear on the display.

Figure 5: Available alarm modes for different schedules.
3. Snooze Function
When the alarm sounds, press the SNOOZE/LIGHT button to activate the snooze function. The alarm will pause for the default 5 minutes. You can adjust the snooze duration from 1 to 60 minutes in the alarm settings.

Figure 6: Activating the snooze function.
4. Adjusting Screen Brightness
Briefly press the SNOOZE/LIGHT button (when not in alarm mode) to cycle through the four screen brightness levels: Bright, Medium, Low, and Off.
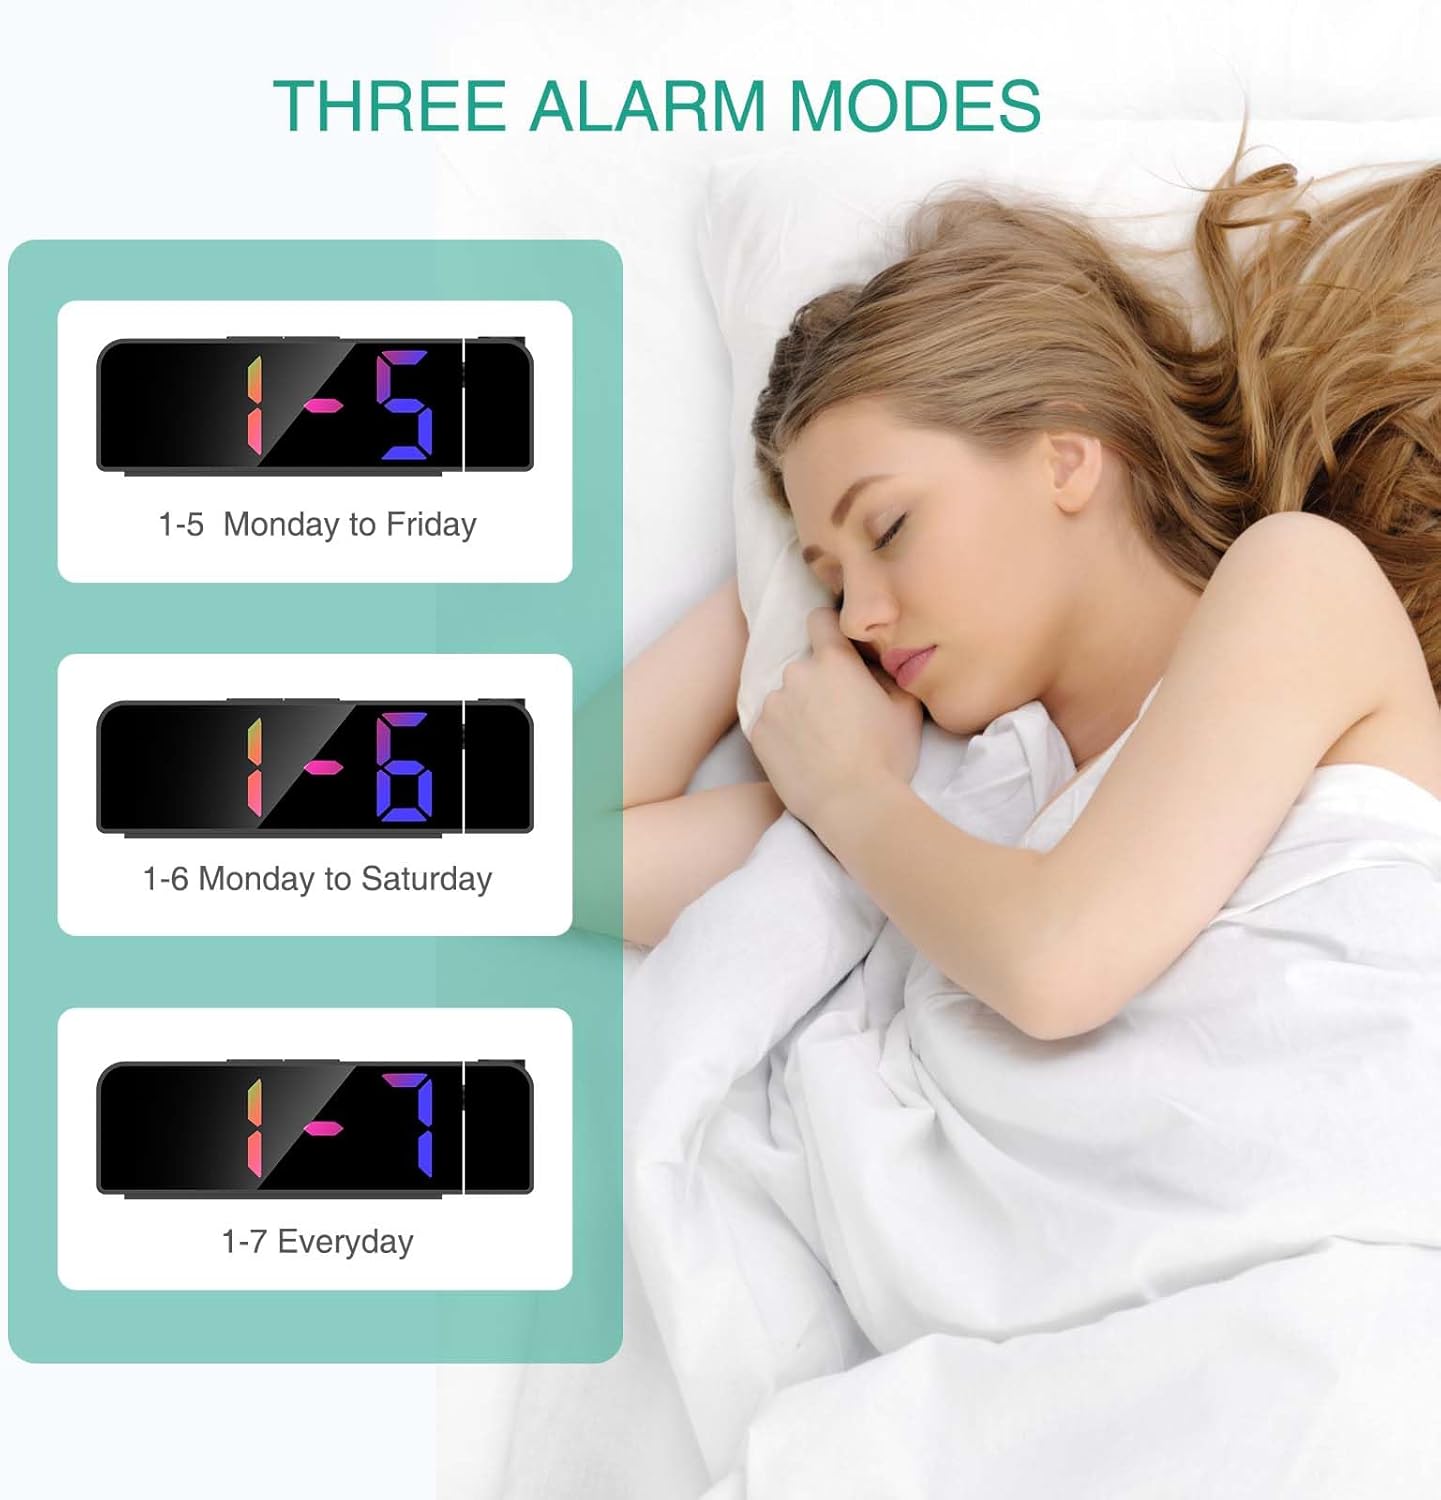
Figure 7: Visual representation of screen brightness levels.
5. Projection Function
The projection lamp can rotate 180° to project the time onto your ceiling or wall. The projection brightness is adjustable in 2 levels.
- To adjust projection brightness, briefly press the PROJECT button.
- To flip the projected image 180°, press and hold the PROJECT button.

Figure 8: Projection capabilities including distance and flip function.
Important Note on Projection Orientation:
For the projected time to display correctly (not upside down), ensure the alarm clock is positioned so that the projection is directed towards its back. If the clock is facing forward and projecting, the numbers will appear upside down. Use the 180° flip function by pressing and holding the PROJECT button to correct the orientation if needed.
6. Night Mode
In Night Mode, the screen brightness automatically dims to a low-light state during a set period. The default period is from 18:00 to 5:59.
- To activate/deactivate Night Mode, press and hold the DOWN button.
- To customize the Night Mode time period, enter the time setting mode and follow the prompts for Night Mode start and end times.
Maintenance
- Clean the clock surface with a soft, dry cloth. Do not use abrasive cleaners or solvents.
- Keep the device away from water and high humidity.
- Avoid exposing the clock to direct sunlight or extreme temperatures.
- If the clock will not be used for an extended period, disconnect it from power and remove the CR2032 battery.
Troubleshooting
| Problem | Possible Cause | Solution |
|---|---|---|
| Clock display is off. | No power connection or power outage. | Ensure the USB cable is securely connected and the power source is active. Check if the screen brightness is set to "Off". |
| Projected time is upside down. | Incorrect projection orientation. | Press and hold the PROJECT button to flip the projected image 180°. Ensure the clock is positioned correctly relative to the projection surface. |
| Alarm does not sound. | Alarm not activated or set incorrectly. | Verify the alarm is activated (alarm icon visible) and the alarm time is set correctly. Check alarm volume if adjustable (not explicitly stated, but common). |
| Difficulty setting time/alarm. | User unfamiliarity with controls. | Refer to the "Setting Time" and "Setting Alarm" sections in this manual. Practice the steps carefully. |
Specifications
| Feature | Detail |
|---|---|
| Brand | ORIA |
| Model Number | GH8013 |
| Display Type | LED |
| Color | Black Case & Colorful Digit |
| Product Dimensions | 7.7"W x 2.5"H |
| Item Weight | 6.7 ounces |
| Power Source | Corded Electric |
| Battery (Memory) | 1 Lithium Metal battery (CR2032, included) |
| Projection Rotation | 180° |
| Projection Distance | 1.6ft - 16ft |
| Screen Brightness | 4 Levels (Bright, Medium, Low, Off) |
| Projection Brightness | 2 Levels |
Warranty & Support
ORIA is committed to providing high-quality products and excellent customer service.
- Lifetime Support: We offer lifetime support for our products.
- 12-Month Replacement: Enjoy a 12-month replacement policy for any manufacturing defects.
- 24/7 Online Customer Service: Our dedicated customer service team is available 24 hours a day, 7 days a week to assist you with any inquiries or issues.
For further assistance, please visit the ORIA Store on Amazon or contact our customer support directly.


