1. Introduction
Welcome to the Keychron Q2 Max user manual. This guide provides detailed instructions for setting up, operating, maintaining, and troubleshooting your new 65% compact custom mechanical gaming keyboard kit. The Keychron Q2 Max is designed for enthusiasts seeking a premium typing experience with extensive customization options and versatile connectivity.
The Q2 Max features a full metal body, advanced 2.4 GHz wireless, Bluetooth 5.1, and wired USB-C connectivity. It supports QMK/VIA for comprehensive key remapping and macro programming, and includes multi-layered acoustic foams and a double-gasket design for an enhanced typing feel.
Please read this manual thoroughly before using your keyboard to ensure proper setup and optimal performance.
2. Package Contents
The Keychron Q2 Max Barebone Keyboard Kit includes the following components:
- 1x Keychron Q2 Max Keyboard Kit (Barebone Version - without keycaps & switches)
- 1x Aluminum Case
- 1x PCB (Printed Circuit Board)
- 1x PC Plate
- 1x Sound Absorbing Foam
- 1x IXPE Foam
- 1x PET Film
- 1x Latex Bottom Pad
- 1x Bottom Case Acoustic Foam
- 1x Bottom Case PET Film
- 14x Gaskets (10 installed, 4 in box)
- 4 sets x PCB Stabilizers
- 1x Type-C to Type-C Cable
- 1x Type-A to Type-C Adapter
- 1x Extension Adapter for Receiver
- 1x Type-A 2.4 GHz Receiver
- 1x Keycap & Switch Puller
- 1x Screwdriver
- 1x Hex Key

3. Setup
3.1. Assembling Your Keyboard (Barebone Kit)
Since the Q2 Max is a barebone kit, you will need to install your preferred switches and keycaps. Follow these steps:
- Prepare Switches: Ensure your mechanical switches are compatible with hot-swappable PCBs (3-pin or 5-pin).
- Install Switches: Align the pins of each switch with the holes on the PCB. Gently press down until the switch clicks into place. Ensure the switch is fully seated and straight.
- Install Keycaps: Align the keycap stem with the cross-shaped stem on the switch. Press firmly until the keycap is securely attached.

3.2. Initial Connection
The Keychron Q2 Max offers three connectivity modes: 2.4 GHz wireless, Bluetooth 5.1, and wired USB-C.
- Wired Connection: Connect the provided USB-C to USB-C cable (or USB-A to USB-C with adapter) from your keyboard to your computer's USB port. The keyboard will power on automatically.
- 2.4 GHz Wireless Connection: Insert the 2.4 GHz receiver into an available USB-A port on your computer. Slide the mode switch on the keyboard to the 2.4G position. The keyboard should connect automatically.
- Bluetooth Connection: Slide the mode switch on the keyboard to the BT position. Press and hold Fn + 1 (or Fn + 2 / Fn + 3) for 4 seconds to enter pairing mode. The backlight will flash rapidly. On your device, search for "Keychron Q2 Max" in Bluetooth settings and connect.

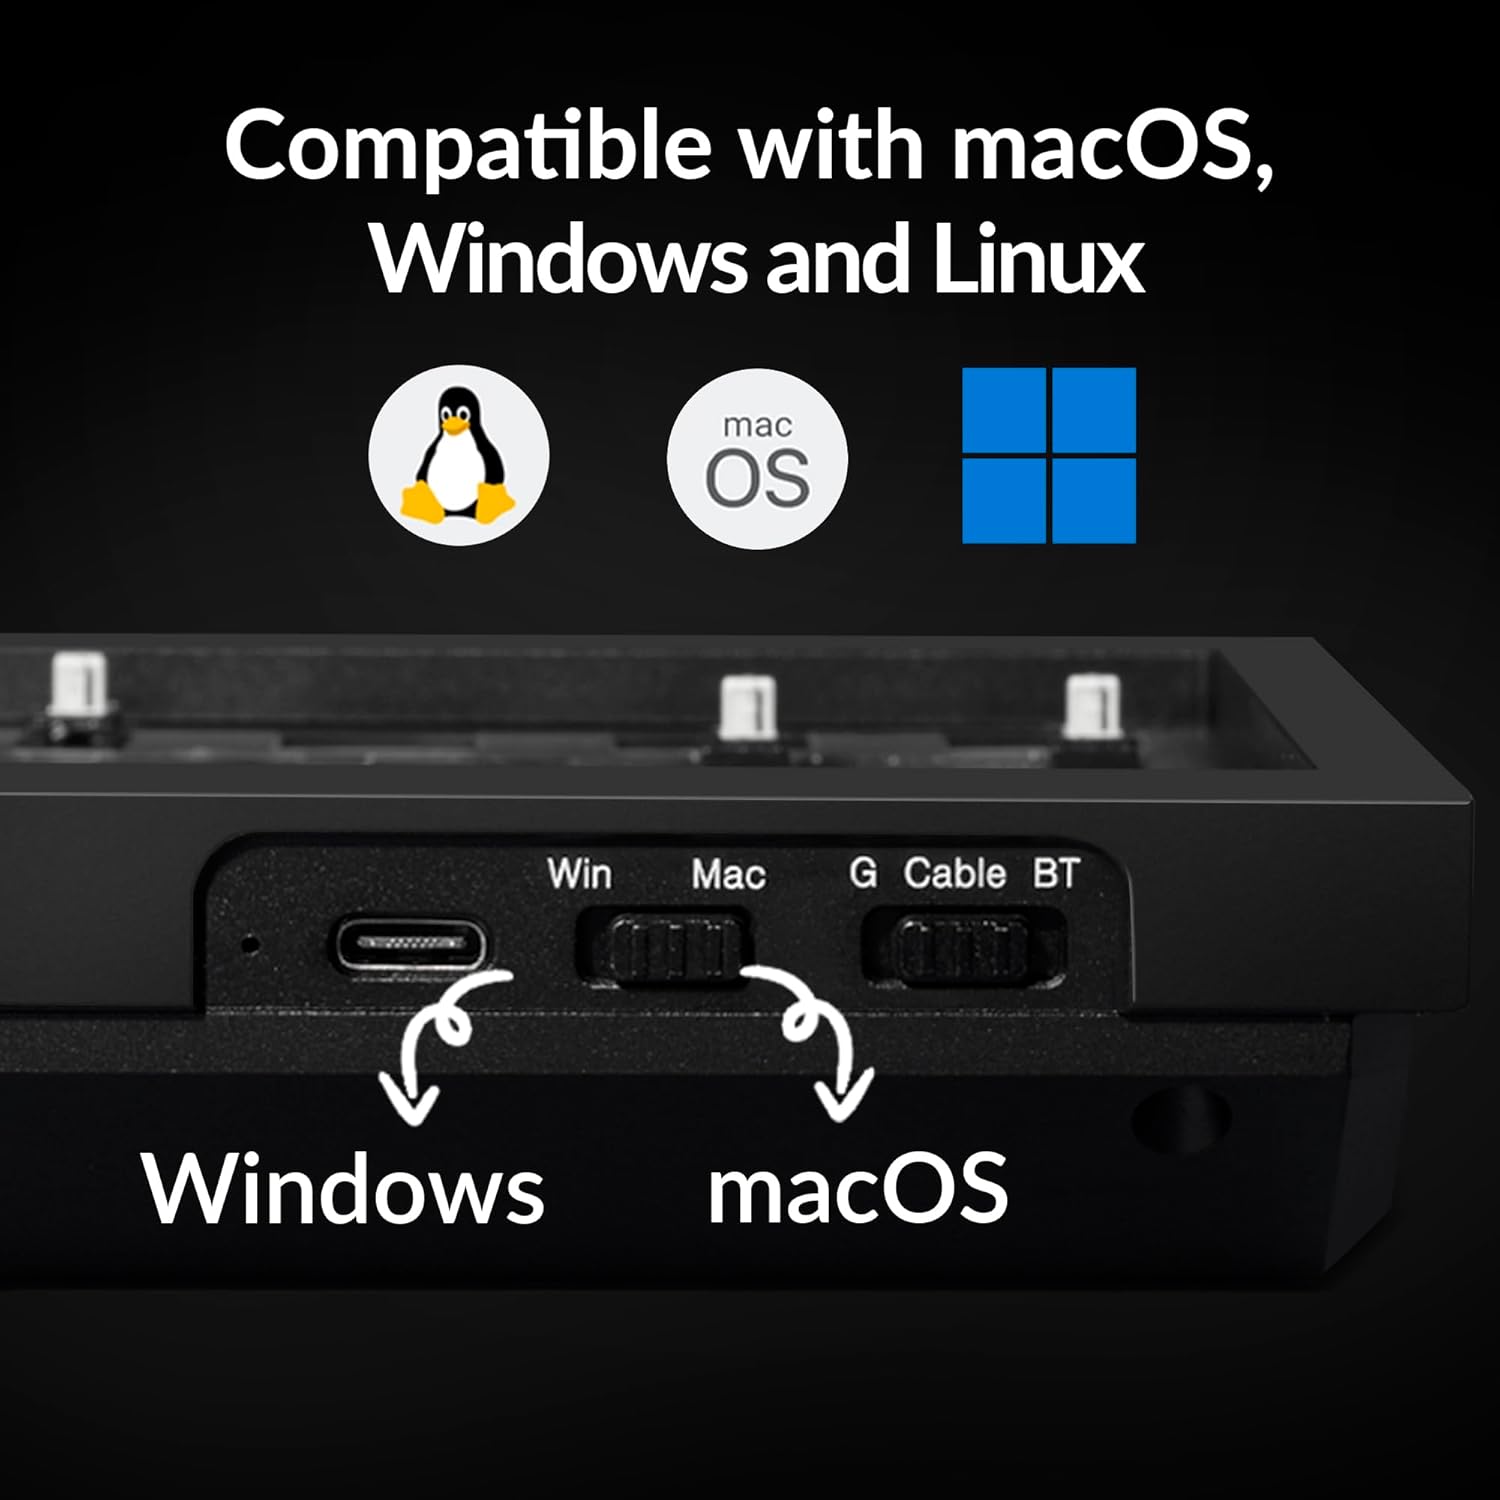
3.3. System Compatibility Switch
The Q2 Max has a system toggle switch located on the back or side of the keyboard to switch between macOS and Windows layouts. Ensure this switch is set to your operating system for correct key mapping.

4. Operating Instructions
4.1. QMK/VIA Programmability
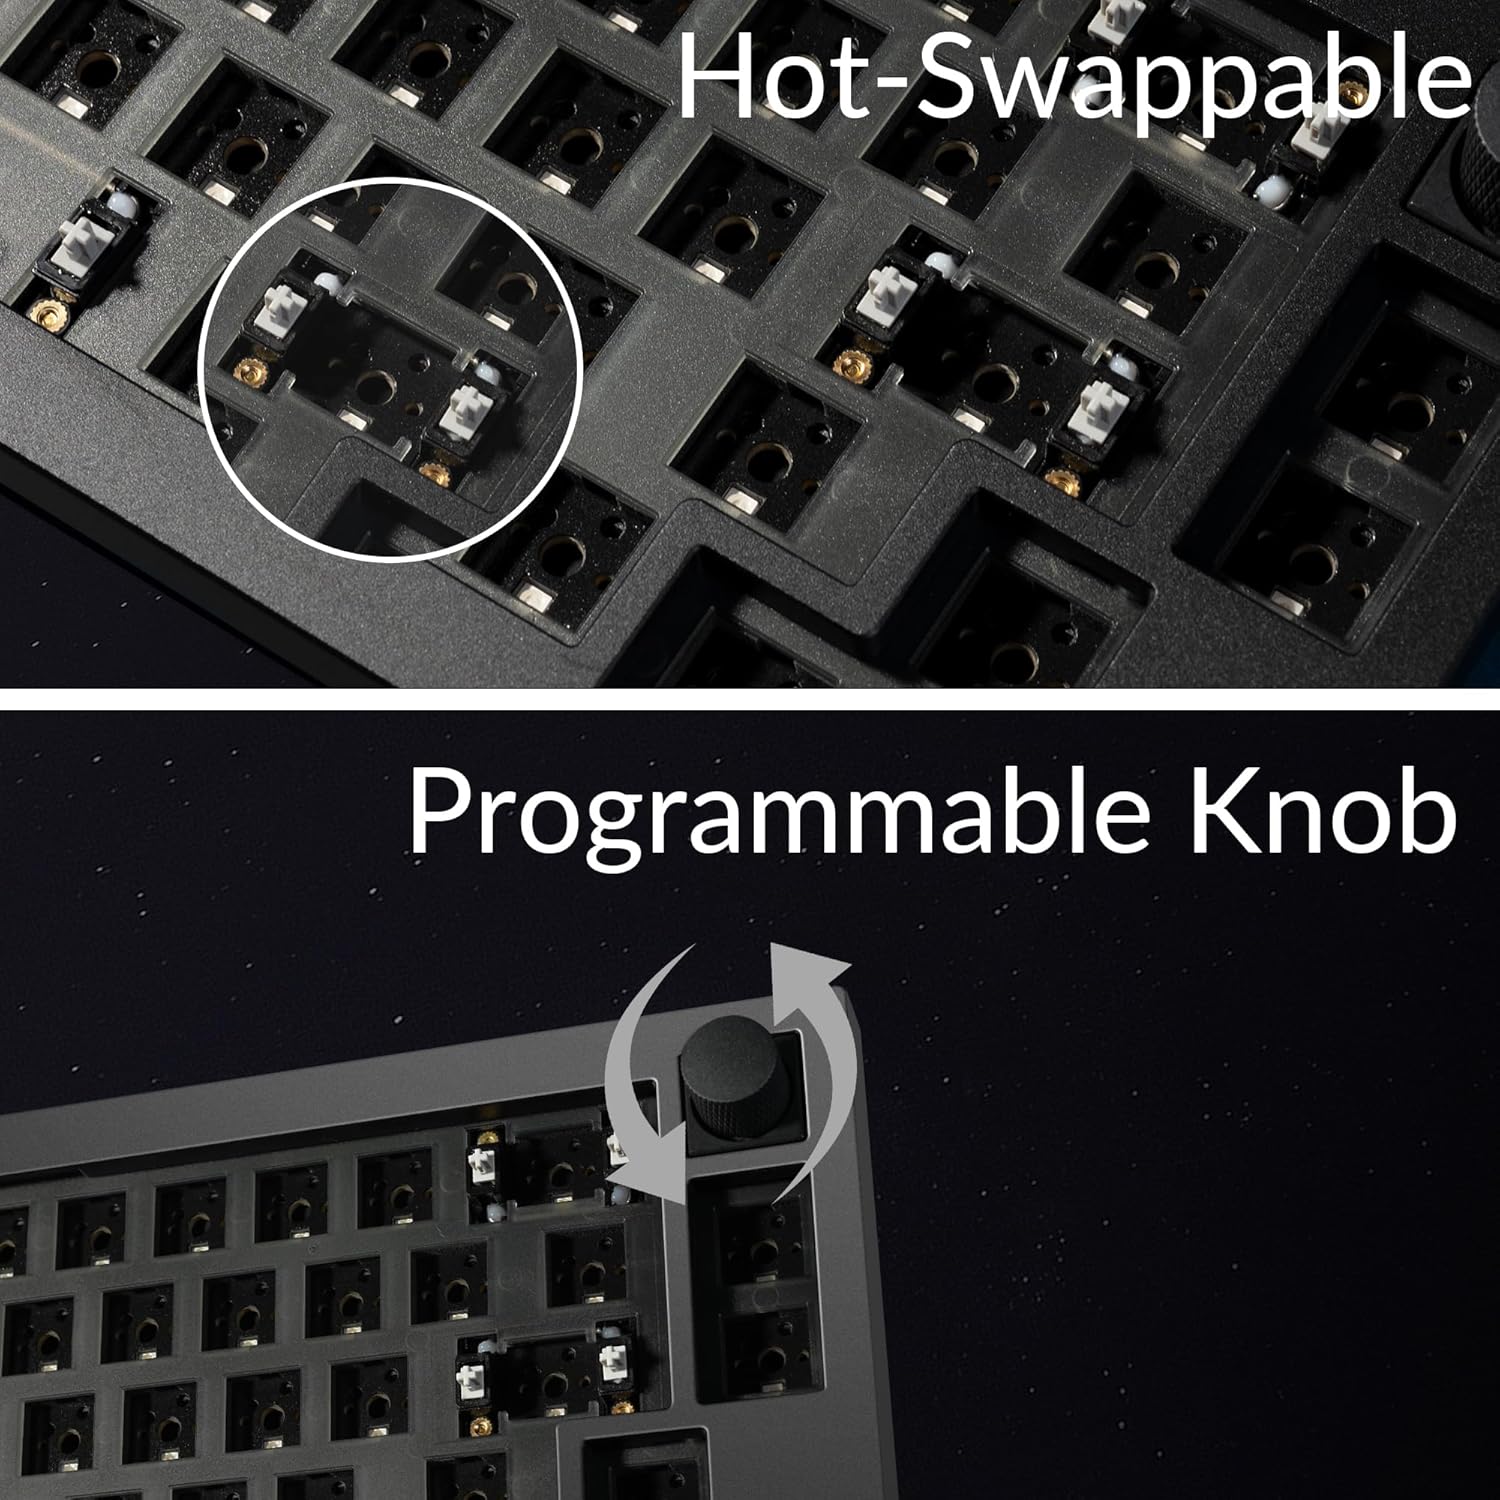
The Keychron Q2 Max is fully programmable with QMK/VIA open-source software. This allows you to remap keys, create macros, and customize the knob's functions across different layers.
- Download VIA: Visit the official VIA website to download the latest software for your operating system (macOS, Windows, Linux).
- Download Keymap JSON: Obtain the specific keymap JSON file for the Keychron Q2 Max from the Keychron support page.
- Load Keymap in VIA: Open VIA, navigate to the "Settings" tab, and enable "Show Design tab". Drag and drop the downloaded JSON file into the "Design" tab to load your keyboard's layout.
- Customize: Use the VIA interface to remap keys, assign macros, and configure the rotary knob. Changes are applied in real-time.
4.2. RGB Backlighting
The Q2 Max features 22 types of RGB LED backlighting. You can cycle through different lighting effects and adjust brightness directly on the keyboard using function key combinations or through the VIA software for more granular control.

4.3. Battery and Charging
The keyboard is equipped with a rechargeable Lithium Polymer battery. Connect the USB-C cable to charge the keyboard. The LED indicator will show charging status (usually red for charging, green for full). For optimal battery life, avoid fully discharging the battery frequently.
5. Maintenance
5.1. Cleaning Your Keyboard
- Keycaps: Use the provided keycap puller to remove keycaps. Clean them with a mild soap and water solution, then dry thoroughly before reattaching.
- Switches: Use compressed air to remove dust and debris from around the switches. Avoid spraying liquid directly into the switches.
- Case: Wipe the aluminum case with a soft, damp cloth. Avoid abrasive cleaners.
5.2. Replacing Switches
The Q2 Max features hot-swappable sockets, allowing you to change switches without soldering.
- Remove Keycap: Use the keycap puller to gently remove the keycap from the switch you wish to replace.
- Remove Switch: Use the switch puller to grasp the top and bottom clips of the switch. Gently rock and pull the switch upwards until it detaches from the PCB.
- Install New Switch: Align the pins of the new switch with the holes on the PCB. Ensure the pins are straight. Gently press down until the switch clicks into place. Do not force it, as bent pins can damage the socket.
- Reattach Keycap: Place the keycap back onto the new switch.
6. Troubleshooting
| Problem | Possible Cause | Solution |
|---|---|---|
| Keyboard not responding (wired) | Loose cable connection, faulty cable, driver issue. | Check USB-C cable connection. Try a different USB port or cable. Restart your computer. |
| Keyboard not connecting (wireless) | Low battery, incorrect mode switch, pairing issue, receiver not detected. | Charge the keyboard. Ensure mode switch is set to 2.4G or BT. Re-pair Bluetooth (Fn+1/2/3 for 4s). Try receiver in a different USB port. |
| Keys not registering or double-typing | Loose or faulty switch, debris in switch. | Remove keycap and switch. Clean the switch socket with compressed air. Reinstall or replace the switch. |
| RGB backlight not working | Backlight turned off, low brightness, software conflict. | Adjust backlight brightness/effect using keyboard shortcuts. Check VIA software settings. |
| QMK/VIA software not detecting keyboard | Keyboard not in wired mode, incorrect firmware, software version. | Ensure keyboard is connected via USB-C cable. Download the correct keymap JSON file. Update VIA software to the latest version. |
7. Specifications
| Feature | Detail |
|---|---|
| Model Name | Keychron Q2 Max |
| Layout | 65% Compact |
| Connectivity | 2.4 GHz Wireless, Bluetooth 5.1, USB-C Wired |
| Polling Rate | 1000 Hz (2.4 GHz Wireless & Wired) |
| Body Material | 6063 Aluminum (CNC machined) |
| Customization | QMK/VIA Programmable, Hot-swappable PCB, Programmable Knob |
| Backlighting | RGB LED (22 types) |
| Acoustic Design | Multi-layered acoustic foams, Double-gasket design |
| Stabilizers | Screw-In PCB Stabilizers |
| Battery Type | Lithium Polymer (included) |
| Compatible OS | macOS, Windows, Linux |
| Item Weight | 4.27 pounds |
| Dimensions | 14.26 x 6.89 x 2.83 inches |

8. Warranty and Support
Keychron products typically come with a limited warranty covering manufacturing defects. For specific warranty terms and conditions, please refer to the warranty card included with your product or visit the official Keychron website.
For technical support, troubleshooting assistance, or to download the latest drivers and firmware, please visit the Keychron support page:
Keychron Official Support Page
You can also find additional resources and community support on the Keychron brand store on Amazon:


