
1. Product Overview
The Luejnbogty 2L Blender Spare Jug is a transparent replacement part designed for blenders, offering a 2-liter capacity. It includes the jug, an integrated blade assembly, a main lid, and a removable lid plug.

Figure 1: Individual components of the Luejnbogty 2L blender spare jug, including the transparent jug with integrated blade, the dark grey main lid, and the clear lid plug.

Figure 2: The transparent blender jug, highlighting its ergonomic handle and clear measurement markings on the side for precise ingredient measurement.
2. Safety Information
- Always ensure the blender jug is securely seated on the blender motor base before operation.
- Do not operate the blender with an empty jug.
- Keep hands and utensils out of the jug while the blender is running.
- Exercise caution when handling the blade assembly, as blades are sharp.
- Ensure the lid is properly secured before blending to prevent spills.
- Do not overfill the jug beyond the maximum fill line.
3. Setup
3.1 Unpacking and Initial Inspection
- Carefully remove all components from the packaging.
- Inspect the jug, lid, and blade assembly for any signs of damage. Do not use if damaged.
- Wash all parts that will come into contact with food in warm, soapy water before first use. Rinse thoroughly and dry.
3.2 Assembling the Jug
- Ensure the blade assembly is firmly integrated into the base of the jug. It is pre-assembled and not designed for user disassembly.
- Place the main lid onto the top of the jug, ensuring it fits snugly.
- Insert the clear lid plug into the opening in the center of the main lid.

Figure 3: The blender jug fully assembled with the dark grey lid and clear lid plug securely attached, ready for placement on the blender base.
3.3 Attaching to Blender Base
- Align the base of the assembled jug with the motor base of your compatible blender.
- Twist the jug clockwise until it locks securely into place. Refer to your blender's main instruction manual for specific attachment procedures.

Figure 4: Underside of the blender jug, showing the coupling mechanism and 'Open' and 'Close' indicators for proper attachment to the blender motor base.
4. Operating Instructions
4.1 Adding Ingredients
- Ensure the jug is securely attached to the blender base.
- Remove the main lid or the clear lid plug to add ingredients.
- Add ingredients, ensuring not to exceed the maximum fill line indicated on the jug.
- Replace the lid and lid plug securely before starting the blender.
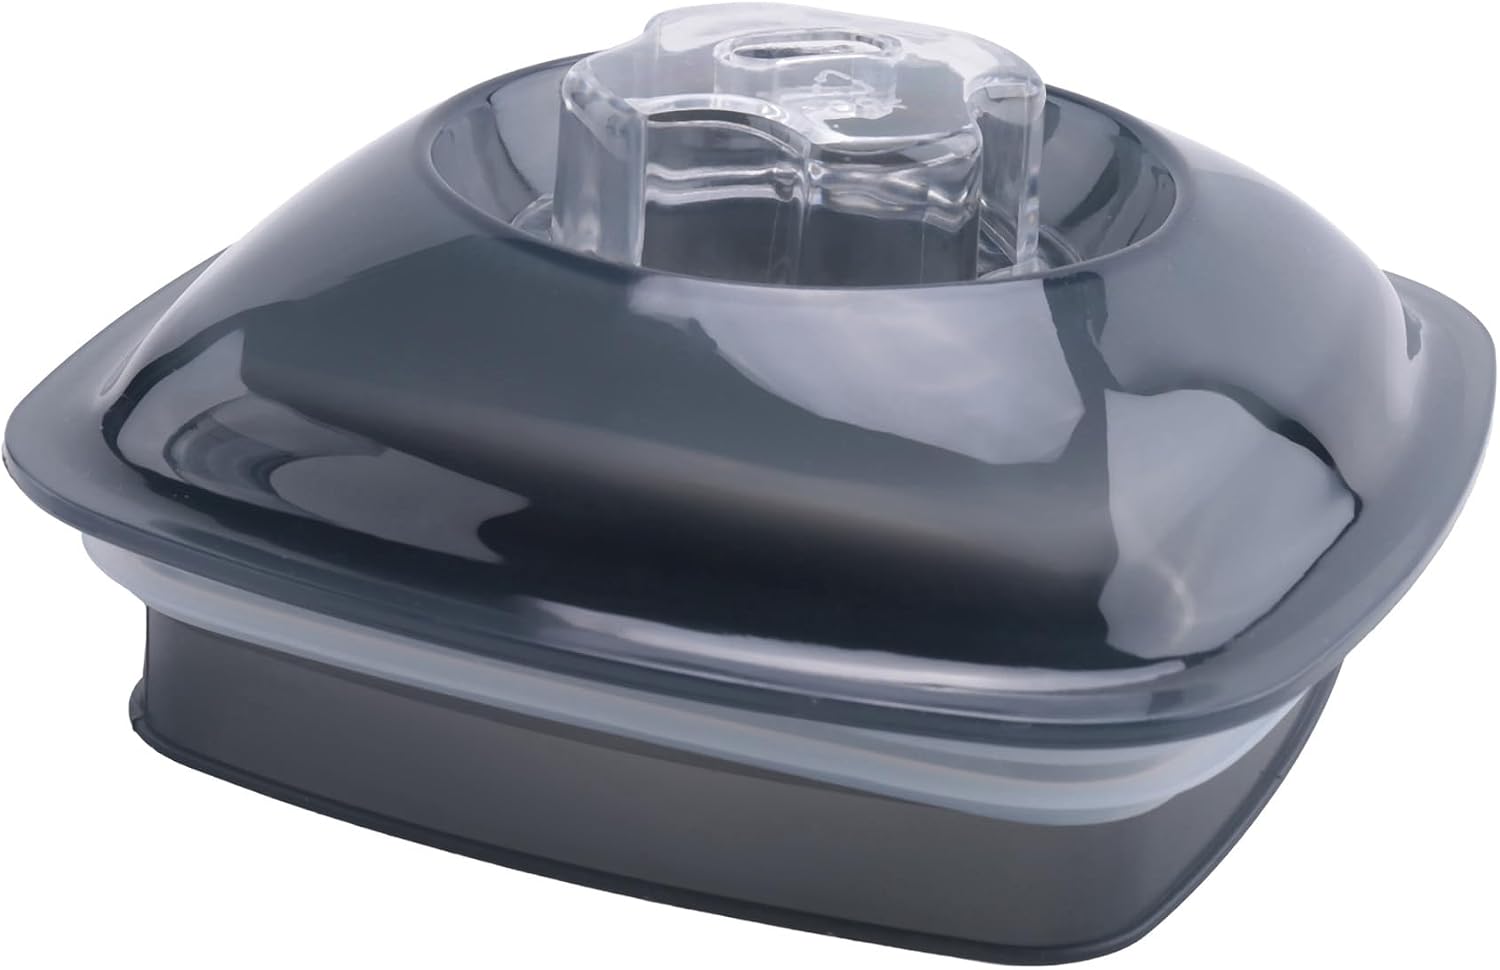
Figure 5: Detailed view of the dark grey blender jug lid with the clear lid plug inserted. The plug can be removed to add ingredients during blending.
4.2 Blending
- With ingredients added and the lid secured, select the desired speed or program on your blender's motor base.
- Begin blending. If adding ingredients during blending, remove only the clear lid plug and carefully add items.
- Once blending is complete, turn off the blender and wait for the blades to stop completely before removing the jug.
5. Maintenance and Cleaning
5.1 General Cleaning
- Always unplug the blender from the power outlet before cleaning.
- Remove the jug from the blender motor base.
- Wash the jug, lid, and lid plug immediately after each use to prevent food from drying on the surfaces.
- Hand wash with warm, soapy water. Use a brush for thorough cleaning around the blade area.
- Rinse all parts thoroughly with clean water.
- Allow all parts to air dry completely before storing or reassembling.

Figure 6: Top-down view of the stainless steel four-pronged blade assembly integrated into the base of the transparent blender jug, illustrating the area requiring careful cleaning.
5.2 Storage
Store the clean and dry jug, lid, and lid plug in a safe place, away from direct sunlight or extreme temperatures.
6. Troubleshooting
| Problem | Possible Cause | Solution |
|---|---|---|
| Jug not fitting on blender base | Incorrect alignment or not twisted fully. | Ensure the jug is correctly aligned with the motor base and twist clockwise until it locks. |
| Lid not sealing properly | Lid not seated correctly or debris on rim. | Remove the lid, check for any obstructions on the rim of the jug or lid, and re-seat firmly. |
| Leakage during blending | Lid not secured, lid plug missing, or jug overfilled. | Ensure lid and lid plug are firmly in place. Do not exceed the maximum fill line. |
7. Specifications
- Brand: Luejnbogty
- Model: B0CRB3DQZC
- Material: Plastic
- Capacity: 2 Liters (2L)
- Dimensions (approx.): 12cm x 12cm x 32.5cm (Length x Width x Height)
- Color: Transparent
8. Warranty and Support
This product is a replacement part. For specific warranty information, please refer to the original blender manufacturer's documentation or contact the retailer where the spare jug was purchased. For support regarding this specific spare jug, please contact Luejnbogty customer service through the platform of purchase.