
Kärcher 1.081-190.0
Kärcher SE 6 Signature Line Spray Extraction Cleaner User Manual
Model: 1.081-190.0
Brand: Kärcher
1. Introduction and Product Overview
The Kärcher SE 6 Signature Line is a versatile 3-in-1 spray extraction cleaner designed for deep cleaning of textile surfaces, upholstery, and hard floors. It functions as a spray extraction unit, a wet vacuum, and a dry vacuum, offering comprehensive cleaning solutions for your home.
This appliance applies a cleaning solution deep into the fibers to dissolve dirt, then immediately vacuums it up into a separate dirty water tank, ensuring efficient and hygienic cleaning. Its robust design and included accessories make it suitable for various cleaning tasks.

Figure 1.1: Kärcher SE 6 Signature Line with all accessories, including various nozzles, detergent, and filter bag.
2. Product Features
- 3-in-1 Functionality: The SE 6 Signature Line is suitable for deep cleaning of carpet fibers and upholstery. It can also be used as a standard dry vacuum or a wet vacuum.
- Hygienic Spray Extraction: Water and detergent are sprayed deep into the fibers, dissolving dirt which is then immediately vacuumed up for quick and convenient use.
- Wet/Dry Vacuuming without Filter Change: Thanks to the flat pleated filter, you can switch from wet to dry vacuuming without interrupting your work to change the filter.
- Practical Accessories: The vacuum comes with numerous accessories for versatile use around the home. The support handle greatly facilitates use on carpets.
- Dual Tank System: Features separate 4-liter tanks for clean and dirty water, easily removable for filling and emptying.
- On-board Accessory Storage: Accessories, suction hose, and cable can be conveniently stored directly on the device.
3. Setup Guide
3.1 Unpacking and Initial Inspection
Carefully remove all components from the packaging. Check for any signs of damage during transit. Ensure all listed accessories are present:
- SE 6 Signature Line unit
- Floor washing nozzle with hard floor attachment
- Upholstery washing nozzle
- Crevice washing nozzle
- Support handle
- Switchable dry floor nozzle
- Dry crevice nozzle
- Dry upholstery nozzle
- Flat pleated filter
- 1L bottle of RM 159 carpet detergent
- Fleece filter bag
3.2 Assembly
- Attach the Suction Hose: Connect the flexible suction hose to the designated inlet on the main unit until it clicks securely into place.
- Assemble the Extension Tubes/Handle: Connect the extension tubes to the handle, then attach the desired nozzle (e.g., floor washing nozzle) to the end. Connect the handle assembly to the suction hose.
- Install Filter (for Dry Vacuuming): Ensure the flat pleated filter is correctly installed. If using for dry vacuuming, insert a fleece filter bag into the dirty water tank compartment.
3.3 Filling the Clean Water Tank (for Spray Extraction)
- Remove the clean water tank from the unit.
- Fill the tank with clean water (maximum 50°C) and the recommended amount of Kärcher RM 159 carpet detergent, following the detergent's instructions.
- Securely close the tank and reinsert it into the unit.
4. Operating Instructions
4.1 Spray Extraction Cleaning (Carpets, Upholstery)
This mode is ideal for deep cleaning textile surfaces.
- Ensure the clean water tank is filled with water and detergent.
- Attach the appropriate washing nozzle (floor, upholstery, or crevice).
- Plug the power cord into a suitable electrical outlet.
- Switch on the unit.
- Press the spray trigger on the handle to apply the cleaning solution while simultaneously moving the nozzle over the surface. The dirty solution will be immediately vacuumed into the dirty water tank.
- For heavily soiled areas, you may spray the solution and let it soak for a few minutes before vacuuming.
- Repeat passes until the extracted water appears clean.

Figure 4.1: Deep cleaning a carpet with the spray extraction function.
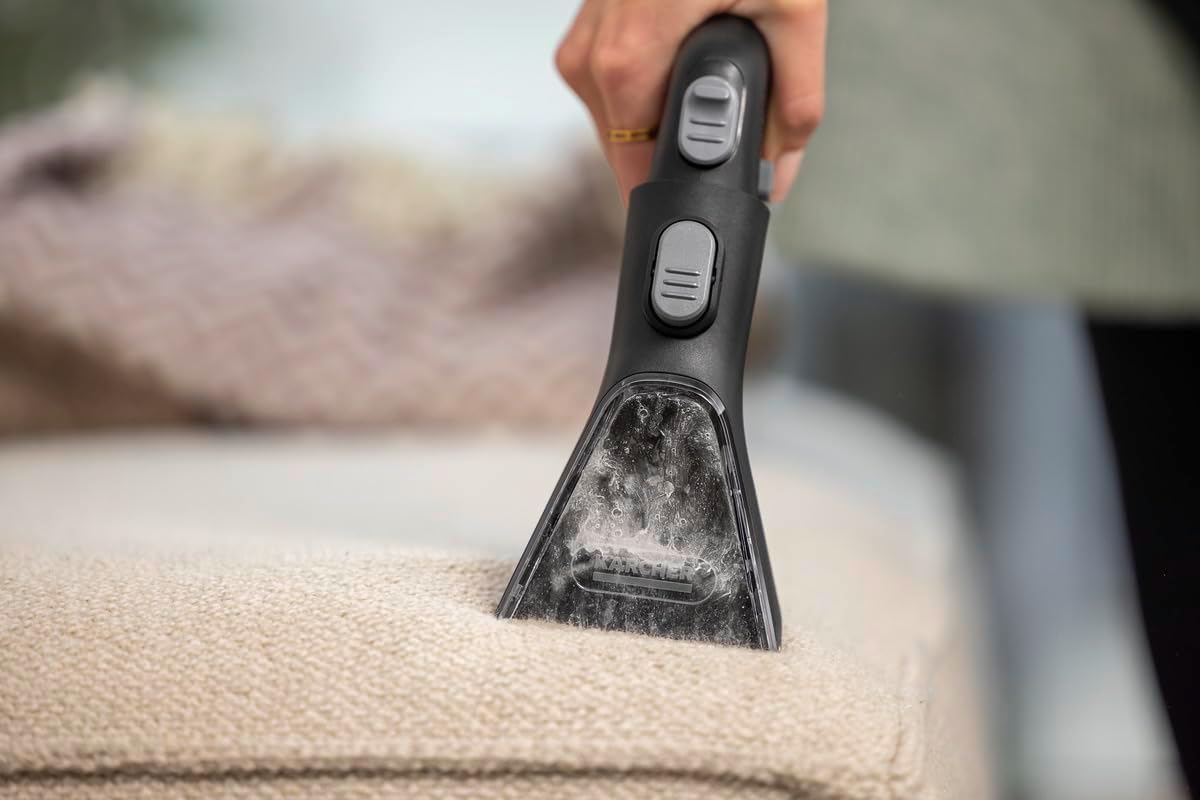
Figure 4.2: Using the upholstery nozzle for targeted cleaning of furniture.
4.2 Wet Vacuuming
The SE 6 Signature Line can vacuum liquids. Ensure the clean water tank is empty or removed if not needed for spray extraction.
- Attach a suitable nozzle for wet vacuuming (e.g., the hard floor attachment on the floor washing nozzle).
- Switch on the unit.
- Move the nozzle over the liquid spill to vacuum it up.
- Monitor the dirty water tank and empty it when full.
4.3 Dry Vacuuming
For dry vacuuming, ensure the dirty water tank is empty and a fleece filter bag is installed. The flat pleated filter allows for seamless transition.
- Remove the clean water tank if present.
- Install a fleece filter bag in the dirty water tank compartment.
- Attach the switchable dry floor nozzle or other dry nozzles (crevice, upholstery).
- Switch on the unit.
- Vacuum dry dirt from surfaces.
5. Maintenance
Regular maintenance ensures optimal performance and extends the life of your Kärcher SE 6 Signature Line.
5.1 Emptying and Cleaning Tanks
- After each use, especially after spray extraction or wet vacuuming, remove the dirty water tank.
- Empty the dirty water and rinse the tank thoroughly with clean water.
- Rinse the clean water tank if any detergent residue remains.
- Allow both tanks to air dry before reassembling or storing.
5.2 Filter Maintenance
The flat pleated filter requires periodic cleaning.
- Remove the filter from its housing.
- Tap the filter gently to dislodge dry dirt. For wet dirt, rinse under running water.
- Ensure the filter is completely dry before reinserting it into the unit.
- Replace the fleece filter bag when full during dry vacuuming.
5.3 Accessory Cleaning and Storage
- Rinse all nozzles and the suction hose with clean water after use, especially after spray extraction.
- Ensure all accessories are dry before storing them.
- Utilize the on-board storage for nozzles, hose, and cable to keep the unit tidy and ready for next use.
6. Troubleshooting
If you encounter issues with your Kärcher SE 6 Signature Line, refer to the following common problems and solutions:
| Problem | Possible Cause | Solution |
|---|---|---|
| No suction power | Hose or nozzle blocked; dirty filter; full dirty water tank; improperly sealed lid. | Check and clear blockages; clean or replace filter; empty dirty water tank; ensure lid is securely closed. |
| No spray from nozzle | Clean water tank empty; spray nozzle blocked; pump malfunction. | Refill clean water tank; clean spray nozzle; if problem persists, contact Kärcher support. |
| Unit does not turn on | No power supply; faulty power cord/plug. | Check power outlet; inspect power cord for damage. |
| Water leakage | Tanks not properly seated; damaged seals. | Ensure tanks are correctly inserted; check seals for wear and tear. |
If the problem persists after attempting these solutions, please contact Kärcher customer support.
7. Specifications
| Specification | Value |
|---|---|
| Manufacturer | Kärcher |
| Product Dimensions (L x W x H) | 32 x 42.4 x 46.6 cm |
| Item Model Number | 1.081-190.0 |
| Color | White. |
| Style | With special accessories |
| Finish | smooth |
| Pattern | New model |
| Power Source | Electric cable |
| Voltage | 12 Volts |
| Number of Items | 1 |
| Number of Pieces | 5 |
| Number of Handles | 1 |
| Special Features | 3-in-1 device |
| Included Components | Floor brush, floor cleaning nozzle, flat nozzle, cushion brush, handle, detergent, non-woven filter bag |
| Battery(ies) Required | No |
| Item Weight | 7.85 Kilograms |
| Spare Parts Availability | Spare parts information unavailable |
| Date First Available on Amazon.com.be | 25 January 2024 |
| Language (Manual) | German |
| Country of Origin | Romania |
| Filter Type | Flat pleated filter |
| Surface Recommendation | Hard floor |
| Cordless? | No |
| Capacity | 4 Liters |
8. Warranty and Support
Kärcher products are manufactured to high-quality standards and come with a manufacturer's warranty. Please refer to the warranty card included with your product for specific terms and conditions, including warranty period and coverage details.
For technical support, spare parts, or service inquiries, please visit the official Kärcher website or contact their customer service department. You can find contact information and frequently asked questions on their website:
Related documents1.081-190.0


Ask a question about this manual
Ask about setup, troubleshooting, compatibility, parts, safety, or missing instructions. Manuals+ will review the question and use this page’s manual context to help answer it.