
1. Introduction
Thank you for choosing the VINGLI 38.5" Outdoor Metal Rose Bench. This manual provides essential information for the safe assembly, operation, and maintenance of your new bench. Please read these instructions carefully before assembly and retain them for future reference.

Image 1: The VINGLI 38.5" Outdoor Metal Rose Bench, black with an antique rose design, positioned on a front porch.
2. Safety Information
- Always assemble the bench according to the provided instructions.
- Do not exceed the maximum weight capacity of 500 lbs (approximately 227 kg). This bench is designed for two persons.
- Ensure all bolts and nuts are securely tightened before use. Periodically check and re-tighten as necessary.
- Place the bench on a flat, stable surface to prevent tipping.
- For outdoor use, store the bench indoors or cover it during harsh weather conditions (heavy rain, snow, strong winds) to maintain its longevity and prevent damage.
- Keep children and pets away from the assembly area to avoid injury.
3. Package Contents
Before beginning assembly, verify that all parts are present and undamaged. If any parts are missing or damaged, please contact customer support.
- Bench Backrest (1)
- Bench Seat (1)
- Left Armrest/Leg Assembly (1)
- Right Armrest/Leg Assembly (1)
- Hardware Pack (bolts, nuts, washers, wrench)
- Instruction Manual (1)
4. Assembly Instructions
Assembly is straightforward and typically takes about 15 minutes with one person. It is recommended to have your own wrench set for easier tightening.
- Carefully unpack all components and lay them out on a soft, clean surface to prevent scratches.
- Attach the bench backrest to the left and right armrest/leg assemblies using the provided bolts, washers, and nuts. Do not fully tighten the bolts yet.
- Attach the bench seat to the left and right armrest/leg assemblies, aligning the holes. Secure with the remaining bolts, washers, and nuts. Do not fully tighten.
- Once all components are loosely assembled, place the bench upright on a flat surface.
- Gradually tighten all bolts evenly until secure. Avoid over-tightening.
- Ensure the bench is stable and does not wobble. If it wobbles, loosen the bolts slightly, adjust the bench, and re-tighten.

Image 2: A diagram illustrating the dimensions of the VINGLI bench, showing a length of 38.5 inches, depth of 13.5 inches, and height of 31 inches.
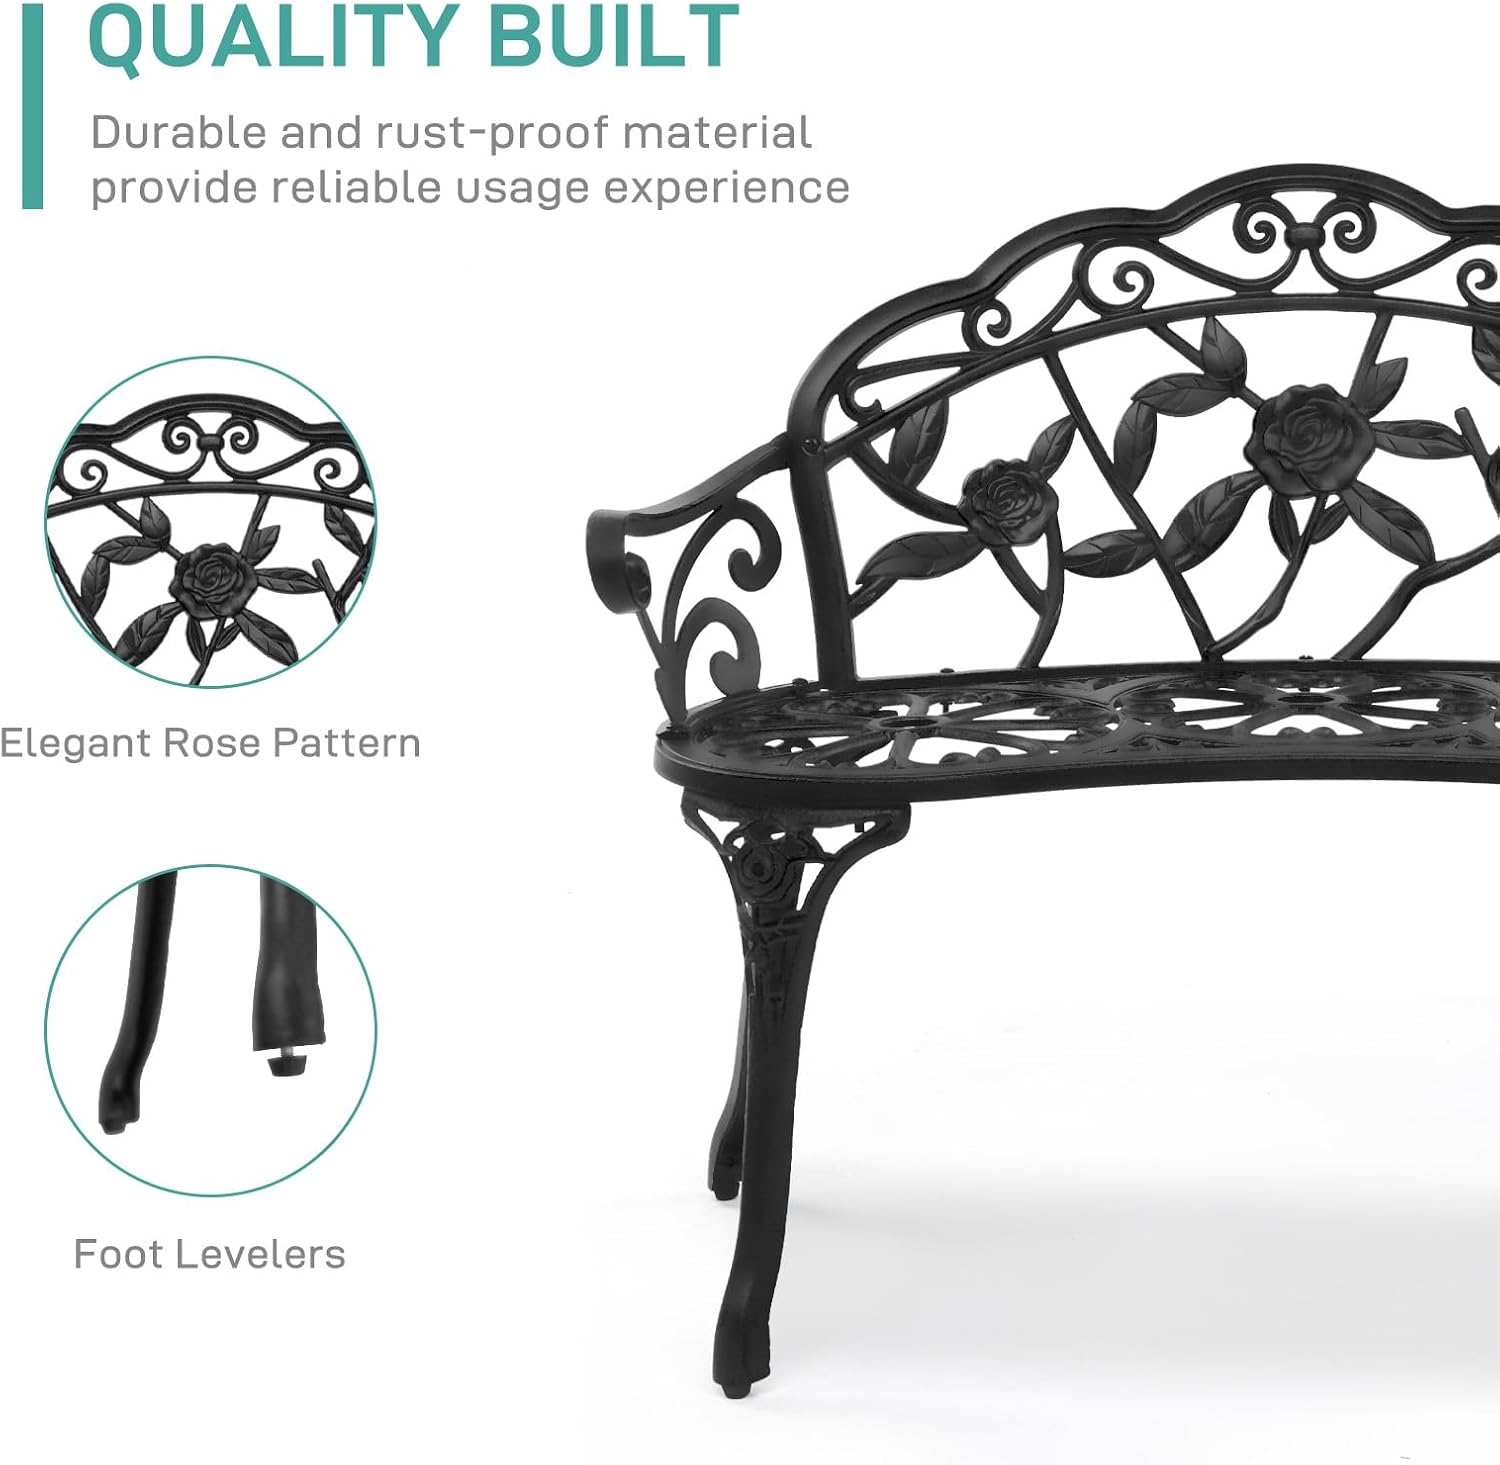
Image 3: Detailed view highlighting the elegant rose pattern on the bench's backrest and the adjustable foot levelers for stability.

Image 4: An infographic detailing the bench's features: a comfortable curved backrest, smooth surface with exquisite craftsmanship, and a weather-resistant cast aluminum frame.
5. Operating Instructions
The VINGLI Outdoor Metal Rose Bench is designed for comfortable seating in various outdoor settings.
- Placement: Position the bench in your desired outdoor location such as a garden, patio, porch, or pathway. Ensure the surface is level and firm.
- Seating: The bench is designed to comfortably seat two adults, with a maximum weight capacity of 500 lbs.
- Stability Check: Before each use, quickly check that the bench is stable and all connections are secure.
6. Maintenance
Proper care will extend the life and appearance of your VINGLI bench.
- Cleaning: Wipe the bench with a dry cloth to remove dust and debris. For more stubborn dirt, use a damp cloth with mild soap and water, then dry thoroughly. Avoid harsh chemicals or abrasive cleaners.
- Weather Protection: Although the bench features a weather-resistant finish, prolonged exposure to extreme weather conditions can affect its appearance and durability. Consider covering the bench or moving it to a sheltered area during heavy rain, snow, or intense sunlight.
- Rust Prevention: The cast iron and aluminum frame is designed to be anti-rust. However, regularly inspect for any signs of rust, especially in areas where the finish might be chipped. Touch up with appropriate outdoor metal paint if necessary.
- Fastener Check: Periodically check all bolts and nuts to ensure they remain tight. Re-tighten as needed to maintain structural integrity.
7. Troubleshooting
If you encounter any issues with your bench, refer to the following common solutions:
| Problem | Possible Cause | Solution |
|---|---|---|
| Bench wobbles | Uneven surface; loose fasteners | Move to a level surface. Check and tighten all bolts. Adjust foot levelers if present. |
| Parts do not align during assembly | Fasteners tightened too early; incorrect orientation of parts | Loosen all fasteners, re-align parts, then gradually tighten. Ensure parts are oriented correctly as per diagrams. |
| Surface finish appears dull or scratched | Exposure to elements; minor abrasions | Clean with mild soap and water. Consider applying a protective outdoor furniture wax or touch-up paint for metal. |
8. Specifications
| Feature | Detail |
|---|---|
| Product Dimensions (D x W x H) | 13.5" x 38.5" x 31" (34.3 cm x 97.8 cm x 78.7 cm) |
| Material | Cast Iron, Cast Aluminum |
| Color | Black |
| Style | Antique |
| Item Weight | 20.68 Pounds (9.38 kg) |
| Maximum Weight Recommendation | 500 Pounds (227 kg) |
| Seating Capacity | 2 Persons |
| Assembly Required | Yes (Estimated 15 minutes) |
9. Warranty and Support
VINGLI offers a 30-day return policy for refund or replacement if the item is defective, damaged, or has missing parts. For any product-related inquiries, assembly assistance, or to report issues, please contact VINGLI customer support directly through your purchase platform or the official VINGLI website. Please retain your proof of purchase for warranty claims.


