
1. Introduction
This manual provides detailed instructions for the installation, operation, and maintenance of your Hiwatch HWD-7108MH-G4 8-Channel Digital Video Recorder (DVR). Please read this manual thoroughly before using the product to ensure proper and safe operation. Keep this manual for future reference.
The HWD-7108MH-G4 is a versatile DVR supporting multiple video input types including HDTVI, CVI, AHD, CVBS, and IP cameras. It features 8 self-adaptive inputs, 8-channel HDTVI coaxial video and audio input, 1-channel local audio input, and 4-channel IP inputs via network. Advanced H.265/H.265+ compression ensures efficient storage, and it includes 1 SATA interface for hard drive installation.
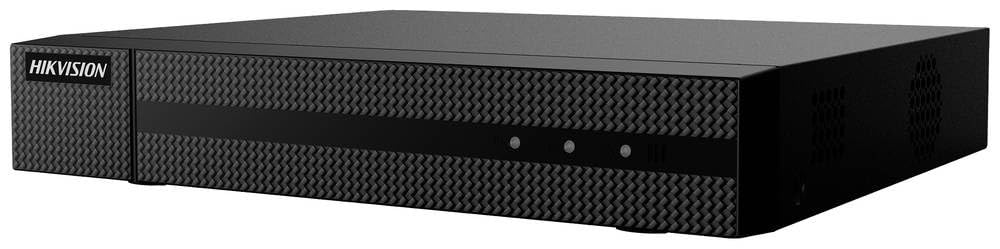
Figure 1: Hiwatch HWD-7108MH-G4 Digital Video Recorder (Front View). This image shows the compact design and front panel indicators of the DVR unit.
2. Safety Precautions
Always follow these safety guidelines to prevent injury or damage to the device:
- Use only the power adapter provided by the manufacturer.
- Ensure the power supply voltage is stable and meets the device requirements.
- Do not expose the DVR to water, moisture, or extreme temperatures.
- Avoid placing the device in direct sunlight or near heat sources.
- Ensure proper ventilation to prevent overheating.
- Do not open the device casing. Refer all servicing to qualified personnel.
- Protect power cables from being walked on or pinched.
3. Package Contents
Verify that all items are present in the package:
- Hiwatch HWD-7108MH-G4 DVR Unit
- Power Adapter
- USB Mouse
- SATA Cable for HDD
- Power Cable for HDD
- Quick Start Guide
- Mounting Screws for HDD
4. Setup
4.1 Hard Drive Installation
- Unscrew and remove the top cover of the DVR.
- Connect the SATA data cable and power cable to the hard drive.
- Align the hard drive with the mounting holes inside the DVR chassis.
- Secure the hard drive using the provided screws.
- Reconnect the SATA data and power cables to the motherboard.
- Replace the top cover and secure it with screws.
4.2 Connecting Peripherals
- Video Input: Connect your HDTVI, CVI, AHD, CVBS cameras to the BNC video input ports (1-8) on the rear panel. For IP cameras, connect them to your network and ensure they are discoverable.
- Video Output: Connect a monitor to the HDMI or VGA output port.
- Audio Input/Output: Connect audio input devices to the audio IN port and speakers to the audio OUT port if required.
- Network: Connect an Ethernet cable from the DVR's LAN port to your router or network switch.
- USB: Connect the USB mouse to a USB port for navigation. Other USB devices like flash drives can be connected for backup.
- Power: Connect the power adapter to the DVR's power input and then to a power outlet.
4.3 Initial Power On and Configuration
- After connecting all peripherals, power on the DVR.
- The system will boot up and display the initial setup wizard on the connected monitor.
- Follow the on-screen instructions to set up the administrator password, date/time, network settings, and hard drive initialization.
- Important: Initialize the hard drive before recording. This will format the drive and prepare it for video storage.
5. Operating Instructions
5.1 Live View
After logging in, the DVR will display the live view of all connected cameras. You can switch between single-camera view, multi-camera view, and sequence view using the controls on the screen or the USB mouse.
5.2 Recording Configuration
To configure recording settings:
- Go to Menu > Record > Parameters.
- Select the desired camera and configure recording mode (continuous, motion detection, scheduled).
- Adjust resolution, frame rate, and quality settings as needed.
- Save your settings.
5.3 Playback
To view recorded footage:
- Go to Menu > Playback.
- Select the camera(s) and the date/time range for playback.
- Use the playback controls (play, pause, fast forward, rewind) to navigate through the footage.
5.4 Network Access (Remote Viewing)
The DVR supports remote viewing via a web browser or mobile application. Ensure the DVR is connected to the internet and network settings are correctly configured (e.g., port forwarding, P2P cloud service).
- P2P Cloud Service: Enable the P2P function in the DVR's network settings. Download the official mobile app (e.g., Hik-Connect) and scan the QR code on the DVR to add the device.
- Web Browser: Access the DVR via its IP address using a web browser on a computer connected to the same network.
6. Maintenance
6.1 Regular Cleaning
Periodically clean the exterior of the DVR with a soft, dry cloth. Do not use liquid cleaners or aerosols. Ensure ventilation openings are free from dust and obstructions.
6.2 Firmware Updates
Check the manufacturer's official website for firmware updates. Keeping your DVR's firmware up-to-date ensures optimal performance, security, and access to new features. Follow the update instructions carefully to avoid damaging the device.
6.3 Hard Drive Management
The DVR will automatically overwrite the oldest recordings when the hard drive is full. Regularly back up important footage to an external storage device (e.g., USB flash drive) if needed. Monitor the hard drive status in the DVR's system settings.
7. Troubleshooting
| Problem | Possible Cause | Solution |
|---|---|---|
| No video output on monitor. | Loose cable connection, incorrect input source on monitor, DVR not powered on. | Check HDMI/VGA cable connections. Ensure monitor is set to correct input. Verify DVR power. |
| No recording. | Hard drive not initialized, recording schedule not set, hard drive full. | Initialize HDD (Menu > HDD > Format). Configure recording schedule (Menu > Record > Parameters). Check HDD status. |
| Cannot access DVR remotely. | Network cable disconnected, incorrect network settings, firewall blocking ports, P2P disabled. | Check network cable. Verify IP address, gateway, DNS. Configure port forwarding on router or enable P2P. |
| Poor video quality. | Camera resolution settings, cable quality, lighting conditions. | Adjust camera resolution/quality settings. Use high-quality cables. Improve lighting. |
8. Specifications
| Feature | Description |
|---|---|
| Model | HWD-7108MH-G4 |
| Video Input | 8-channel BNC (HDTVI/AHD/CVI/CVBS self-adaptive), 4-channel IP (up to 12-channel with analog disabled) |
| Audio Input | 1-channel RCA (local), 8-channel via coaxial (HDTVI) |
| Video Compression | H.265 Pro+/H.265 Pro/H.265/H.264+/H.264 |
| Audio Compression | G.711u |
| Video Output | 1 HDMI, 1 VGA (simultaneous output) |
| Recording Resolution | Up to 4 MP Lite |
| SATA Interface | 1 SATA interface (up to 10 TB capacity per HDD) |
| Network Interface | 1 RJ45 10M/100M self-adaptive Ethernet interface |
| USB Interface | 2 USB 2.0 ports (1 front, 1 rear) |
| Power Supply | 12 VDC |
| Operating Temperature | -10 °C to +55 °C (14 °F to +131 °F) |
9. Warranty Information
Hiwatch products are covered by a limited warranty from the date of purchase. The warranty period and terms may vary by region and product type. Please refer to the official Hiwatch website or your local distributor for specific warranty details. Keep your purchase receipt as proof of purchase for warranty claims.
The warranty typically covers defects in materials and workmanship under normal use. It does not cover damage caused by misuse, accidents, unauthorized modifications, or improper installation.
10. Technical Support
For technical assistance, troubleshooting, or product inquiries, please contact Hiwatch customer support through one of the following channels:
- Official Website: Visit the Hiwatch official website for FAQs, downloads, and support resources.
- Email Support: Contact support via email (refer to the website for the correct address).
- Phone Support: Find regional phone numbers on the Hiwatch official website.
- Authorized Dealers: Your authorized Hiwatch dealer can also provide support and service.
When contacting support, please have your product model number (HWD-7108MH-G4) and serial number ready.


