
DOKIO DSP400M
DOKIO 400 Watt Solar Panel User Manual
Model: DSP400M
1. Product Overview
The DOKIO 400 Watt Solar Panel is a high-efficiency photovoltaic module designed for various off-grid applications, including rooftops, portable power stations, farms, yachts, RVs, and camping setups. This manual provides essential information for the safe and effective use of your solar panel.

Figure 1.1: DOKIO 400 Watt Solar Panel
2. Key Features
- High-Quality Materials: Constructed with corrosion-resistant aluminum and tempered glass, designed for durability in outdoor environments. Features an extra-long 3-meter (9.84 ft) cable for flexible placement.
- Robust Design: Certified to withstand significant wind loads (2400Pa) and snow loads (5400Pa). The IP65 rated waterproof junction box protects against environmental particles and low-pressure water jets.
- High Efficiency: Utilizes Grade A+ monocrystalline cells and a 10BB (Busbar) design for enhanced power generation and up to 23% conversion efficiency. Half-cut cell design minimizes shadow occlusion, improving performance.
- Easy Installation: Equipped with specially designed pre-drilled holes (8 mounting holes) for straightforward installation in various applications.
- Versatile Application: Suitable for a wide range of uses including caravans, RVs, golf cars, electric cars, yachts, boats, tents, and general off-grid power needs.

Figure 2.1: Key components of the DOKIO Solar Panel, including Grade A+ cells, corrosion-resistant aluminum frame, IP67 MC4 cable, and 8 mounting holes.

Figure 2.2: Detailed view of the panel's construction, highlighting low-iron tempered glass, IP65 rated junction box, IP67 rated solar connectors, and rugged aluminum frame.
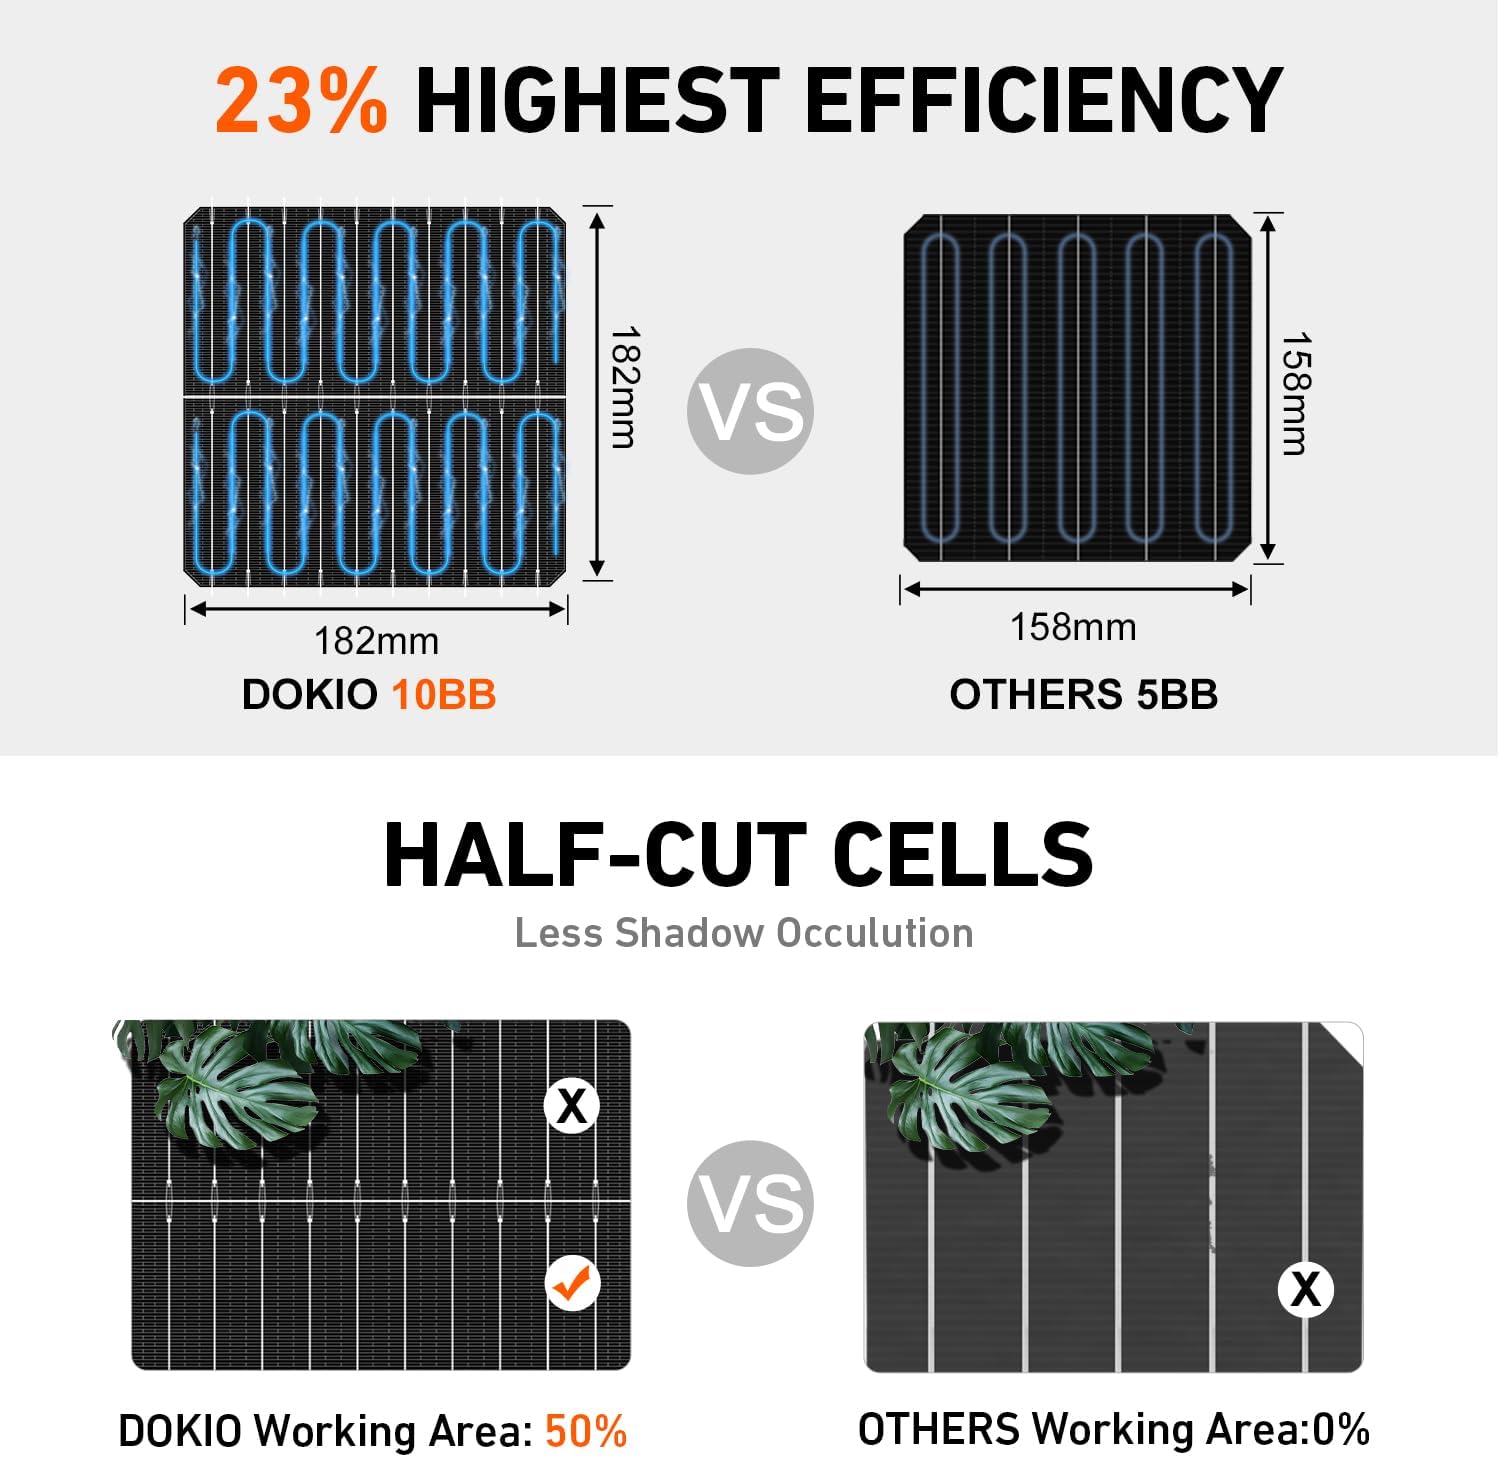
Figure 2.3: Illustration of the 23% highest efficiency and half-cut cell design for reduced shadow occlusion.
Video 2.1: This video demonstrates the high-quality materials and internal structure of the DOKIO 400 Watt Solar Panel, showcasing its robust design and advanced cell technology for optimal performance and durability.
3. Setup and Installation
Proper installation is crucial for the optimal performance and longevity of your DOKIO solar panel. The panel is designed for ease of installation with pre-drilled mounting holes and a long connecting cable.
3.1 Mounting Options
The DOKIO 400W solar panel offers flexibility in mounting to suit various applications:
- Railed/Flat Roof Mounting: Securely attach the panel to existing roof structures using appropriate mounting hardware (not included).
- Pole Mounts: Ideal for ground installations where the panel can be elevated and angled for maximum sun exposure.
- Foundation Mounts: For permanent ground installations, providing a stable and durable base.

Figure 3.1: Examples of various mounting options for the solar panel, including railed/flat roof, pole, and foundation mounts.
3.2 Electrical Connection (Parallel)
For connecting multiple solar panels or integrating with a power system, follow the parallel connection diagram. Ensure your MPPT charge controller can handle the input voltage and current.

Figure 3.2: Diagram illustrating a parallel connection setup for solar panels, including an MPPT charge controller, 24V battery, and power inverter. Note: MPPT controller should accept at least 24V input and handle at least 30A input current.
The panel comes with an extra-long 3-meter (9.84 ft) MC4 cable, providing flexibility in positioning the panel relative to your charge controller or power station.

Figure 3.3: Comparison highlighting the longer 9.84 ft (3M) cable provided with DOKIO solar panels for increased installation flexibility.
4. Operation
Once installed and connected to a compatible charge controller and battery system, the DOKIO 400 Watt Solar Panel will convert sunlight into electrical energy. For optimal performance, ensure the panel is positioned to receive maximum direct sunlight throughout the day, free from shadows.

Figure 4.1: Illustration of the solar panel converting sunlight into electrical energy with 22% conversion efficiency.
The panel's N-type cells and Class A+ cell technology are designed to extend solar power generation time, allowing for more efficient energy capture even in less ideal conditions.

Figure 4.2: Visual representation of N-type cells and Class A+ cells extending solar power generation time, showing day and night scenarios.
5. Maintenance
Regular maintenance ensures the longevity and efficiency of your solar panel.
- Cleaning: Periodically clean the surface of the solar panel with a soft cloth and water to remove dust, dirt, leaves, or other debris that may reduce efficiency. Avoid abrasive cleaners or harsh chemicals.
- Inspection: Regularly inspect the panel for any physical damage, such as cracks in the glass, bent frames, or loose connections. Check the cables and connectors for signs of wear or corrosion.
- Clear Obstructions: Ensure no new obstructions (e.g., growing trees, new structures) are casting shadows on the panel, as shadows can significantly reduce power output.
- Weather Resistance: The panel is designed to withstand extreme weather conditions, including high winds and snow loads. However, in severe weather, ensure the mounting is secure.

Figure 5.1: The DOKIO solar panel is certified to withstand extreme weather conditions, including 2400Pa of wind load and 5400Pa of snow load, as depicted in a snowy environment.
6. Troubleshooting
If you experience issues with your DOKIO solar panel, consider the following common troubleshooting steps:
- No Power Output:
- Check all electrical connections (MC4 connectors, charge controller, battery) to ensure they are secure and free from corrosion.
- Verify that the solar panel is receiving direct sunlight and is not shaded by any objects.
- Ensure the charge controller is functioning correctly and is compatible with the panel's voltage and current specifications.
- Inspect the panel for any visible damage.
- Low Power Output:
- Clean the panel surface thoroughly to remove any dirt, dust, or debris.
- Check for partial shading from nearby objects (trees, buildings, antennas). Even small shadows can significantly reduce output.
- Confirm the panel's angle and orientation are optimized for the current season and time of day.
- Verify the battery connected is not already full or experiencing issues.
- Overheating:
- Ensure adequate airflow around the back of the panel to allow for cooling.
- Verify that the panel is not installed in an enclosed space without ventilation.
If problems persist after following these steps, please contact DOKIO customer support for further assistance.
7. Specifications
Detailed technical specifications for the DOKIO 400 Watt Solar Panel:

Figure 7.1: Visual representation of the DOKIO 400W Solar Panel dimensions and key electrical specifications.
| Attribute | Value |
|---|---|
| Brand | DOKIO |
| Model Number | DSP400M |
| Material | Aluminum, Tempered Glass, Iron |
| Product Dimensions (L x W x H) | 67.8"L x 44.65"W x 1.18"H |
| Efficiency | High Efficiency |
| Connector Type | MC4 |
| Included Components | Bag |
| Maximum Voltage | 12 Volts |
| Maximum Power | 400 Watts |
| Item Weight | 54.9 pounds |
| Country of Origin | China |
| Shape | Rectangular |
| Date First Available | December 22, 2023 |
8. Warranty and Support
DOKIO, as a professional solar system manufacturer, provides an extra-long transferable power output warranty of 15 years for this product. For any technical assistance or issues encountered, DOKIO Solar Panels Service is committed to actively providing professional solutions.
Please refer to your purchase documentation for specific warranty terms and conditions.
Related documentsDSP400M


Ask a question about this manual
Ask about setup, troubleshooting, compatibility, parts, safety, or missing instructions. Manuals+ will review the question and use this page’s manual context to help answer it.