1. Introduction
This manual provides essential information for the installation, operation, and maintenance of your ASUS TUF Gaming NVIDIA GeForce RTX 4080 Super OC Edition Graphics Card. Designed with the NVIDIA Ada Lovelace architecture, this graphics card offers advanced performance for gaming and demanding applications.
Key features include:
- Powered by NVIDIA DLSS 3, ultra-efficient Ada Lovelace architecture, and full ray tracing capabilities.
- 4th Generation Tensor Cores for up to 4x performance with DLSS 3.
- 3rd Generation RT Cores for up to 2x ray tracing performance.
- OC mode clock speed of 2640 MHz (Default mode: 2610 MHz).
- Axial-tech fans with increased airflow for enhanced cooling.
- Dual Ball Fan Bearings for extended lifespan.
- Military-grade Capacitors for improved power rail durability.
- Metal Exoskeleton for structural rigidity and heat dissipation.
- Auto-Extreme precision automated manufacturing for higher reliability.
- GPU Tweak III software for performance tuning and monitoring.
2. Package Contents
Verify that all items are present in your product package:
- ASUS TUF-RTX4080S-O16G-GAMING Graphics card
- Collection card
- Speedsetup Manual (Quick Start Guide)
- Adapter cable (1 to 3)
- TUF Graphics card holder
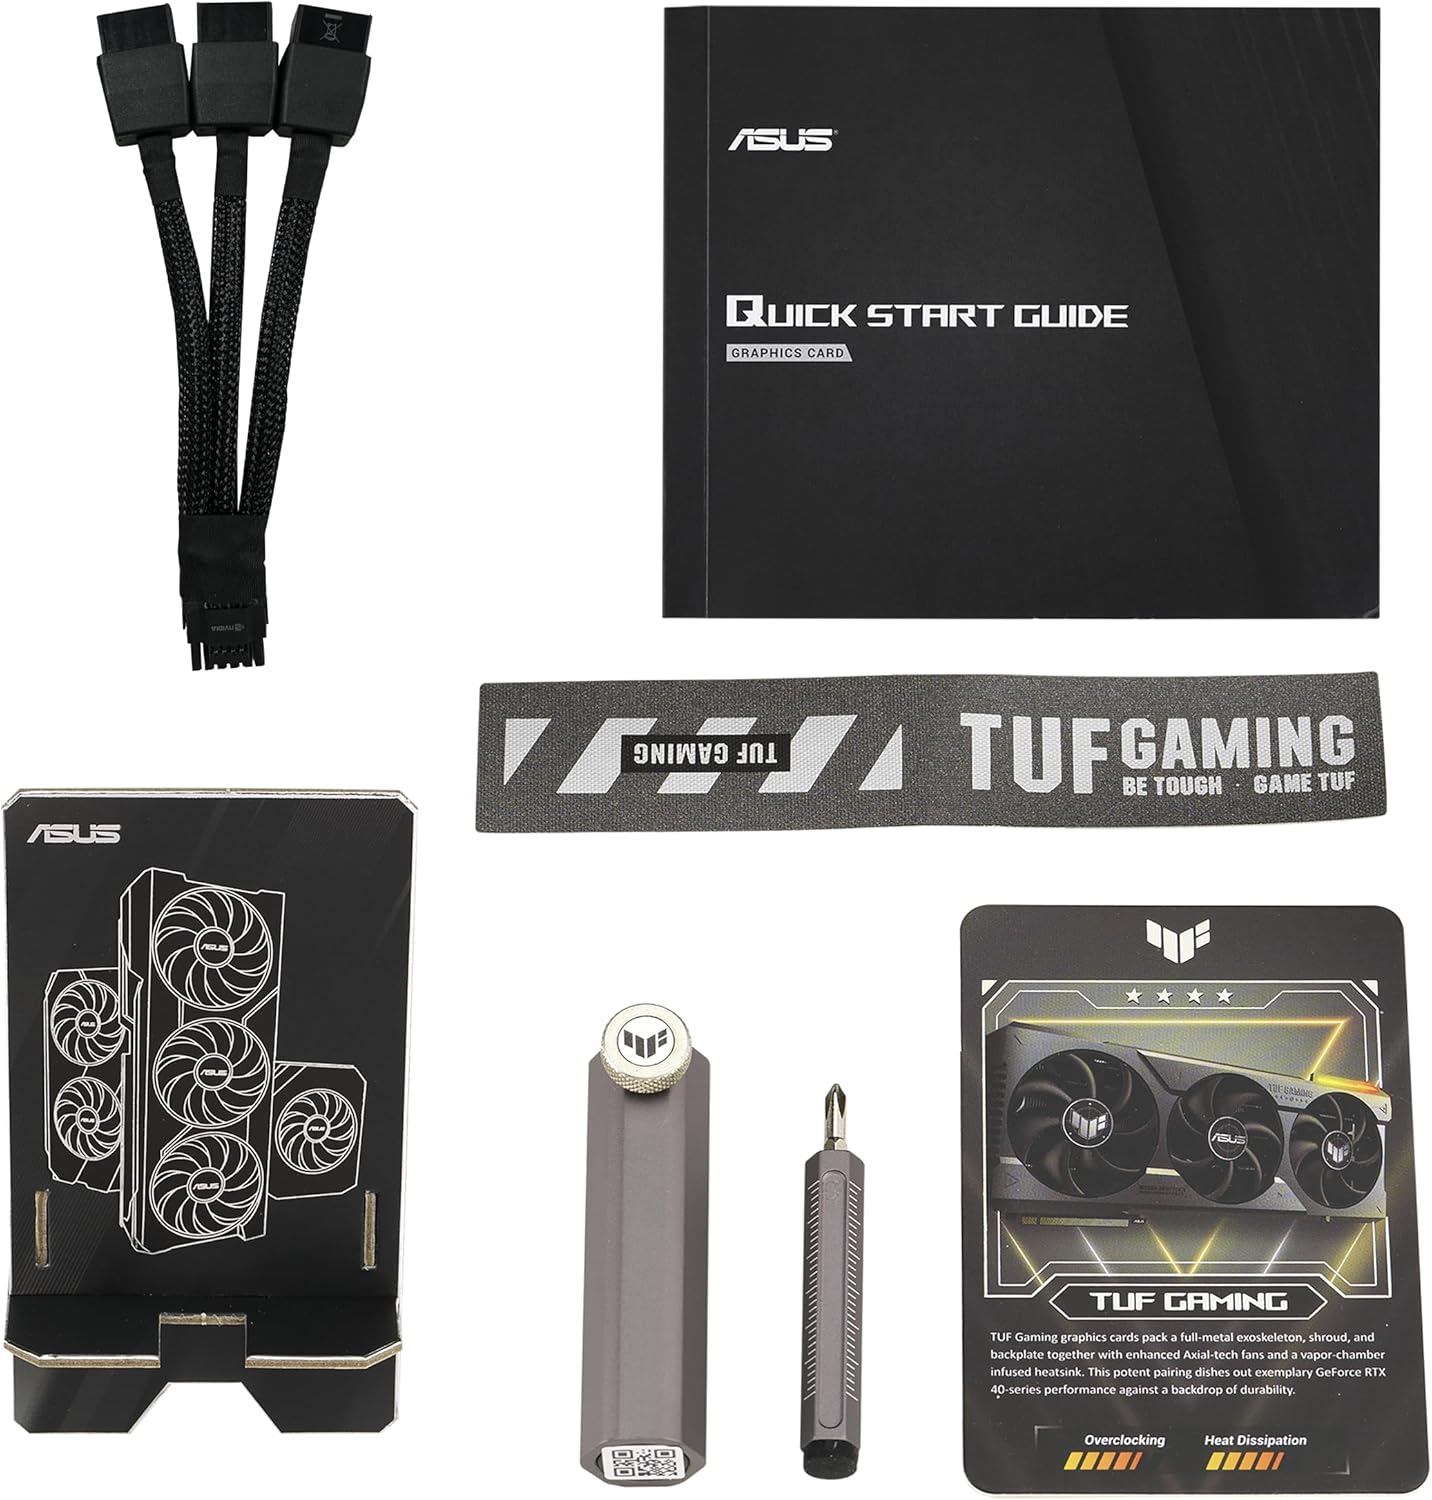
Image: Package contents including the graphics card, quick start guide, adapter cable, collection card, and a screwdriver tool.
3. Setup and Installation
3.1 System Requirements
- PCI Express-compliant motherboard with one x16 graphics slot.
- Minimum recommended power supply unit (PSU) wattage. Refer to the "Pair with a PSU" section for guidance.
- Operating system: Windows 10/11 64-bit or Linux 64-bit.
- Minimum 16GB system memory recommended.
3.2 Physical Installation
- Prepare your system: Power off your computer and disconnect all cables. Open your computer case.
- Locate the PCIe x16 slot: Identify an available PCI Express x16 slot on your motherboard.
- Remove expansion slot covers: Remove the necessary expansion slot covers from your computer case. This graphics card typically occupies 3 to 4 slots.
- Insert the graphics card: Carefully align the graphics card with the PCIe x16 slot and press it firmly until it is securely seated. Ensure the retention clip on the motherboard engages.
- Secure the card: Fasten the graphics card to the computer case using the screws from the expansion slot covers.
- Connect power cables: Connect the required power cables from your power supply unit to the graphics card. The ASUS TUF Gaming RTX 4080 Super OC Edition requires a 12VHPWR (12+4 pin) power connector. Use the included adapter cable if your PSU does not have a native 12VHPWR connector.
- Install GPU holder: Utilize the included TUF Graphics card holder to provide additional support and prevent sag, especially given the card's weight and size.
- Close the case: Once the card is securely installed and powered, close your computer case.

Image: Illustration of pairing the graphics card with a compatible power supply unit (PSU).
3.3 Driver Installation
- Connect display: Connect your monitor to one of the DisplayPort 1.4a or HDMI 2.1a outputs on the graphics card.
- Power on: Power on your computer.
- Download drivers: Visit the official NVIDIA website (www.nvidia.com/drivers) or the ASUS support page for your specific model to download the latest graphics drivers.
- Install drivers: Follow the on-screen instructions to complete the driver installation. A system restart may be required.

Image: Display output ports on the graphics card, including DisplayPort 1.4a and HDMI 2.1a.
4. Operating the Graphics Card
4.1 Performance Modes
Your graphics card supports different performance modes. The OC mode provides a boost clock of 2640 MHz, while the default mode operates at 2610 MHz. These modes are typically managed automatically by the driver or can be adjusted using ASUS GPU Tweak III software.
4.2 GPU Tweak III Software
The ASUS GPU Tweak III software allows for intuitive performance tweaking, thermal controls, and system monitoring. You can download this utility from the official ASUS support website.
- Overclocking: Adjust clock speeds and voltage for enhanced performance.
- Fan Control: Customize fan curves for optimal cooling and noise levels.
- Monitoring: View real-time statistics such as GPU temperature, clock speed, and usage.

Image: ASUS GPU Tweak III software interface for performance and thermal management.
5. Maintenance
Proper maintenance ensures the longevity and optimal performance of your graphics card.
5.1 Cleaning
- Dust Removal: Periodically clean dust from the fans and heatsink using compressed air. Ensure the system is powered off and unplugged before cleaning.
- Fan Blades: Gently clean fan blades with a soft brush if necessary, being careful not to apply excessive force.

Image: Axial-tech fans designed for enhanced airflow and cooling.

Image: Large heatsink design for effective thermal management.
5.2 Driver Updates
Regularly update your graphics drivers to ensure optimal performance, stability, and access to the latest features and game optimizations. Refer to the NVIDIA website for the most current drivers.
6. Troubleshooting
If you encounter issues with your graphics card, consider the following troubleshooting steps:
- No Display Output:
- Ensure the monitor cable is securely connected to both the graphics card and the monitor.
- Verify that the graphics card is fully seated in the PCIe slot.
- Check that all power cables are correctly connected to the graphics card and the power supply.
- Test with a different display cable or monitor if possible.
- System Instability or Crashes:
- Ensure your graphics drivers are up to date.
- Check for adequate power supply wattage. Insufficient power can lead to instability.
- Monitor GPU temperatures using software like GPU Tweak III. Overheating can cause crashes.
- If overclocked, revert to default settings to check for stability.
- Poor Performance in Games/Applications:
- Verify that the latest graphics drivers are installed.
- Check in-game settings to ensure they are appropriate for your system configuration.
- Ensure the graphics card is operating in OC mode if desired, and not throttled by temperature or power limits.
- Close unnecessary background applications.
7. Specifications
| Feature | Specification |
|---|---|
| Model Name | TUF-RTX4080S-O16G-GAMING |
| Graphics Coprocessor | NVIDIA GeForce RTX 4080 SUPER |
| Chipset Brand | NVIDIA |
| Graphics Card Ram Size | 16 GB GDDR6X |
| Memory Speed | 2640 MHz (OC mode) / 2610 MHz (Default mode) |
| Max Screen Resolution | 7680x4320 Pixels |
| Video Output Interface | HDMI 2.1a, DisplayPort 1.4a (3x DisplayPort, 2x HDMI) |
| Item Weight | 6.6 pounds (approximately 2.99 kg) |
| Product Dimensions (LxWxH) | 13.7 x 5.9 x 2.9 inches (approximately 34.8 x 15.0 x 7.4 cm) |
| Manufacturer | ASUS |
8. Warranty and Support
ASUS products are manufactured to the highest quality standards. For detailed warranty information, please refer to the warranty card included in your product package or visit the official ASUS support website.
For technical support, driver downloads, and FAQs, please visit the ASUS support website:
When contacting support, please have your product model number (TUF-RTX4080S-O16G-GAMING) and serial number ready.


