
Gearwiz Wiz-Loc1
Gearwiz Keyless Entry Door Lock User Manual
Model: Wiz-Loc1
1. Introduction
Welcome to the Gearwiz Keyless Entry Door Lock user manual. This guide provides comprehensive instructions for the installation, setup, operation, and maintenance of your new smart lock. Please read this manual carefully before installation and use to ensure optimal performance and security.
2. Product Overview
The Gearwiz Keyless Entry Door Lock is an advanced electronic keypad deadbolt designed to enhance your home security and convenience. It offers multiple unlocking methods and smart features for modern living.
Key Features:
- Cutting-Edge Security: Experience keyless entry with advanced biometric fingerprint identification technology, unlocking your door in just 1 second.
- Convenient Keyless Access: Supports up to 100 unique user codes and fingerprints. Create temporary codes for guests, including self-deleting one-time PIN codes.
- Smart Locking Features: Customizable automatic door lock function (10-99 seconds) and a one-touch auto-lock feature by holding any key for 2 seconds.
- Easy Installation: Designed for quick installation with a screwdriver, compatible with most US standard door sizes and both left-handed and right-handed doors.
- Durable Design: Crafted with high-quality aluminum, available in Satin Nickel finish.

Figure 2.1: Front and back view of the Gearwiz Keyless Entry Door Lock. The front features a keypad and fingerprint sensor, while the back houses the battery compartment and manual turn knob.

Figure 2.2: Overview of multi-function security features including 100 fingerprints, 100 user codes, anti-peeking password, one-time password, weather resistance, low power reminder, auto-lock, one-click lock, and a USB emergency power socket.

Figure 2.3: The lock supports three unlocking methods: fingerprint, password, and traditional key. It boasts a 0.3-second biometric identification time, 99.9% recognition rate, and 0.01% false accept rate.
3. Package Contents
Please verify that all components are present before beginning installation:
- Exterior Keypad Assembly
- Interior Deadbolt Assembly
- Mounting Plate
- Deadbolt Latch
- Strike Plate
- Mounting Screws
- Keys (2 or more)
- User Manual (this document)
4. Installation
The Gearwiz Keyless Entry Door Lock is designed for easy installation on most standard US doors. A Phillips head screwdriver is typically the only tool required.
4.1 Door Preparation
Ensure your door meets the following specifications:
- Door thickness: 1-3/8" to 2" (35-50mm)
- Hole diameter: 2-1/8" (54mm)
- Bore diameter (latch hole): 0.70" (18mm)
- Backset: 2-3/8" or 2-3/4" (60mm or 70mm)

Figure 4.1: Detailed product dimensions and compatibility requirements for standard door preparation, including hole diameters and latch hole types.
4.2 Installation Steps
- Install the deadbolt latch into the door edge. Ensure the latch is oriented correctly for your door's swing.
- Install the exterior keypad assembly, feeding the cable through the door hole.
- Attach the mounting plate to the interior side of the door, securing it with screws.
- Connect the cable from the exterior assembly to the interior deadbolt assembly.
- Mount the interior deadbolt assembly to the mounting plate, ensuring the thumb turn spindle engages with the latch mechanism.
- Install the strike plate on the door frame, aligning it with the deadbolt latch.
- Insert 4 AA batteries (not included) into the interior assembly's battery compartment.
After installation, perform a manual test by turning the thumb turn to ensure the deadbolt extends and retracts smoothly without obstruction.
5. Setup and Programming
Once installed, program your lock with user codes and fingerprints.
5.1 Master Code Setup
The first step is to set a Master Code. This code is used for programming and should be kept confidential.
- Open the battery cover on the interior assembly.
- Press the "Program" button (usually located near the battery compartment).
- Enter your desired 4-8 digit Master Code on the keypad.
- Press the "Lock" button (or checkmark/confirm button).
- Re-enter the Master Code and press the "Lock" button again to confirm.
A successful setup will be indicated by a confirmation tone or light. If unsuccessful, repeat the steps.
5.2 Adding User Codes
You can add up to 100 unique user codes for family members or regular visitors.
- Press the "Program" button.
- Enter your Master Code and press the "Lock" button.
- Press the "1" key (or designated "Add User Code" key).
- Enter the new 4-8 digit User Code.
- Press the "Lock" button.
- Repeat steps 4-5 for additional user codes.
- Press the "Program" button to exit programming mode.
5.3 Adding Fingerprints
The lock supports up to 100 fingerprints for quick and secure access.
- Press the "Program" button.
- Enter your Master Code and press the "Lock" button.
- Press the "2" key (or designated "Add Fingerprint" key).
- Place your finger on the fingerprint sensor. Lift and place your finger multiple times as prompted by the lock (usually 4-5 times) until successful registration is confirmed.
- Repeat step 4 for additional fingerprints.
- Press the "Program" button to exit programming mode.
5.4 One-Time PIN Codes
Generate temporary, self-deleting PIN codes for single use, ideal for deliveries or one-time access.
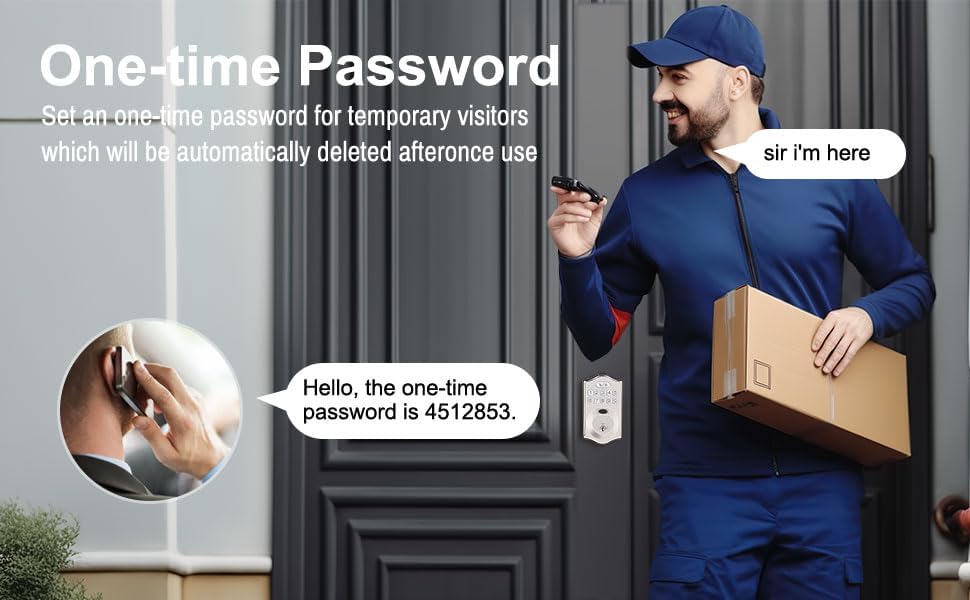
Figure 5.1: Illustrates the use of a one-time password for temporary visitors, such as delivery personnel, which automatically deletes after a single use.
Refer to your lock's specific programming instructions for generating one-time PIN codes, as this process can vary.
5.5 Automatic Locking Feature
The lock can be set to automatically lock after a specified delay (10-99 seconds) once the door is closed.

Figure 5.2: Demonstrates the automatic locking feature, which can be set to engage within 1-99 seconds after the door closes, and the one-touch locking by holding any key for 2 seconds.
To enable/disable or adjust the auto-lock time, consult the detailed programming section in your lock's specific manual.
6. Operating the Lock
6.1 Unlocking
- Using a User Code: Enter your 4-8 digit user code on the keypad, then press the "Lock" button.
- Using Fingerprint: Place your registered finger on the fingerprint sensor. The lock will unlock if the fingerprint is recognized.
- Using a Key: Insert the physical key into the keyhole and turn to unlock.
6.2 Locking
- One-Touch Locking: Press and hold any key on the keypad for 2 seconds.
- Automatic Locking: If enabled, the lock will automatically engage after the set delay once the door is closed.
- Manual Locking: From the interior, turn the thumb turn to lock the deadbolt.
7. Maintenance
Proper maintenance ensures the longevity and reliable operation of your Gearwiz smart lock.
7.1 Battery Replacement
The lock requires 4 AA batteries. When the batteries are low, the lock will typically provide an audible or visual low battery warning. Replace all four batteries simultaneously with new, high-quality alkaline batteries.
- Remove the battery cover on the interior assembly.
- Remove the old batteries.
- Insert new AA batteries, ensuring correct polarity (+/-).
- Replace the battery cover.
Note: Using rechargeable batteries is not recommended as they may not provide consistent power.
7.2 Cleaning
Clean the lock's exterior with a soft, damp cloth. Avoid abrasive cleaners or solvents that could damage the finish or electronic components. Keep the fingerprint sensor clean and free of debris for optimal performance.
7.3 USB Emergency Power
In case of complete battery depletion, the lock features a USB emergency power socket. Connect a standard USB power bank to this port to temporarily power the lock and gain entry.
8. Troubleshooting
If you encounter issues with your Gearwiz smart lock, refer to the following common problems and solutions:
| Problem | Possible Cause | Solution |
|---|---|---|
| Lock does not respond (no power). | Dead batteries. | Replace all 4 AA batteries. If still unresponsive, use the USB emergency power port. |
| Fingerprint not recognized. | Finger not placed correctly, dirty sensor, unregistered fingerprint, or extreme temperatures. | Ensure finger is clean and dry, place firmly on sensor. Re-register fingerprint if needed. Use keypad or key in extreme cold. |
| Keypad does not respond or beeps repeatedly. | Incorrect code entered, low battery, or system error. | Verify code. Replace batteries. Try resetting the lock (refer to manual for reset procedure). |
| Auto-lock not engaging or deadbolt not fully extending. | Misalignment during installation, obstruction, or incorrect auto-lock setting. | Check door alignment and strike plate. Ensure no obstructions. Verify auto-lock settings. Re-install if necessary. |
| Lock makes unusual noises. | Mechanical obstruction or internal issue. | Check for any physical obstructions. If noises persist, contact customer support. |
9. Specifications
| Feature | Detail |
|---|---|
| Brand | Gearwiz |
| Model Name | Wiz-Loc1 |
| Lock Type | Keypad Deadbolt |
| Special Feature | Fingerprint, Keypad, Key |
| Material | Aluminum |
| Color | Satin Nickel |
| Item Dimensions (L x W x H) | 5 x 3 x 0.5 inches |
| Item Weight | 2.25 pounds |
| Power Source | 4 x AA Batteries (not included) |
| Connectivity Protocol | Bluetooth (Note: App control may vary by model/region) |
| Recommended Uses | Home security and access control |
10. Warranty and Support
Gearwiz is committed to providing high-quality products. For warranty information, technical support, or any questions regarding your Keyless Entry Door Lock, please refer to the contact information provided with your purchase or visit the official Gearwiz website.
Please retain your proof of purchase for warranty claims.
Related documentsWiz-Loc1


Ask a question about this manual
Ask about setup, troubleshooting, compatibility, parts, safety, or missing instructions. Manuals+ will review the question and use this page’s manual context to help answer it.